{
    "id": "b7d4b224-e90d-48ae-a72a-eb53bb6c2ba4",
    "name": "Monitor Resources with Azure Monitor",
    "slug": "monitor-resources-with-azure-monitor",
    "status": "published",
    "lab_type": "pta",
    "is_sample": false,
    "duration_in_seconds": 1800,
    "metadata": {
        "courses": [
            "1d0c3874-1dec-4abd-90aa-f5cbf362c035",
            "bdbadde2-fe15-49c9-b700-c0c8873eb04f"
        ],
        "pta_sdn": "548",
        "pta_namespace": "my.ine",
        "learning_paths": [],
        "has_published_parent": true
    },
    "session": null,
    "company": "a491bc32-c056-4946-9169-cc053387bada",
    "created": "2022-11-09T21:16:42.956087Z",
    "modified": "2023-10-03T18:57:19.817102Z",
    "is_beta": false,
    "lab_objectives": [],
    "main_learning_area": "d3f82c70-f4e7-428e-afd7-4b1d28988e18",
    "learning_areas": [
        {
            "id": "d3f82c70-f4e7-428e-afd7-4b1d28988e18",
            "name": "Cloud",
            "slug": "cloud"
        }
    ],
    "categories": [],
    "tags": [],
    "difficulty": null,
    "is_web_access": true,
    "is_lab_experience": false,
    "is_featured": false,
    "cve": null,
    "severity": null,
    "year": null,
    "classification": null,
    "is_trackable": false,
    "cpe_credits": null,
    "is_skill_check": false,
    "external_url": "",
    "solution_video": null,
    "explanation_video": null,
    "description": "The goal of this task is to use the Azure monitor. This includes setting diagnostic logging for resources, monitoring activity and creating performance graphs.",
    "description_html": "<p>The goal of this task is to use the Azure monitor. This includes setting diagnostic logging for resources, monitoring activity and creating performance graphs.</p>",
    "tasks": "",
    "tasks_html": "",
    "published_date": "2020-04-07T18:00:00Z",
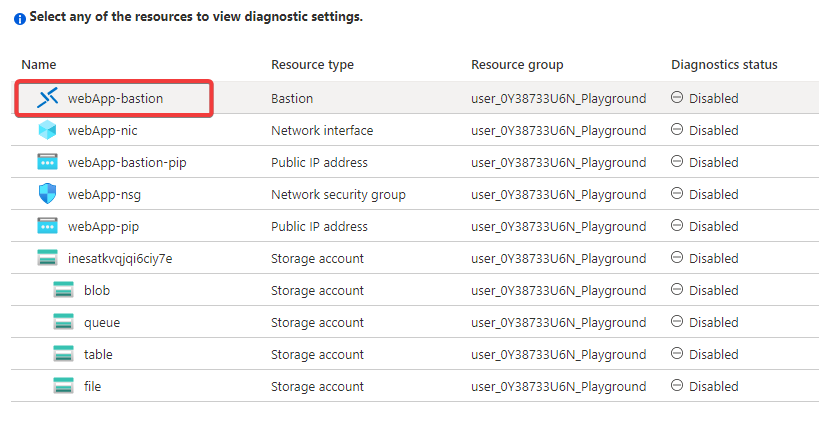
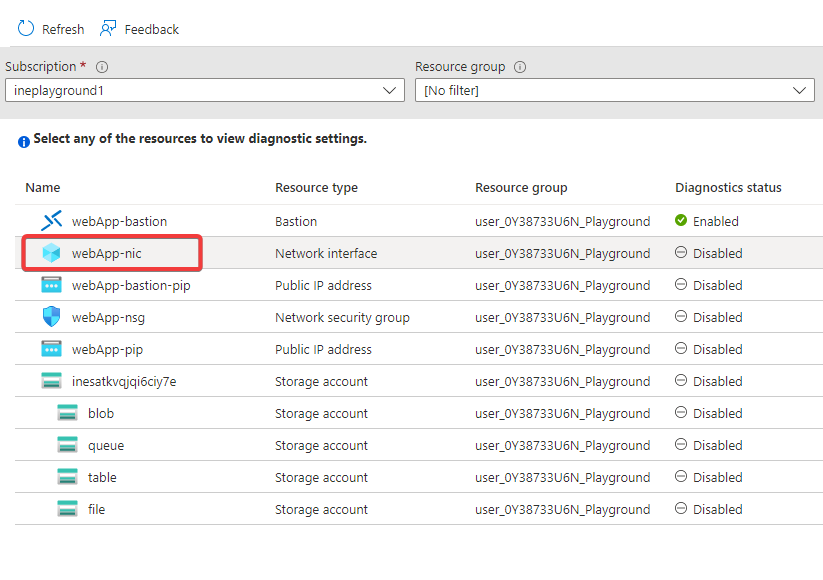
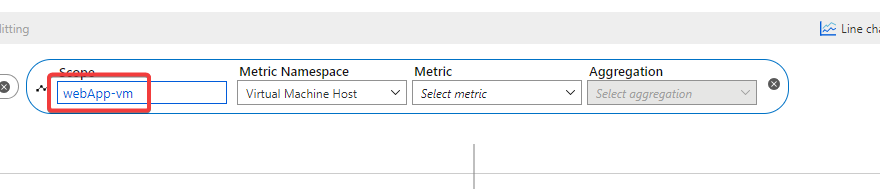
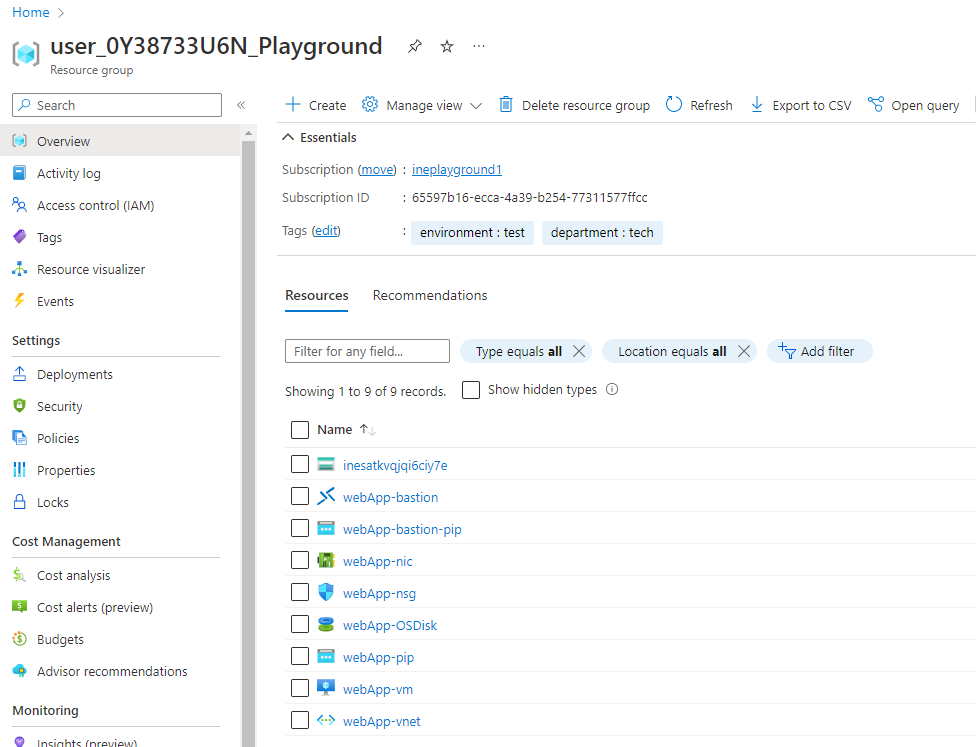
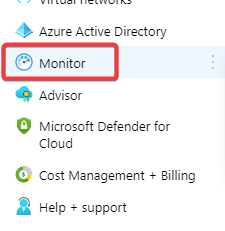
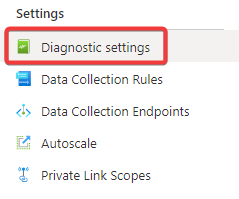
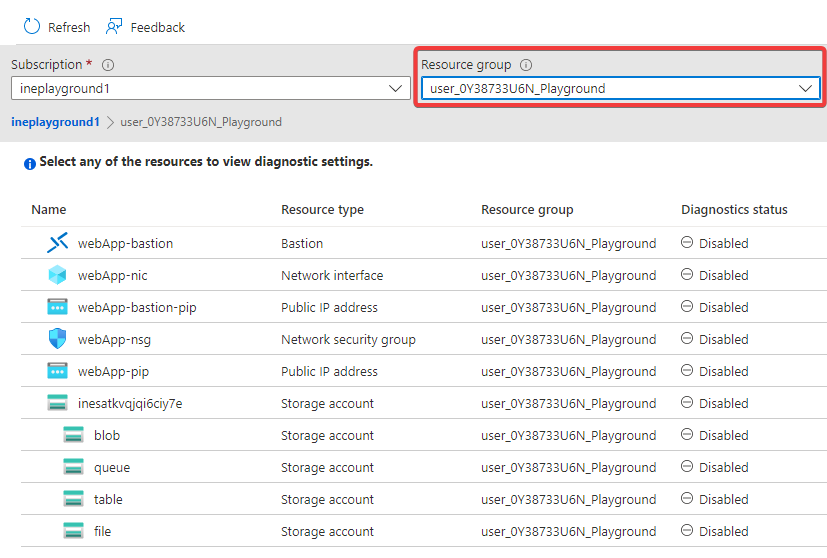
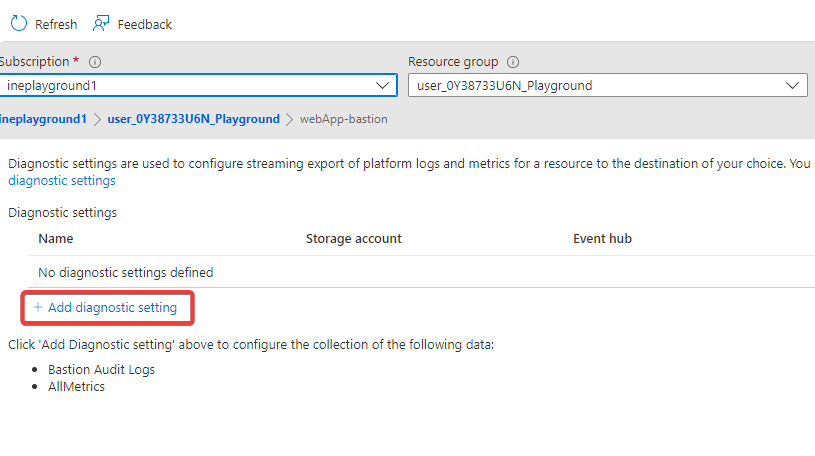
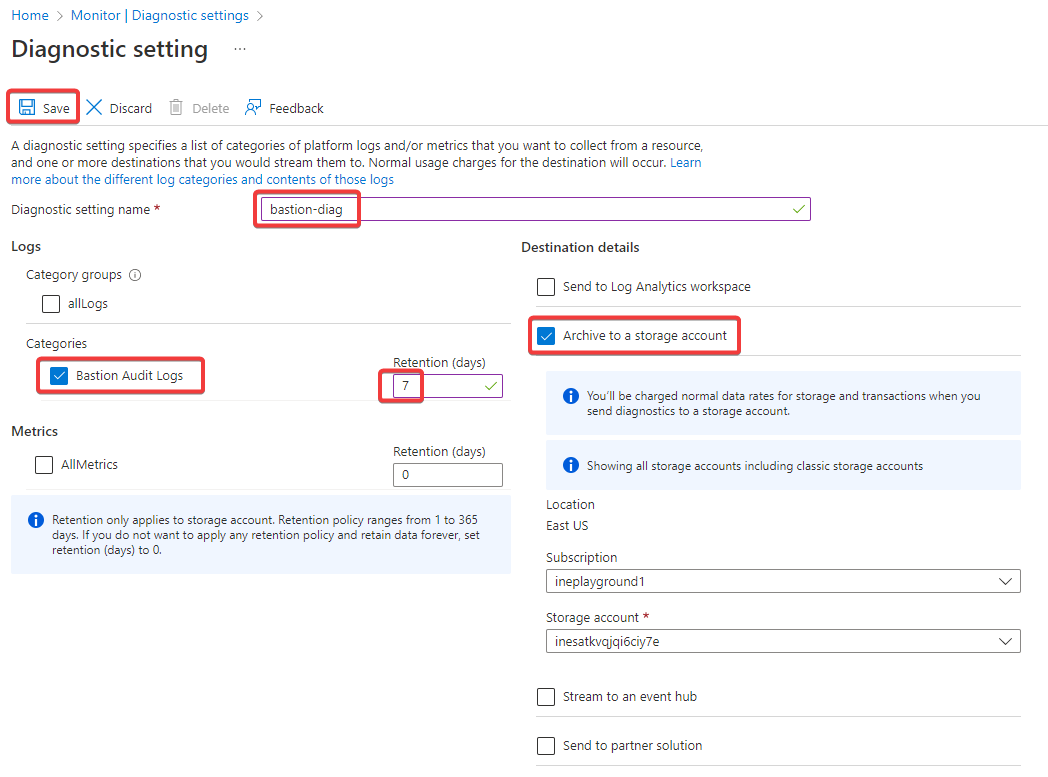
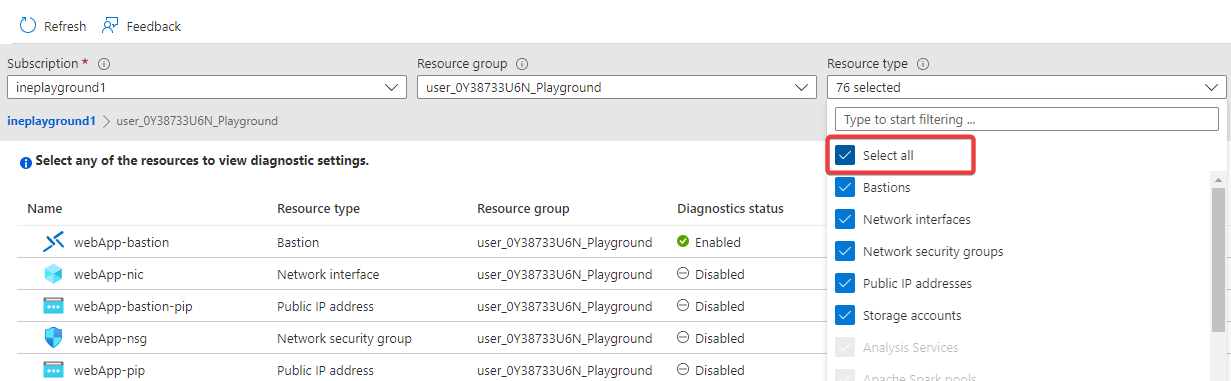
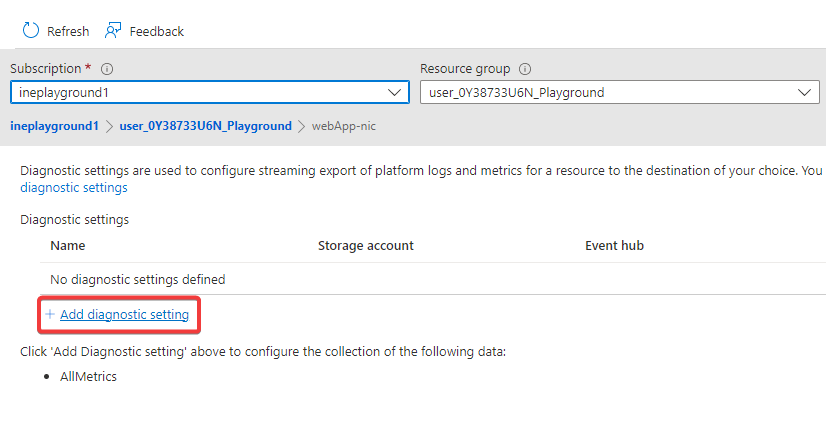
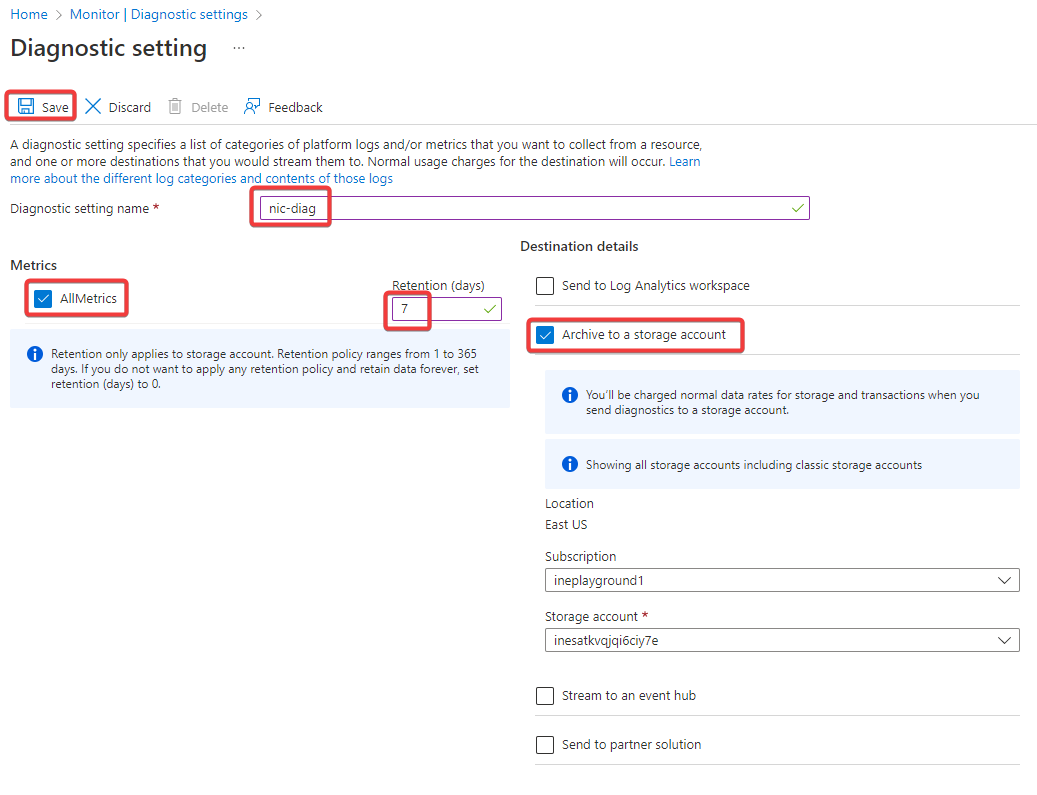
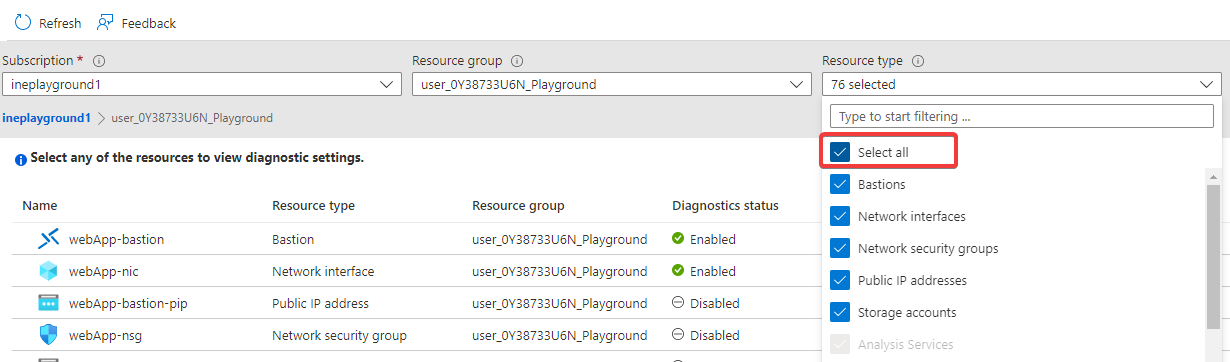
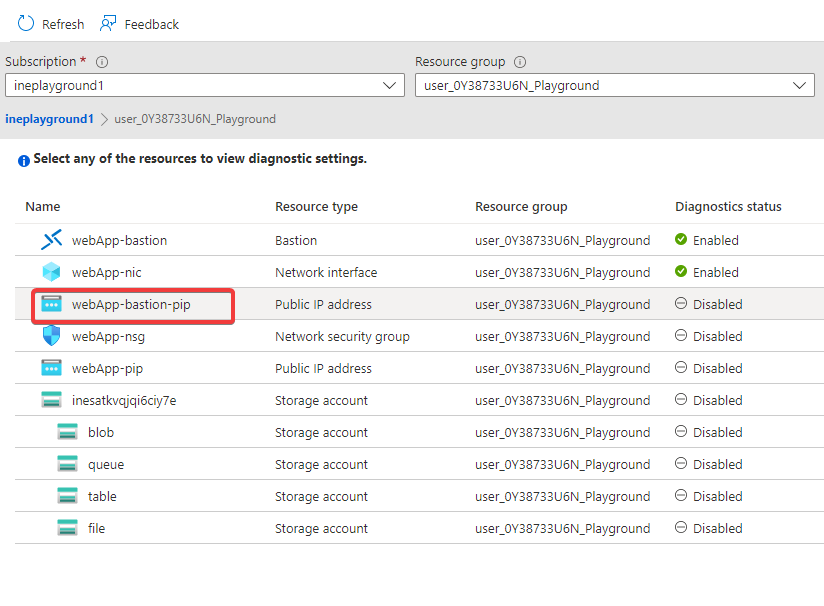
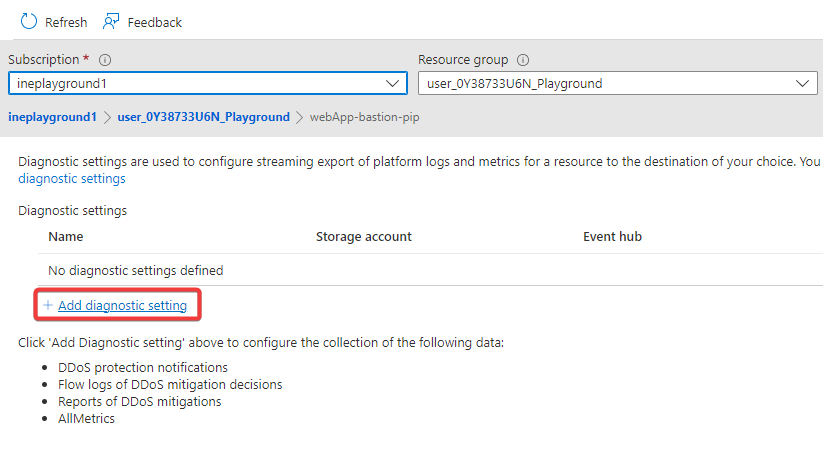
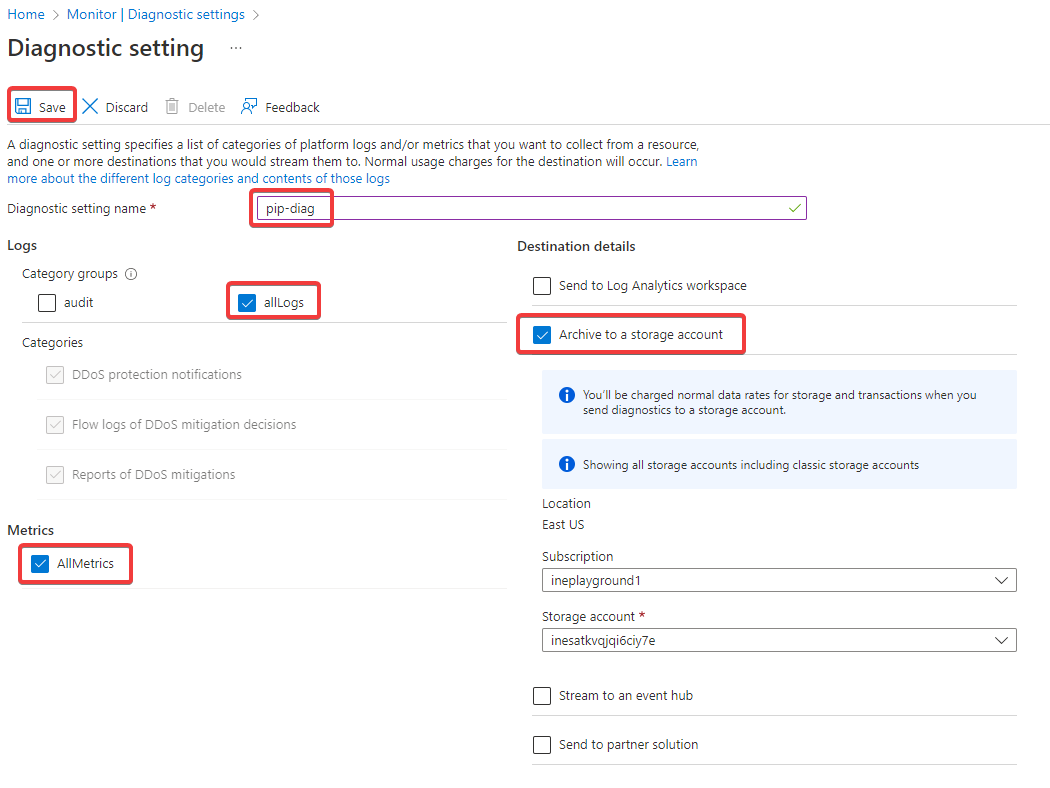
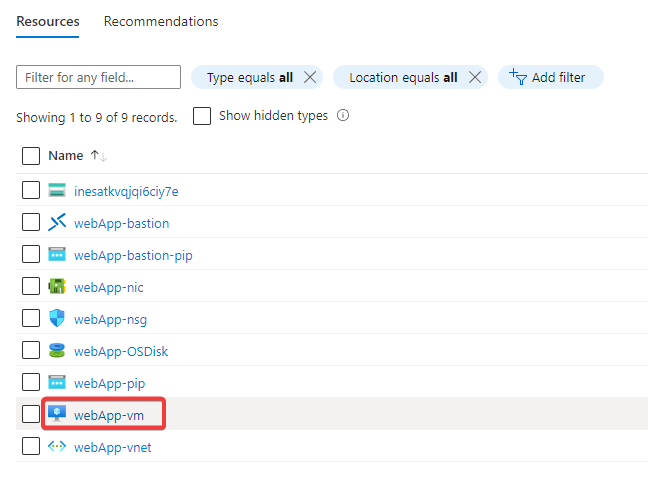
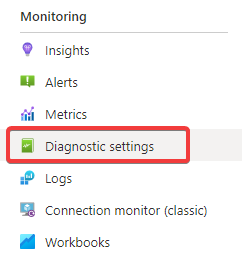
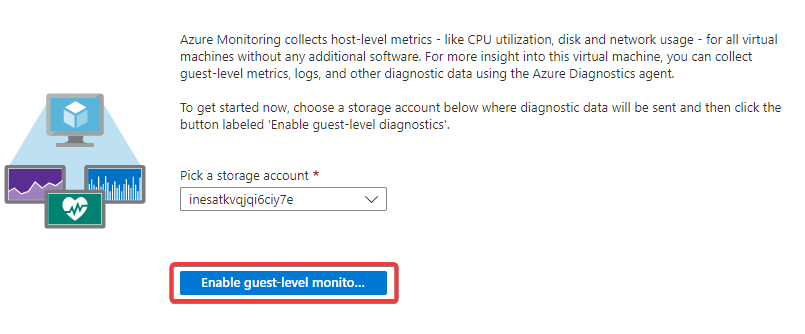
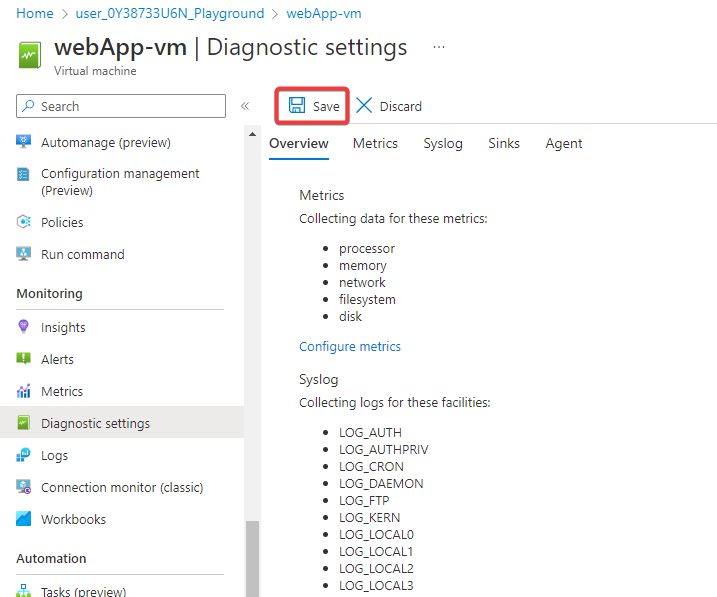
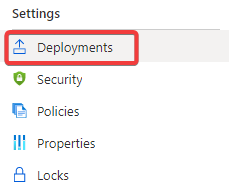
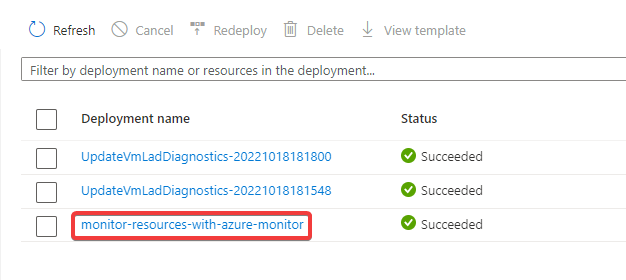
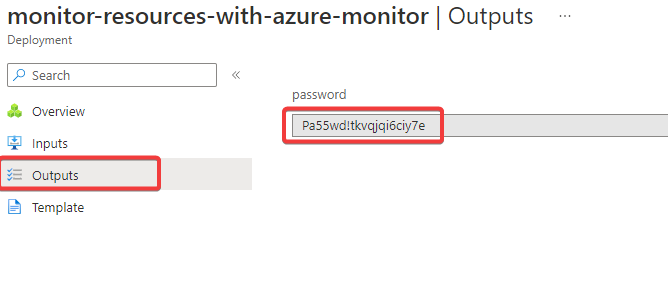
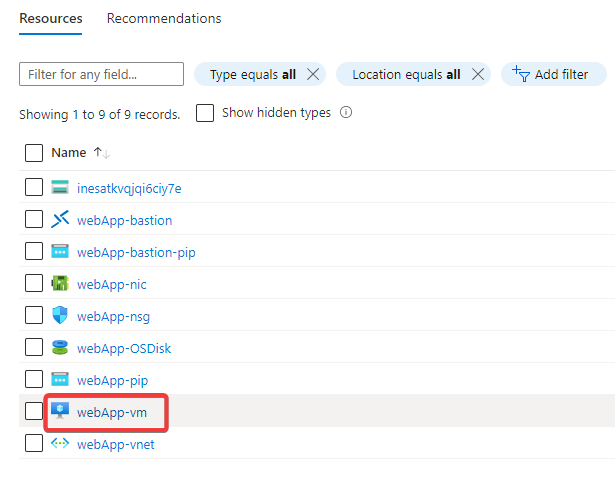
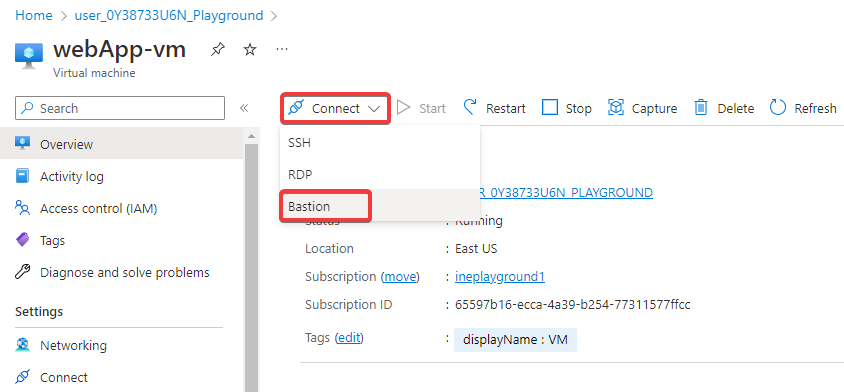
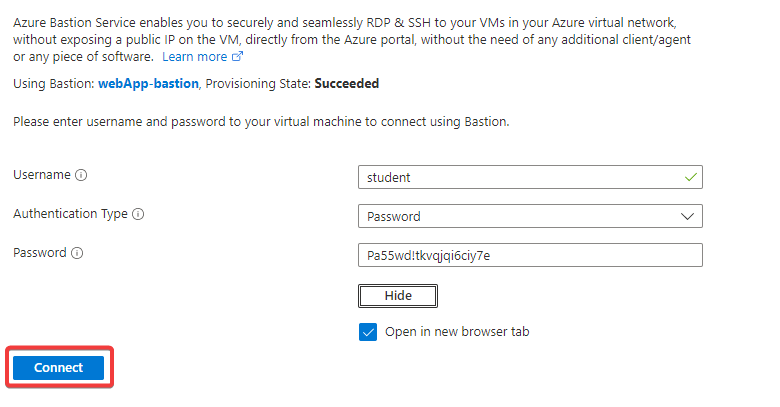
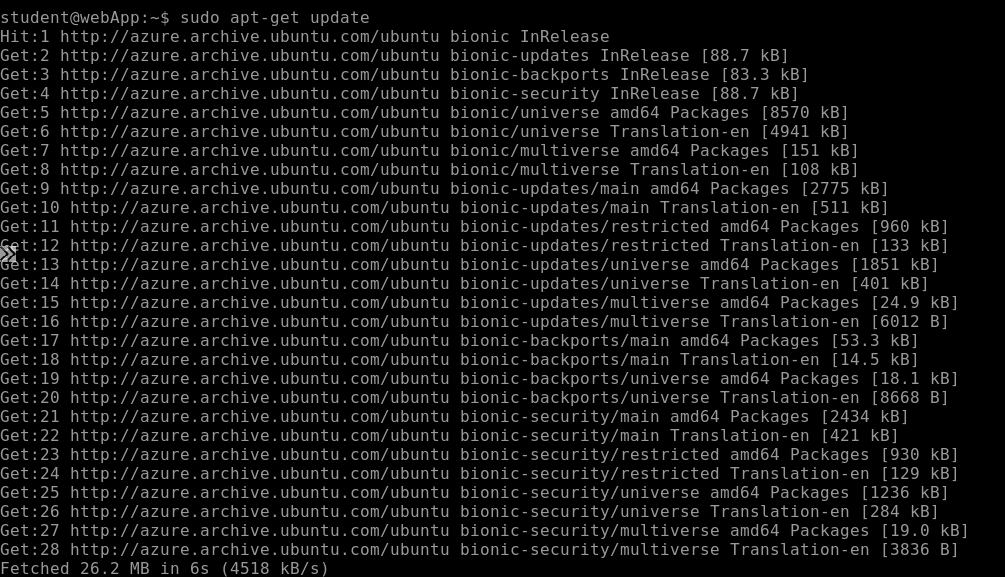
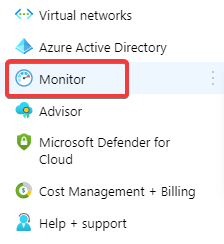
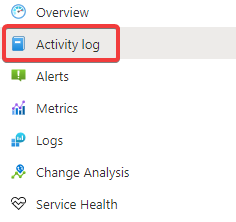
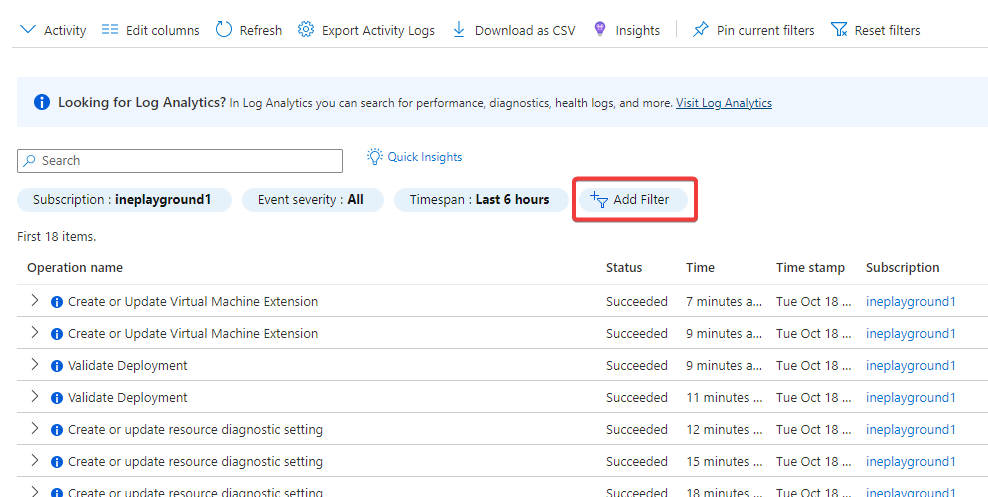
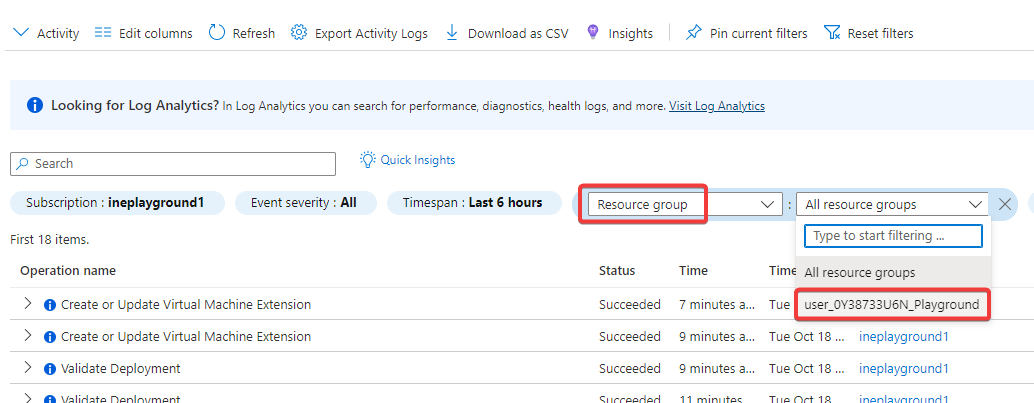
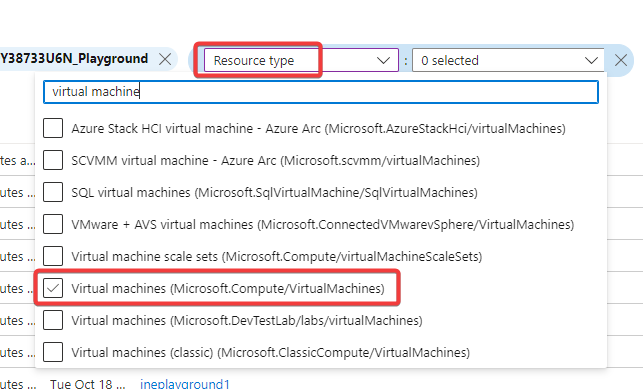
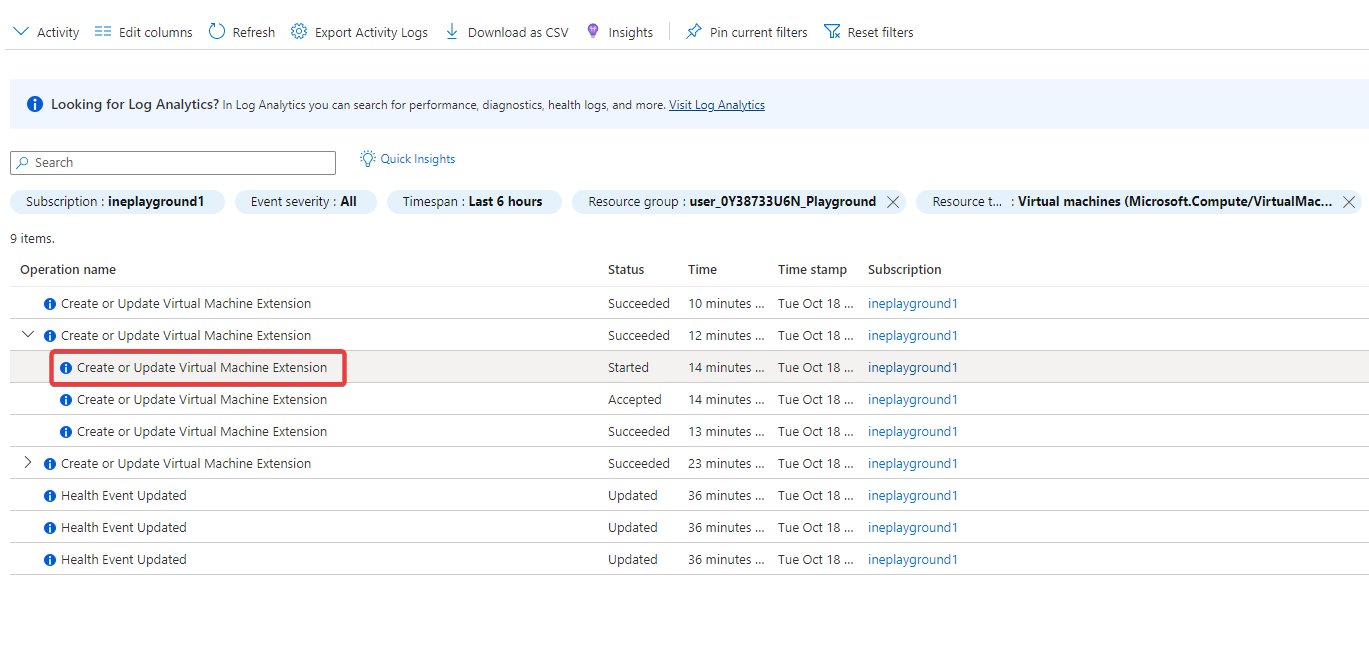
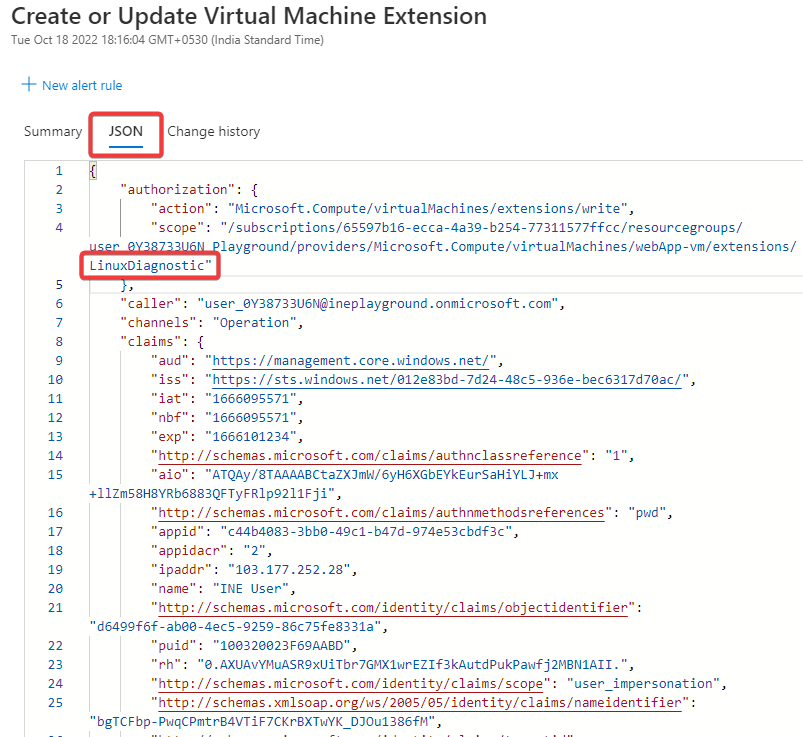
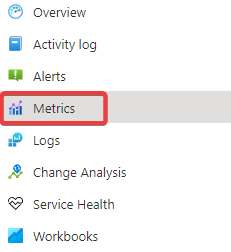
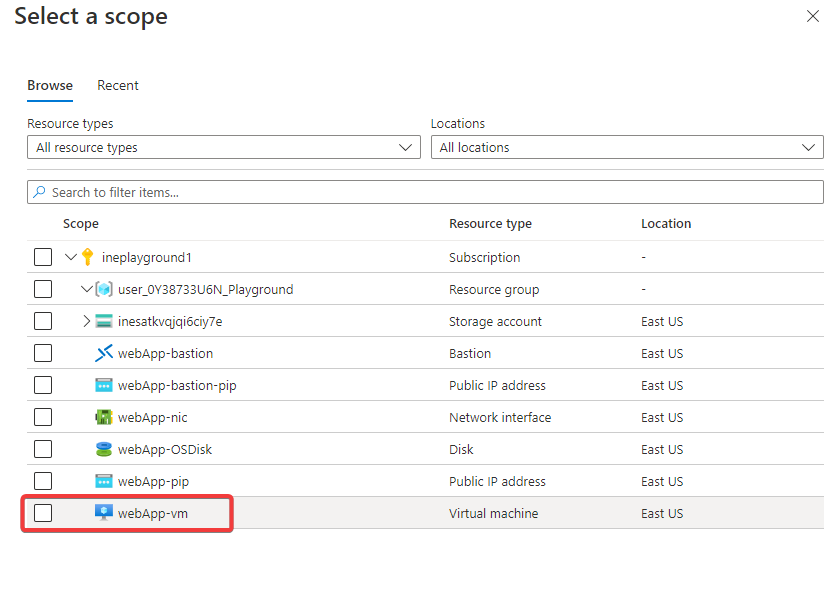
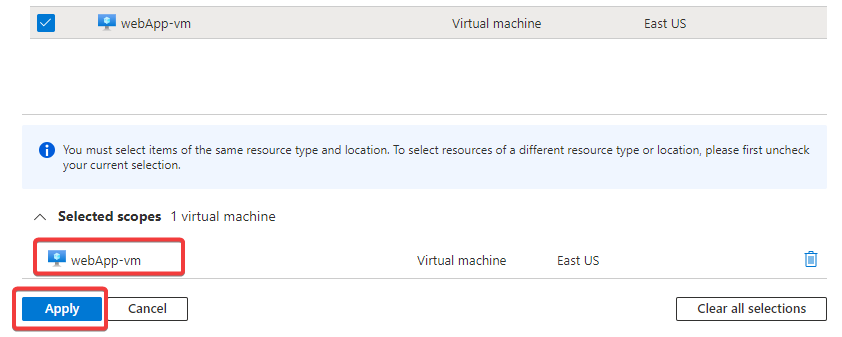
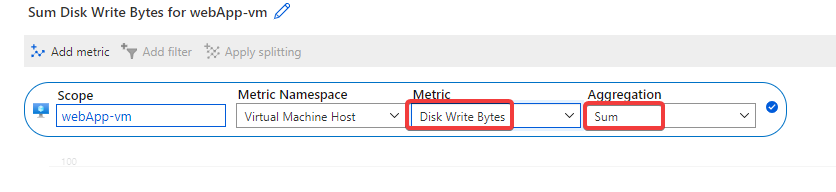
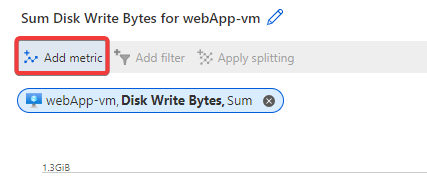
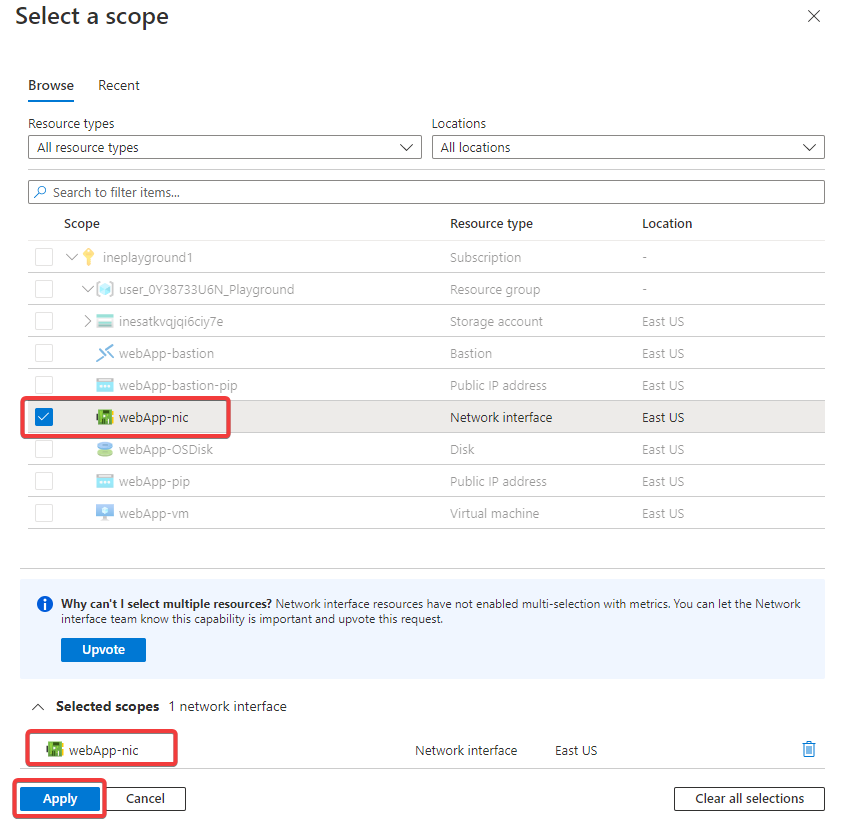
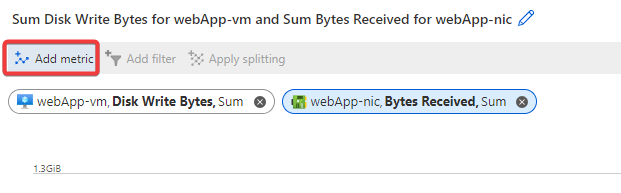
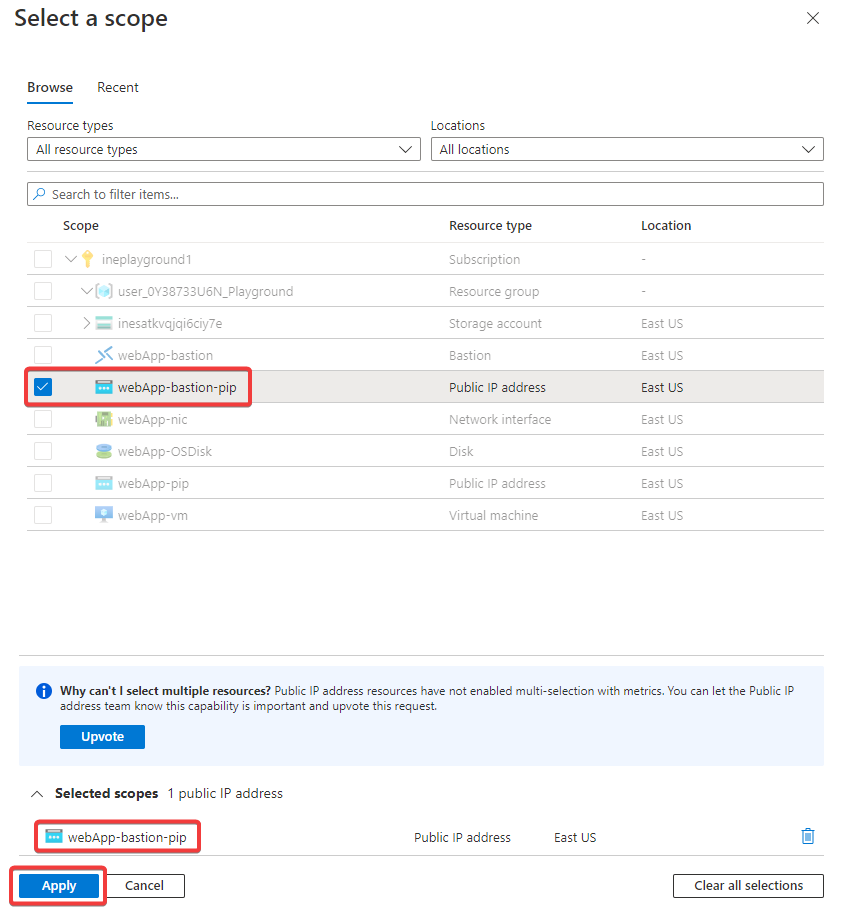
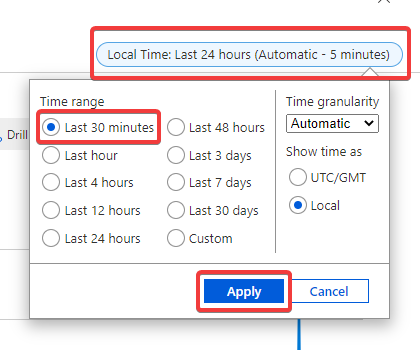
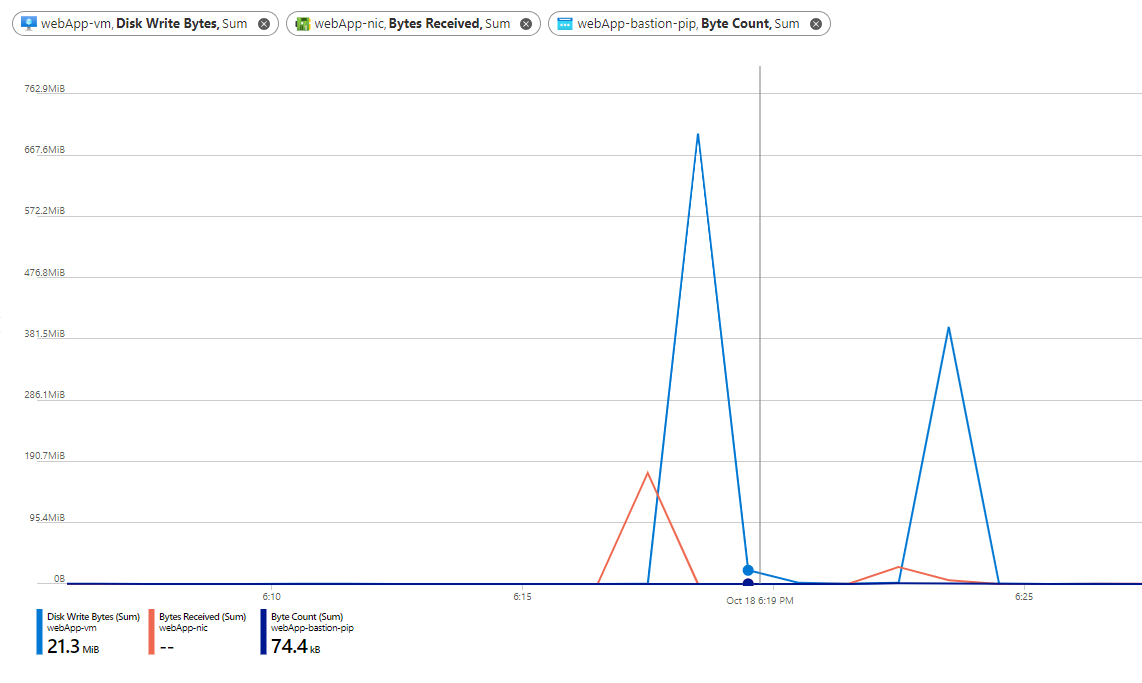
    "solutions": "# Configure monitoring for Azure resources\n\nWhen you log in to Azure with the provided credentials, you will find all the required resources available in the resource group.\n\n**Note:** Deployment of **Bastion service** will take some time.\n\n![](https://assets.ine.com/content/labs/azure-course-labs/monitor-resources-with-azure-monitor/1.png)\n\nThe portal menu lets you quickly get to key functionality and resource types. When the portal menu is in flyout mode, it's hidden until you need it. Select the menu icon to open the menu. Now click on **Monitor**.\n\n![](https://assets.ine.com/content/labs/azure-course-labs/monitor-resources-with-azure-monitor/2.png)\n\nNow click on **Diagnostic settings** from the left navigation menu.\n\n![](https://assets.ine.com/content/labs/azure-course-labs/monitor-resources-with-azure-monitor/3.png)\n\nSelect the provided resource group and filter out all other resources.\n\n![](https://assets.ine.com/content/labs/azure-course-labs/monitor-resources-with-azure-monitor/4.png)\n\nClick on **WebApp-bastion**.\n\n![](https://assets.ine.com/content/labs/azure-course-labs/monitor-resources-with-azure-monitor/5.png)\n\nClick on **Add diagnostic setting**.\n\n![](https://assets.ine.com/content/labs/azure-course-labs/monitor-resources-with-azure-monitor/6.png)\n\nConfigure the following settings and click on **Save**.\n\n- Set the diagnostic setting name as **bastion-diag**.\n- In the Logs, check **Bastion Audit Logs** under categories and set retention days as **7**.\n- Set Destination as **Archive to a storage account**.\n\n![](https://assets.ine.com/content/labs/azure-course-labs/monitor-resources-with-azure-monitor/7.png)\n\nNavigate back to diagnostic settings page and set **Select all** in resource type.\n\n![](https://assets.ine.com/content/labs/azure-course-labs/monitor-resources-with-azure-monitor/8.png)\n\nClick on **webApp-nic**.\n\n![](https://assets.ine.com/content/labs/azure-course-labs/monitor-resources-with-azure-monitor/9.png)\n\nclick on **Add diagnostic setting**.\n\n![](https://assets.ine.com/content/labs/azure-course-labs/monitor-resources-with-azure-monitor/10.png)\n\nConfigure the following settings and click on **Save**.\n\n- Set the diagnostic setting name as **nic-diag**.\n- In the Metrics, check **AllMetrics** and set retention days as **7**.\n- Set Destination as **Archive to a storage account**.\n\n![](https://assets.ine.com/content/labs/azure-course-labs/monitor-resources-with-azure-monitor/11.png)\n\nNavigate back to diagnostic settings page and set **Select all** in resource type.\n\n![](https://assets.ine.com/content/labs/azure-course-labs/monitor-resources-with-azure-monitor/12.png)\n\nClick on **webApp-bastion-pip**.\n\n![](https://assets.ine.com/content/labs/azure-course-labs/monitor-resources-with-azure-monitor/13.png)\n\nclick on **Add diagnostic setting**.\n\n\n![](https://assets.ine.com/content/labs/azure-course-labs/monitor-resources-with-azure-monitor/14.png)\n\nConfigure the following settings and click on **Save**.\n\n- Set the diagnostic setting name as **pip-diag**.\n- In the Logs, check **allLogs**.\n- In the Metrics, check **AllMetrics**.\n- Set Destination as **Archive to a storage account**.\n\n\n![](https://assets.ine.com/content/labs/azure-course-labs/monitor-resources-with-azure-monitor/15.png)\n\nNavigate back to the resource group and click on **webApp-vm**.\n\n![](https://assets.ine.com/content/labs/azure-course-labs/monitor-resources-with-azure-monitor/16.png)\n\nClick on **Diagnostic settings**.\n\n![](https://assets.ine.com/content/labs/azure-course-labs/monitor-resources-with-azure-monitor/17.png)\n\nSelect the storage account and click on **Enable guest-level monitoring**.\n\n**Note:** It will take some time to setup the monitoring agent. \n\n![](https://assets.ine.com/content/labs/azure-course-labs/monitor-resources-with-azure-monitor/18.png)\n\nOnce the setup is done, click on **Save**.\n\n![](https://assets.ine.com/content/labs/azure-course-labs/monitor-resources-with-azure-monitor/19.png)\n\n# Generate activity\n\nNavigate back to the resource group and click on **Deployments**.\n\n![](https://assets.ine.com/content/labs/azure-course-labs/monitor-resources-with-azure-monitor/20.png)\n\nClick on **monitor-resources-with-azure-monitor**.\n\n![](https://assets.ine.com/content/labs/azure-course-labs/monitor-resources-with-azure-monitor/21.png)\n\nNow click on **Outputs** and copy the password.\n\n![](https://assets.ine.com/content/labs/azure-course-labs/monitor-resources-with-azure-monitor/22.png)\n\nNavigate back to resource group and click on **webApp-vm**.\n\n![](https://assets.ine.com/content/labs/azure-course-labs/monitor-resources-with-azure-monitor/23.png)\n\nClick on **Connect** and select **Bastion** from the drop-down.\n\n![](https://assets.ine.com/content/labs/azure-course-labs/monitor-resources-with-azure-monitor/24.png)\n\nEnter the username and paste the password and click on **Connect**.\n\n![](https://assets.ine.com/content/labs/azure-course-labs/monitor-resources-with-azure-monitor/25.png)\n\nIt will open a new tab in the browser.\n\n**Note:** Allow the popup in the browser if it is blocking the portal to shift to a new tab.\n\nNow execute the following commands to generate network traffic.\n\n```\nsudo apt-get update\nsudo apt-get install -y nodejs\nsudo apt-get install -y npm\n```\n\n![](https://assets.ine.com/content/labs/azure-course-labs/monitor-resources-with-azure-monitor/26.png)\n\n# Monitor activity logs with Azure monitor\n\nSelect the menu icon to open the menu. Now click on **Monitor**.\n\n![](https://assets.ine.com/content/labs/azure-course-labs/monitor-resources-with-azure-monitor/27.png)\n\nclick on **Activity log** from the left navigation menu.\n\n![](https://assets.ine.com/content/labs/azure-course-labs/monitor-resources-with-azure-monitor/28.png)\n\nNow add filter to the logs by clicking **Add filter**.\n\n![](https://assets.ine.com/content/labs/azure-course-labs/monitor-resources-with-azure-monitor/29.png)\n\nChoose filter type as **Resource group** and select the provided resource group.\n\n![](https://assets.ine.com/content/labs/azure-course-labs/monitor-resources-with-azure-monitor/30.png)\n\nNow add a filter again and put filter type as **Resource type**. Search of virtual machine and select **Virtual machines(Microsoft.Compute/VirtualMachines)**.\n\n![](https://assets.ine.com/content/labs/azure-course-labs/monitor-resources-with-azure-monitor/31.png)\n\nAfter setting these filters you will find the logs related to virtual machine. Now click on **Create or Update Virtual Machine Extension**.\n\n![](https://assets.ine.com/content/labs/azure-course-labs/monitor-resources-with-azure-monitor/32.png)\n\nSelect JSON and find **LinuxDiagnostic**. This JSON file will provide all the details of the operation performed in the virtual machine.\n\n![](https://assets.ine.com/content/labs/azure-course-labs/monitor-resources-with-azure-monitor/33.png)\n\n# Generate a performance graph with Azure monitor\n\nClick on **Metrics** in from the left navigation menu.\n \n![](https://assets.ine.com/content/labs/azure-course-labs/monitor-resources-with-azure-monitor/34.png)\n\nIn the scope select **webApp-vm** under the provided resource group.\n\n![](https://assets.ine.com/content/labs/azure-course-labs/monitor-resources-with-azure-monitor/35.png)\n\nYou will find **webApp-vm** in the selected list. Now click on **Apply**.\n\n![](https://assets.ine.com/content/labs/azure-course-labs/monitor-resources-with-azure-monitor/36.png)\n\nSet Metric as **Disk Write Bytes** and Aggregation as **Sum**. Click on tick after entering these settings.\n\n![](https://assets.ine.com/content/labs/azure-course-labs/monitor-resources-with-azure-monitor/37.png)\n\nNow again add a metric by clicking **Add metric**.\n\n![](https://assets.ine.com/content/labs/azure-course-labs/monitor-resources-with-azure-monitor/38.png)\n\nClik on the **Scope**.\n\n![](https://assets.ine.com/content/labs/azure-course-labs/monitor-resources-with-azure-monitor/39.png)\n\nSelect **webApp-nic** and click on **Apply**.\n\n![](https://assets.ine.com/content/labs/azure-course-labs/monitor-resources-with-azure-monitor/40.png)\n\nSet Metric as **Bytes Received** and Aggregation as **Sum**. Click on tick after entering these settings.\n\n![](https://assets.ine.com/content/labs/azure-course-labs/monitor-resources-with-azure-monitor/41.png)\n\nNow again add a metric by clicking **Add metric**.\n\n![](https://assets.ine.com/content/labs/azure-course-labs/monitor-resources-with-azure-monitor/42.png)\n\nClik on the **Scope**.\n\n![](https://assets.ine.com/content/labs/azure-course-labs/monitor-resources-with-azure-monitor/43.png)\n\nSelect **webApp-bastion-pip** and click on **Apply**.\n\n![](https://assets.ine.com/content/labs/azure-course-labs/monitor-resources-with-azure-monitor/44.png)\n\nSet Metric as **Bytes Count** and Aggregation as **Sum**. Click on tick after entering these settings.\n\n![](https://assets.ine.com/content/labs/azure-course-labs/monitor-resources-with-azure-monitor/45.png)\n\nClick on **Local time** and set time range as **Last 30 minutes**. Click on **Apply**\n\n![](https://assets.ine.com/content/labs/azure-course-labs/monitor-resources-with-azure-monitor/46.png)\n\nYou will now find a graph displayed in the portal similar to this.\n\n![](https://assets.ine.com/content/labs/azure-course-labs/monitor-resources-with-azure-monitor/47.png)\n\nOur lab is now complete.",


    "solutions_html": "<h1>Configure monitoring for Azure resources</h1>\n<p>When you log in to Azure with the provided credentials, you will find all the required resources available in the resource group.</p>\n<p><strong>Note:</strong> Deployment of <strong>Bastion service</strong> will take some time.</p>\n<p><img alt=\"\" src=\"https://assets.ine.com/content/labs/azure-course-labs/monitor-resources-with-azure-monitor/1.png\" /></p>\n<p>The portal menu lets you quickly get to key functionality and resource types. When the portal menu is in flyout mode, it's hidden until you need it. Select the menu icon to open the menu. Now click on <strong>Monitor</strong>.</p>\n<p><img alt=\"\" src=\"https://assets.ine.com/content/labs/azure-course-labs/monitor-resources-with-azure-monitor/2.png\" /></p>\n<p>Now click on <strong>Diagnostic settings</strong> from the left navigation menu.</p>\n<p><img alt=\"\" src=\"https://assets.ine.com/content/labs/azure-course-labs/monitor-resources-with-azure-monitor/3.png\" /></p>\n<p>Select the provided resource group and filter out all other resources.</p>\n<p><img alt=\"\" src=\"https://assets.ine.com/content/labs/azure-course-labs/monitor-resources-with-azure-monitor/4.png\" /></p>\n<p>Click on <strong>WebApp-bastion</strong>.</p>\n<p><img alt=\"\" src=\"https://assets.ine.com/content/labs/azure-course-labs/monitor-resources-with-azure-monitor/5.png\" /></p>\n<p>Click on <strong>Add diagnostic setting</strong>.</p>\n<p><img alt=\"\" src=\"https://assets.ine.com/content/labs/azure-course-labs/monitor-resources-with-azure-monitor/6.png\" /></p>\n<p>Configure the following settings and click on <strong>Save</strong>.</p>\n<ul>\n<li>Set the diagnostic setting name as <strong>bastion-diag</strong>.</li>\n<li>In the Logs, check <strong>Bastion Audit Logs</strong> under categories and set retention days as <strong>7</strong>.</li>\n<li>Set Destination as <strong>Archive to a storage account</strong>.</li>\n</ul>\n<p><img alt=\"\" src=\"https://assets.ine.com/content/labs/azure-course-labs/monitor-resources-with-azure-monitor/7.png\" /></p>\n<p>Navigate back to diagnostic settings page and set <strong>Select all</strong> in resource type.</p>\n<p><img alt=\"\" src=\"https://assets.ine.com/content/labs/azure-course-labs/monitor-resources-with-azure-monitor/8.png\" /></p>\n<p>Click on <strong>webApp-nic</strong>.</p>\n<p><img alt=\"\" src=\"https://assets.ine.com/content/labs/azure-course-labs/monitor-resources-with-azure-monitor/9.png\" /></p>\n<p>click on <strong>Add diagnostic setting</strong>.</p>\n<p><img alt=\"\" src=\"https://assets.ine.com/content/labs/azure-course-labs/monitor-resources-with-azure-monitor/10.png\" /></p>\n<p>Configure the following settings and click on <strong>Save</strong>.</p>\n<ul>\n<li>Set the diagnostic setting name as <strong>nic-diag</strong>.</li>\n<li>In the Metrics, check <strong>AllMetrics</strong> and set retention days as <strong>7</strong>.</li>\n<li>Set Destination as <strong>Archive to a storage account</strong>.</li>\n</ul>\n<p><img alt=\"\" src=\"https://assets.ine.com/content/labs/azure-course-labs/monitor-resources-with-azure-monitor/11.png\" /></p>\n<p>Navigate back to diagnostic settings page and set <strong>Select all</strong> in resource type.</p>\n<p><img alt=\"\" src=\"https://assets.ine.com/content/labs/azure-course-labs/monitor-resources-with-azure-monitor/12.png\" /></p>\n<p>Click on <strong>webApp-bastion-pip</strong>.</p>\n<p><img alt=\"\" src=\"https://assets.ine.com/content/labs/azure-course-labs/monitor-resources-with-azure-monitor/13.png\" /></p>\n<p>click on <strong>Add diagnostic setting</strong>.</p>\n<p><img alt=\"\" src=\"https://assets.ine.com/content/labs/azure-course-labs/monitor-resources-with-azure-monitor/14.png\" /></p>\n<p>Configure the following settings and click on <strong>Save</strong>.</p>\n<ul>\n<li>Set the diagnostic setting name as <strong>pip-diag</strong>.</li>\n<li>In the Logs, check <strong>allLogs</strong>.</li>\n<li>In the Metrics, check <strong>AllMetrics</strong>.</li>\n<li>Set Destination as <strong>Archive to a storage account</strong>.</li>\n</ul>\n<p><img alt=\"\" src=\"https://assets.ine.com/content/labs/azure-course-labs/monitor-resources-with-azure-monitor/15.png\" /></p>\n<p>Navigate back to the resource group and click on <strong>webApp-vm</strong>.</p>\n<p><img alt=\"\" src=\"https://assets.ine.com/content/labs/azure-course-labs/monitor-resources-with-azure-monitor/16.png\" /></p>\n<p>Click on <strong>Diagnostic settings</strong>.</p>\n<p><img alt=\"\" src=\"https://assets.ine.com/content/labs/azure-course-labs/monitor-resources-with-azure-monitor/17.png\" /></p>\n<p>Select the storage account and click on <strong>Enable guest-level monitoring</strong>.</p>\n<p><strong>Note:</strong> It will take some time to setup the monitoring agent. </p>\n<p><img alt=\"\" src=\"https://assets.ine.com/content/labs/azure-course-labs/monitor-resources-with-azure-monitor/18.png\" /></p>\n<p>Once the setup is done, click on <strong>Save</strong>.</p>\n<p><img alt=\"\" src=\"https://assets.ine.com/content/labs/azure-course-labs/monitor-resources-with-azure-monitor/19.png\" /></p>\n<h1>Generate activity</h1>\n<p>Navigate back to the resource group and click on <strong>Deployments</strong>.</p>\n<p><img alt=\"\" src=\"https://assets.ine.com/content/labs/azure-course-labs/monitor-resources-with-azure-monitor/20.png\" /></p>\n<p>Click on <strong>monitor-resources-with-azure-monitor</strong>.</p>\n<p><img alt=\"\" src=\"https://assets.ine.com/content/labs/azure-course-labs/monitor-resources-with-azure-monitor/21.png\" /></p>\n<p>Now click on <strong>Outputs</strong> and copy the password.</p>\n<p><img alt=\"\" src=\"https://assets.ine.com/content/labs/azure-course-labs/monitor-resources-with-azure-monitor/22.png\" /></p>\n<p>Navigate back to resource group and click on <strong>webApp-vm</strong>.</p>\n<p><img alt=\"\" src=\"https://assets.ine.com/content/labs/azure-course-labs/monitor-resources-with-azure-monitor/23.png\" /></p>\n<p>Click on <strong>Connect</strong> and select <strong>Bastion</strong> from the drop-down.</p>\n<p><img alt=\"\" src=\"https://assets.ine.com/content/labs/azure-course-labs/monitor-resources-with-azure-monitor/24.png\" /></p>\n<p>Enter the username and paste the password and click on <strong>Connect</strong>.</p>\n<p><img alt=\"\" src=\"https://assets.ine.com/content/labs/azure-course-labs/monitor-resources-with-azure-monitor/25.png\" /></p>\n<p>It will open a new tab in the browser.</p>\n<p><strong>Note:</strong> Allow the popup in the browser if it is blocking the portal to shift to a new tab.</p>\n<p>Now execute the following commands to generate network traffic.</p>\n<pre class=\"codehilite\"><code>sudo apt-get update\nsudo apt-get install -y nodejs\nsudo apt-get install -y npm</code></pre>\n\n<p><img alt=\"\" src=\"https://assets.ine.com/content/labs/azure-course-labs/monitor-resources-with-azure-monitor/26.png\" /></p>\n<h1>Monitor activity logs with Azure monitor</h1>\n<p>Select the menu icon to open the menu. Now click on <strong>Monitor</strong>.</p>\n<p><img alt=\"\" src=\"https://assets.ine.com/content/labs/azure-course-labs/monitor-resources-with-azure-monitor/27.png\" /></p>\n<p>click on <strong>Activity log</strong> from the left navigation menu.</p>\n<p><img alt=\"\" src=\"https://assets.ine.com/content/labs/azure-course-labs/monitor-resources-with-azure-monitor/28.png\" /></p>\n<p>Now add filter to the logs by clicking <strong>Add filter</strong>.</p>\n<p><img alt=\"\" src=\"https://assets.ine.com/content/labs/azure-course-labs/monitor-resources-with-azure-monitor/29.png\" /></p>\n<p>Choose filter type as <strong>Resource group</strong> and select the provided resource group.</p>\n<p><img alt=\"\" src=\"https://assets.ine.com/content/labs/azure-course-labs/monitor-resources-with-azure-monitor/30.png\" /></p>\n<p>Now add a filter again and put filter type as <strong>Resource type</strong>. Search of virtual machine and select <strong>Virtual machines(Microsoft.Compute/VirtualMachines)</strong>.</p>\n<p><img alt=\"\" src=\"https://assets.ine.com/content/labs/azure-course-labs/monitor-resources-with-azure-monitor/31.png\" /></p>\n<p>After setting these filters you will find the logs related to virtual machine. Now click on <strong>Create or Update Virtual Machine Extension</strong>.</p>\n<p><img alt=\"\" src=\"https://assets.ine.com/content/labs/azure-course-labs/monitor-resources-with-azure-monitor/32.png\" /></p>\n<p>Select JSON and find <strong>LinuxDiagnostic</strong>. This JSON file will provide all the details of the operation performed in the virtual machine.</p>\n<p><img alt=\"\" src=\"https://assets.ine.com/content/labs/azure-course-labs/monitor-resources-with-azure-monitor/33.png\" /></p>\n<h1>Generate a performance graph with Azure monitor</h1>\n<p>Click on <strong>Metrics</strong> in from the left navigation menu.</p>\n<p><img alt=\"\" src=\"https://assets.ine.com/content/labs/azure-course-labs/monitor-resources-with-azure-monitor/34.png\" /></p>\n<p>In the scope select <strong>webApp-vm</strong> under the provided resource group.</p>\n<p><img alt=\"\" src=\"https://assets.ine.com/content/labs/azure-course-labs/monitor-resources-with-azure-monitor/35.png\" /></p>\n<p>You will find <strong>webApp-vm</strong> in the selected list. Now click on <strong>Apply</strong>.</p>\n<p><img alt=\"\" src=\"https://assets.ine.com/content/labs/azure-course-labs/monitor-resources-with-azure-monitor/36.png\" /></p>\n<p>Set Metric as <strong>Disk Write Bytes</strong> and Aggregation as <strong>Sum</strong>. Click on tick after entering these settings.</p>\n<p><img alt=\"\" src=\"https://assets.ine.com/content/labs/azure-course-labs/monitor-resources-with-azure-monitor/37.png\" /></p>\n<p>Now again add a metric by clicking <strong>Add metric</strong>.</p>\n<p><img alt=\"\" src=\"https://assets.ine.com/content/labs/azure-course-labs/monitor-resources-with-azure-monitor/38.png\" /></p>\n<p>Clik on the <strong>Scope</strong>.</p>\n<p><img alt=\"\" src=\"https://assets.ine.com/content/labs/azure-course-labs/monitor-resources-with-azure-monitor/39.png\" /></p>\n<p>Select <strong>webApp-nic</strong> and click on <strong>Apply</strong>.</p>\n<p><img alt=\"\" src=\"https://assets.ine.com/content/labs/azure-course-labs/monitor-resources-with-azure-monitor/40.png\" /></p>\n<p>Set Metric as <strong>Bytes Received</strong> and Aggregation as <strong>Sum</strong>. Click on tick after entering these settings.</p>\n<p><img alt=\"\" src=\"https://assets.ine.com/content/labs/azure-course-labs/monitor-resources-with-azure-monitor/41.png\" /></p>\n<p>Now again add a metric by clicking <strong>Add metric</strong>.</p>\n<p><img alt=\"\" src=\"https://assets.ine.com/content/labs/azure-course-labs/monitor-resources-with-azure-monitor/42.png\" /></p>\n<p>Clik on the <strong>Scope</strong>.</p>\n<p><img alt=\"\" src=\"https://assets.ine.com/content/labs/azure-course-labs/monitor-resources-with-azure-monitor/43.png\" /></p>\n<p>Select <strong>webApp-bastion-pip</strong> and click on <strong>Apply</strong>.</p>\n<p><img alt=\"\" src=\"https://assets.ine.com/content/labs/azure-course-labs/monitor-resources-with-azure-monitor/44.png\" /></p>\n<p>Set Metric as <strong>Bytes Count</strong> and Aggregation as <strong>Sum</strong>. Click on tick after entering these settings.</p>\n<p><img alt=\"\" src=\"https://assets.ine.com/content/labs/azure-course-labs/monitor-resources-with-azure-monitor/45.png\" /></p>\n<p>Click on <strong>Local time</strong> and set time range as <strong>Last 30 minutes</strong>. Click on <strong>Apply</strong></p>\n<p><img alt=\"\" src=\"https://assets.ine.com/content/labs/azure-course-labs/monitor-resources-with-azure-monitor/46.png\" /></p>\n<p>You will now find a graph displayed in the portal similar to this.</p>\n<p><img alt=\"\" src=\"https://assets.ine.com/content/labs/azure-course-labs/monitor-resources-with-azure-monitor/47.png\" /></p>\n<p>Our lab is now complete.</p>",
    "flags": [],
    "min_points_to_pass": null,
    "access_type": "web",
    "user_status": "unstarted",
    "user_lab_status": null,
    "user_status_modified": null,
    "user_flags": [],
    "global_running_session": null
}