This lab helps you create a custom template for a virtual machine in Azure Portal, deploy it, and export it from deployed resources.
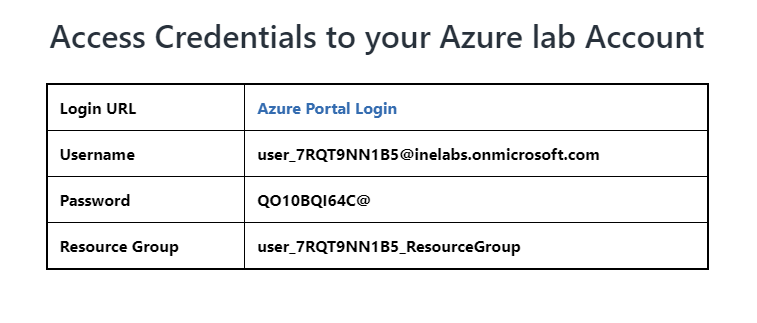
Step 1: Start the lab, agree after reading terms and conditions and check the credential/URL provided on the page.
Step 2: Open the Login URL link in incognito (Right click on the URL and select Open link in incognito Window option).
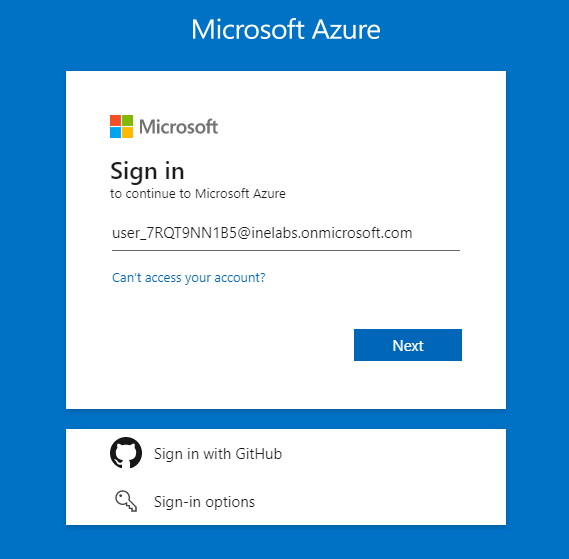
The URL will take you to the Azure Portal login page. Use the provided username and password to login into it.
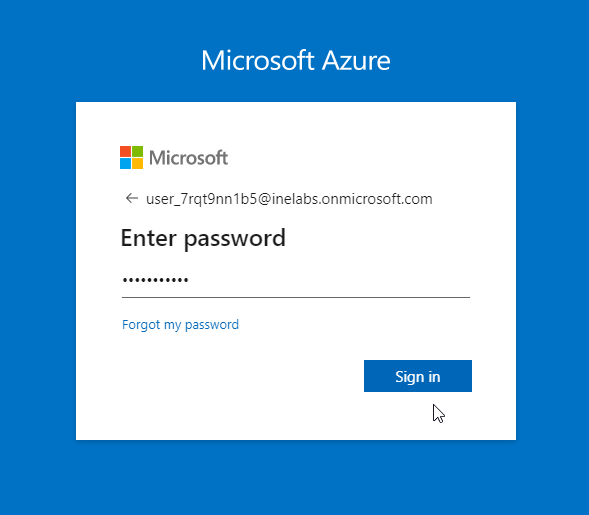
Enter password
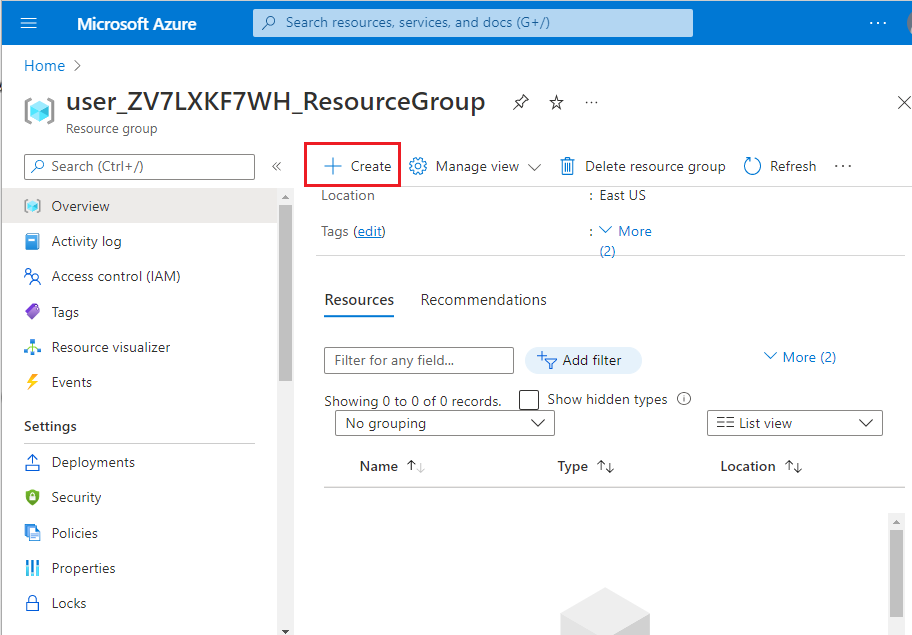
Step 3: An empty resource group will be visible. Click on Create option to create aVirtual Network, Storage Account and virtual machine
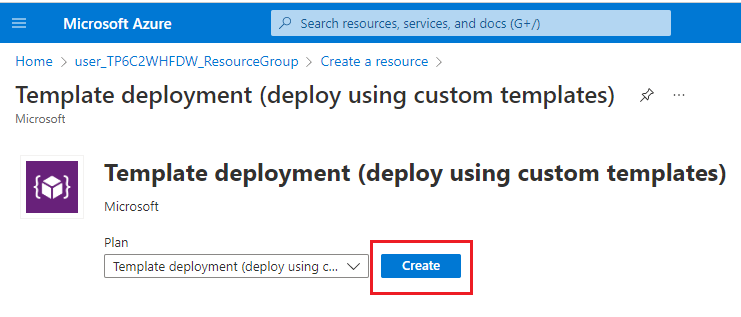
Step 4: Create a Template deployment as shown below
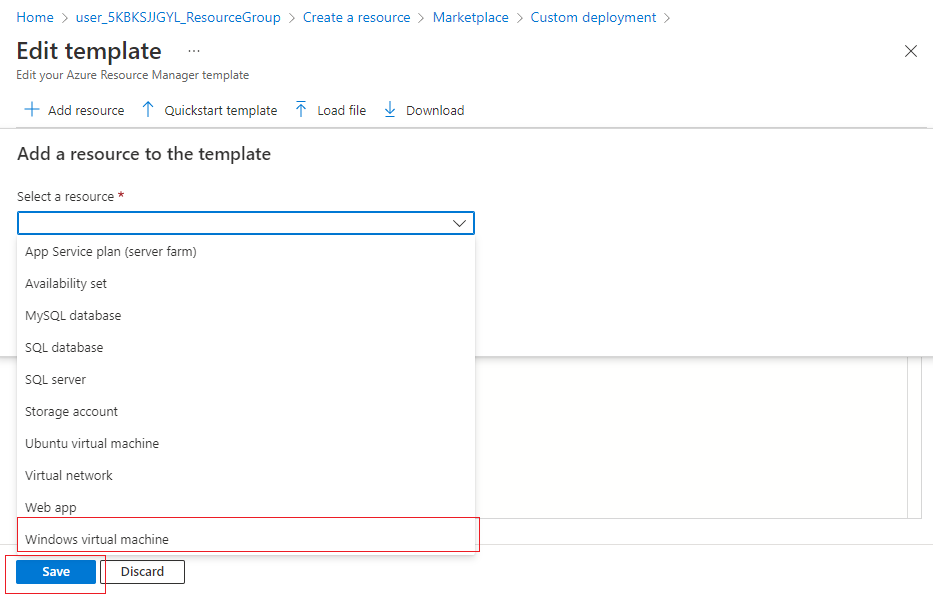
Step 5: A basic template will be visible which does not contain any resources at this point.Click on Add Resources

Select Windows Virtual Machine in Select a Resource
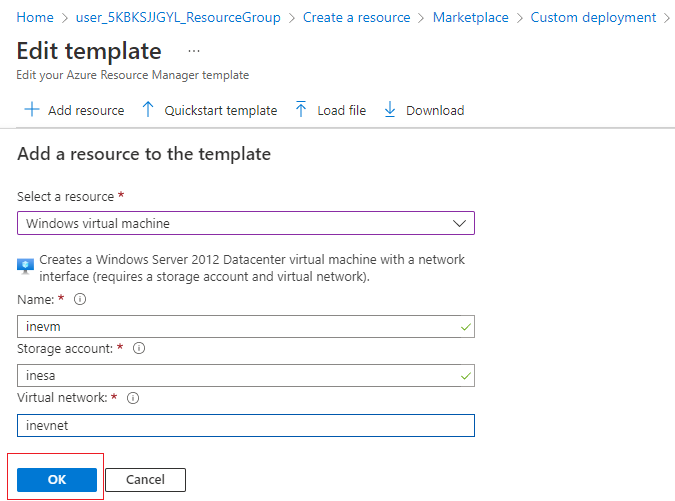
Enter other details such as Name,Storage Account and Virtual Network. Click on OK
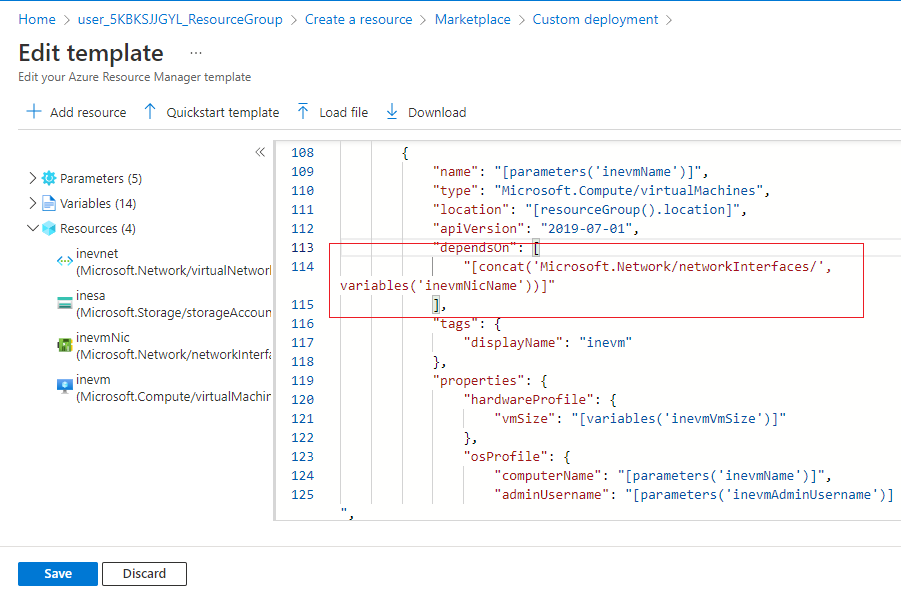
Step 6: Replace Apiversion as 2019-07-01 given below, to use the latest api version.

Remove Storage Accounts from DependsOn to use managed disk
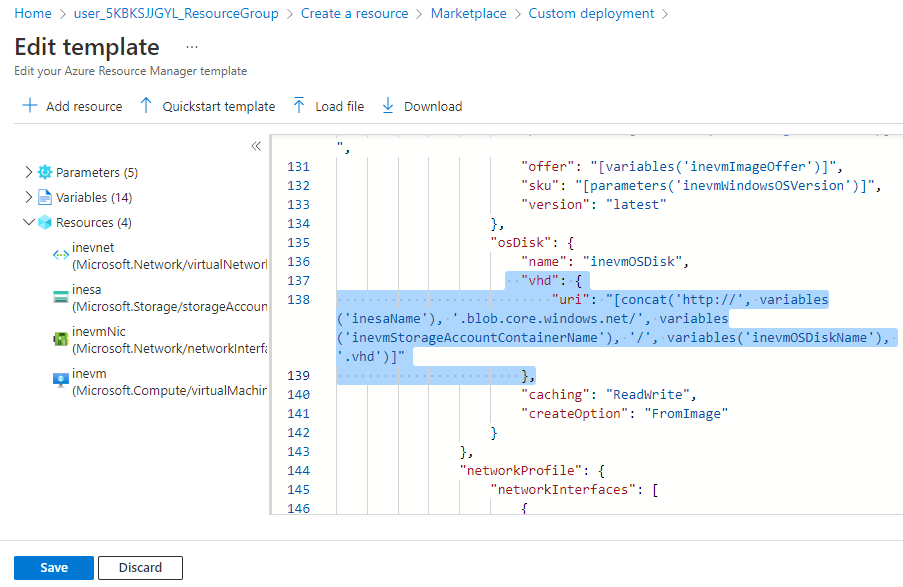
Step 7: Navigate to Virtual Machine Resource, select and delete some parameters of osDisk as shown below
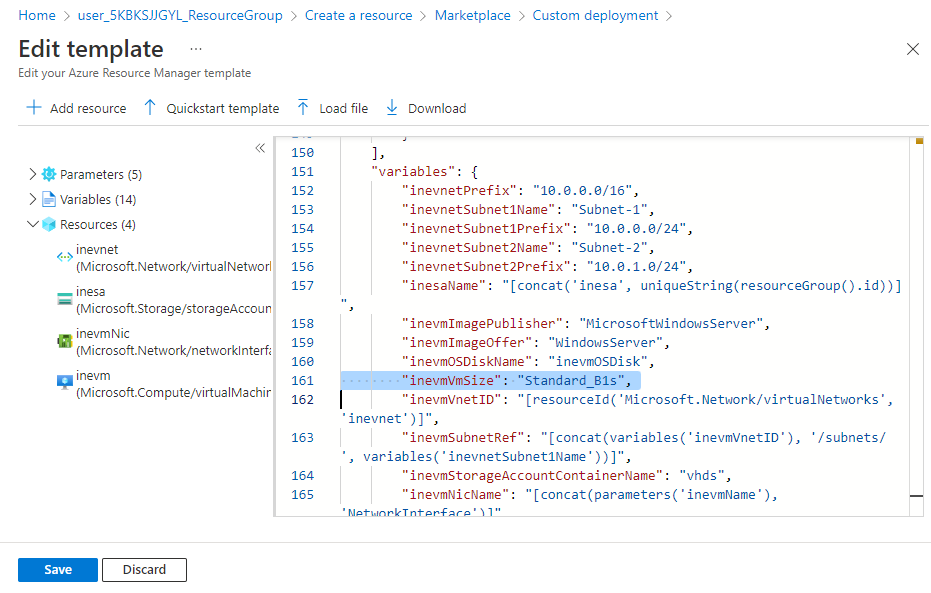
In Variables, select VmSize as B1s . Click on Save
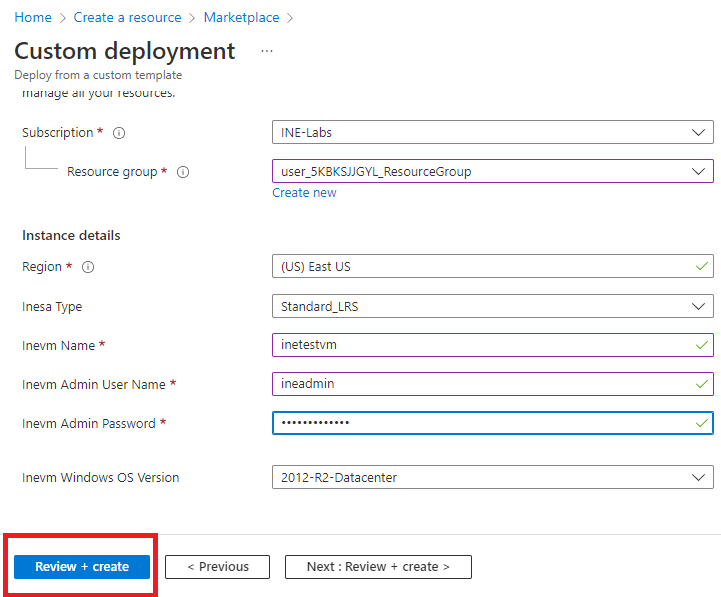
Step 8: Fill in the details and Click on Review and Create
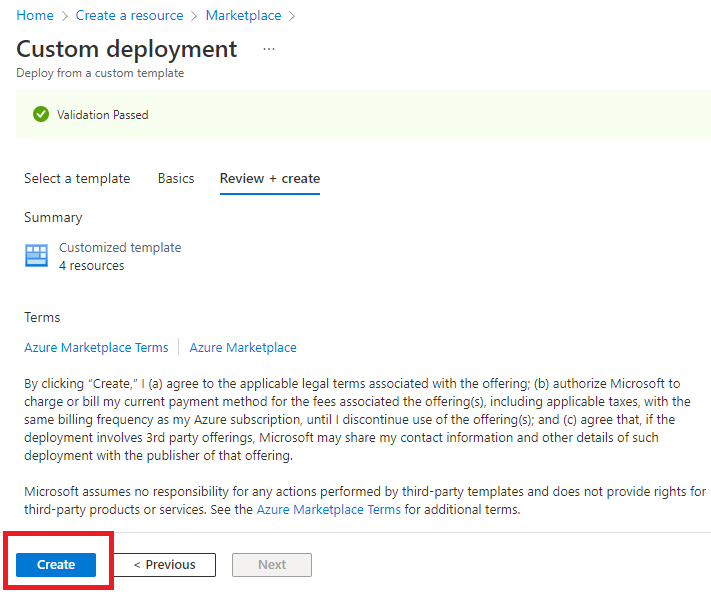
After successful Validation, Click on Create
Step 9: Check your Resource after successful deployment. Click on Export Template .
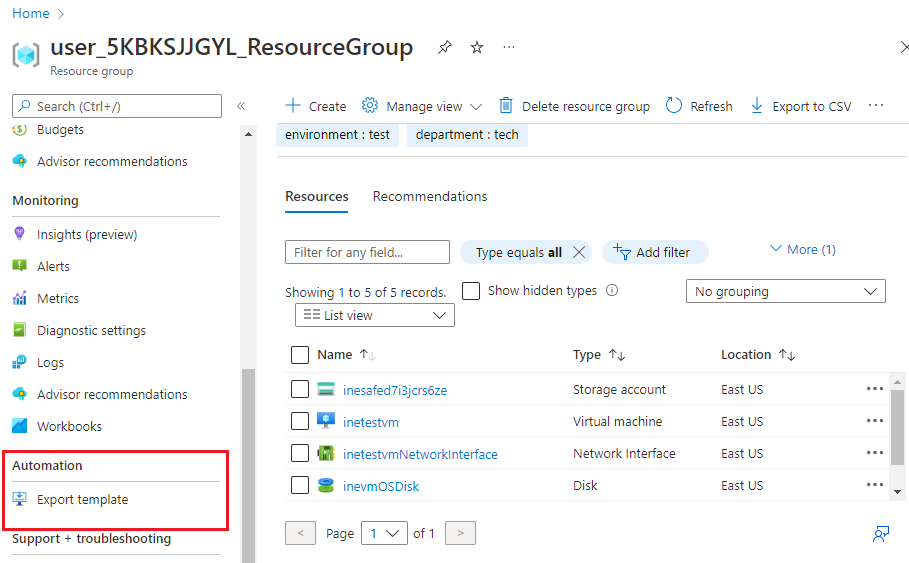
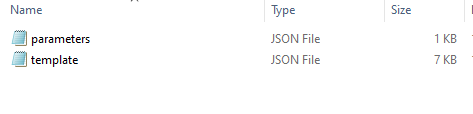
Click on Download option. Template and Parameter files will be Downloaded

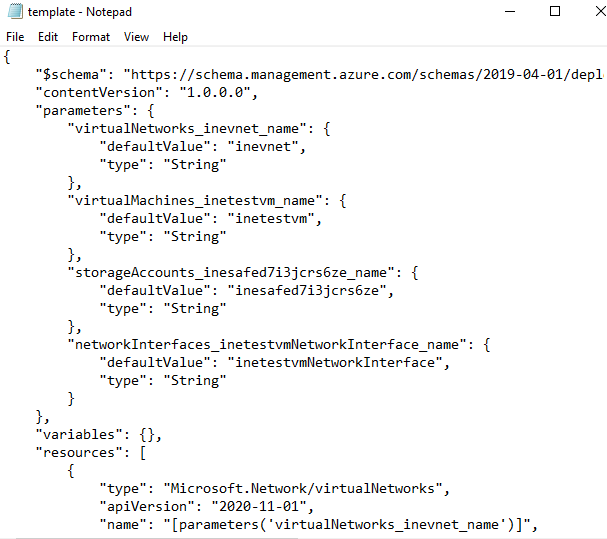
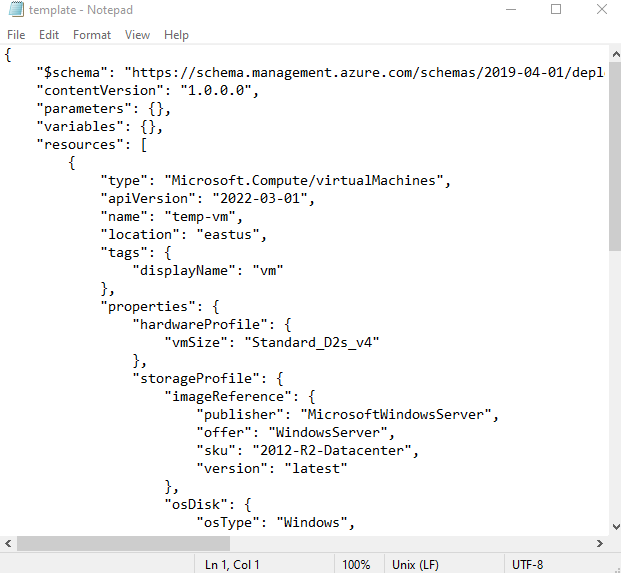
The contents of Template file are similar to given below
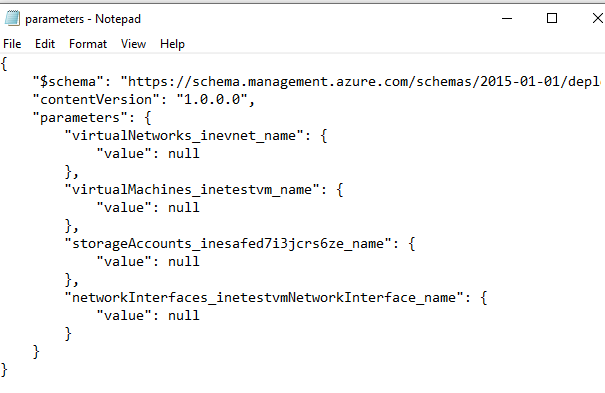
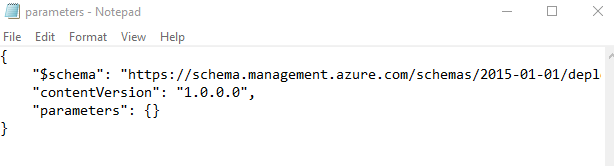
Contents of the Parameter file are similar to given below
Similarly, Navigate to your Virtual Machine. Select Export Template to download template of the Virtual Machine.
Note uncheck the Include Parameters Checkbox.Both the files will be downloaded
As the parameters were excluded, the parameter files will be NULL as shown below
And Similarly, the Template file will be as similar to shown below
Delete the resources using Delete option. Navigate to Virtual Machine and Click on delete

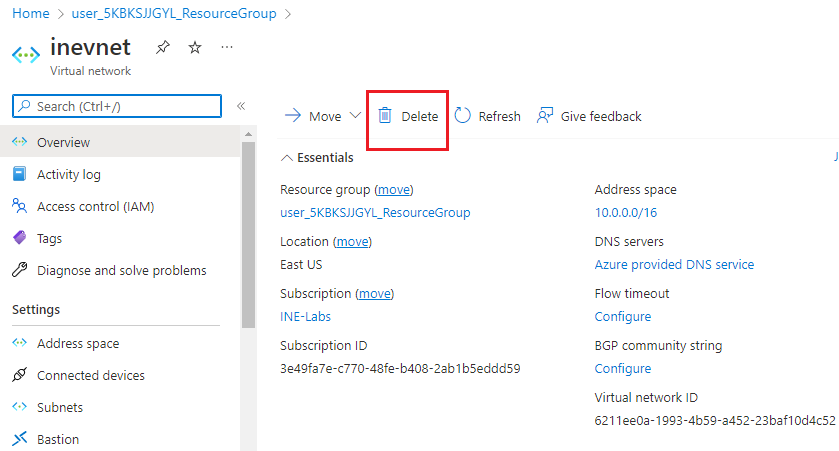
Navigate to Virtual Network and Click on Delete
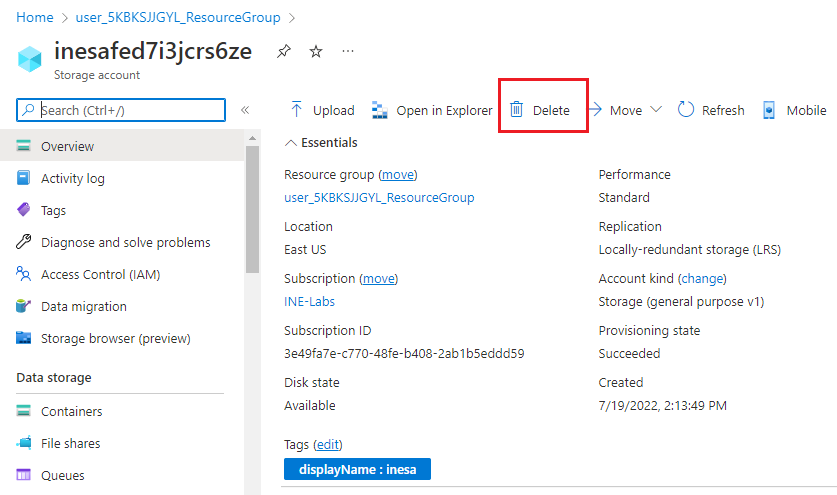
Navigate to Storage Account and Click on Delete
In this way you can Create a custom template for Virtual Machine in Azure Portal. Deploy the Virtual Machine using the template