In this task you will provision a container instance to host a web application. You will then verify that the application works as expected.
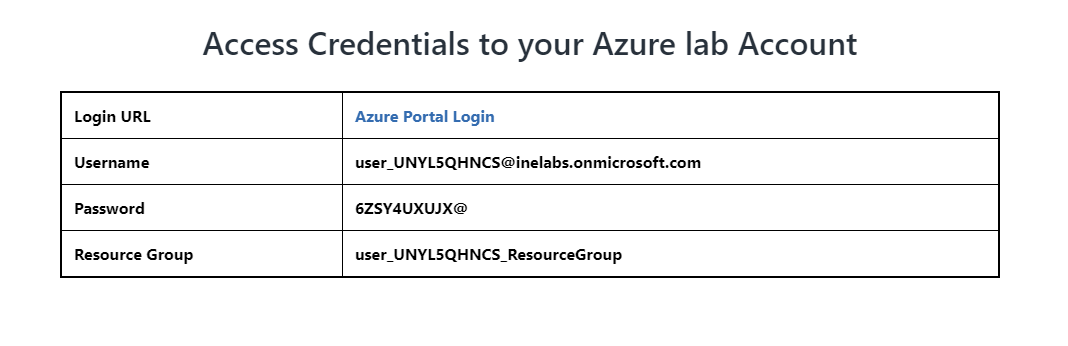
First of all login to your azure portal with the generated credentials. You have to accept the terms and click continue to generate the credentials.
Note: Your credentials will be different from the one shown in the figure.
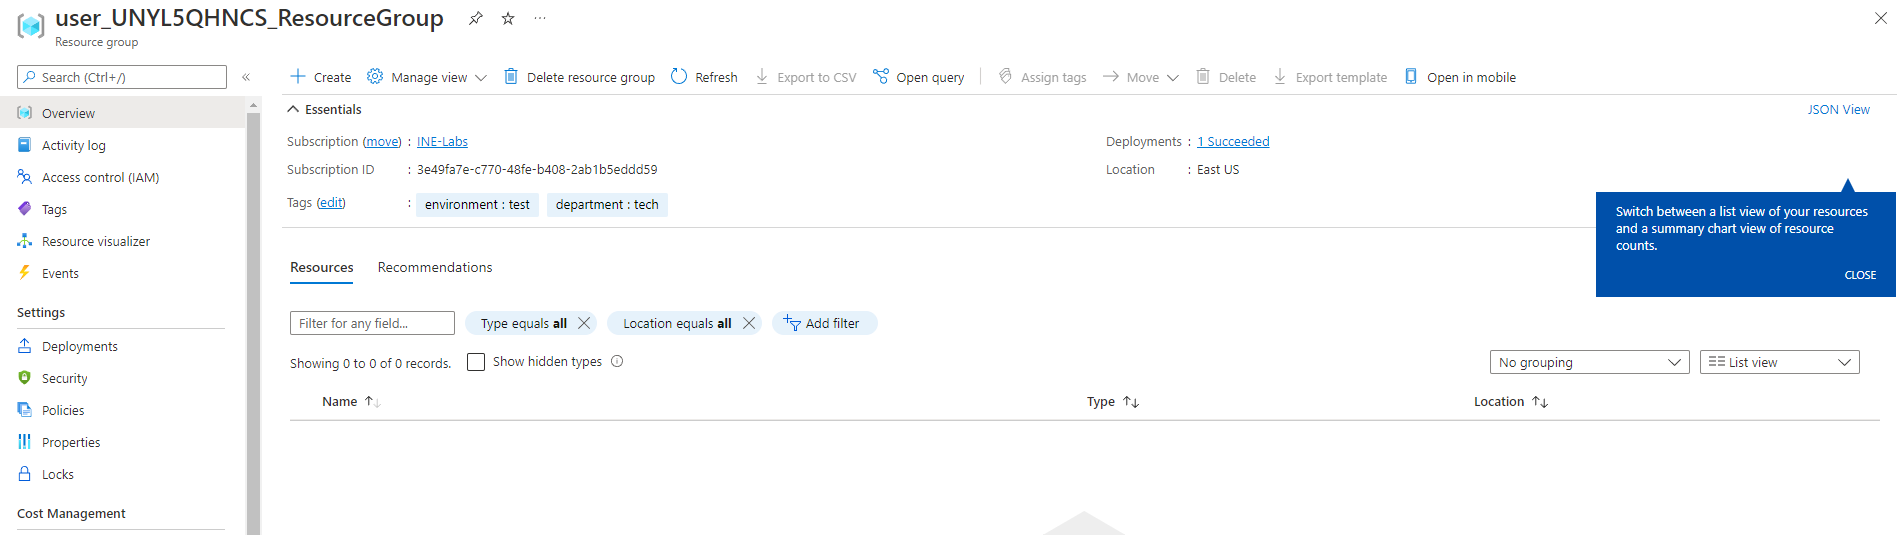
After logging in to portal using the credentials. You will see an empty resource group, where you can create some resources.
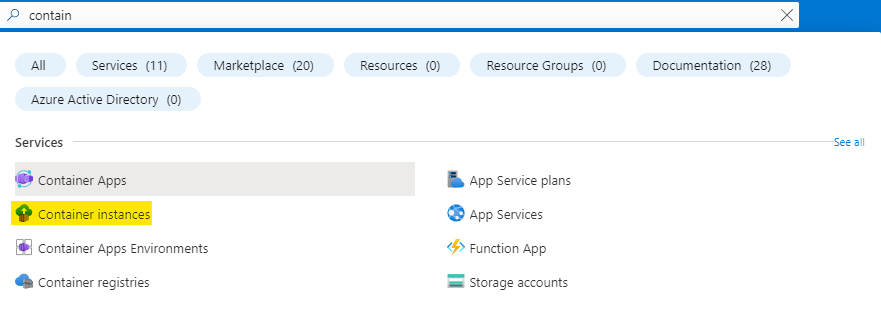
Search for Container and click on Container instances as highlighted below.
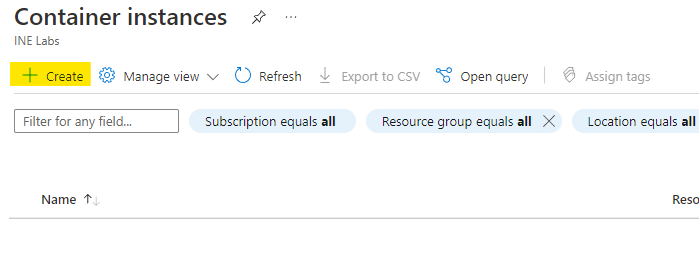
Click on the Create to start creating a new container instance.
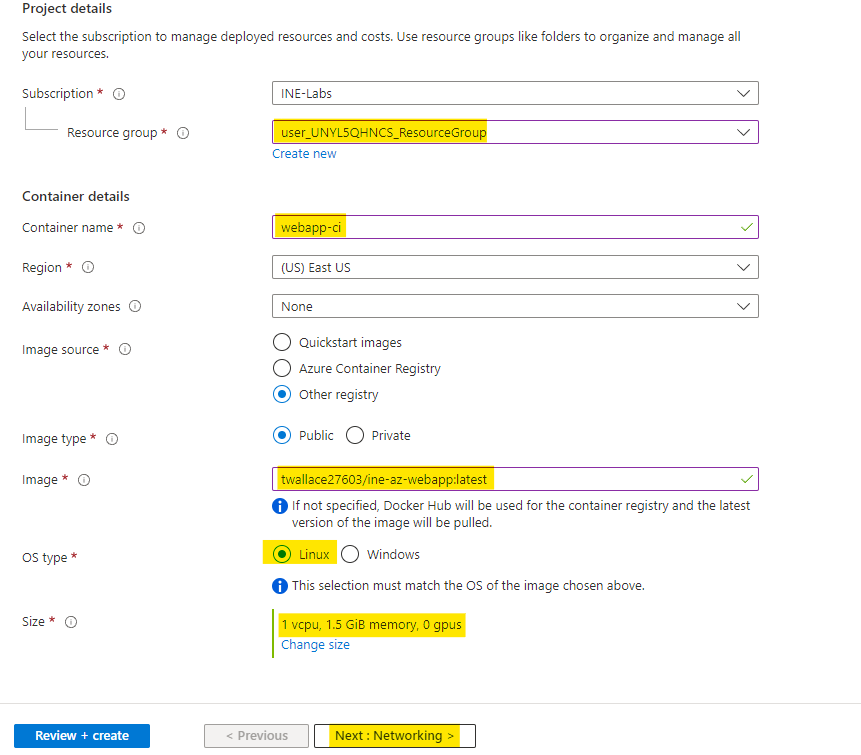
Now configure your container instance as follows:
twallace27603/ine-az-webapp:latestNow after doing this configuration, click on Next to configure networking.
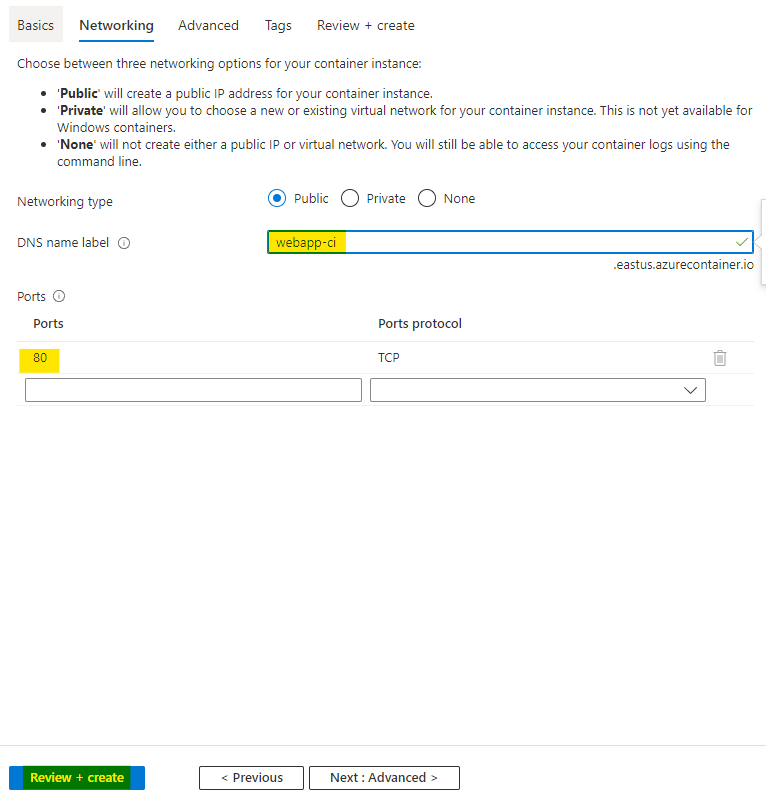
Click on Review+Create to create the container instance.
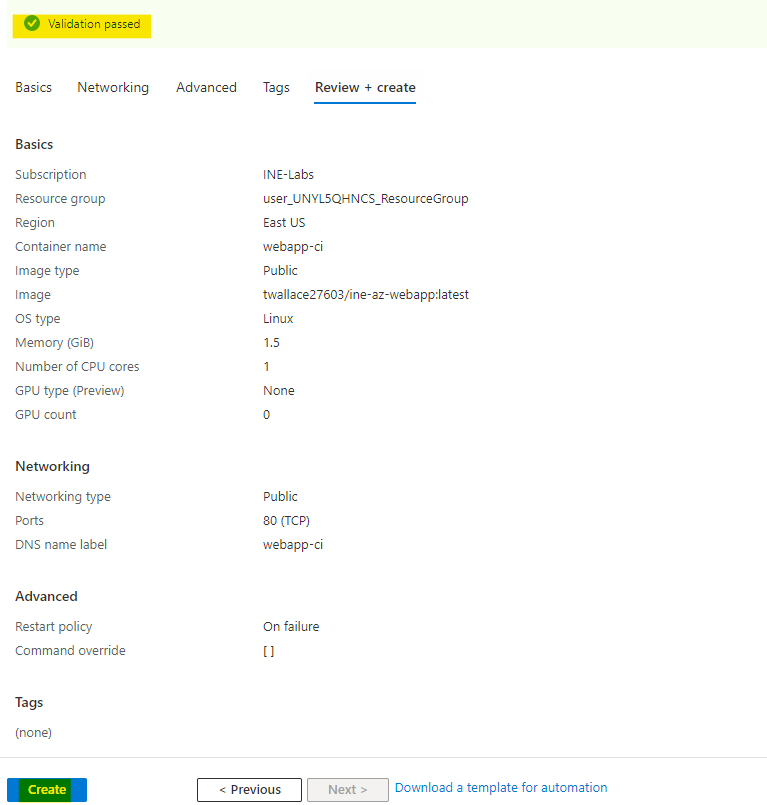
Now Azure will verify your deployment. After sometime you will see Validation Passed that means everything is fine. Click on Create to create the container instance.
After few minutes you will see Your deployment is complete, it means everything is deployed correctly.
You can click on Go to resource to go and check the resource you just deployed.

Here at the container instance you can see the public IP address and FQDN also. FQDN is fully qualified domain name.
You can use any of them to access the container instance.
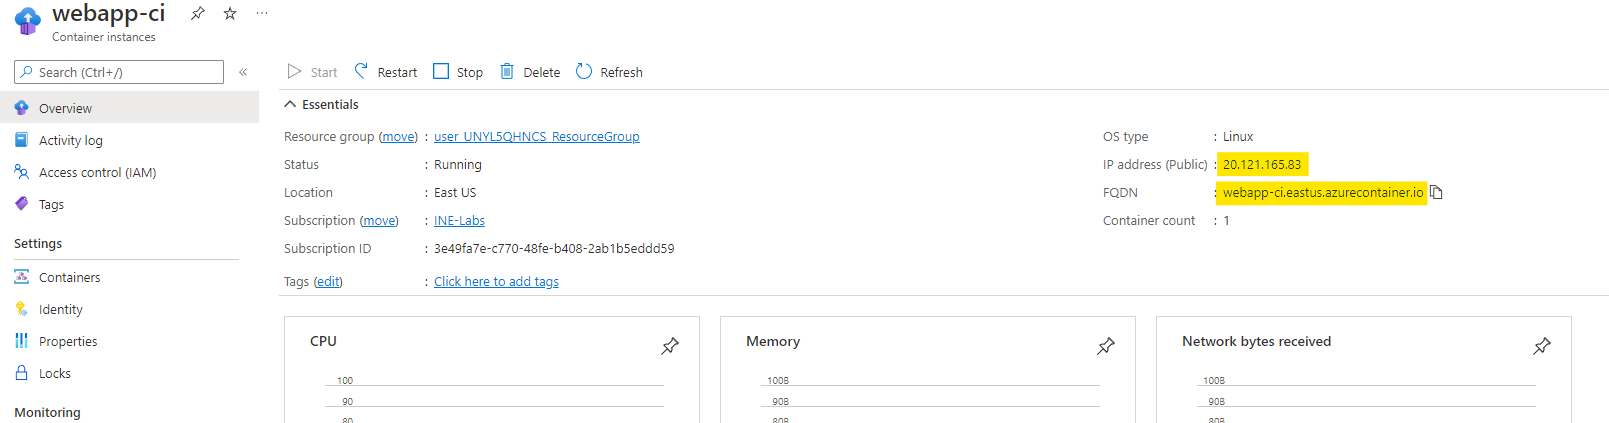
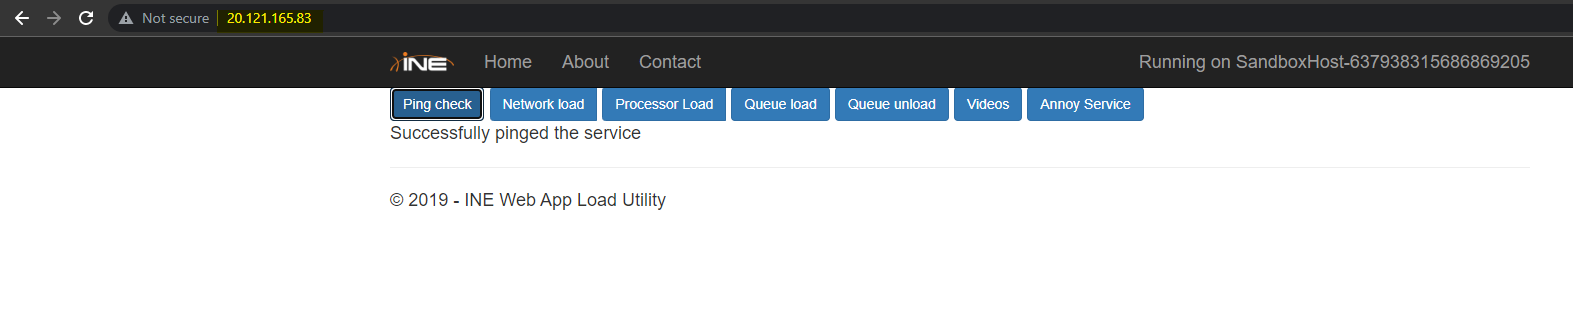
Copy the IP address and paste it in your browser. You can see that our container instance is deployed properly.
Copy the FQDN and paste it in your browser. You can see that you can also access the web app from FQDN.

Note: It may take upto 2 minutes after deployment, to actually access the webapp from your browser. So reload the IP address or FQDN a few times.
The lab is now complete.