The goal of this task is to provision and configure an Azure application gateway. The gateway will serve as both a public and private endpoint for two servers that host a web application.
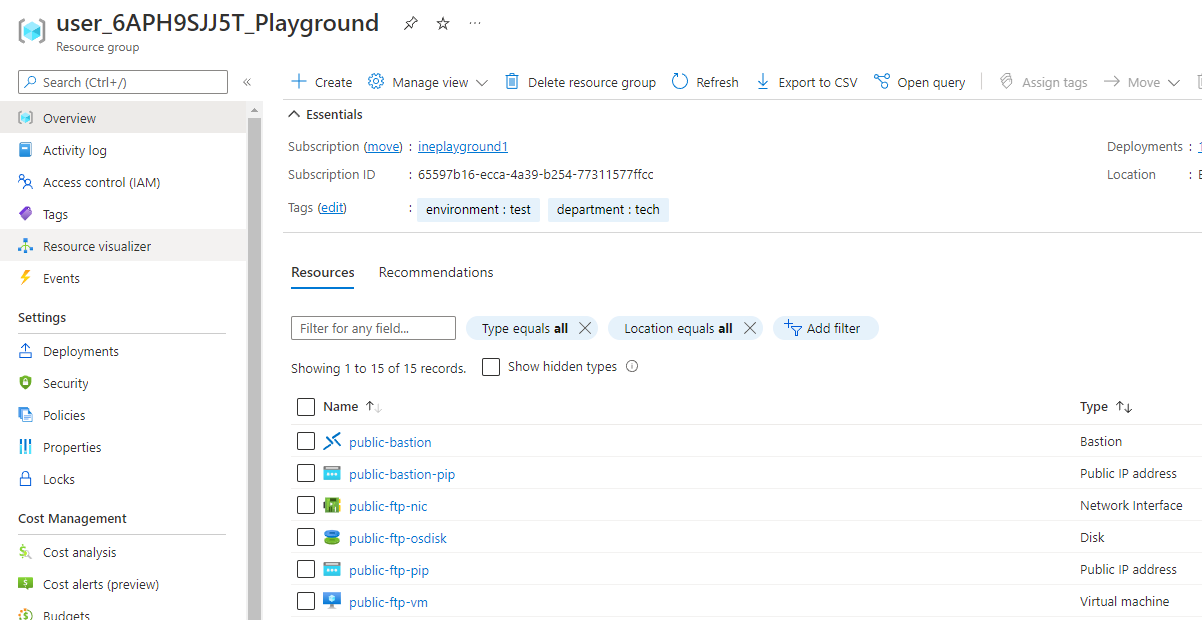
When you will login to the azure with the provided credentials, you will find some predeployed resources. This is all you will need for this lab.
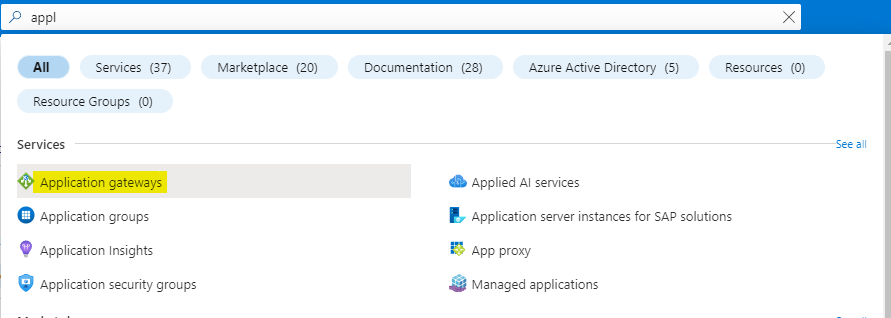
Search for Application gateways and open the Application gateways service as highlighted below.
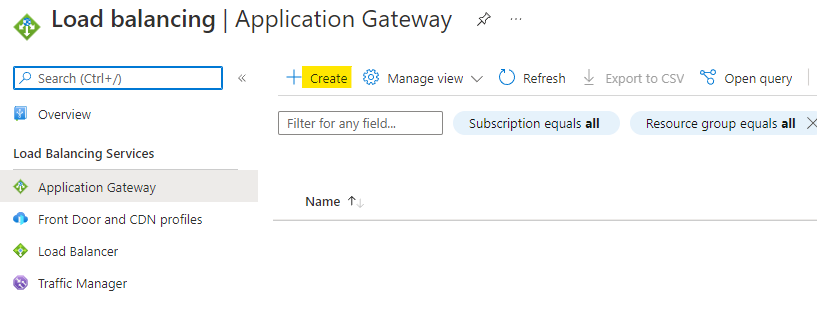
Click on Create to start creating the application gateway.
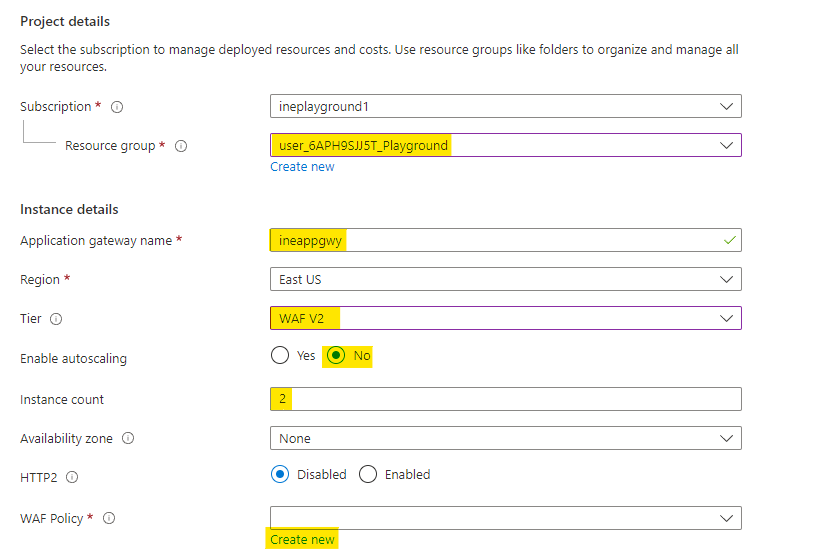
Configure the application gateways as below:
Use the assigned resource group
Give a unique name to the application gateway
Use WAF V2 tier
Set autoscaling to No and instance count to 2
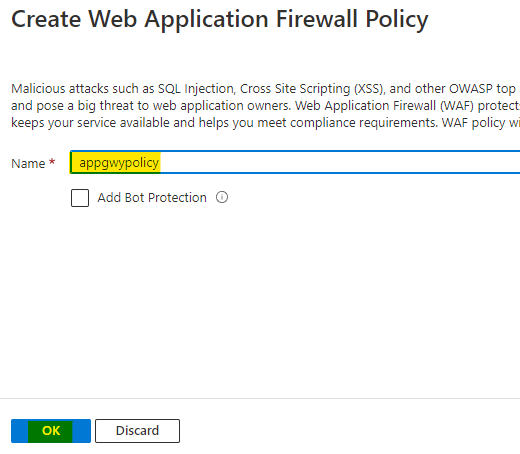
You also need a WAF policy for WAF V2 tier, click on Create new under the WAF policy.
Name the policy as appgwypolicy and click on OK to add the policy.
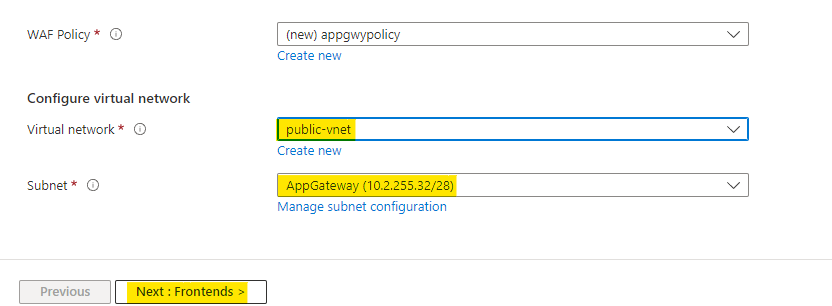
Use the public-vnet virtual network and it will automatically set the subnet to AppGateway.
Click on Next to configure the frontend.
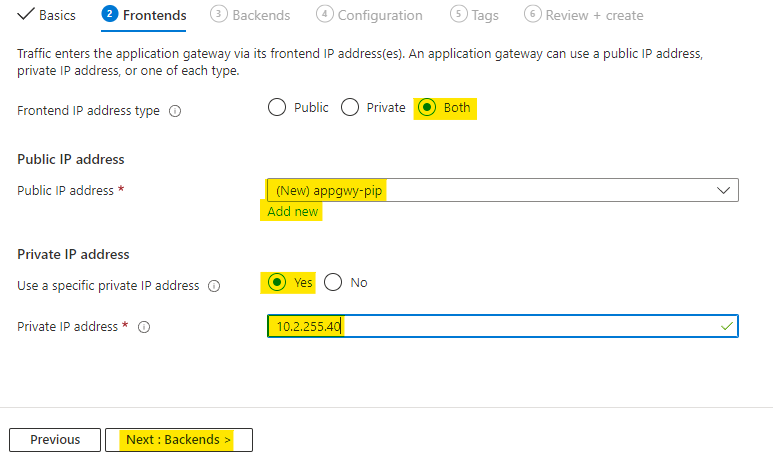
Set the front end IP address type to Both
Create a new public IP address named as appgwy-pip
For private IP address use the specific address as 10.2.255.40
Click on Next to configure the backends.
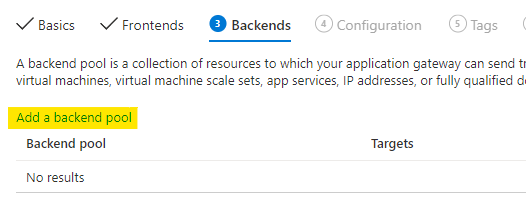
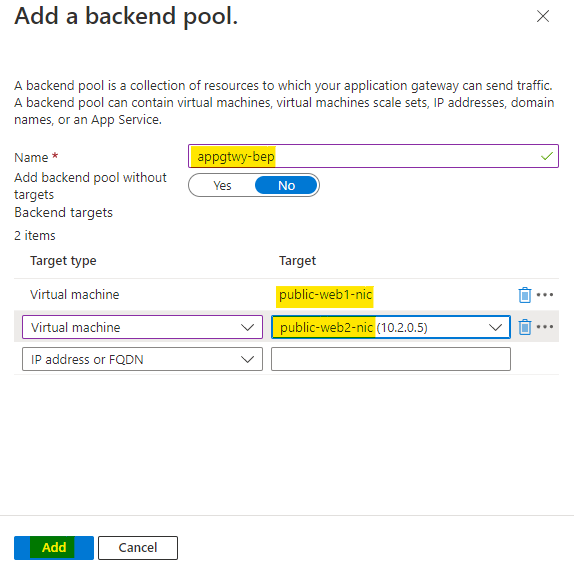
You will see that there are no backend pools, click on Add a backend pool to create one.
Name this backend pool as appgtwy-bep
Add the public-web1 and public-web2 VMs as targets
Click on Add to add the backend pool.
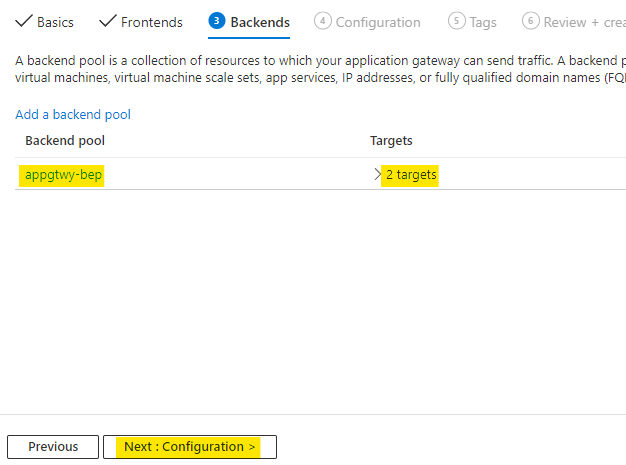
A new backend pool with two target is added. Click on Next for the configurations.
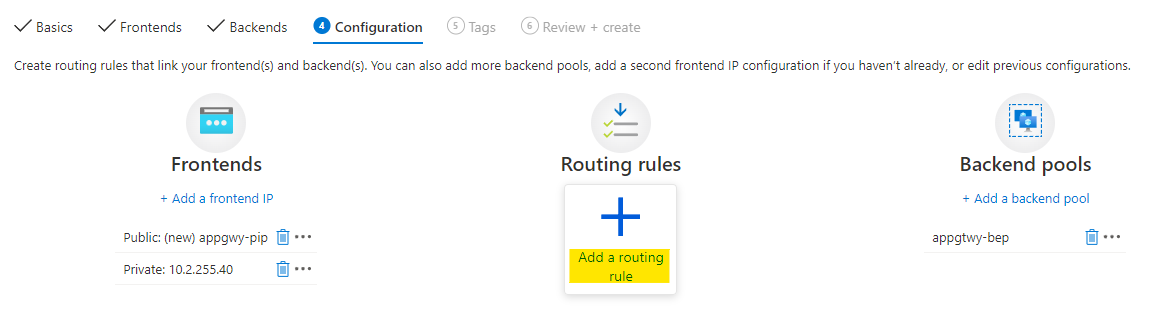
You can see that we have backend and frontend, all we need now is routing rules.
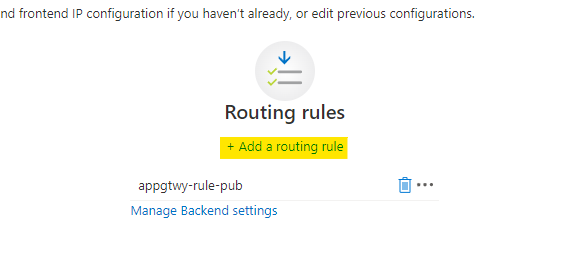
Click on Add a routing rule as highlighted below.
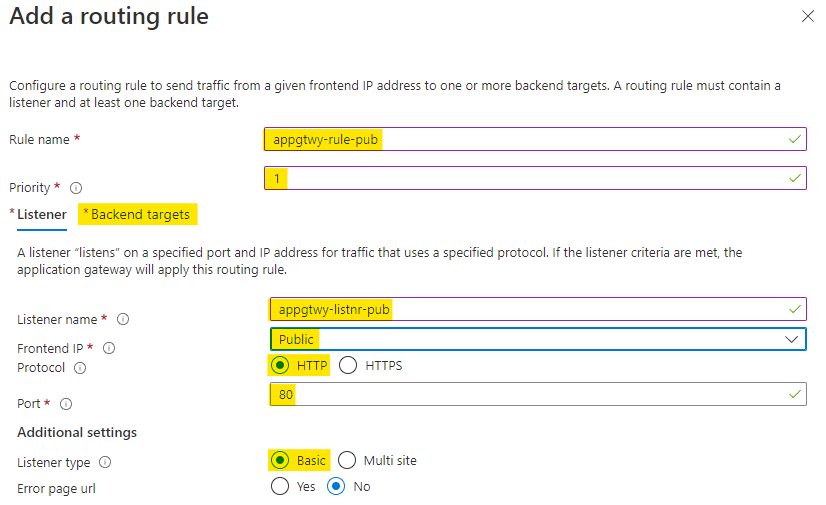
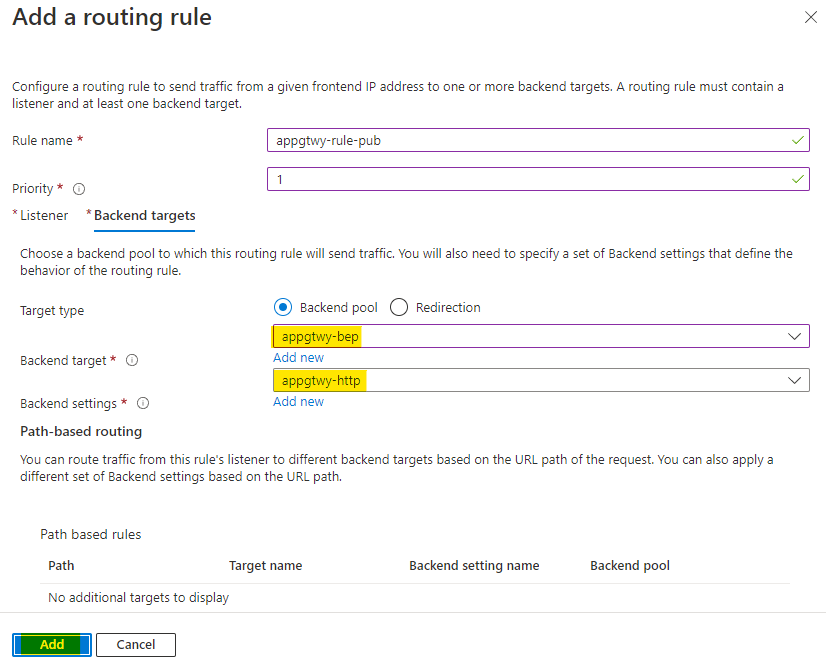
Name this rule as appgtwy-rile-pub and set the priority as 1
Name the listener as appgtwy-listnr-pub
Set frondend IP protocol to Public and HTTP
Use port 80 and listener type Basic
Now go to Backend targets as highlighted
Use the backend pool you created earlier which is appgtwy-bep.
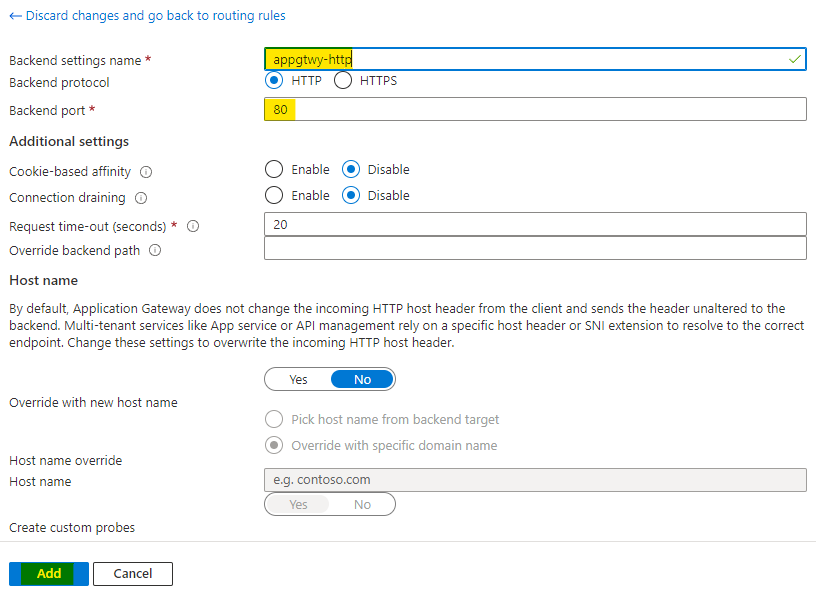
Click on Add new under Backend settings to create a new setting. Backend settings was previously known as HTTP settings.
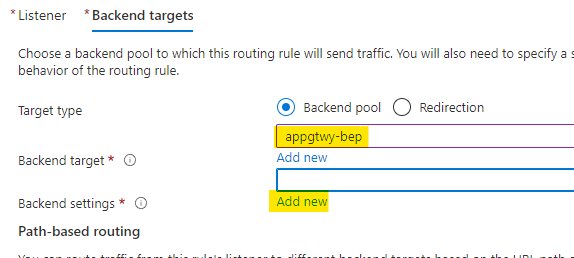
Name the setting as appgtwy-http and use HTTP protocol
Use the backend port as 80
Leave everything else as it is and click on Add to add the setting.
Now the backend target and settings are set, click on Add to add the routing rule.
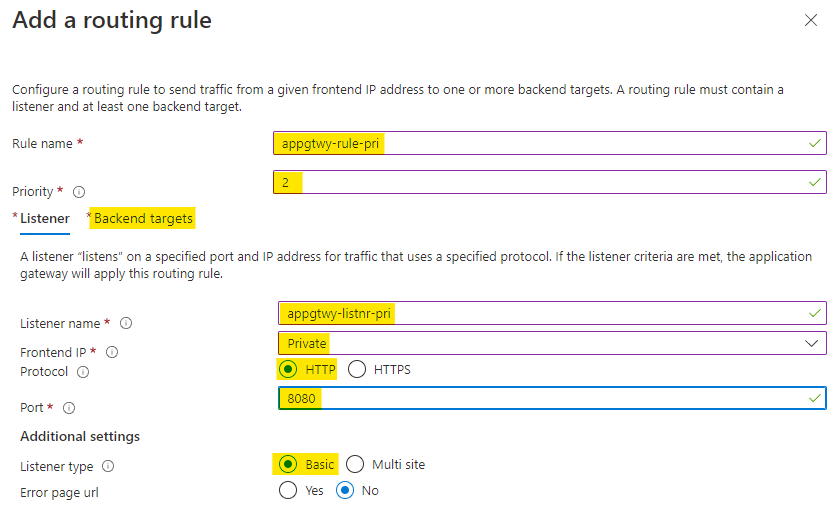
After the public rule is added, click on Add a routing rule to add one private routing rule.
Name this rule as appgtwy-rile-pri and set the priority as 2
Name the listener as appgtwy-listnr-pri
Set frondend IP protocol to Private and HTTP
Use port 8080 and listener type Basic
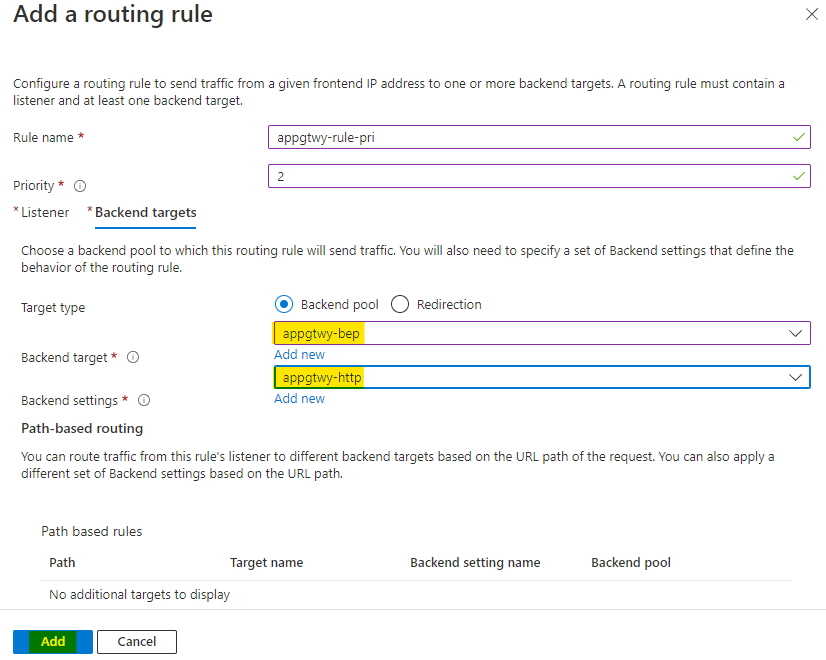
Now go to Backend targets as highlighted
Use the backend pool you created earlier which is appgtwy-bep.
Also you will use the same backend setting you created for public rule. Click on Add to add the private routing rule.
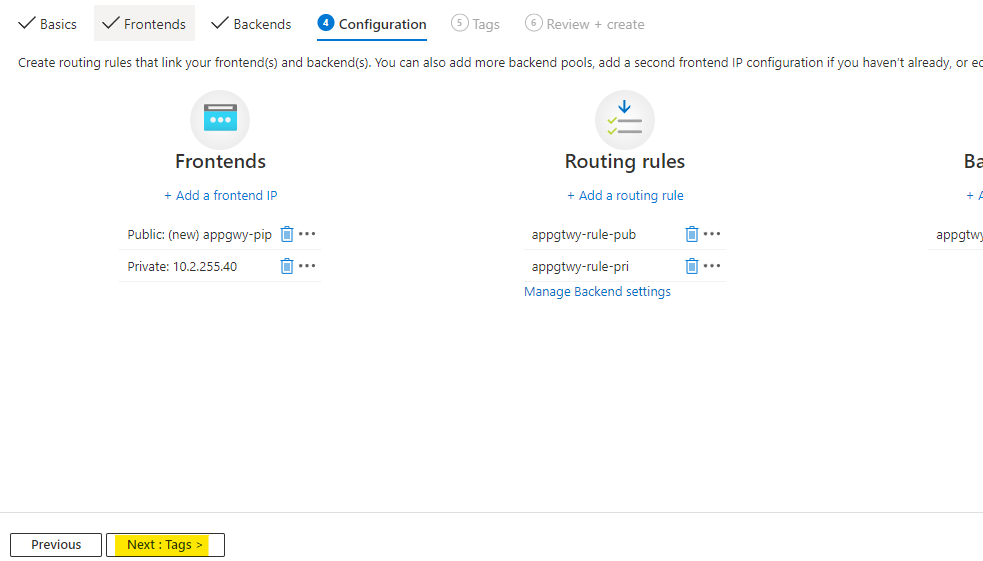
Now backend, frontend, and routing rules are all configured click on Next until Review + Create.
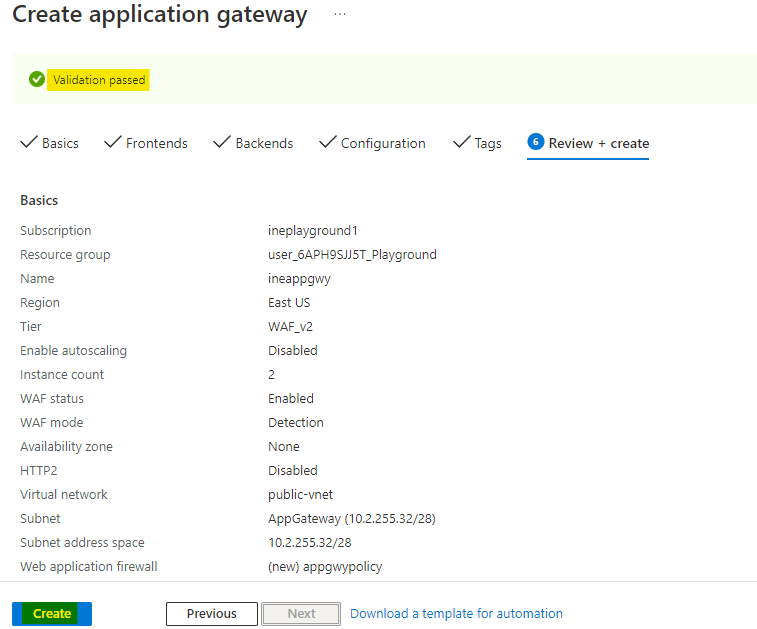
Azure will verify the configuration and it will show Validation passed if everything was configured properly. Click on Create to provision the application gateway.
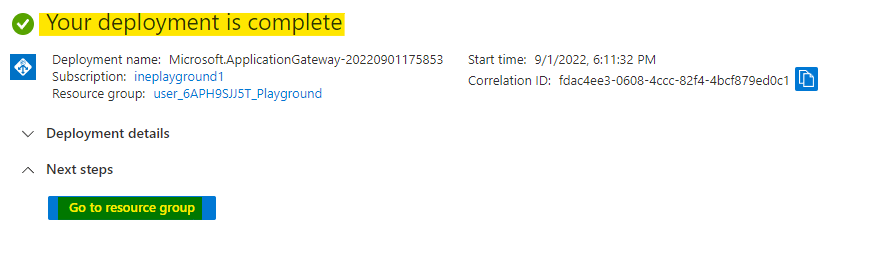
It will take few minutes to deploy the application gateway. Check after 5 to 10 minutes. You will see Your deployment is complete which means appgateway is provisioned. You can click on Go to resource group to check all the resources.
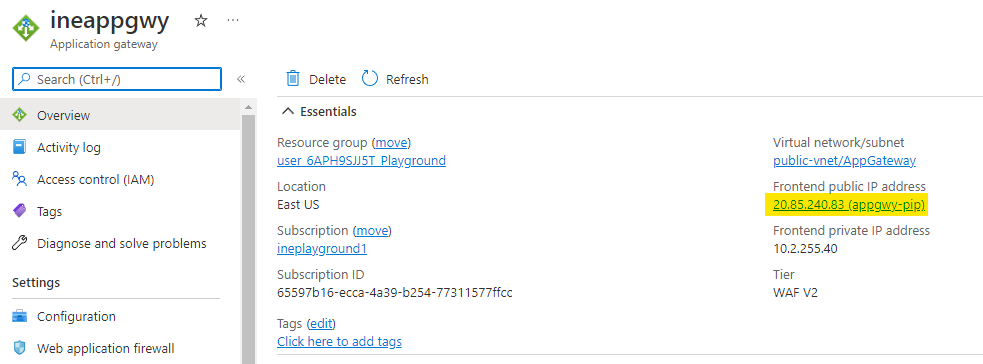
Go to the application gateway you deployed and copy the public IP address of the app gateway.
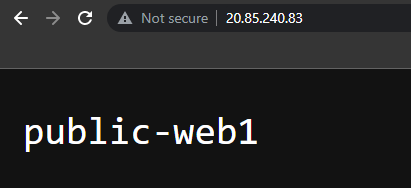
Go and paste this IP address in your browser and you can see the output just like the below images, which means public frontend is working fine.
Now go to the deployments of your assigned resource group. Go to oldest deployment as highlighted below.

Here in the ouput of the deployment, note down the password. This is the password for the deployed VMs.

Go to the public-ftp VM and click on Connect and choose the Bastion option.
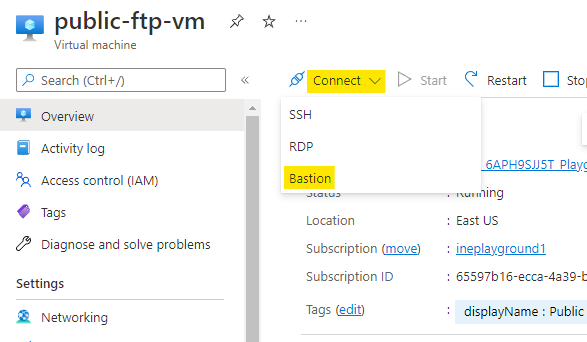
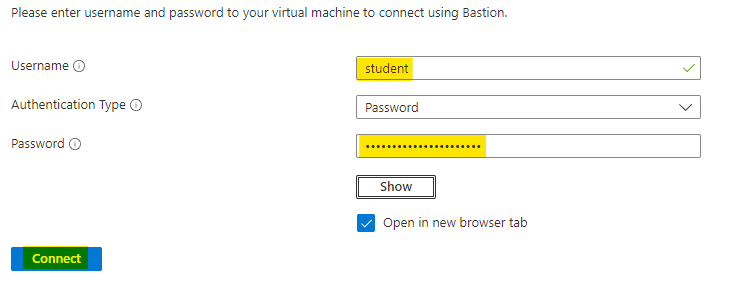
Here use the student username and the password you copied from output of the deployments. Click on Connect to connect to the VM.
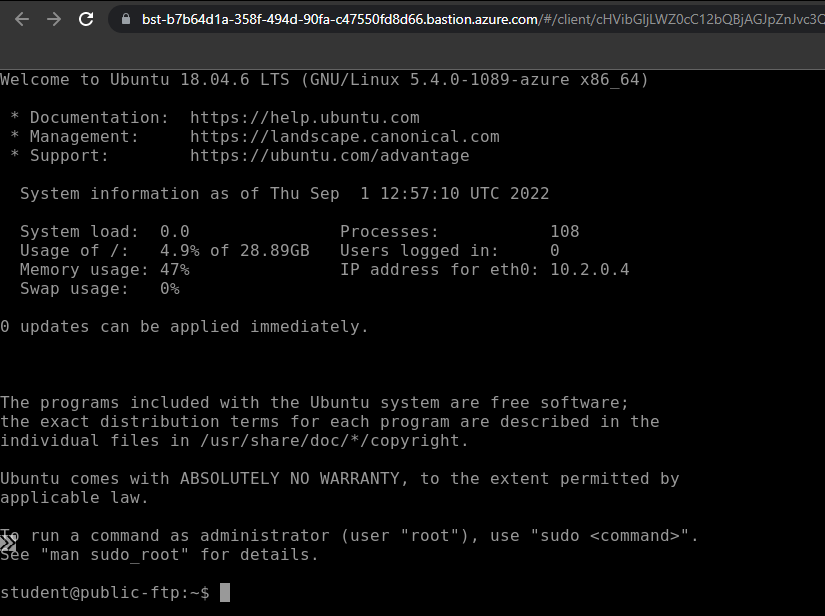
A new window with a SSH connect to the public-ftp VM will open.
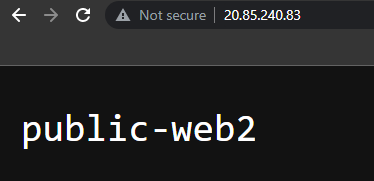
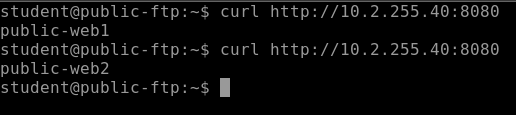
Run the below command to test the private frontend.
curl http://10.2.255.40:8080This will output the name of VM with webserver, just like the below image.
Our lab is now complete.