In this task you will provision a pfSense firewall appliance and configure a network to use it. The firewall will act as a reverse proxy for a web application running on a protected virtual machine. The virtual machine is on a protected subnet, has no direct public endpoint, and is running a very simple web application. You will provision a pfSense appliance that has a primary network interface with a public IP address on an "edge" subnet, and a secondary network interface on the protected subnet. You will configure the appliance to route incoming web traffic to the protected web application. You will also configure routing for the protected subnet such that outbound external traffic is routed through the appliance.
Click on the login URL and enter the given credentials to log in to the Azure portal.
Note: Your credentials will be different from the ones shown in the image.
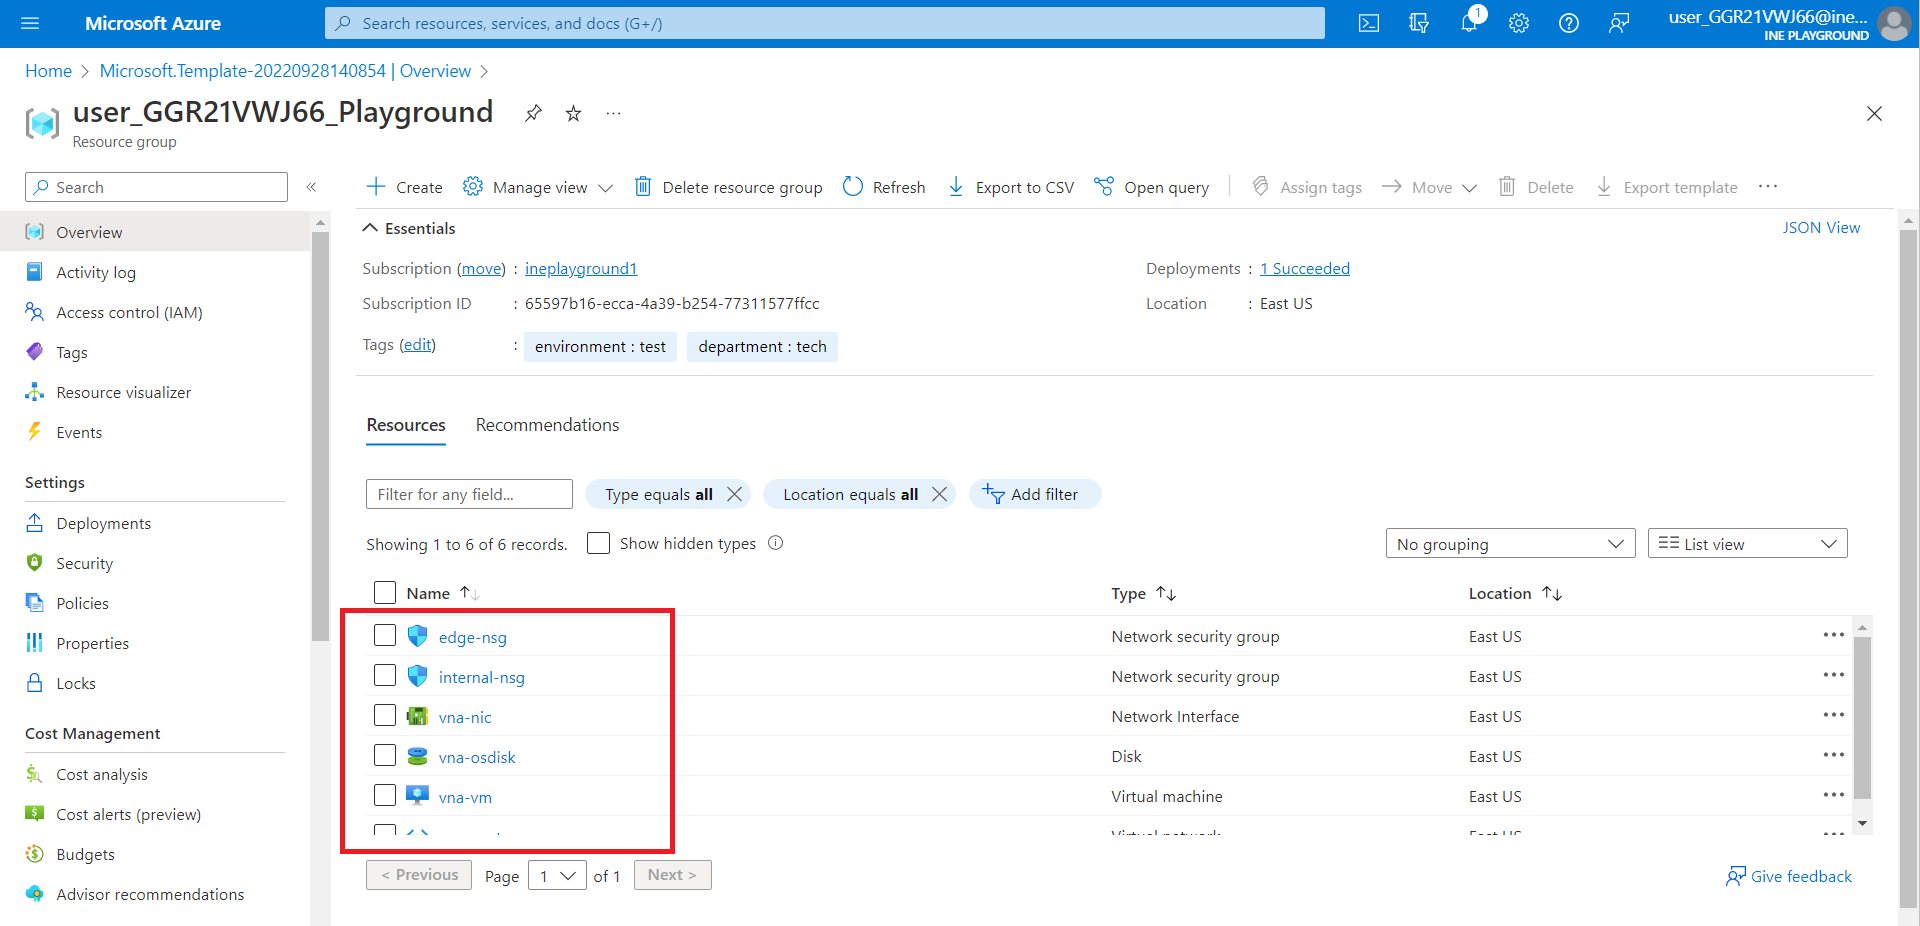
After logging in to the portal using the credentials. You will see a resource group with some pre-defined resources created for the lab, you will be using this resource group throughout the lab.
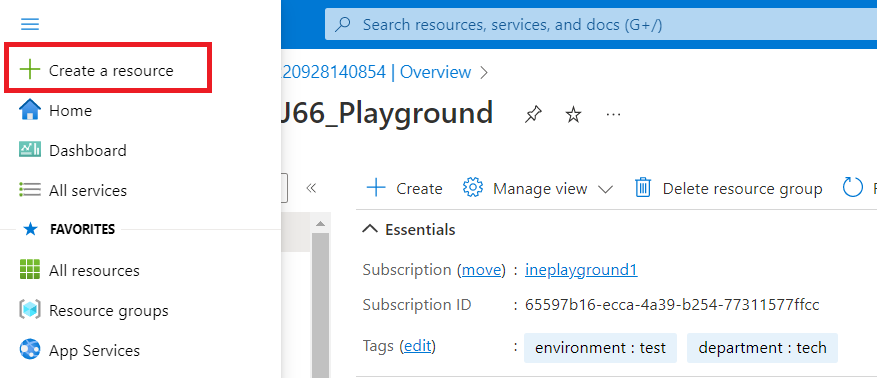
Click on the hamburger icon and click on "Create a resource".
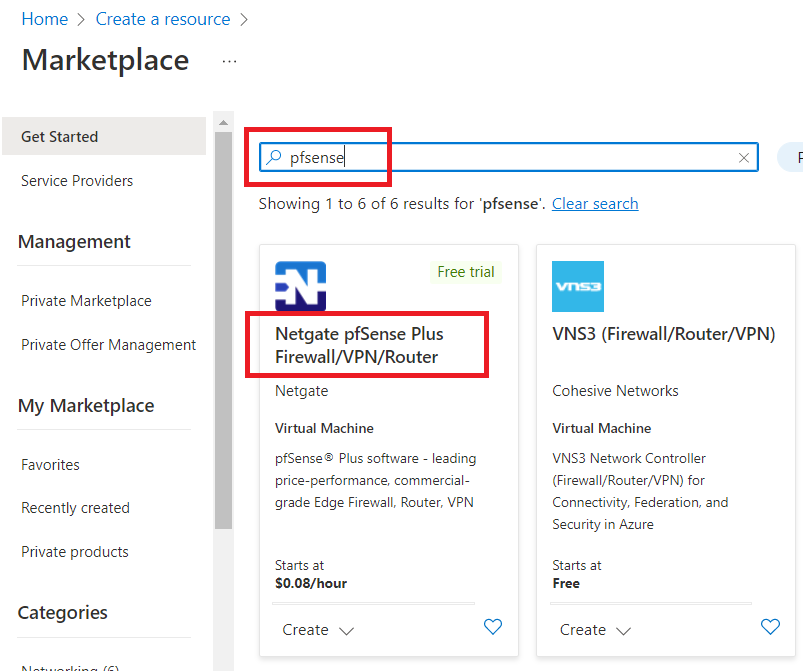
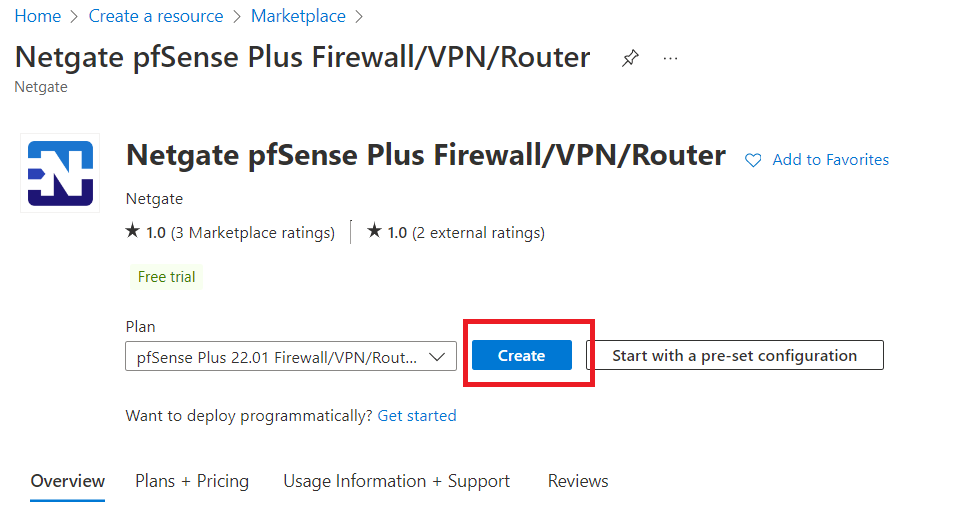
Now, type "pfsense" in the search box and click on "Netgate pfSense Plus Firewall" as shown in the below image.
Click on "Create".
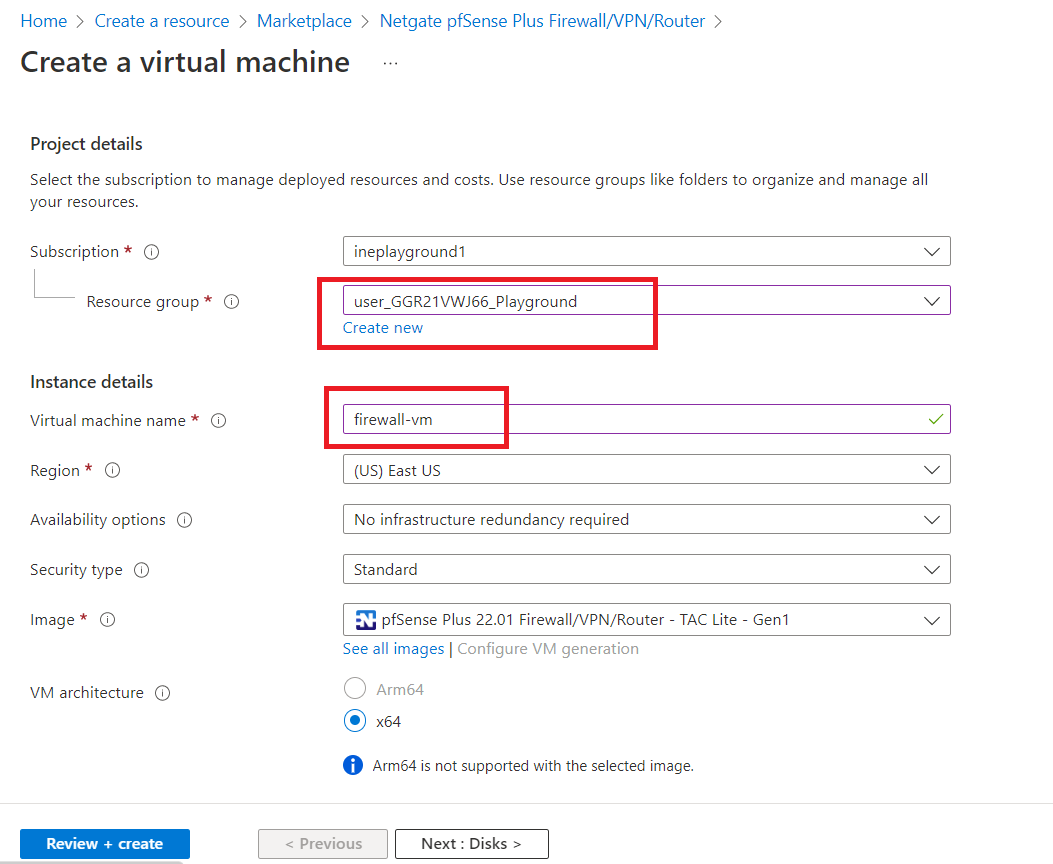
In resource group select the pre-defined resource group. And give virtual machine a name e.g., "firewall-vm"
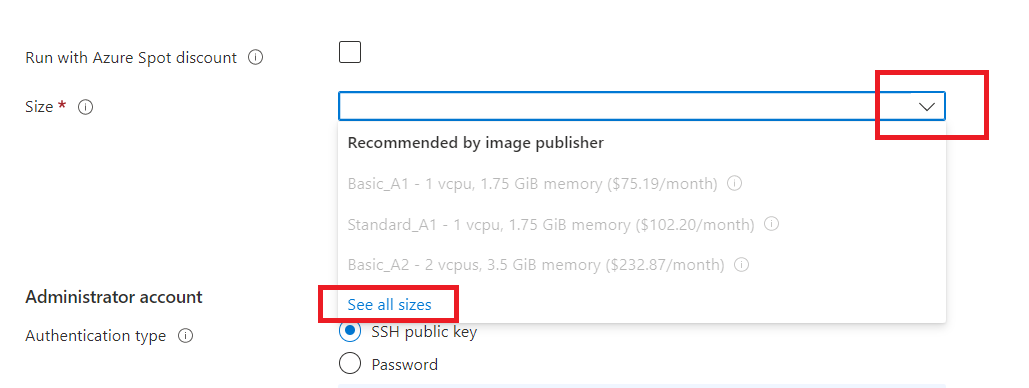
To select the size of the VM open the drop-down menu as shown below and click on "See all sizes".
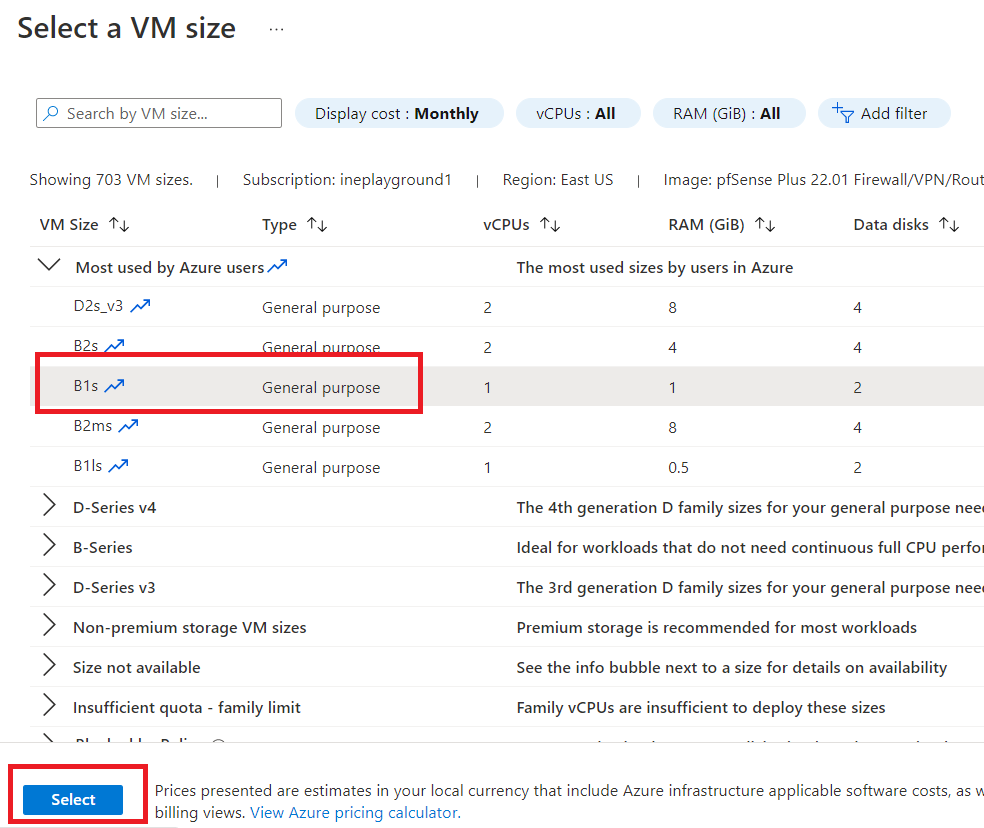
Select "B1s" and click on "Select".
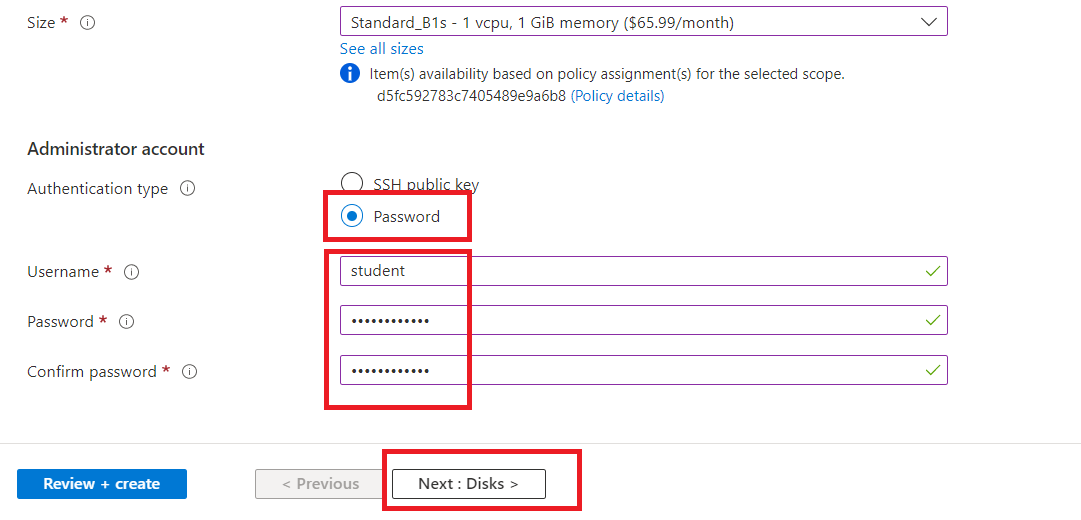
Select "Password" as Authentication type. And give username as "student" and set the password as "MyP@sswrd123".
Now, click on "Next".
NOTE: We will be needing this credentials later. Save it somewhere.
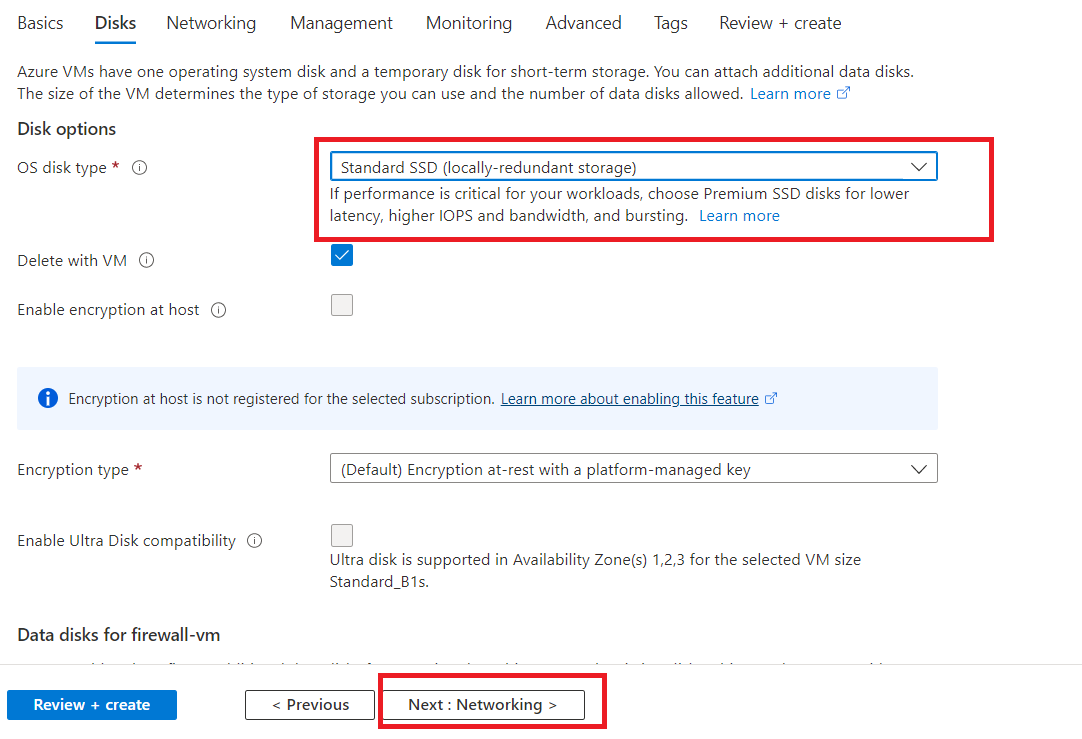
Select "Standard SSD" as OS disk type and click on "Next".
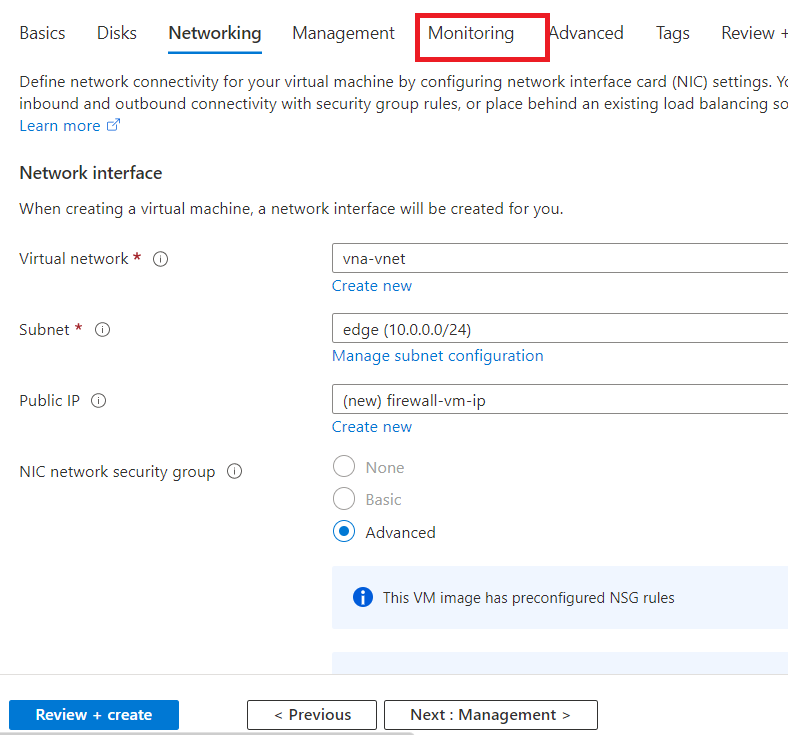
Click on "Monitoring".
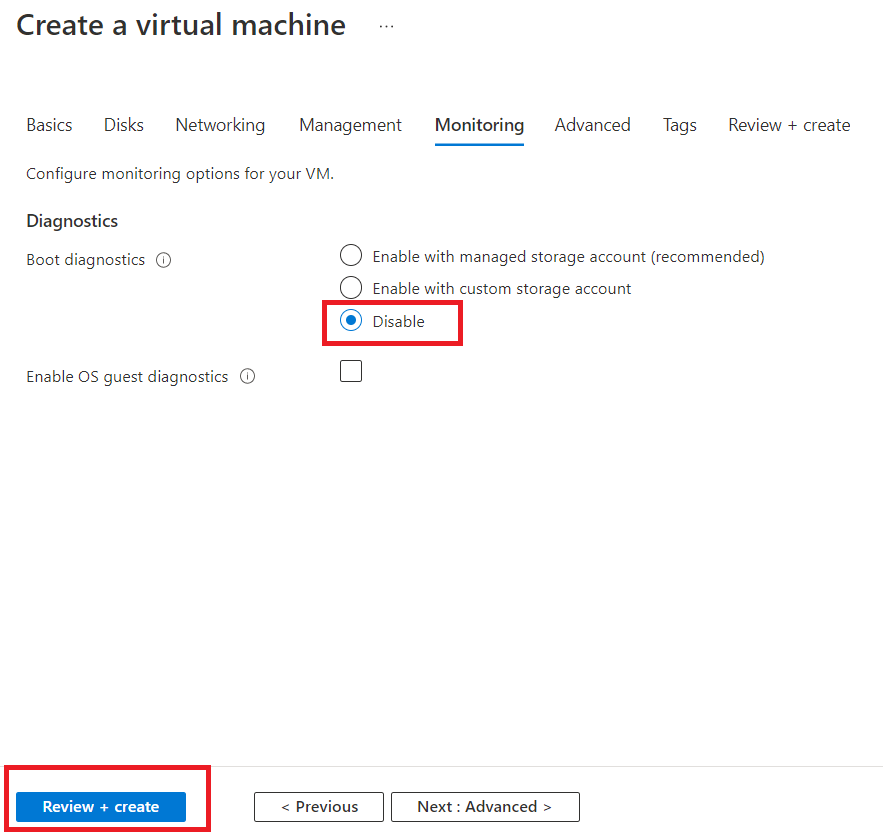
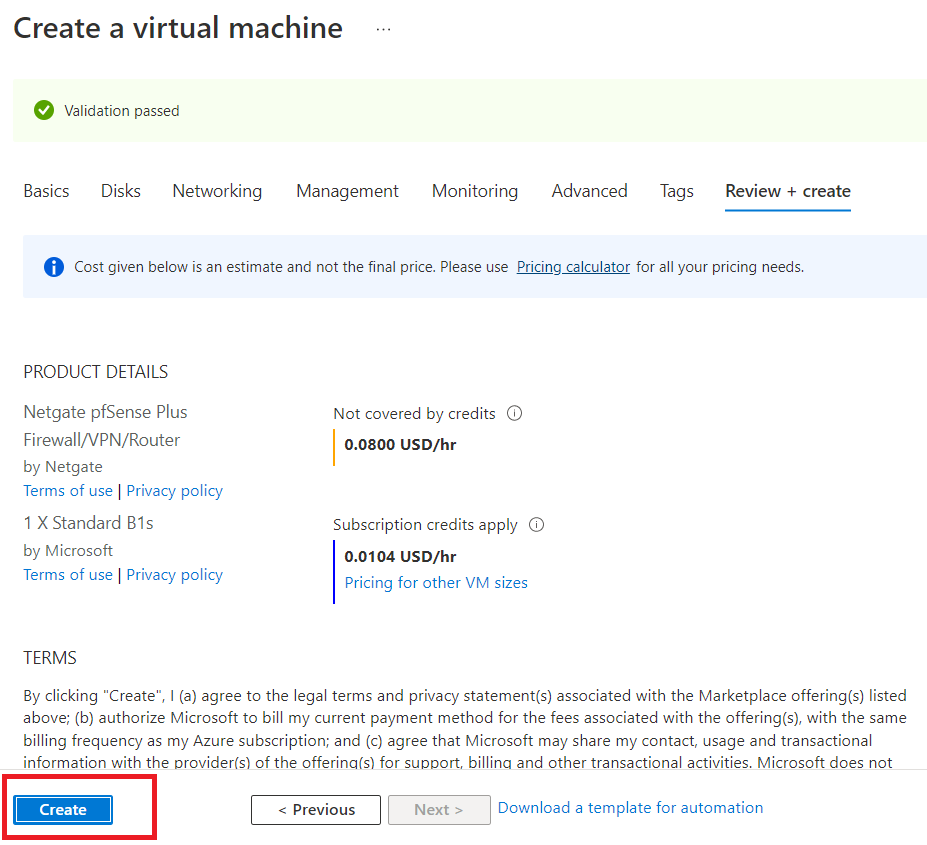
Disable the Boot diagnostics. And click on "Review + create".
Click on "Create".
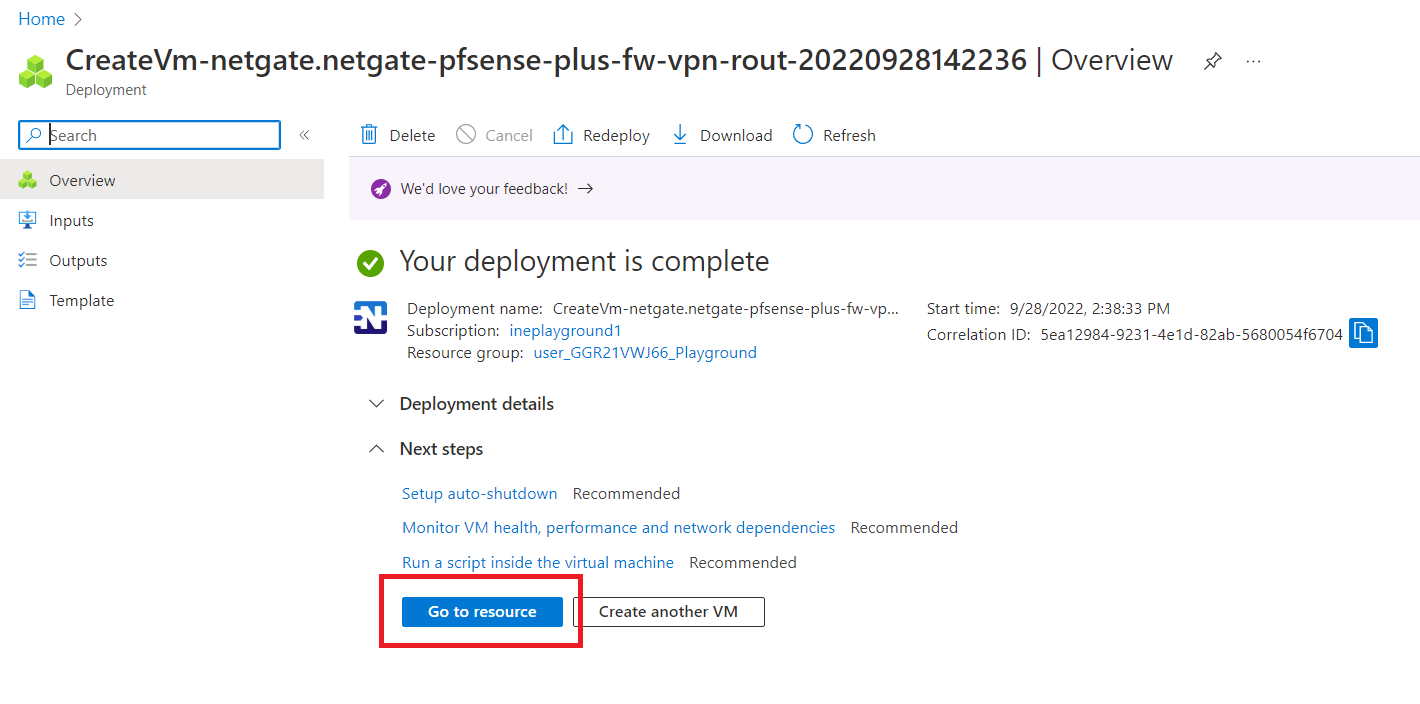
Wait for resources to get deployed, and click on "Go to resource" once the deployment is complete.
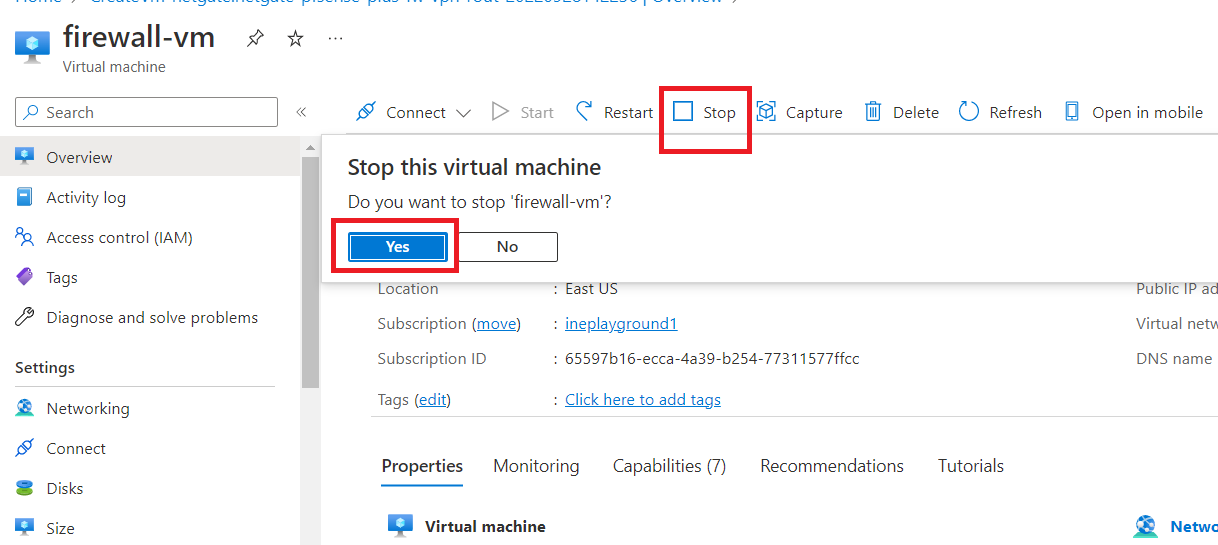
Stop the firewall-vm and click on "yes" when prompted.
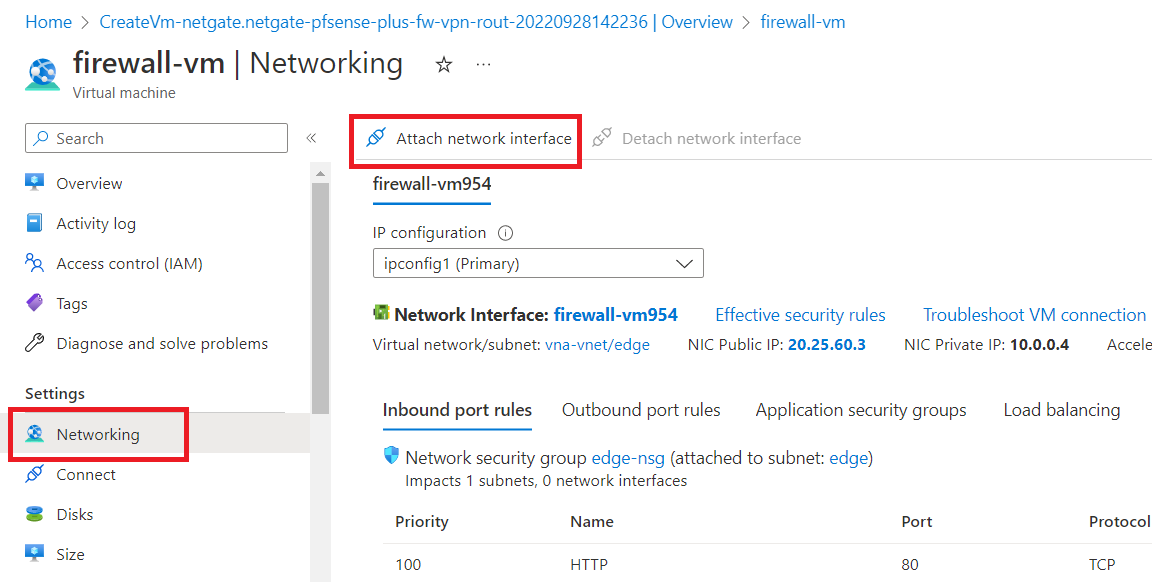
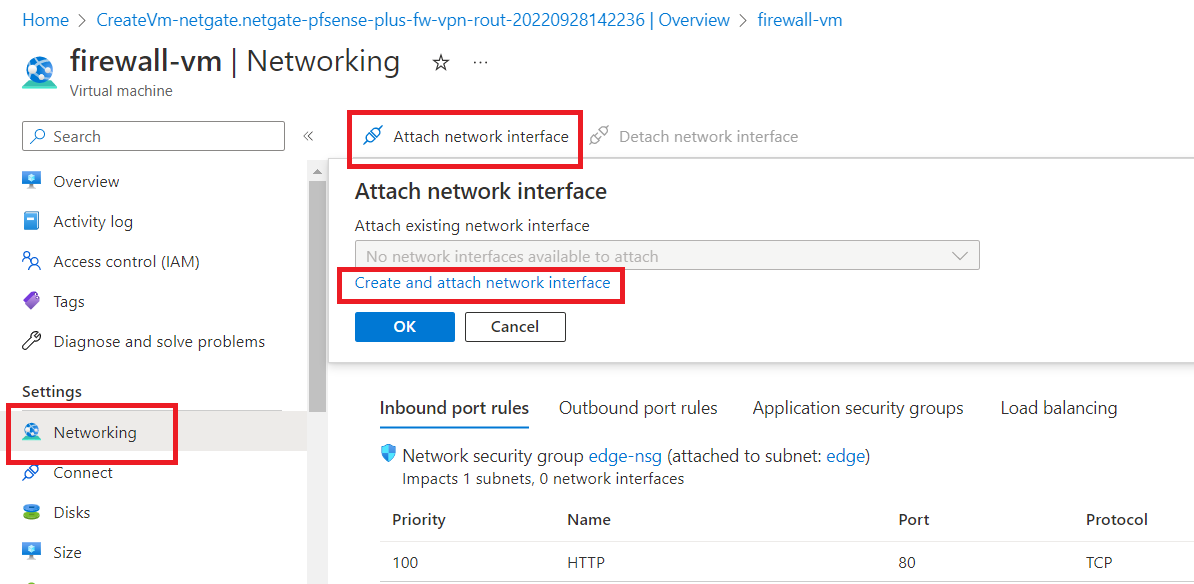
From side navigation menu, click on "Networking" and click "Attach network interface".
Now, click on "create and attach network interface".
Give network interface a name "vna-fwsecond-nic" and select "internal (10.0.1.0/24)" as subnet. Now, select "None" as NIC-network security group.
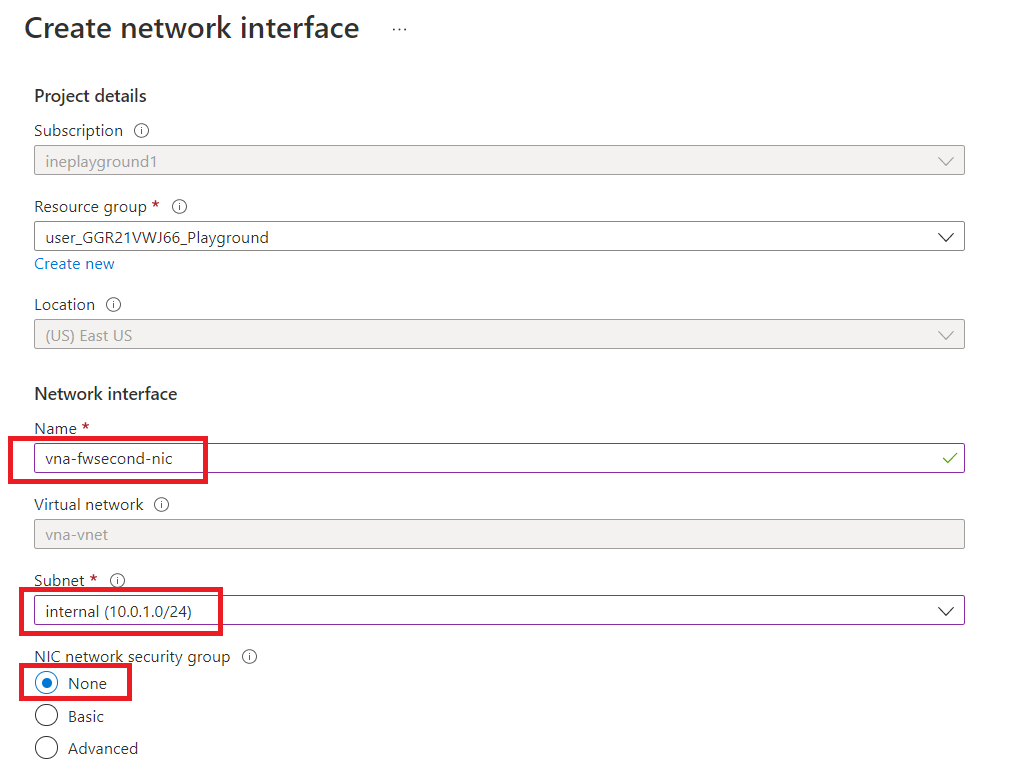
Select Private IP address assignment as "Static" and set "10.0.1.100" as Private IP Address. Now, click on "Create".

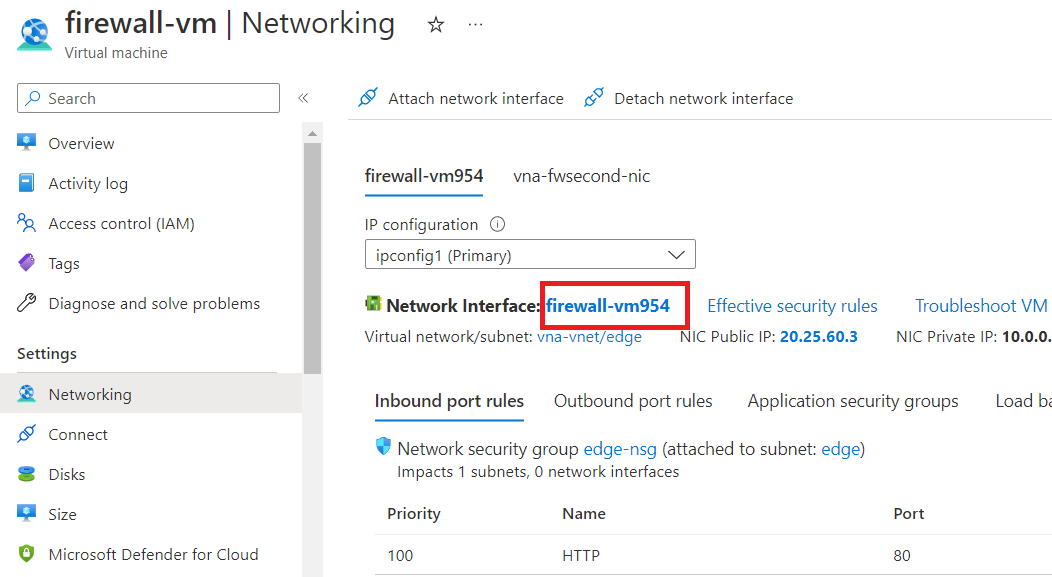
Now, click on "firewall-vm954".
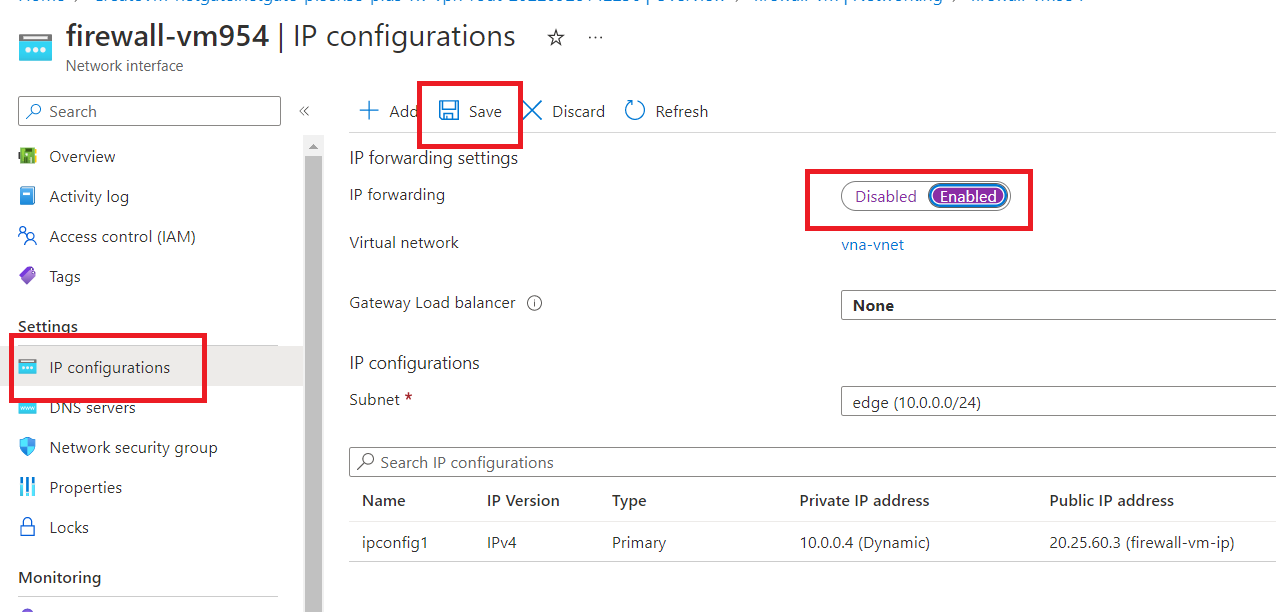
Click on "IP configurations" first, and then enable IP forwarding. Now, click on "Save".
Now, navigate back and select "vna-fwsecond-nic".
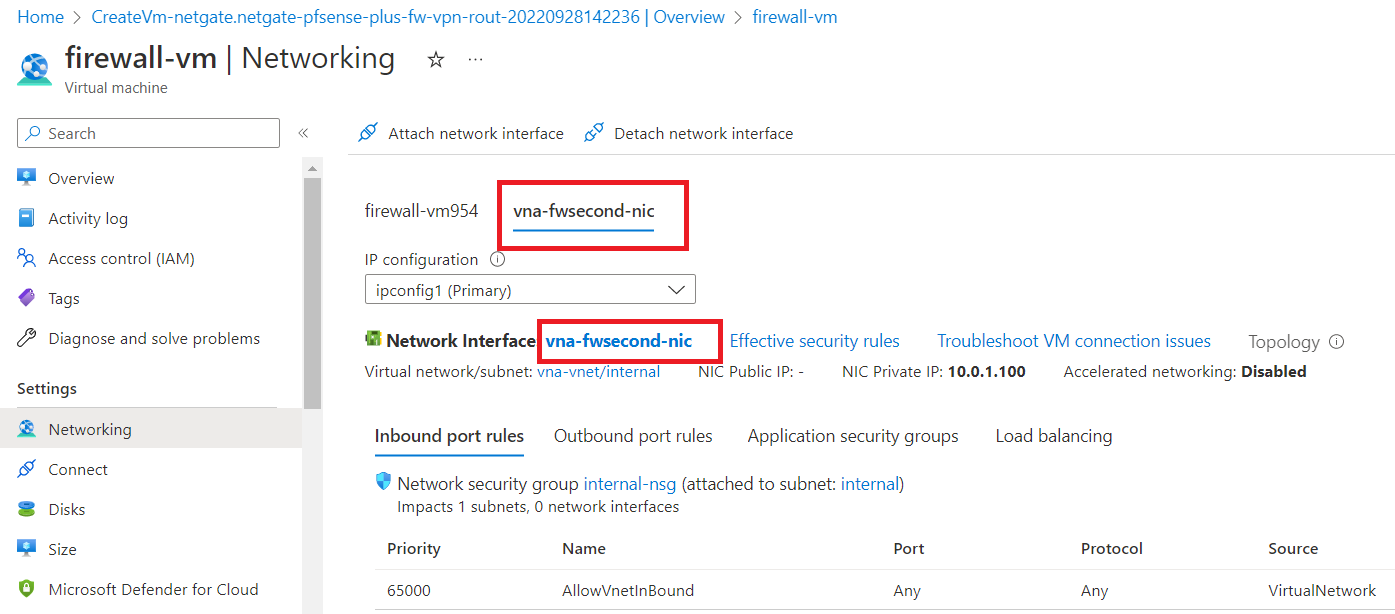
Click on "IP configurations" first, and then enable IP forwarding. Now, click on "Save".

Now, Start the firewall-vm.

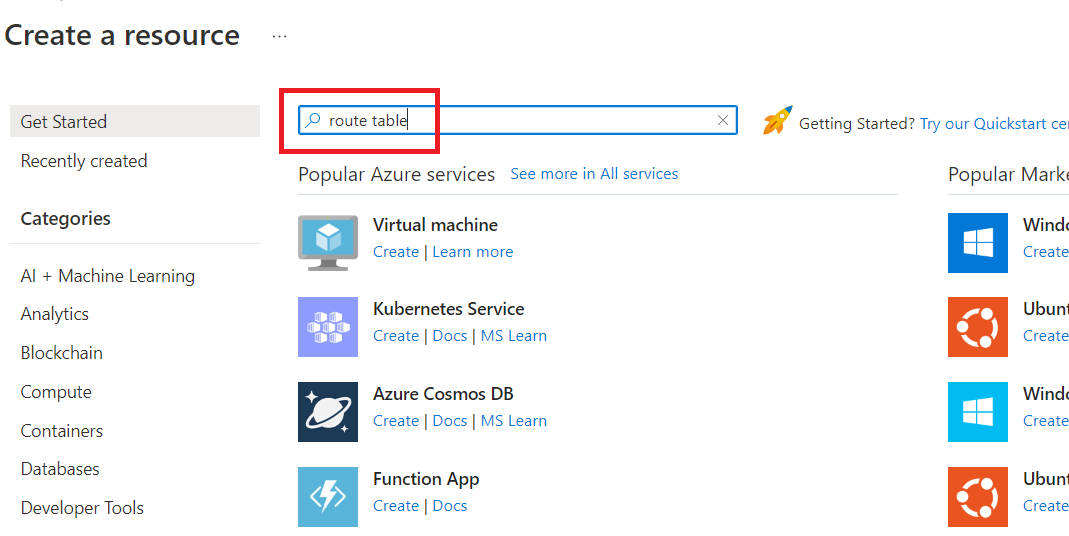
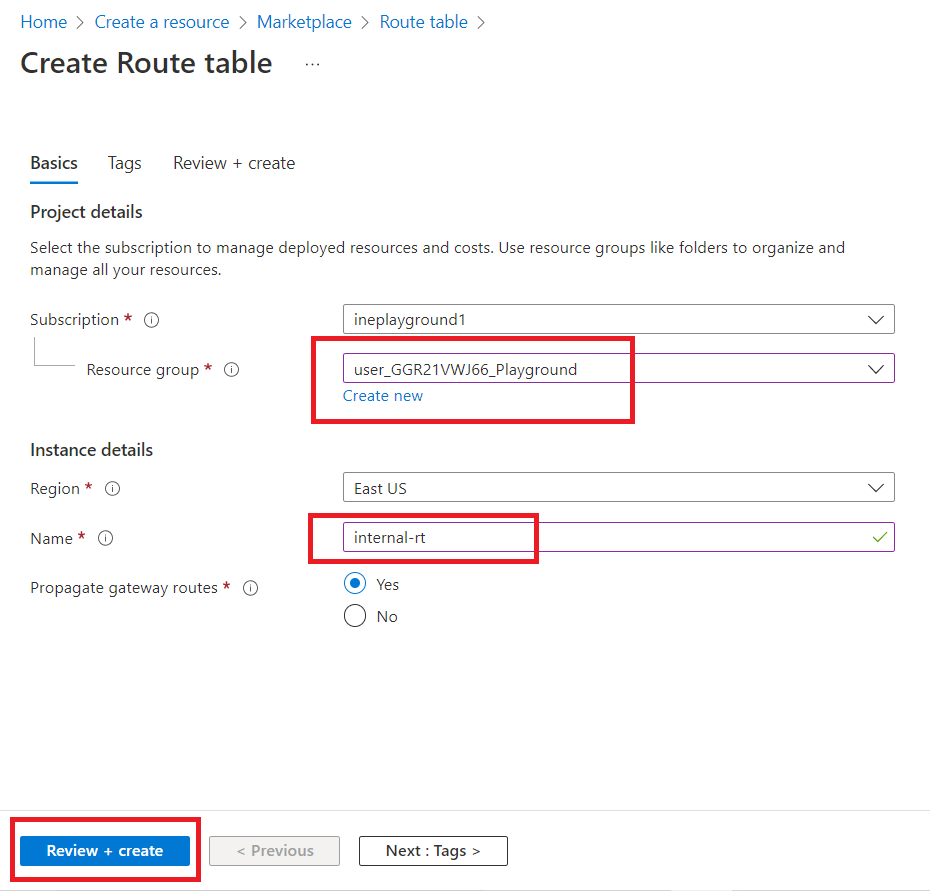
Click on the hamburger icon and click on "Create a resource".

Type "route table" in the search box and hit the enter key.
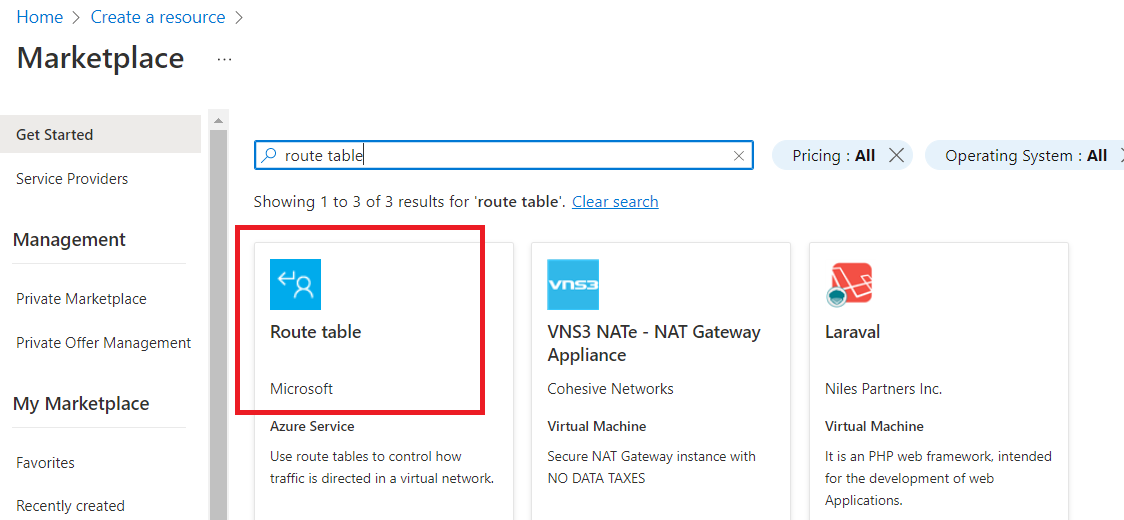
Click on the "Route table".
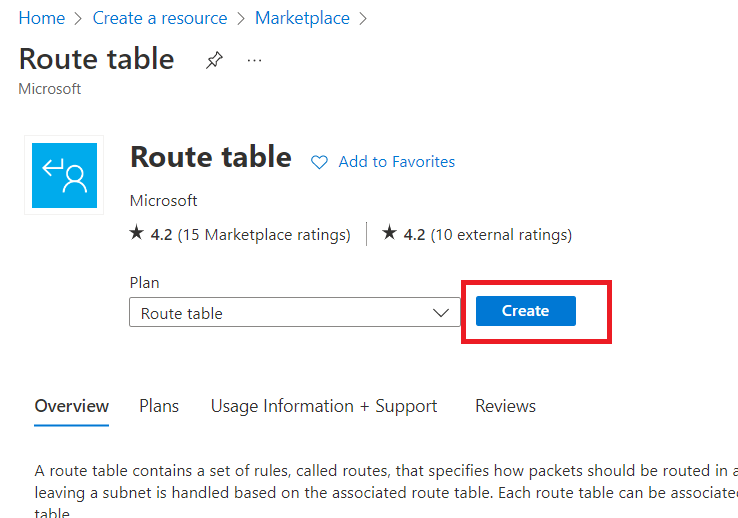
Now, click on "Create".
Select the resource group and give route table a name e.g., "internal-rt".
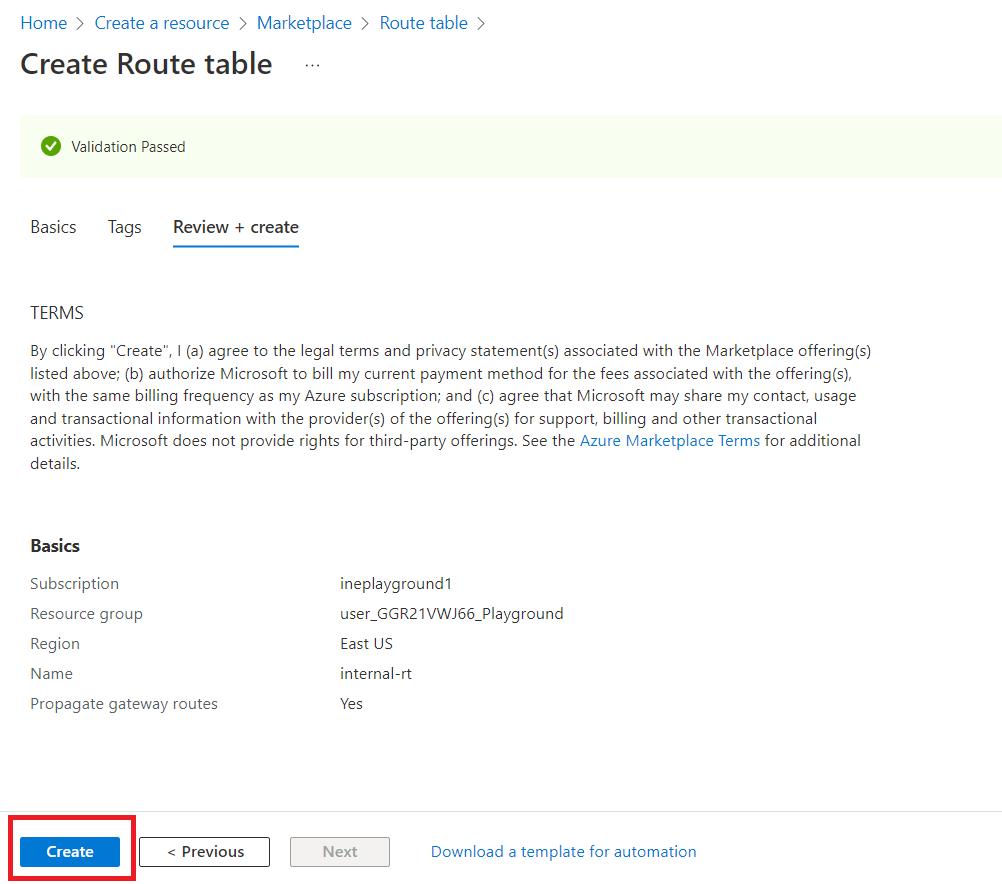
Click on "Review + create".
Click on "Create".
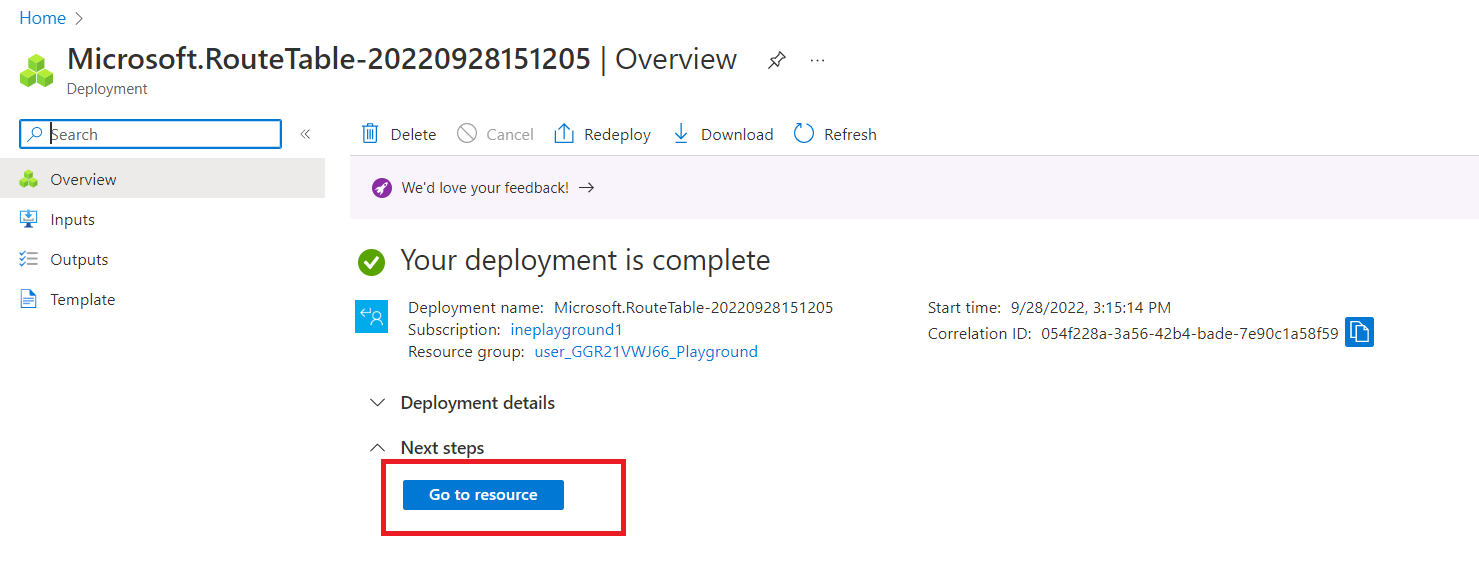
Once the deployment is complete, click on "Go to resource".
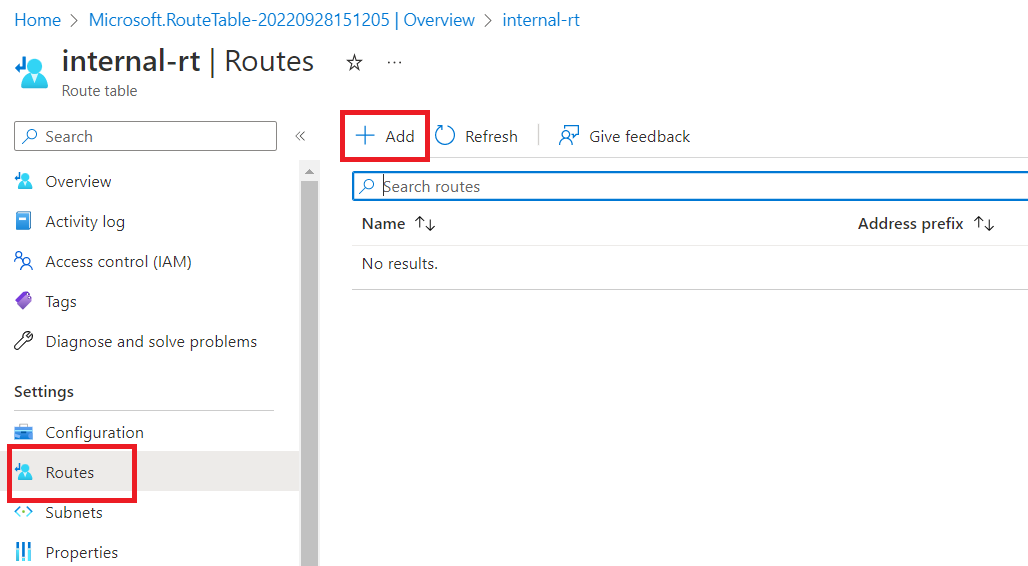
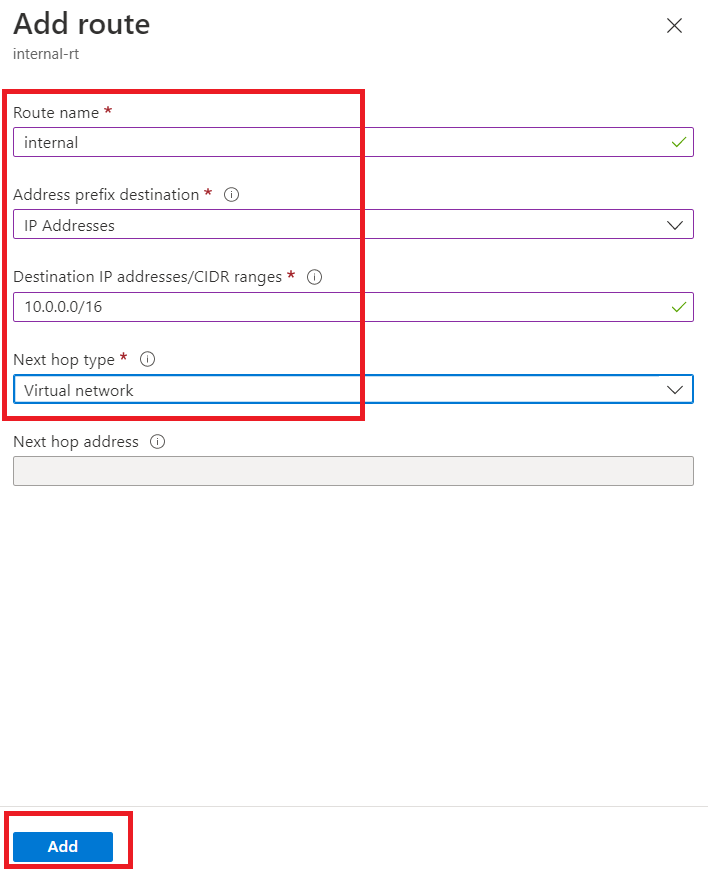
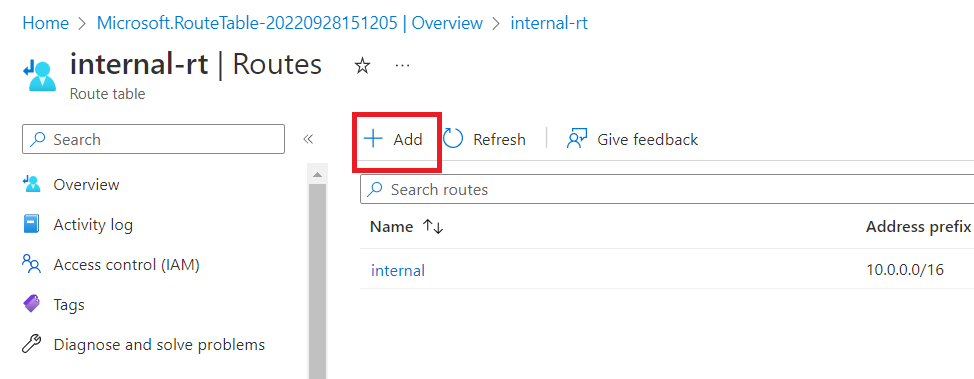
Now, go to "Routes" and click on "Add".
Give route name as "internal", select Address prefix destination as "IP Addresses". Destination IP addresses/CIDR ranges as "10.0.0.0/16" and Next hop type as "Virtual network". Click on "Add".
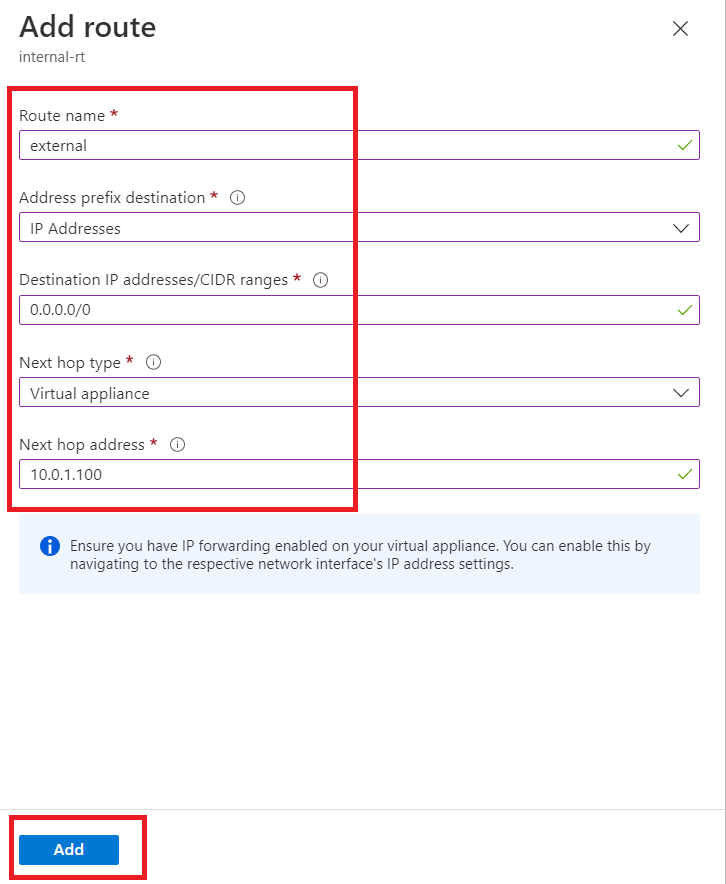
Again, click on "Add" and add another route.
Give Route name as "external". Select Address prefix destination as "IP Addresses". Give "0.0.0.0/0" as Destination IP addresses/CIDR ranges. Next hop type as "Virtual appliance" and Next hop address as "10.0.1.100".
Now, click on "Add".
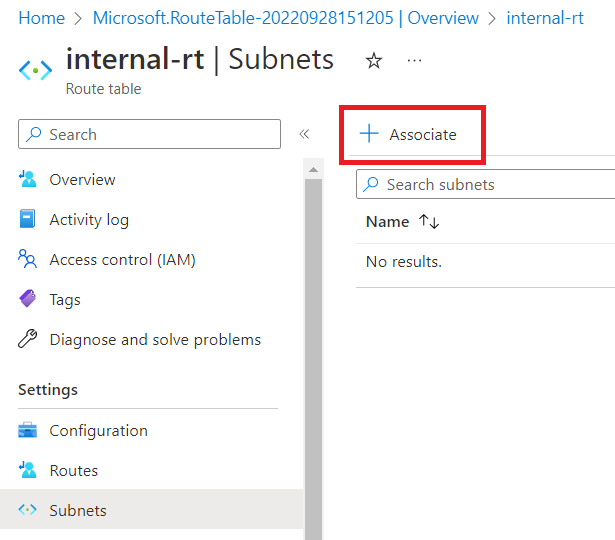
Now, click on "Subnets".
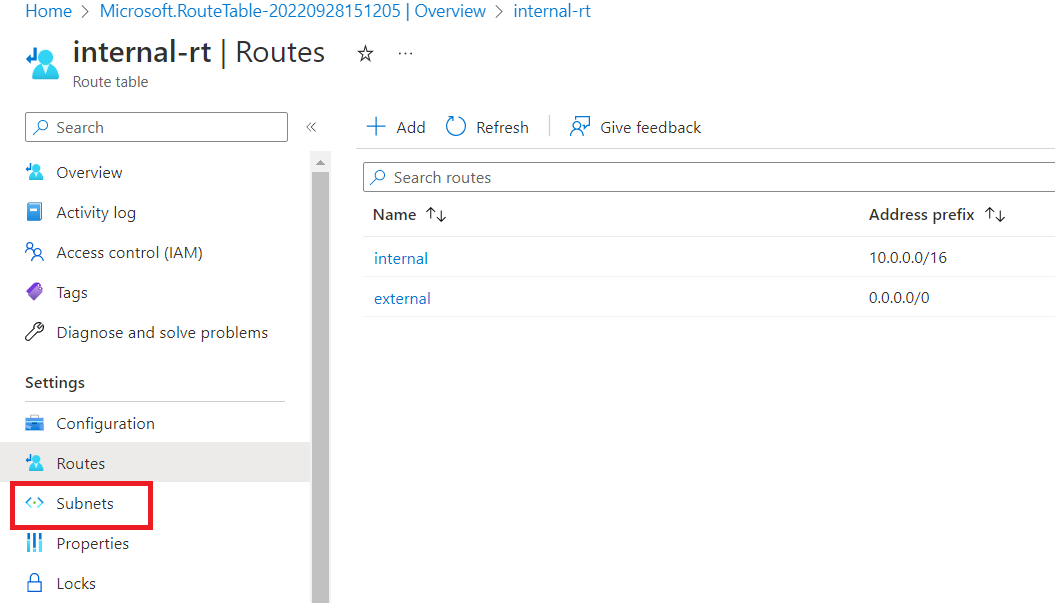
Click on "Associate".
Select Virtual network as "vna-vnet" and Subnet as "internal".
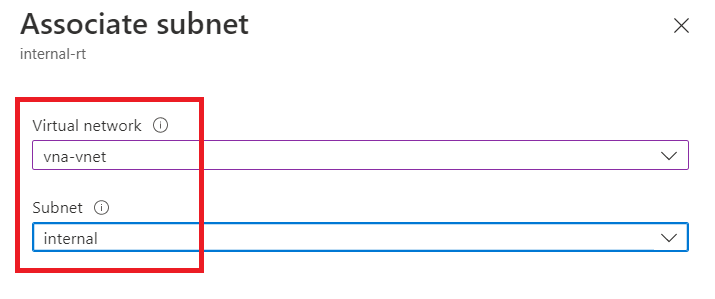
Click "OK".

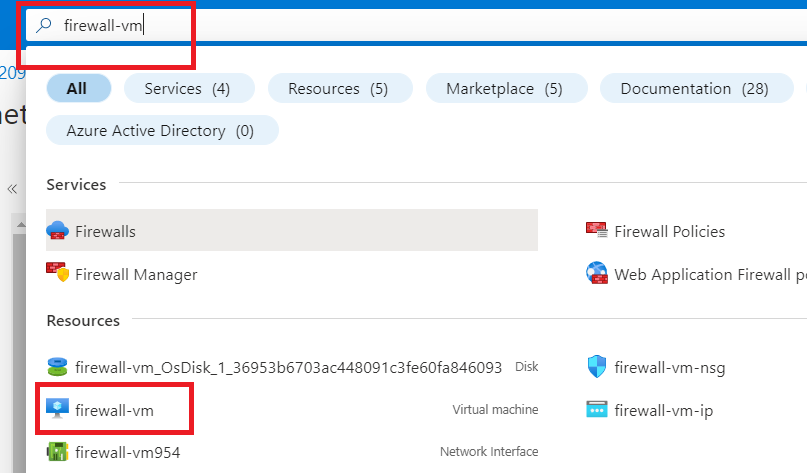
Search "firewall-vm" in the search box and click on it.
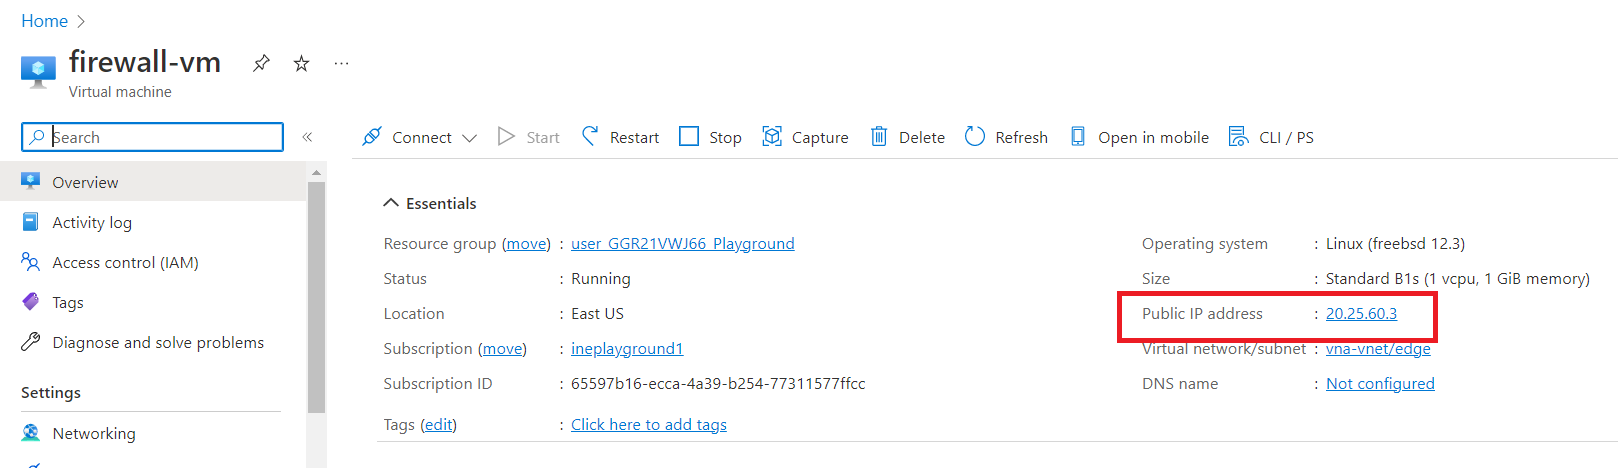
Copy the Public IP address (of firewall-vm).
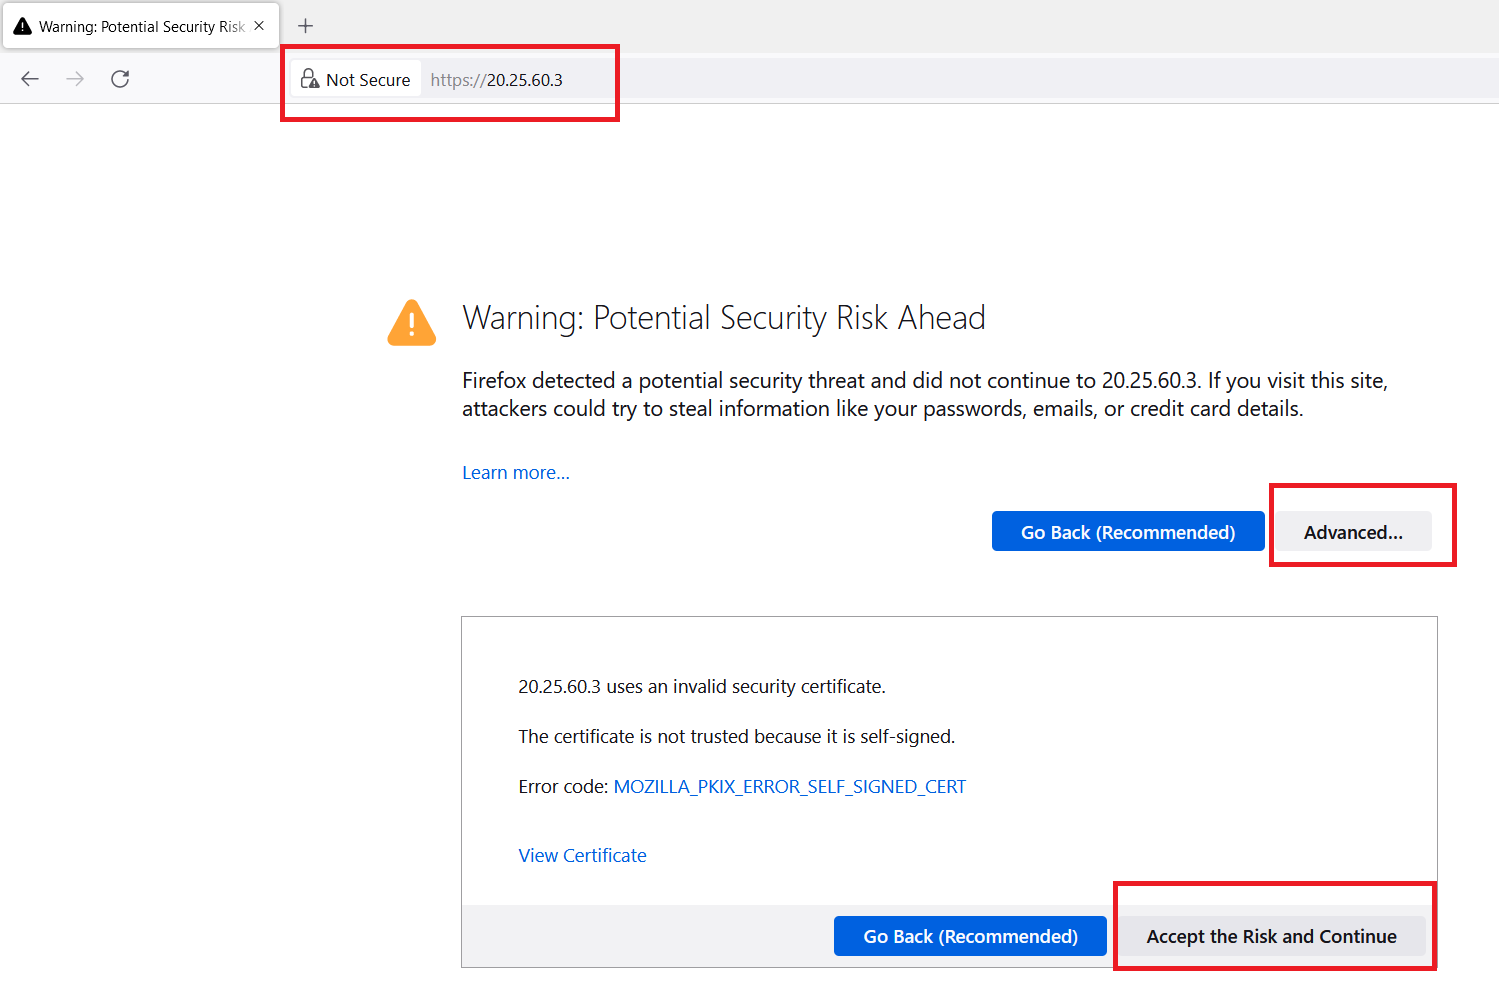
Open a web browser (use firefox) and search "https://< firewall-vm Public IP Address >"
https://20.25.60.3NOTE: Depending upon the web browser, the below options will change. We are using firefox.
Click on "Advanced" option and click on "Accept the Risk and Continue".
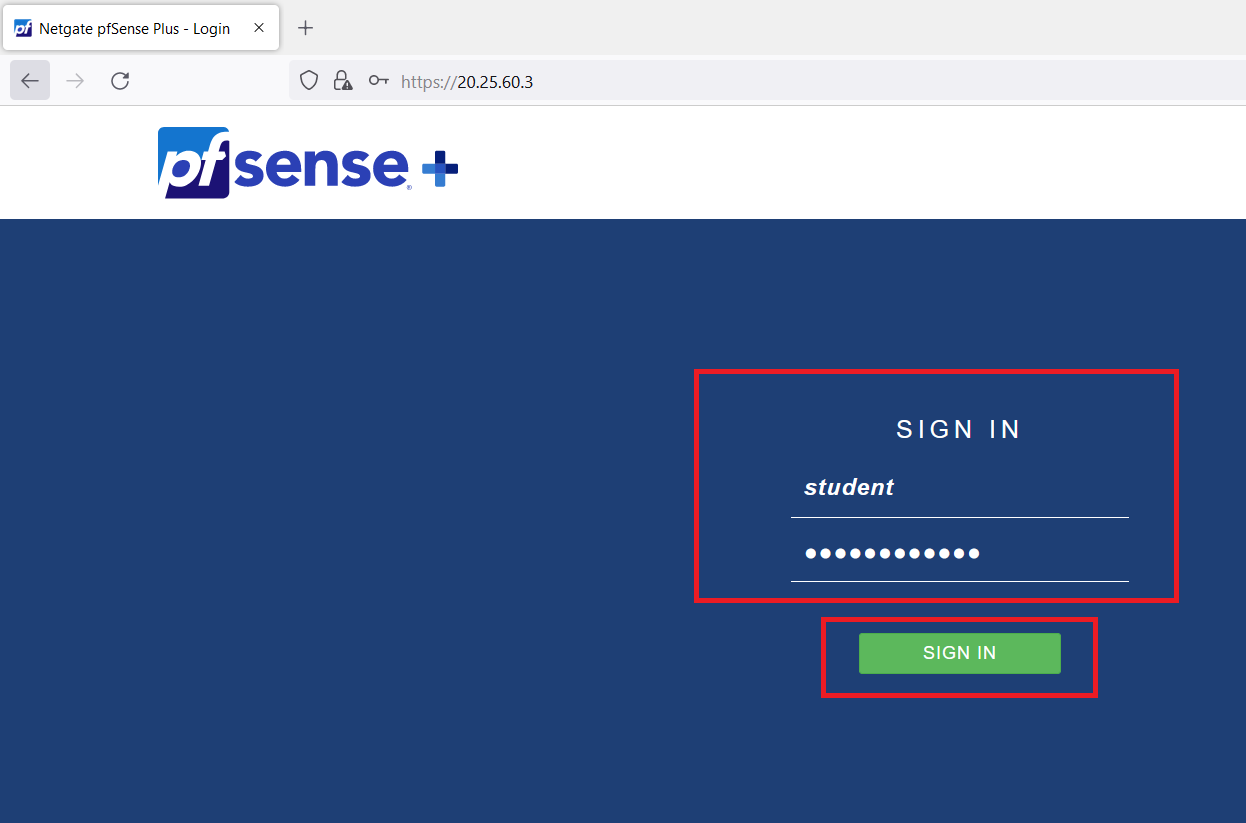
Now, login with the credentials you saved before. In our case, the credentials were as follows:
student
MyP@sswrd123
Click on "SIGN IN".
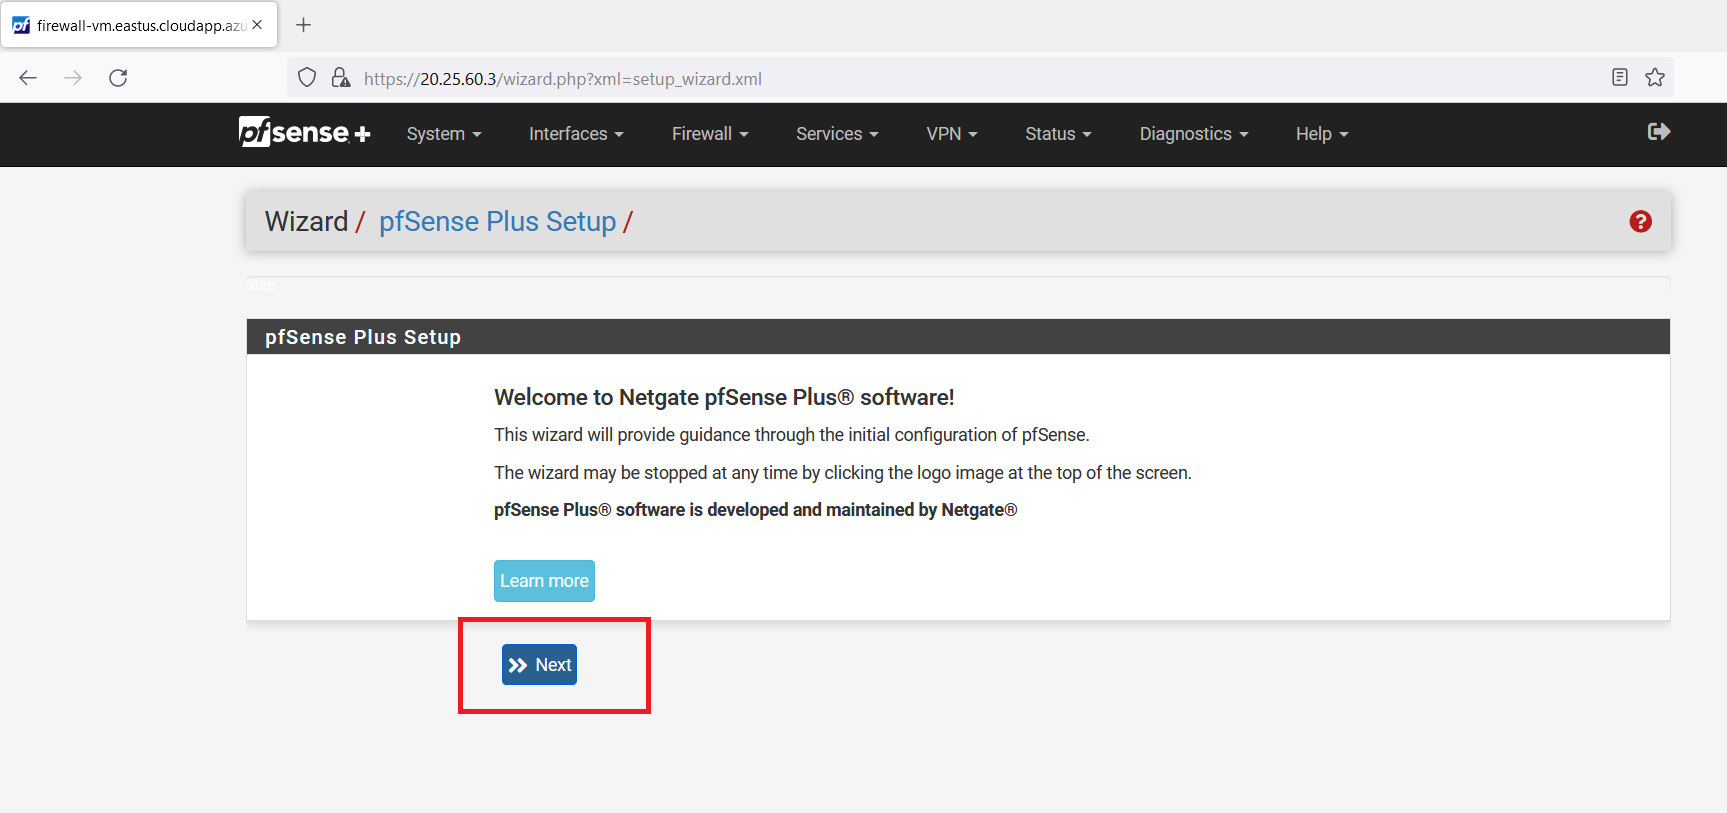
Click on "Next" and keep clicking the "Next" button till you reach to the Step 6.
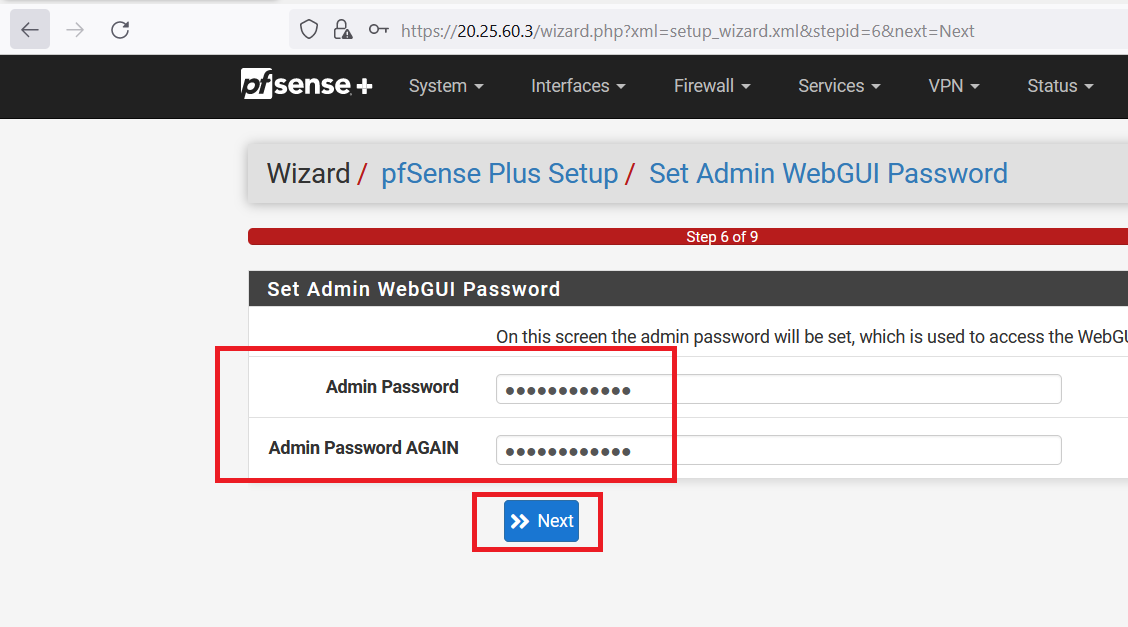
At Step 6 enter any password of your choice we are keeping it the same i.e., "MyP@sswrd123". Now, click on the "Next" button.
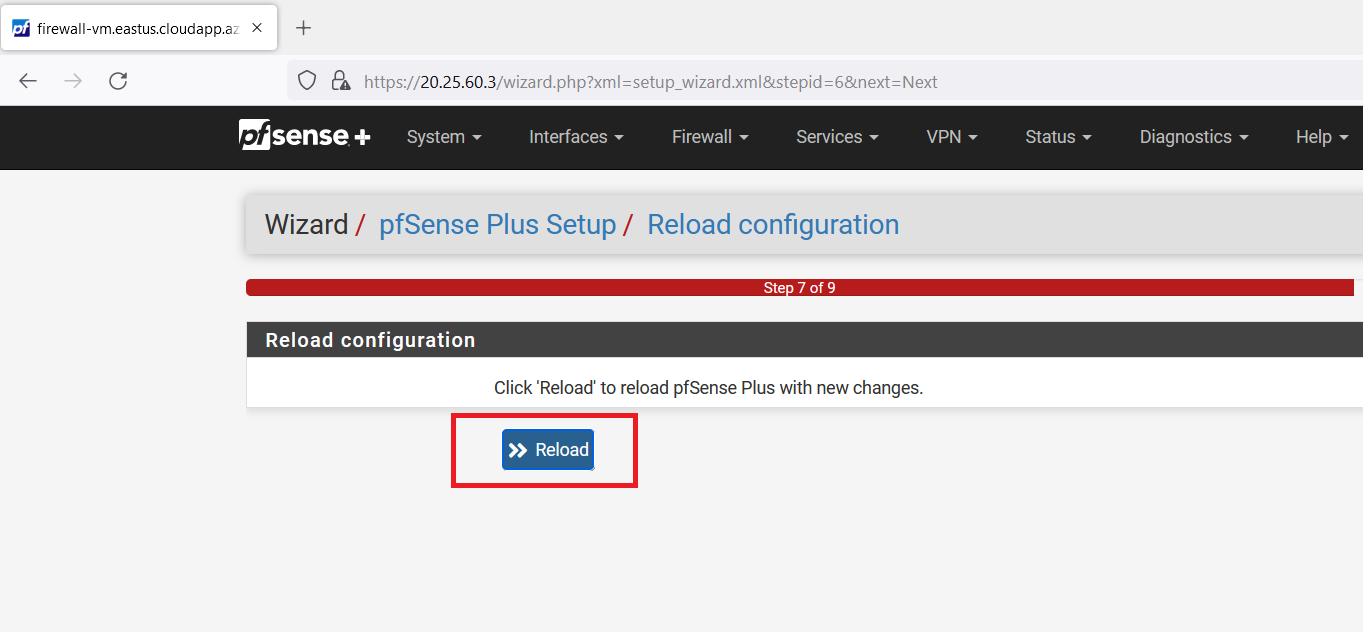
Click on "Reload" and wait.
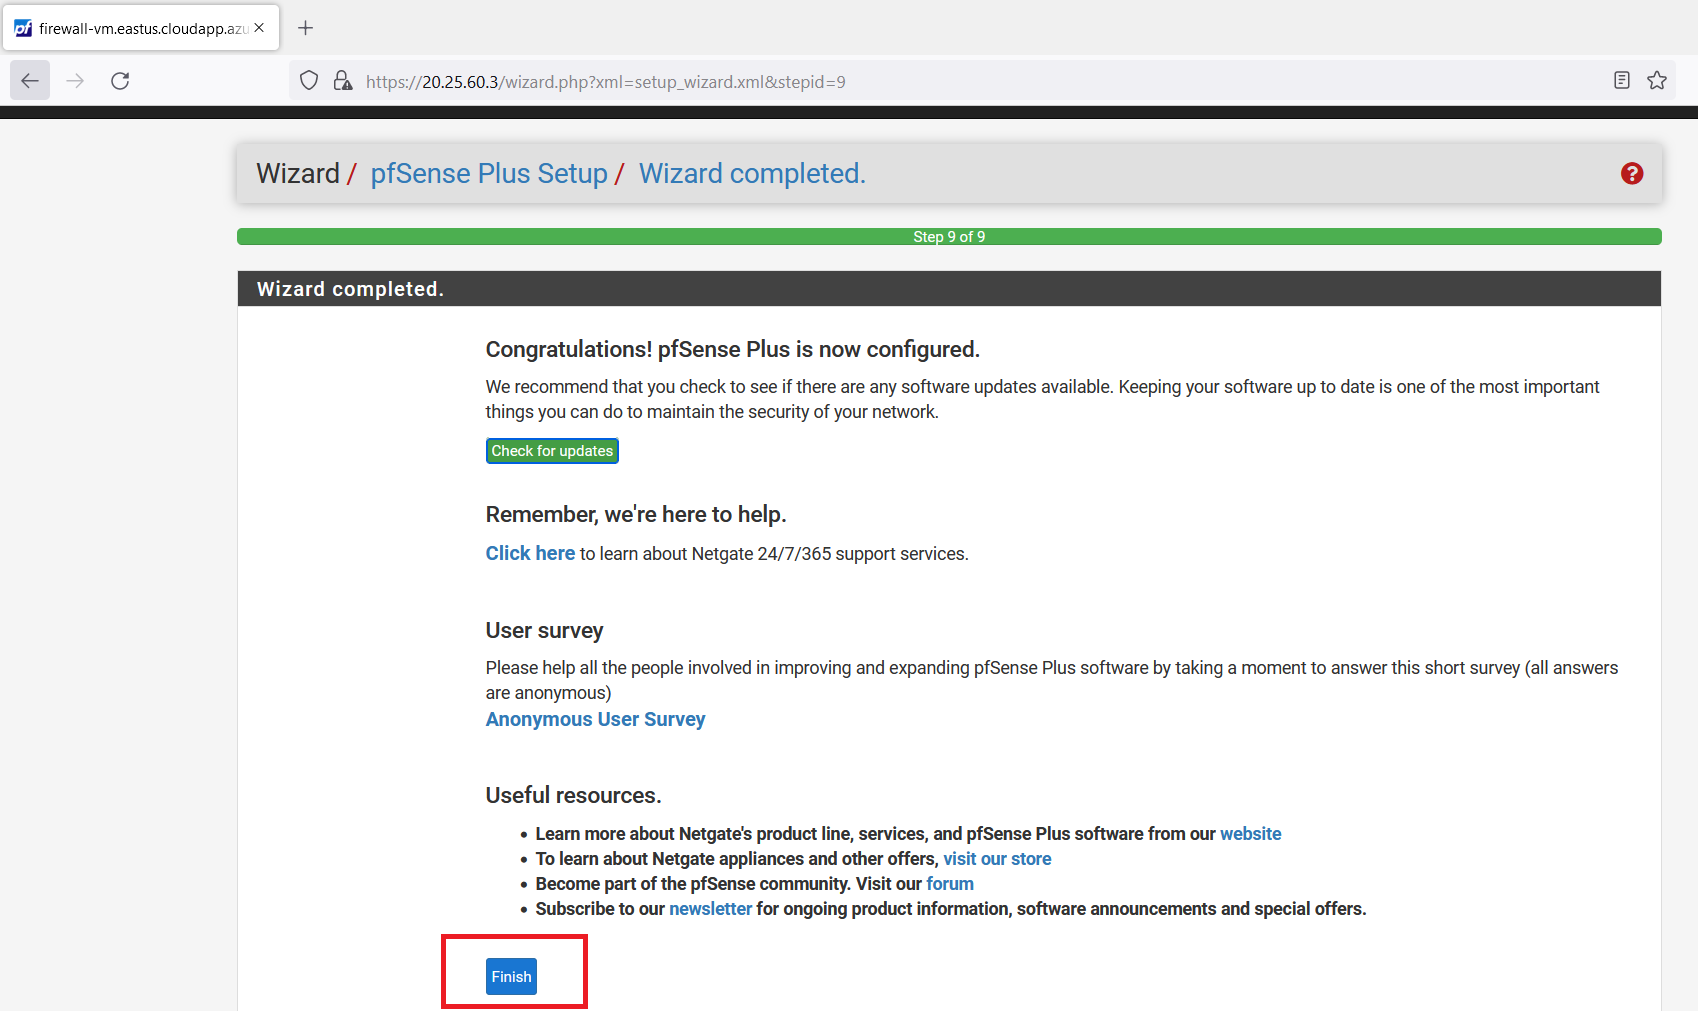
Now, click on the "Finish" button.
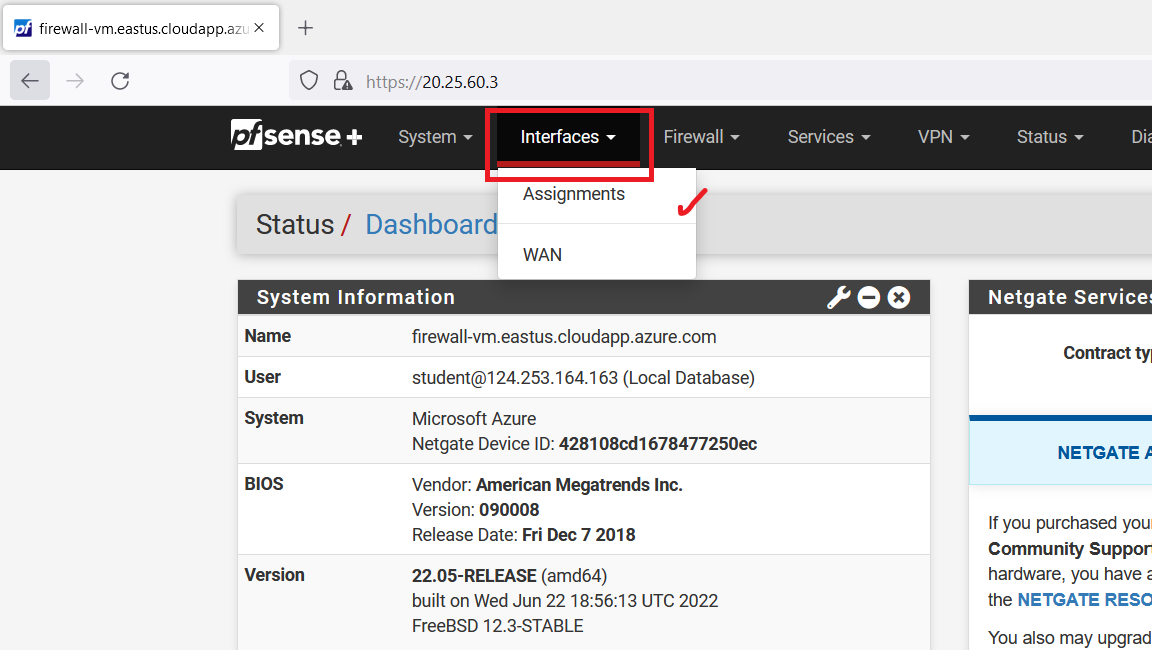
Select "Interfaces" from the navigation bar and click on "Assignments".
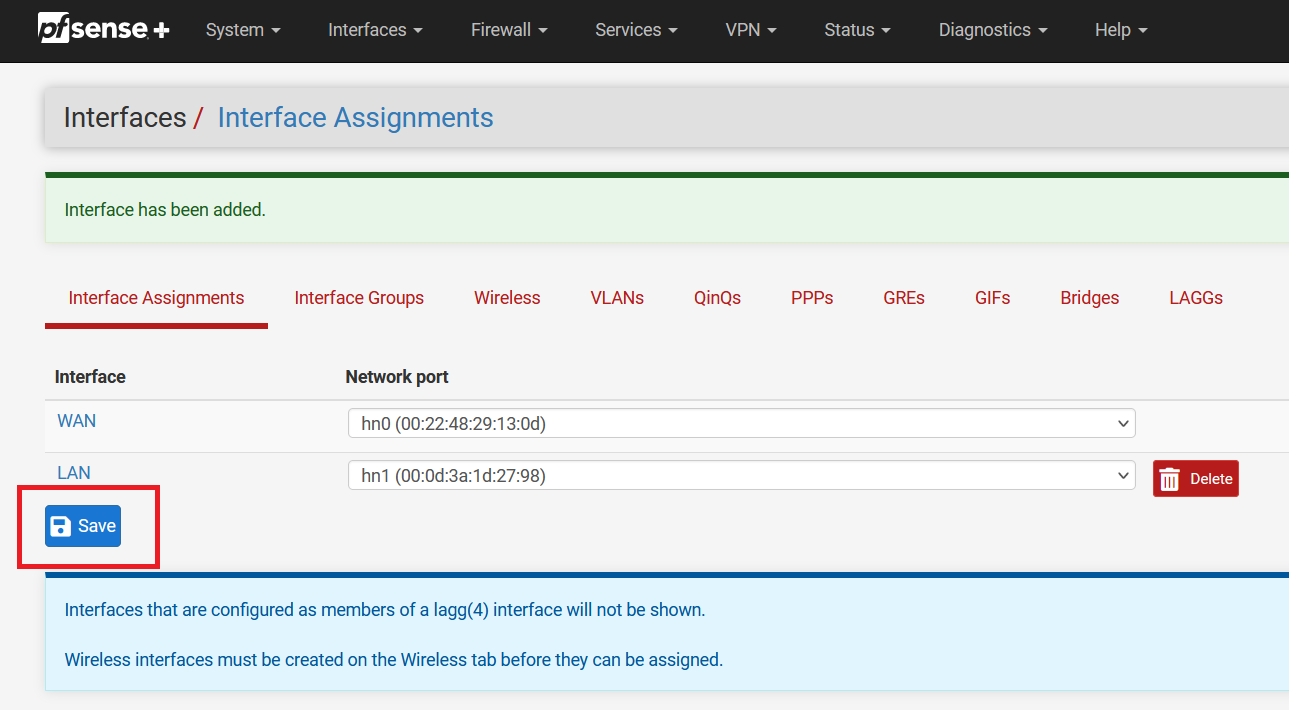
Now, click on the "Add" button.
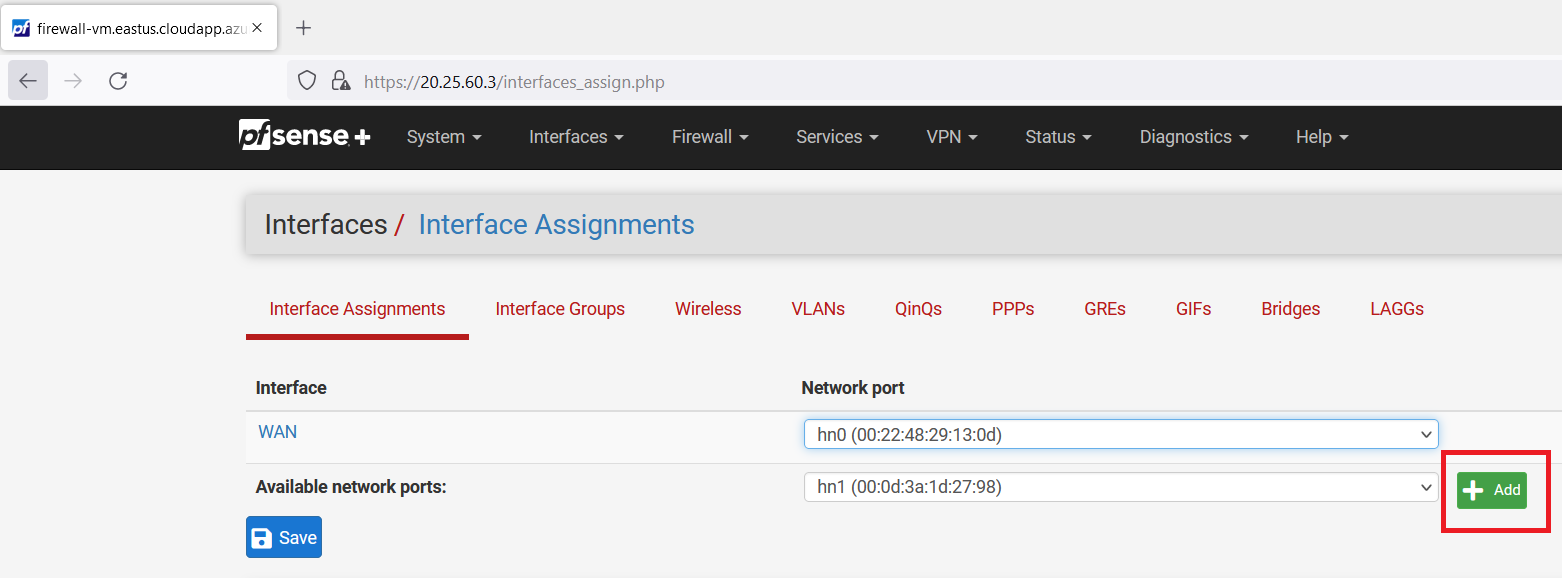
Click on the "Save" button.
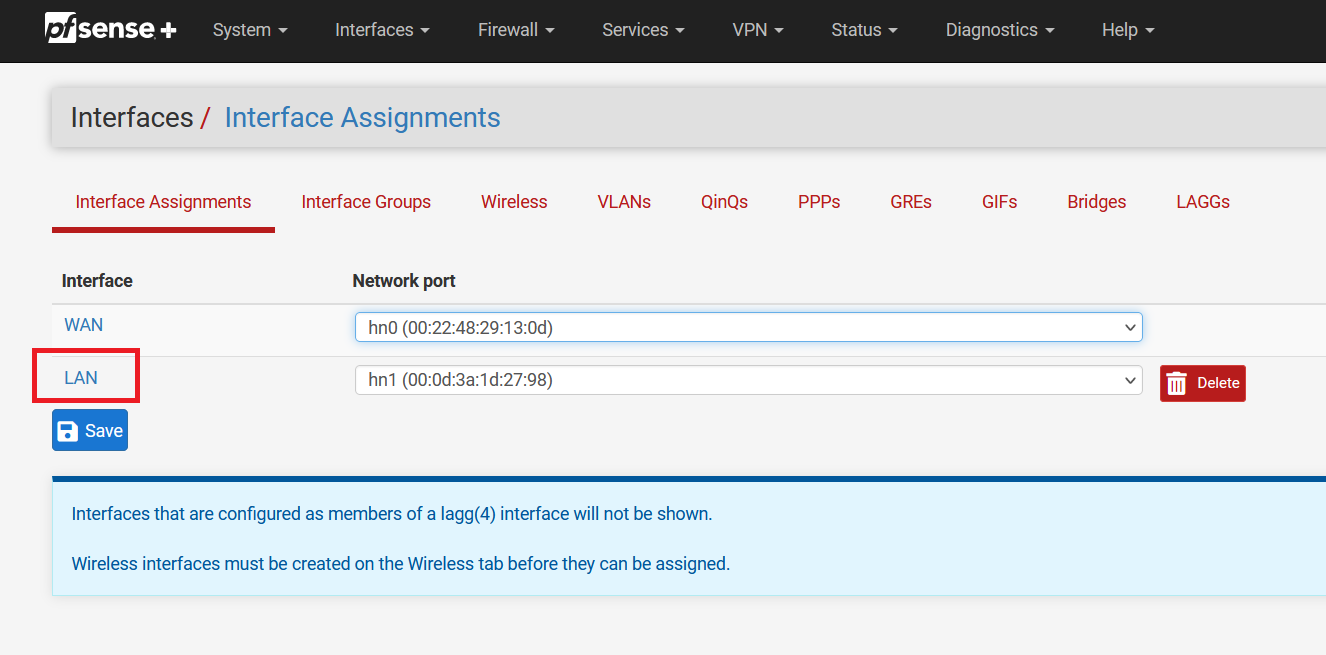
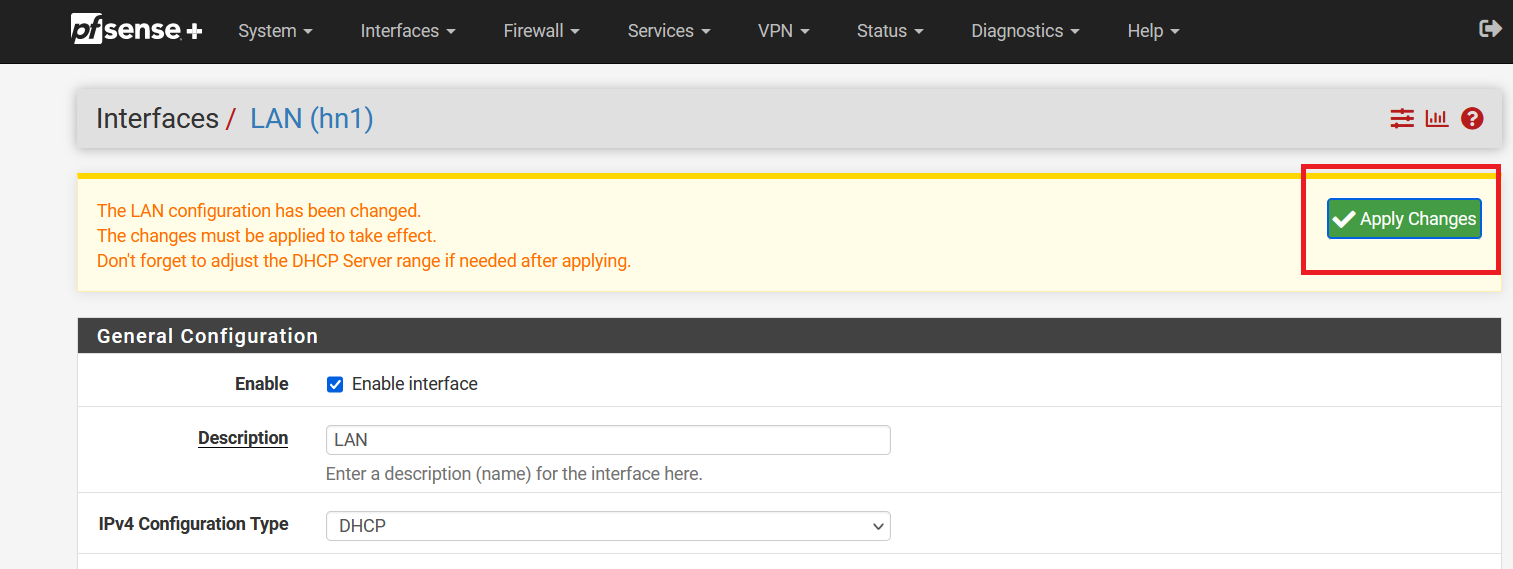
Now, click on "LAN".
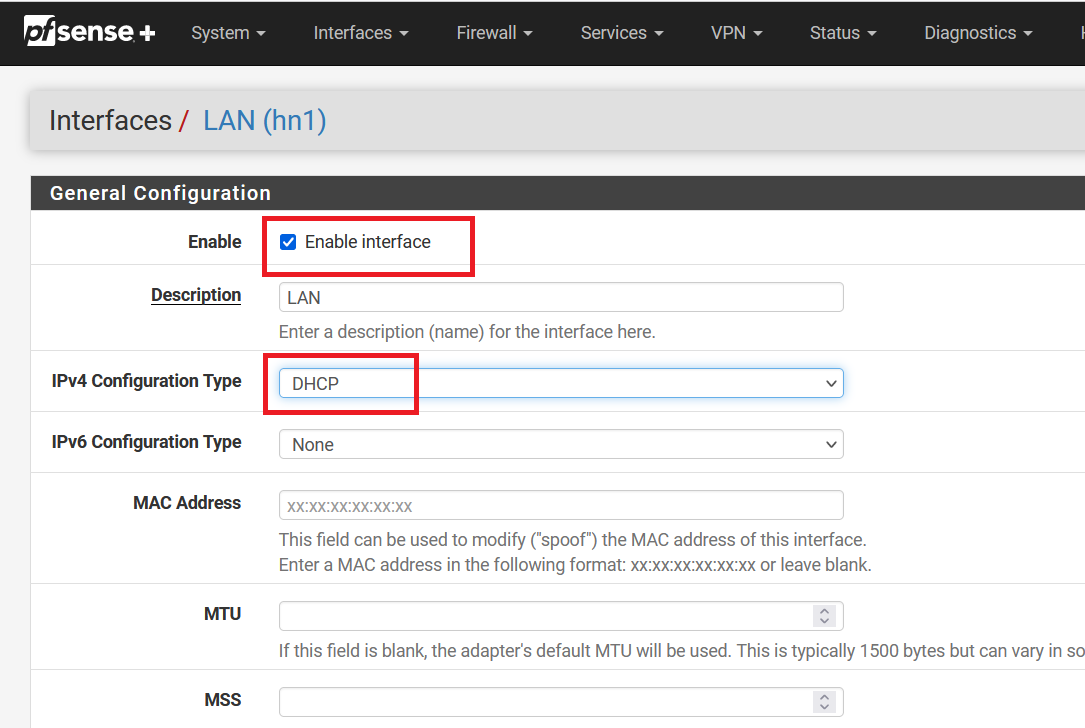
Click on the "Enable interface" and select "DHCP" as IPv4 Configuration Type.
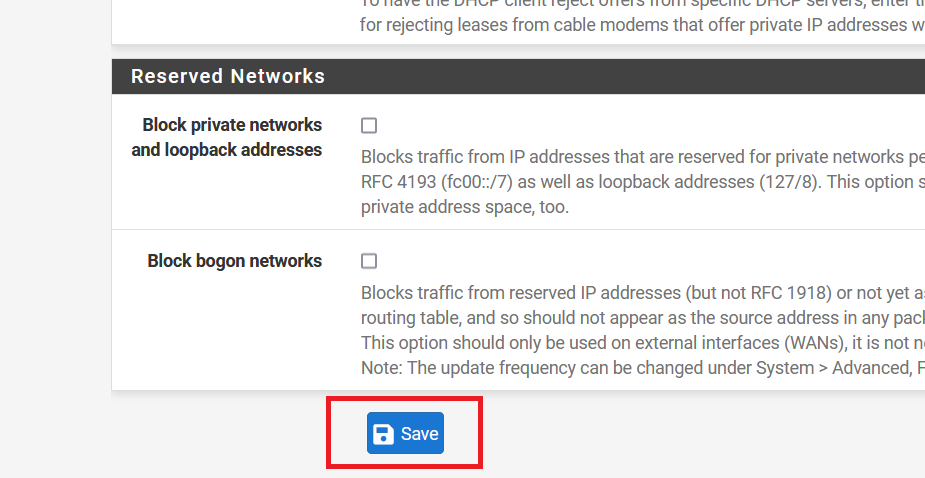
Click on "Save".
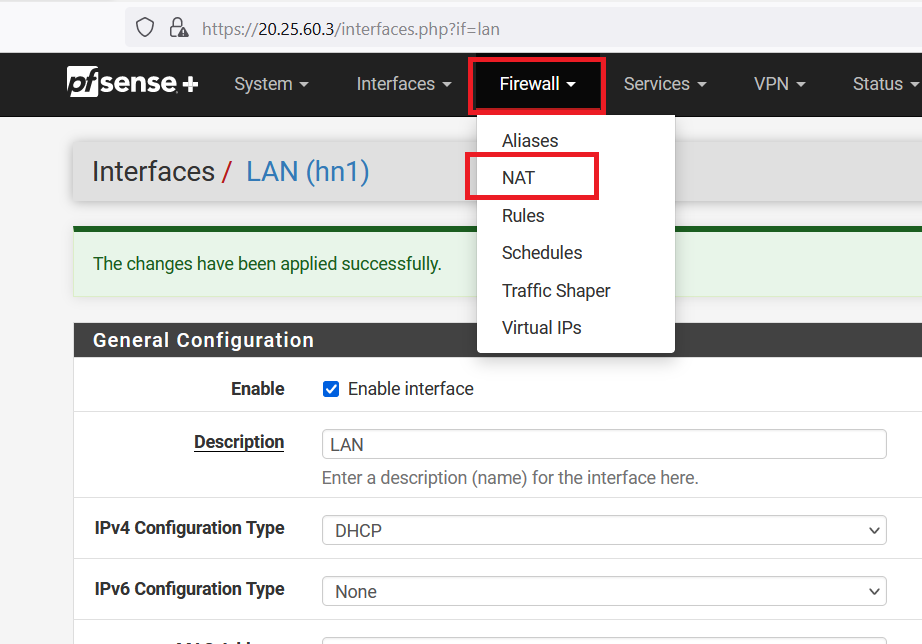
Click on "Apply Changes".
Now, form navigation bar go to "Firewall" and select "NAT".
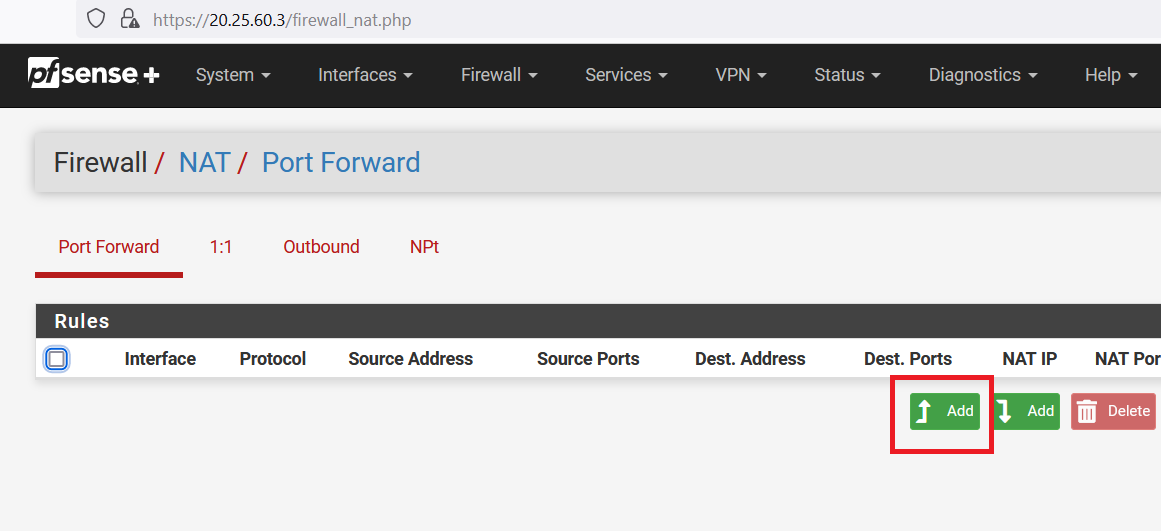
Click on the "ADD" button as shown below.
Select "Any" as Destination type. And "HTTP" as Destination port range.
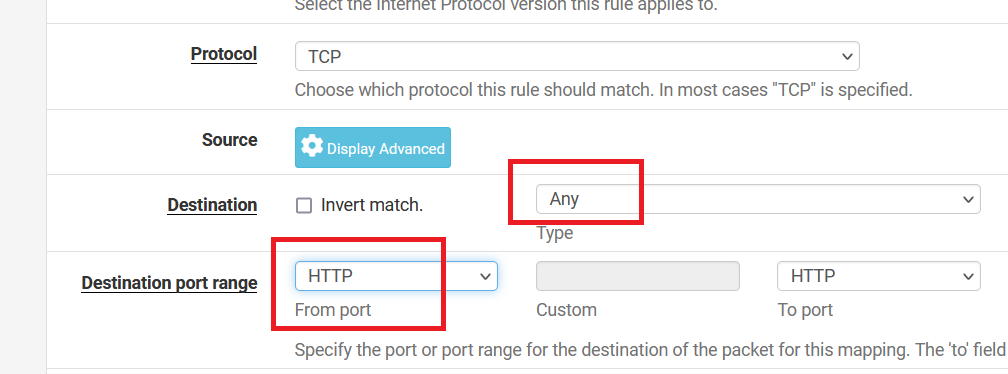
Write "10.0.1.4" as Redirect target IP. And select "HTTP" as Redirect target port. Now, click on the "Save" button.
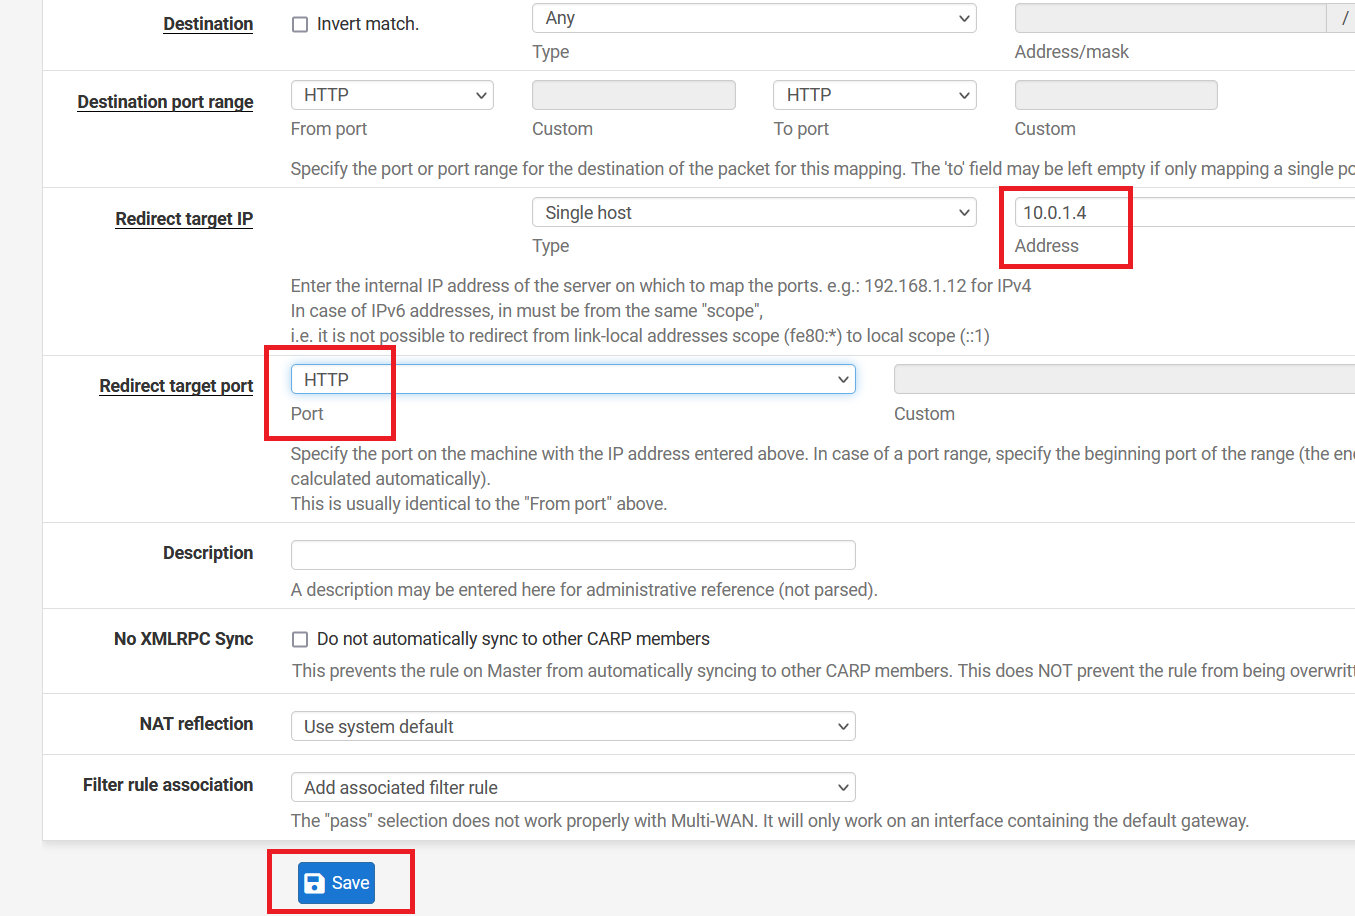
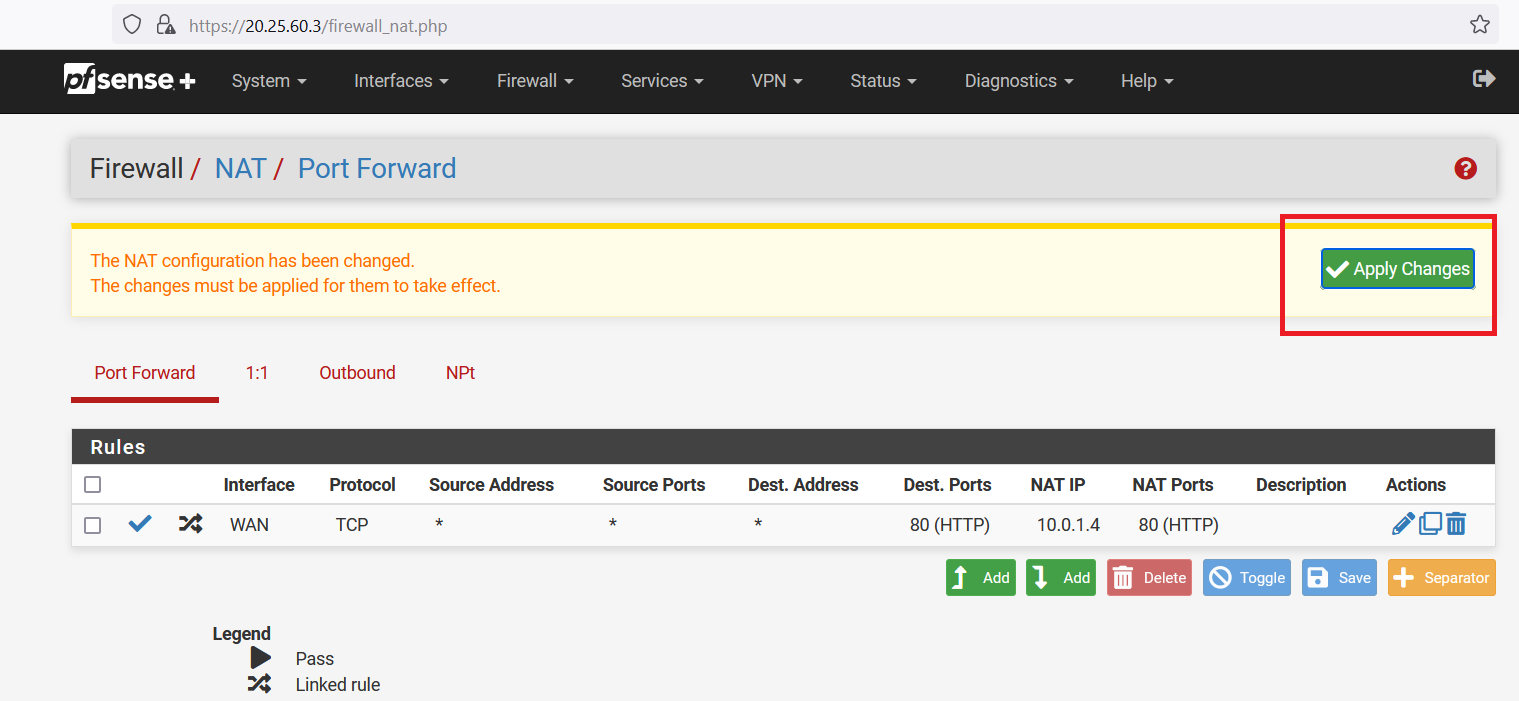
Click on the "Apply Changes".
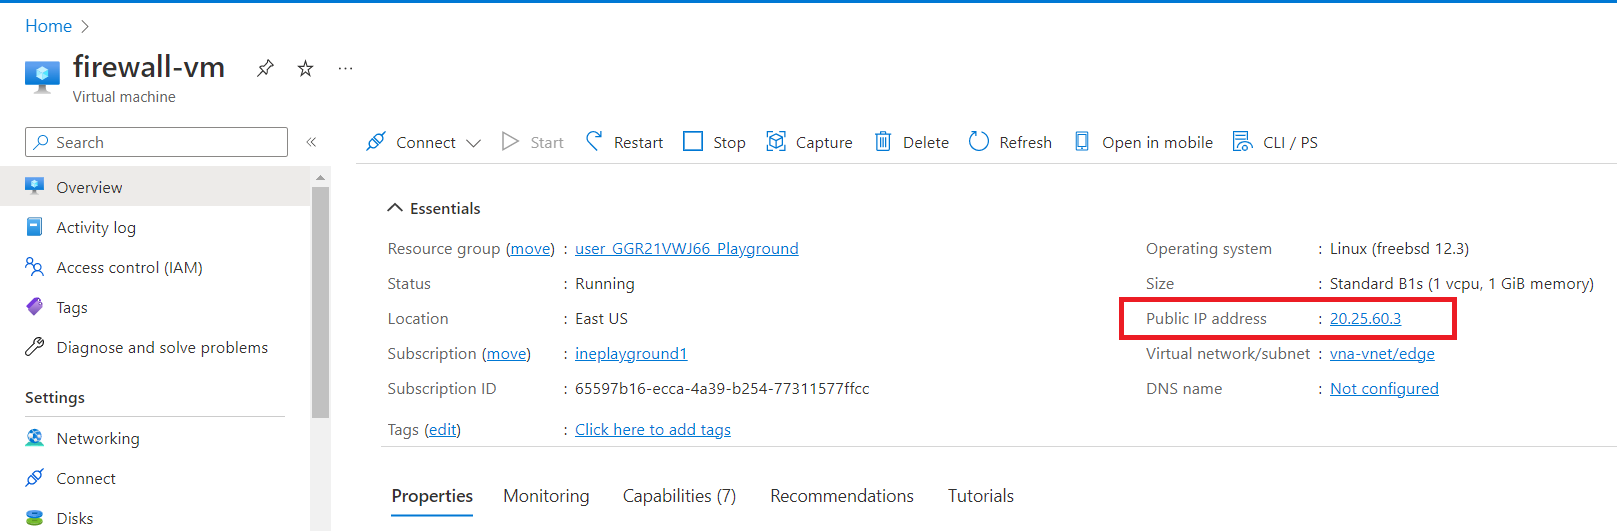
Now, copy the Public IP address of "firewall-vm".
Open any browser and search for "http://< Public IP address of firewall-vm >" e.g.,
http://20.25.60.3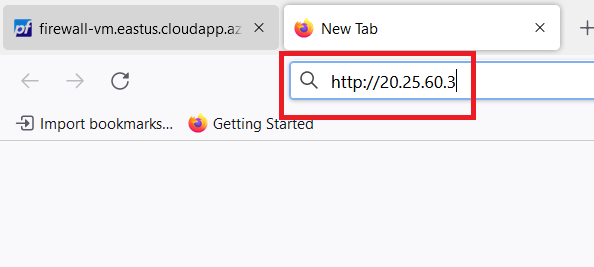
Now, hit the enter key. You will see the following output:
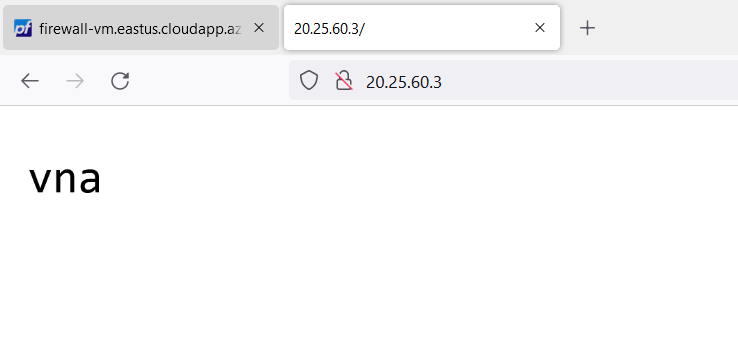
This is a simple response with the name of the protected virtual machine.
Footer © 2022 GitHub, Inc. Footer navigation Terms Privacy