In this task, you will provision an Azure SQL database and configure it for remote access and Azure AD authentication.
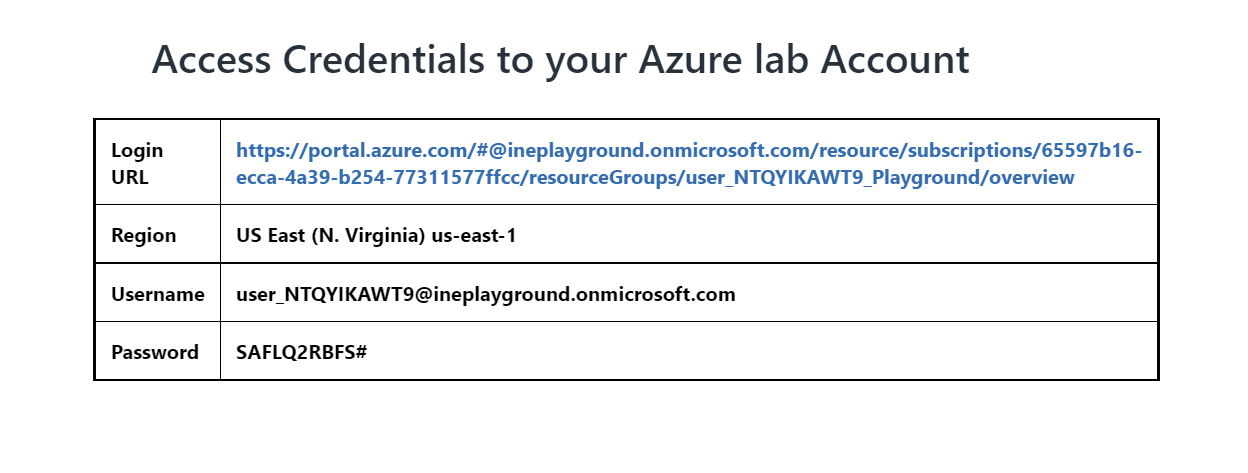
Click on the login URL and enter the given credentials to log in to the Azure portal.
Note: Your credentials will be different from the ones shown in the figure.
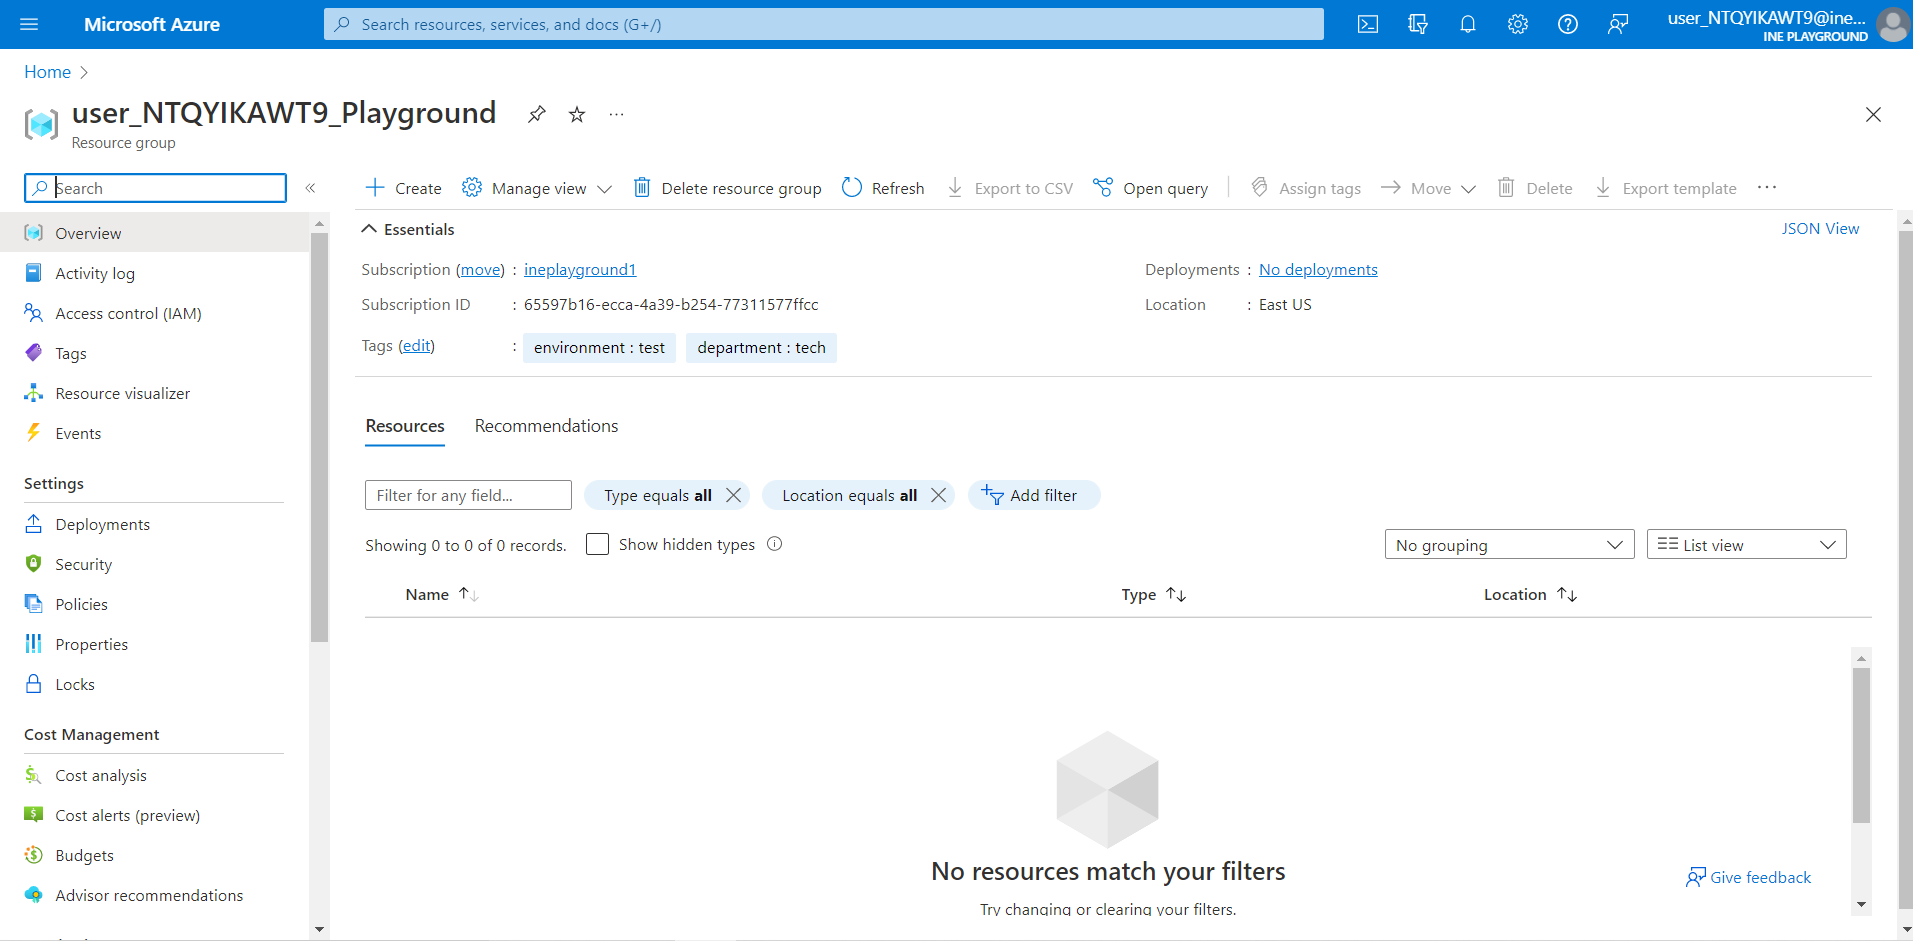
After logging in to the portal using the credentials. You will see an empty resource group, where you can create some resources.
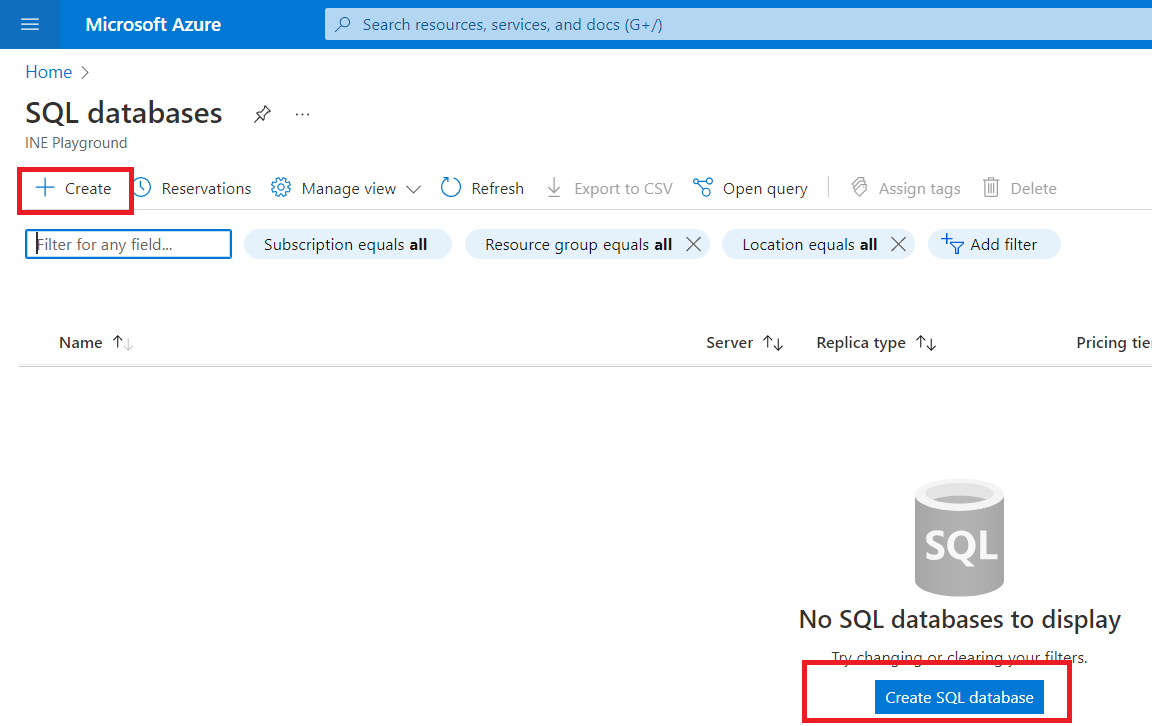
Go to the search box and type SQL databases. Click on SQL databases.

Now, click on "Create" or "Create SQL databases" to create the database.
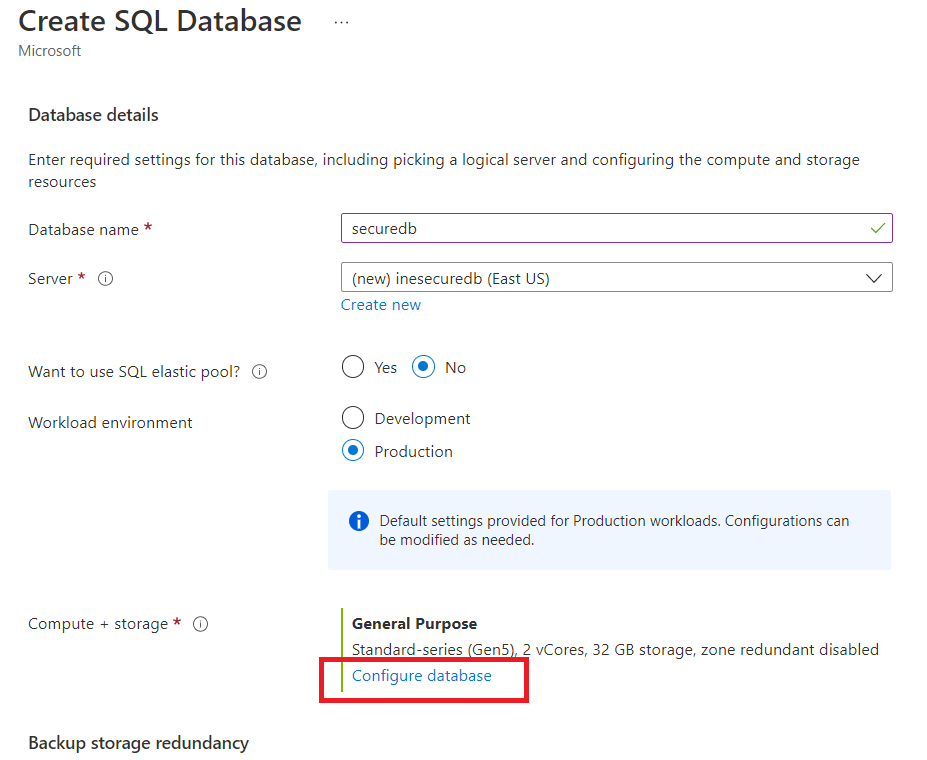
Select the pre-defined resource group from the drop-down menu and give the database a name e.g., securedb.

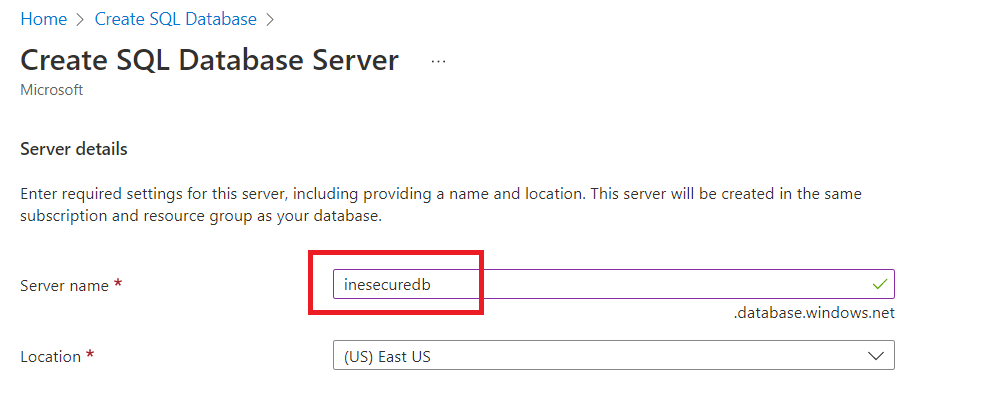
Now to create a new server, click on the Create new option.

Give the server a name e.g., inesecuredb.
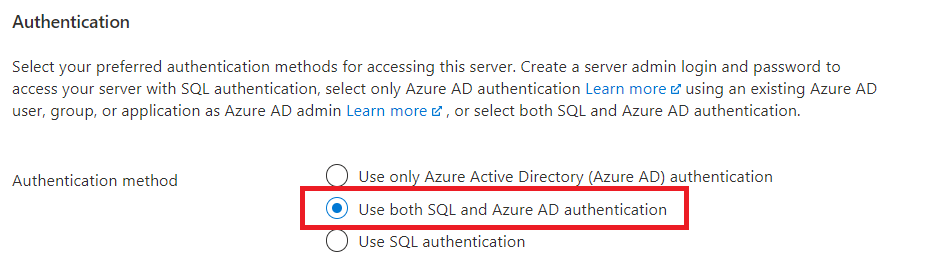
Select the Use both SQL and Azure AD authentication option.
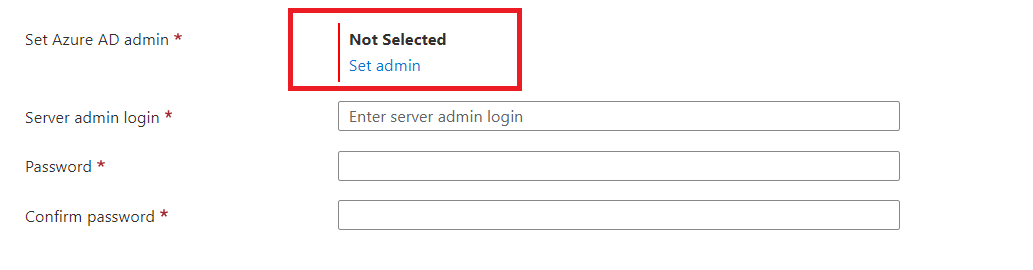
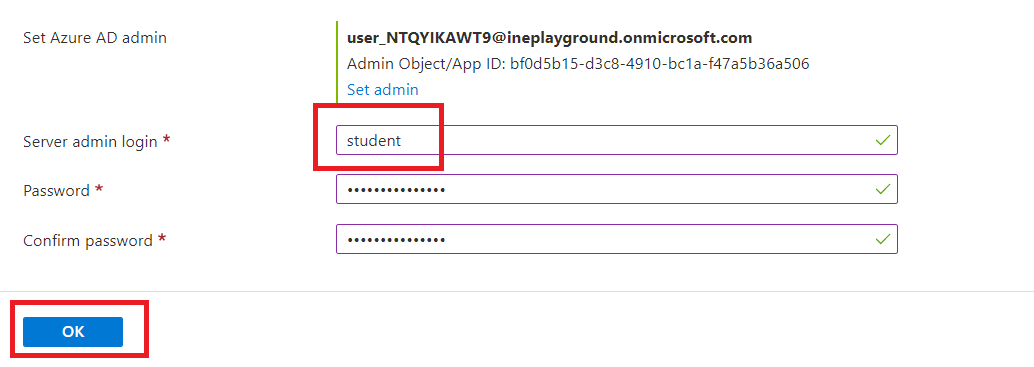
To set the Azure AD admin, click on the "Set admin" option.
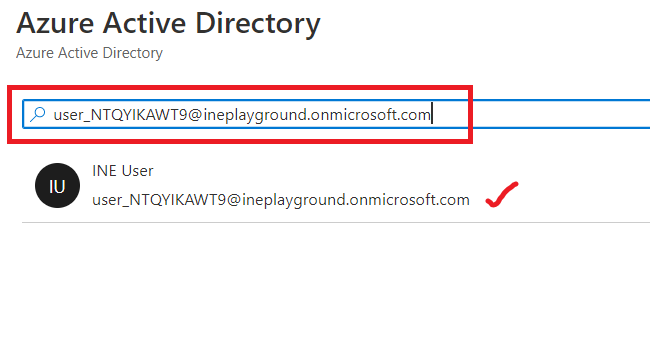
Now inside the search box paste the user id with which you logged in to this lab. And select the user as shown in the below image.
NOTE: Select only that user (the current user) with which you have logged in to the lab.
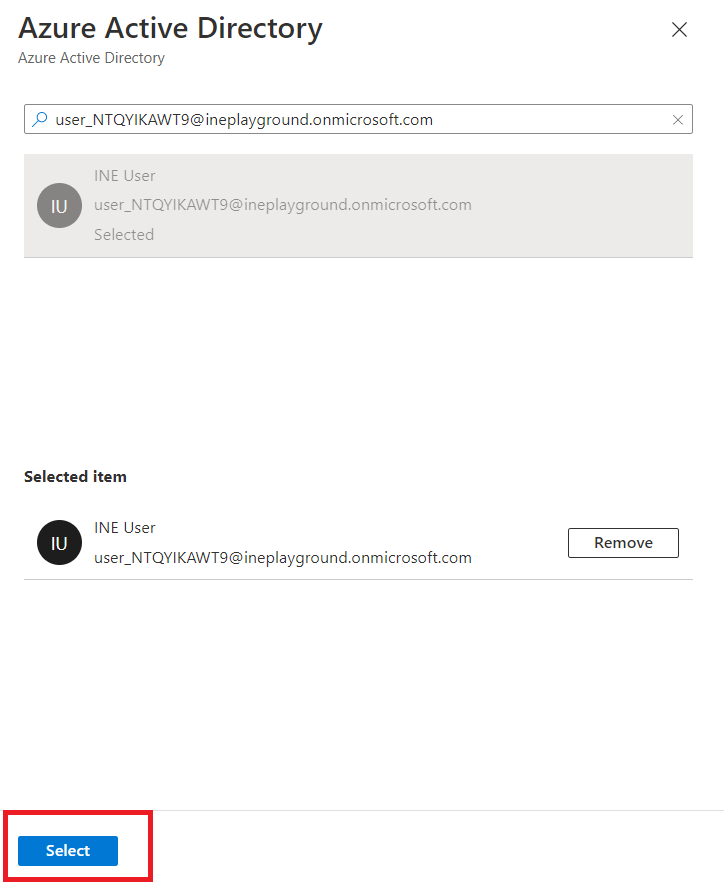
Now, click on select.
Now, give the server admin login name as student and give it a password of your choice, e.g.,"$trongPasswd123".
NOTE: Store the login id and password somewhere for future use.
Now, click on "OK".
Now, click on "Configure database" option.
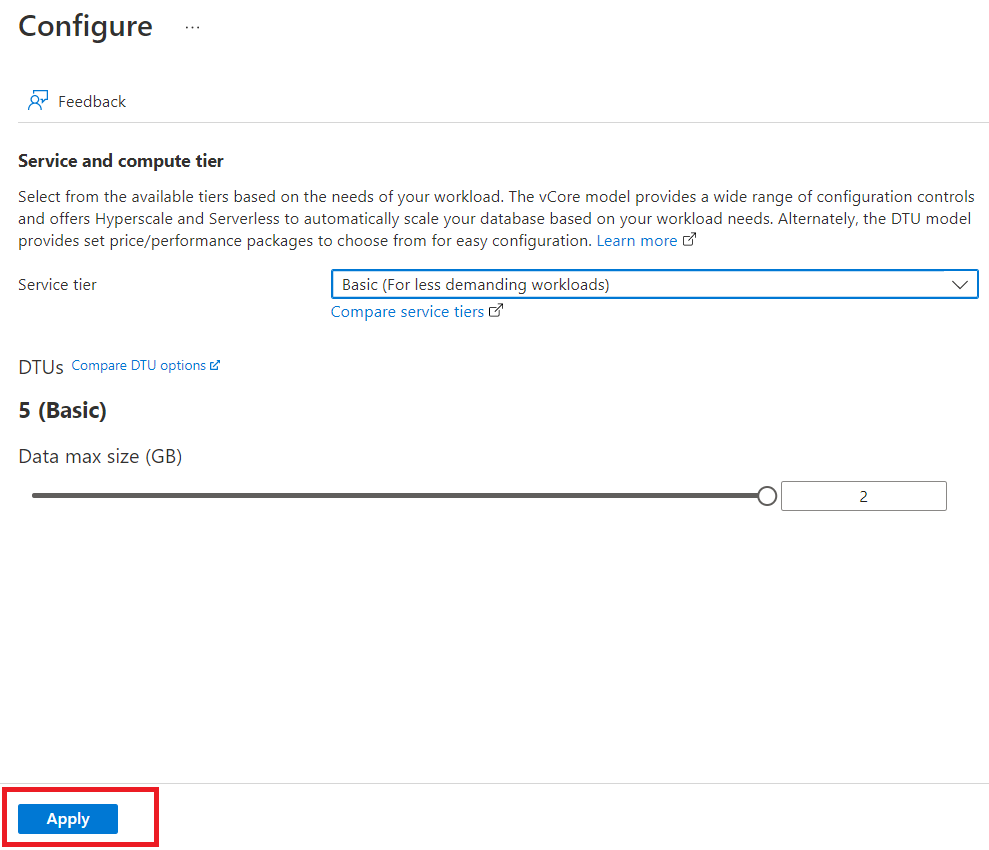
Here, using the drop down menu select "Basic" as service tier.

Click on "Apply".
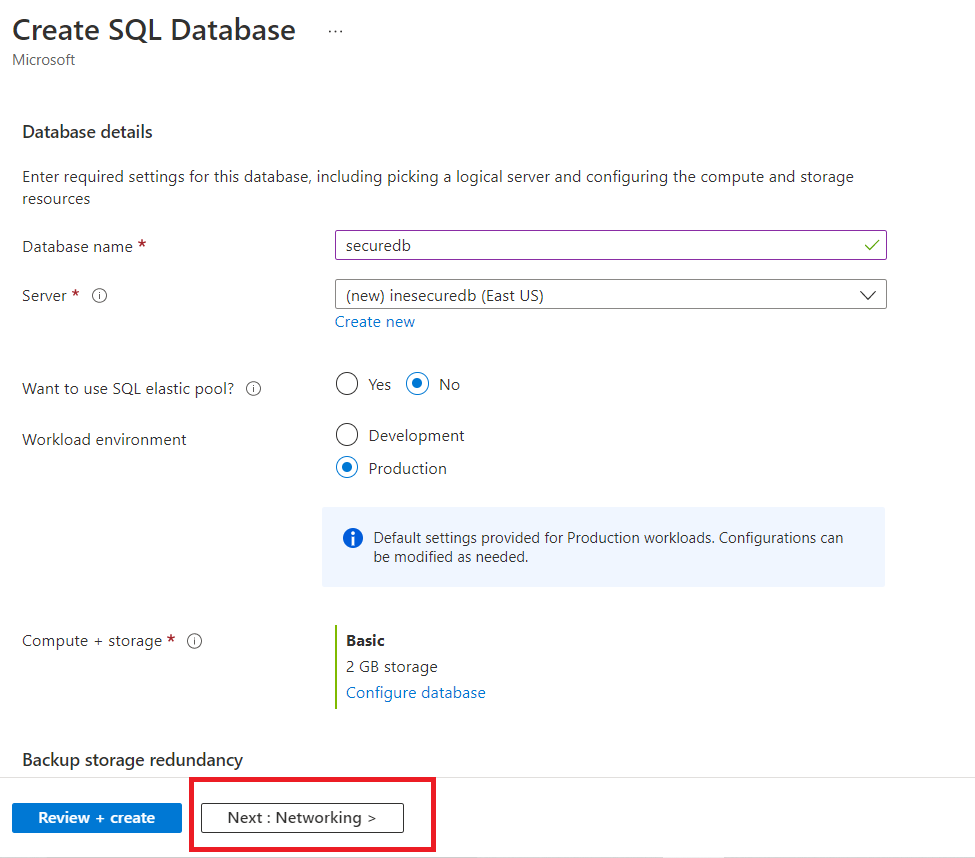
Now select "Next.
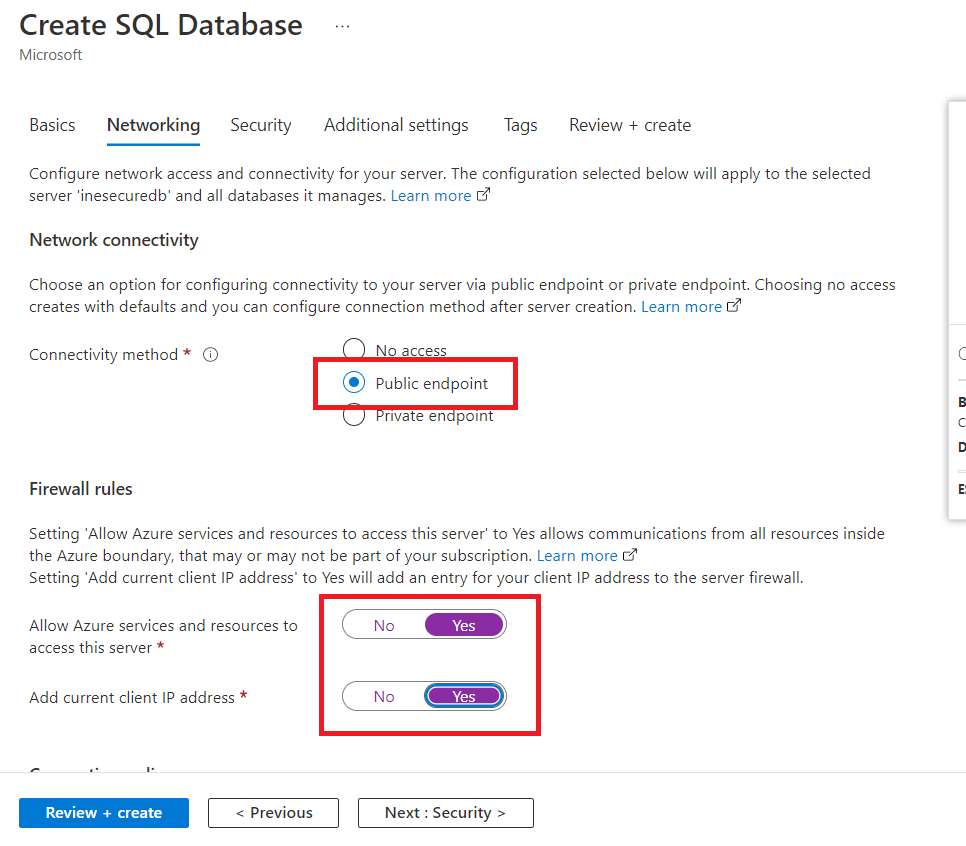
Select the connectivity method as "Public endpoint" and select "Yes" for both firewall rules ("Allow Azure services and resources to access this server" and " Add current client IP address").
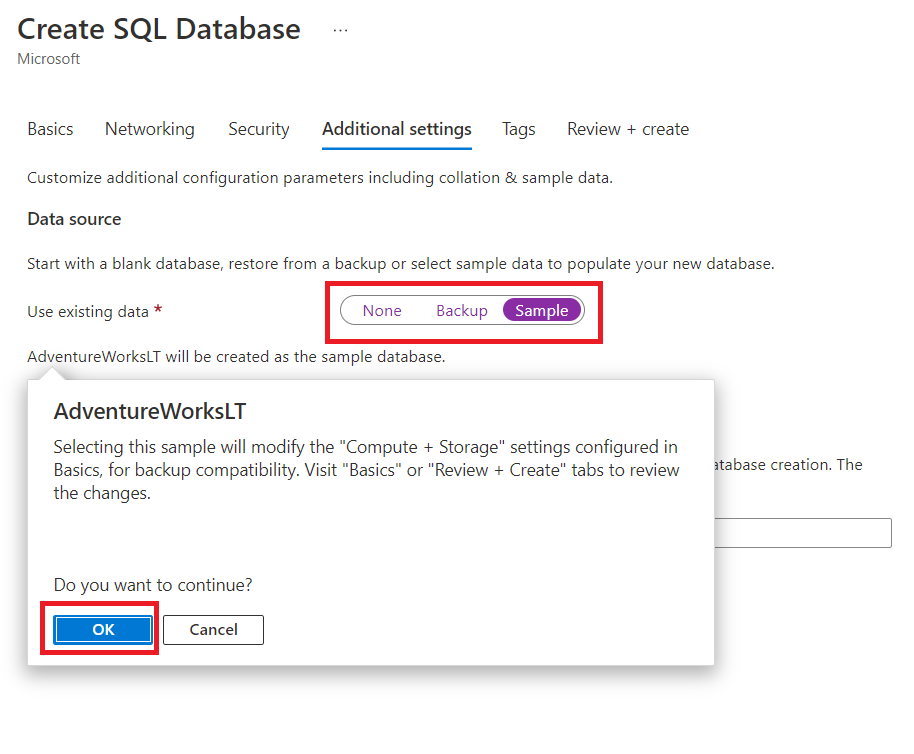
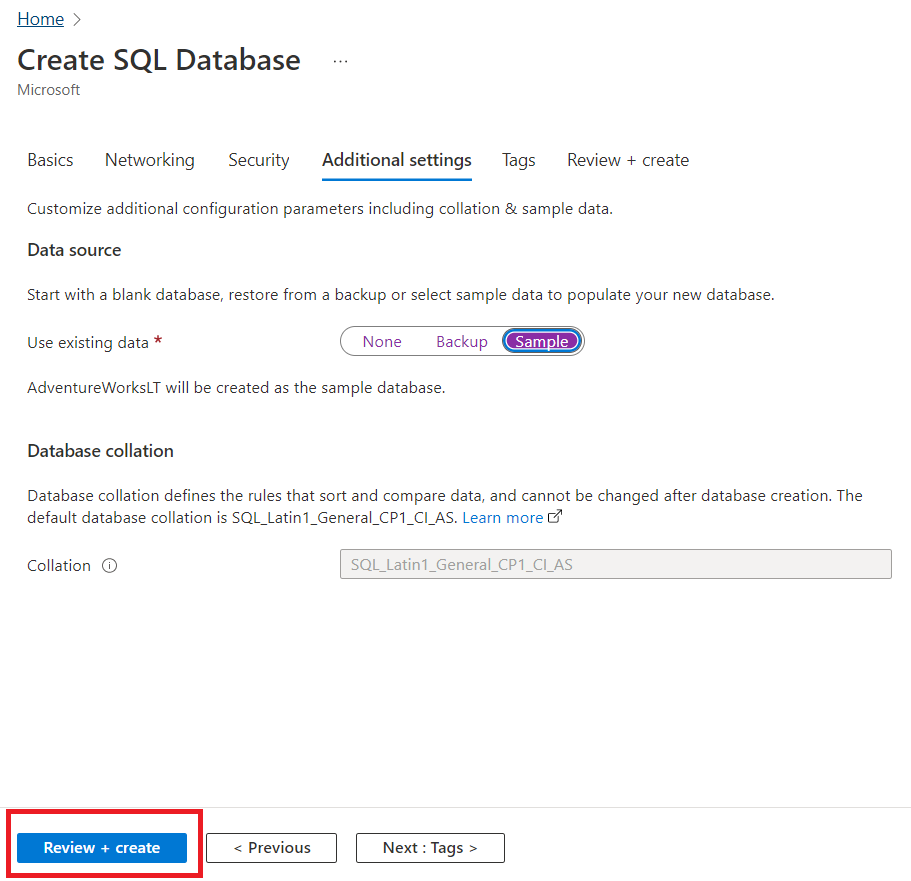
Now, go to "Additional settings" and select the "Sample" option for "Use existing data" and click on "OK" if asked.
Now, click on "Review + create" option.
Click on the "Create" button.

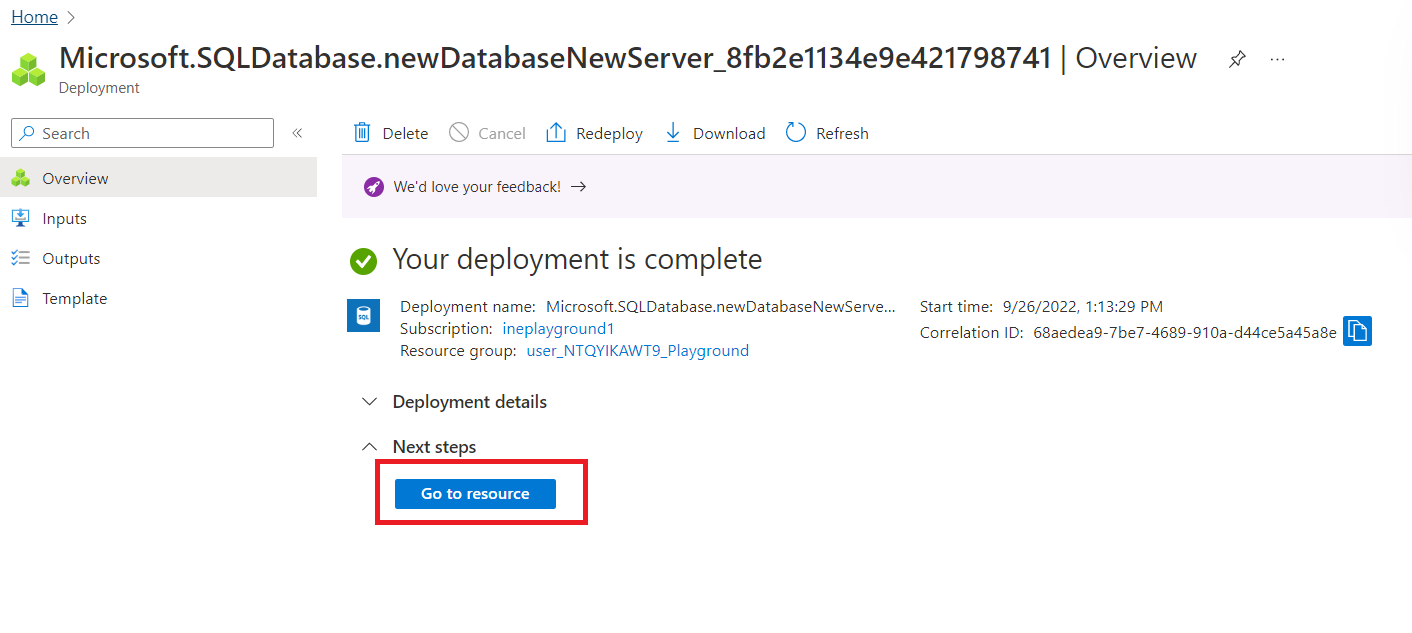
Wait for the resources to get deployed and after deployment is complete, click on the "Go to resources" option to view the resources.
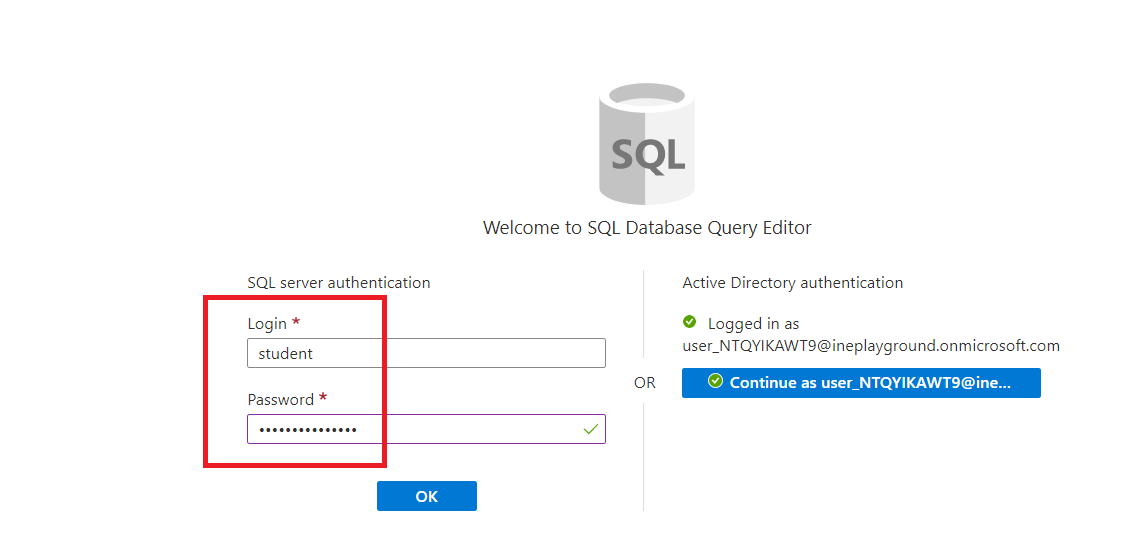
Inside the search-box, type "query editor" and select "Query editor" option.

Here, provide the login credentials that we saved previously (e.g., "student" and "$trongPasswd123" as login id and password, respectively).
Now inside the editor, write down a query given below and click on the "Run" button.
SELECT CompanyName FROM [SalesLT].[Customer];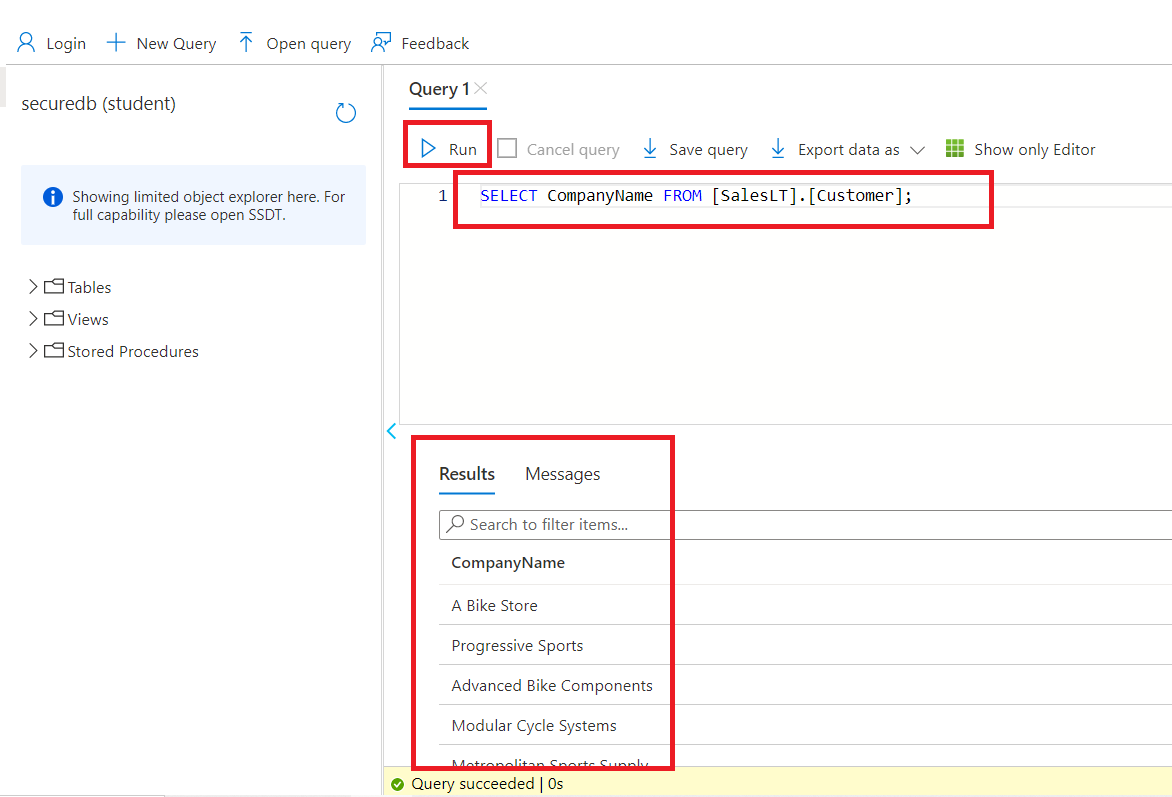
You successfully got the result from the above query.