Objective : In this task you will provision a web app and provision an application gateway with web application firewall to protect it. You will configure the web app to only allow traffic from the virtual network associated with the application gateway.
Note: For this task, you will actually degrade the direct security on the web app. You will not require HTTPS. This is to allow the system to work without deploying a certificate to the application gateway. In a production system you should absolutely use certificates, but certificate generation is well outside the scope of this task.
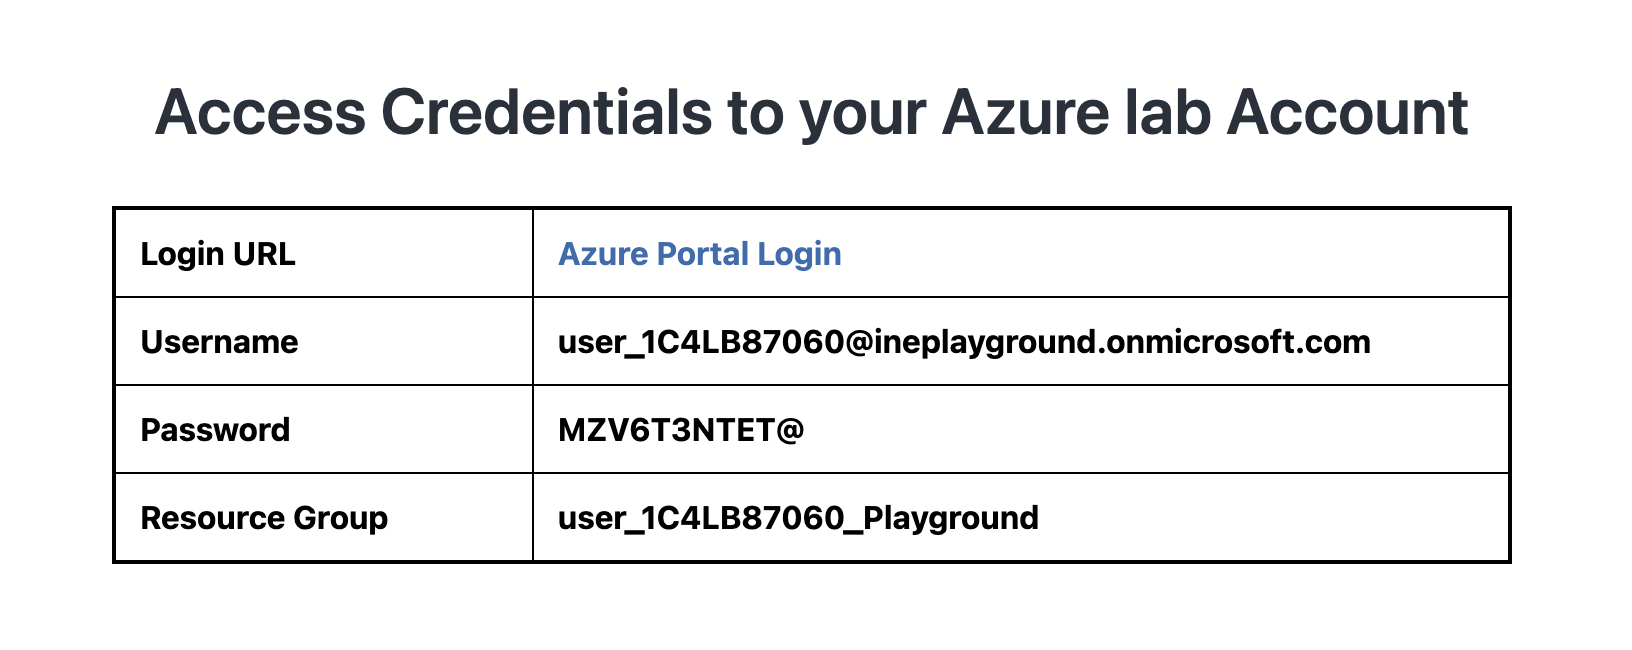
1. Start the lab, agree after reading terms and conditions and check the credentials/URL provided on the page.
2. Open the Login URL link in incognito (Right click on the URL and select Open Link in Incognito Window option).
The URL will take you to the Azure Portal login page. Use the provided username and password to login into it.
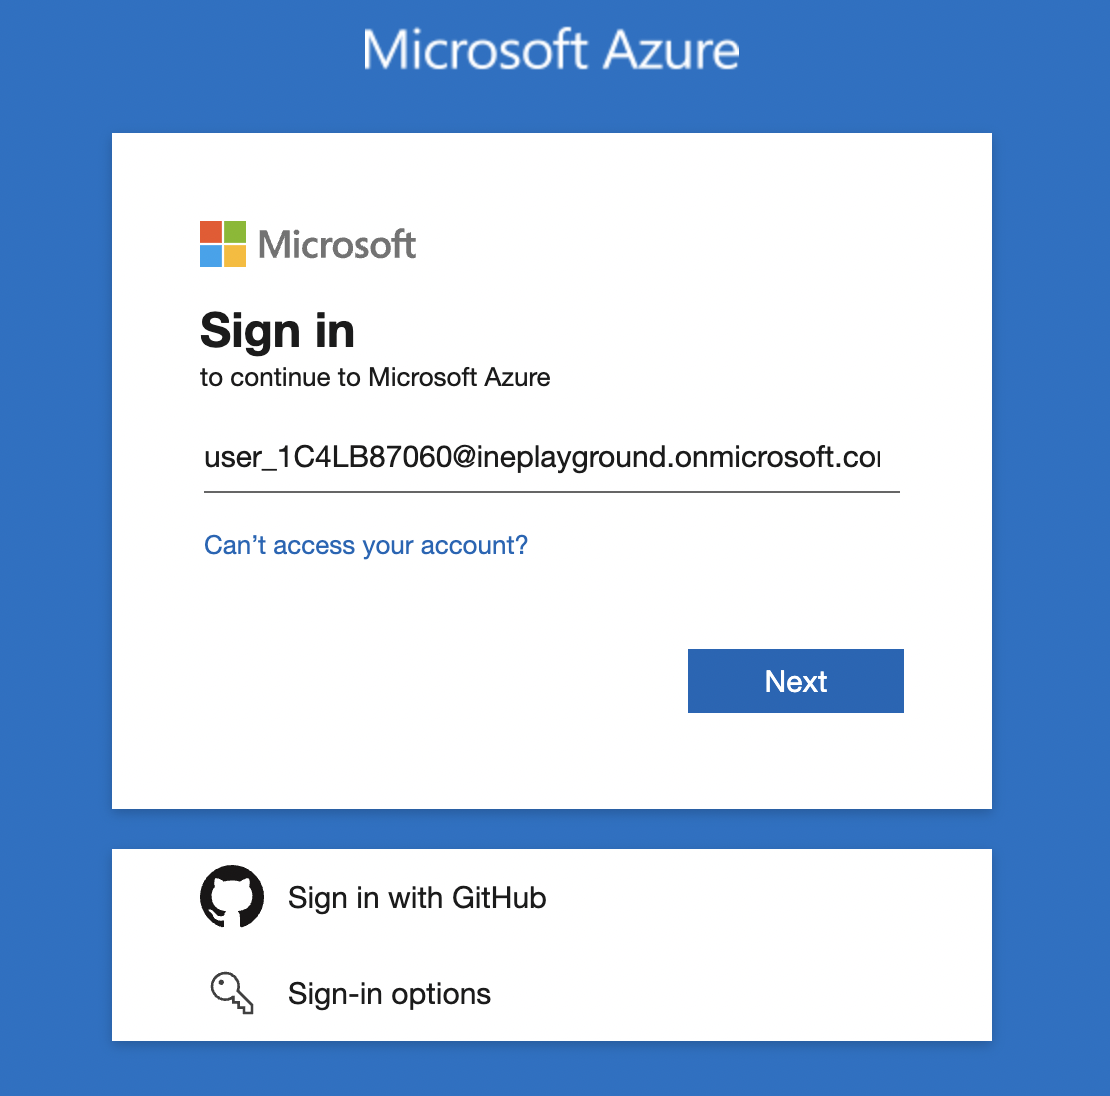
Enter password

The Azure portal dashboard should be available to you along with the empty Resource Group.

You need to provision a web app.
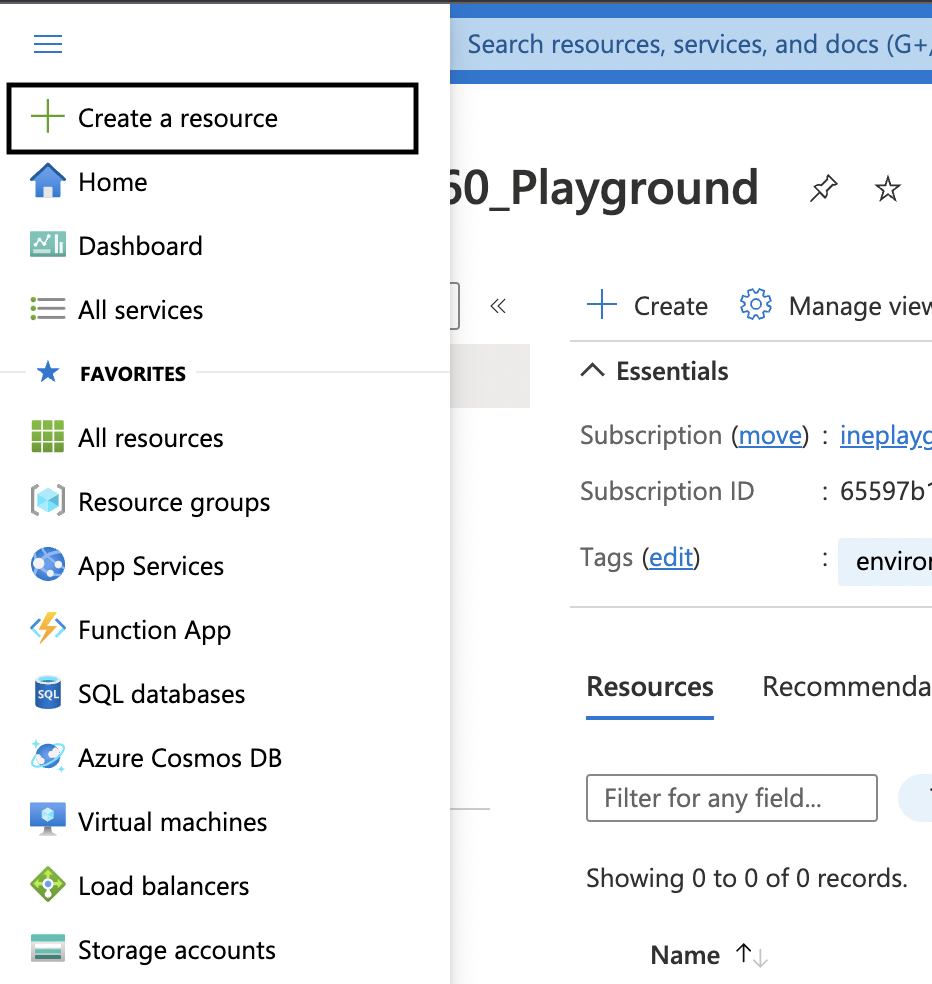
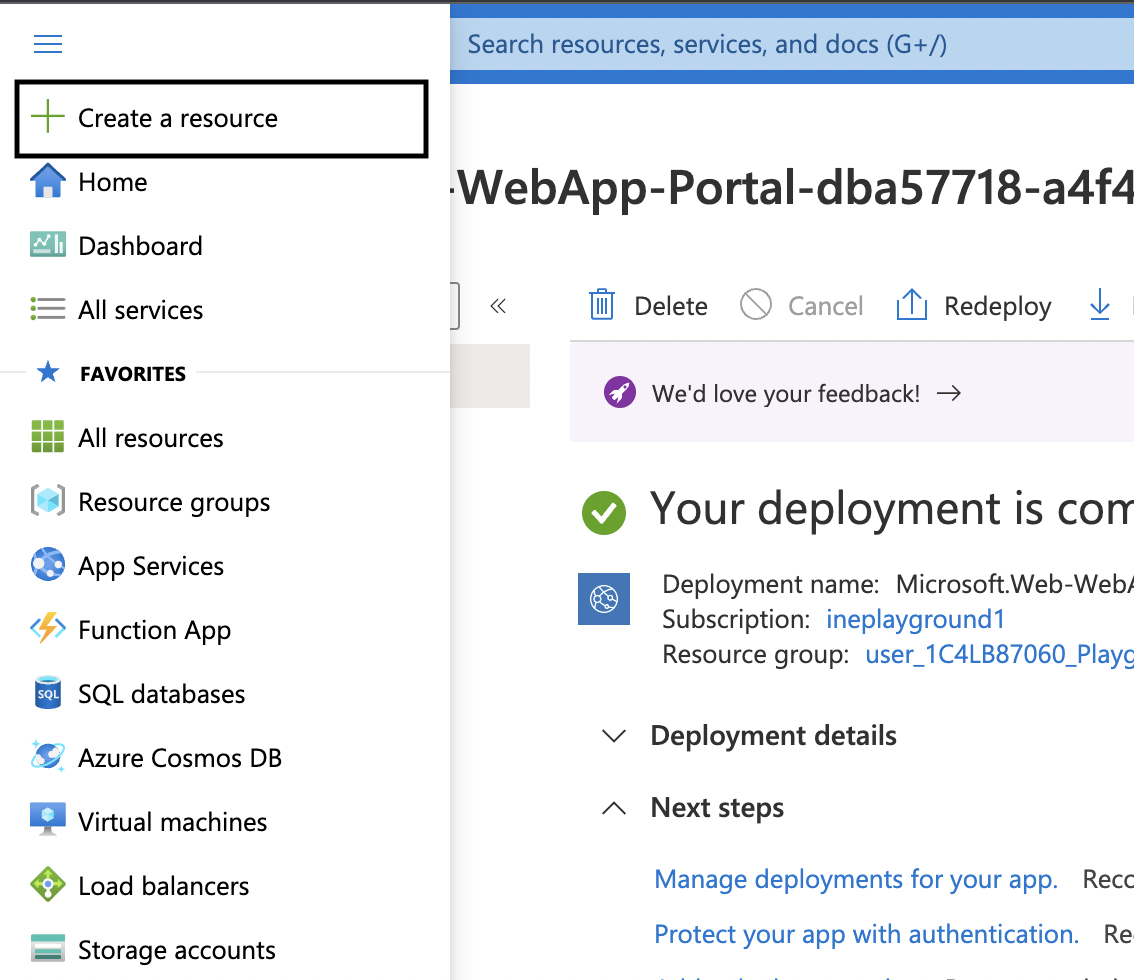
1. Click on the hamburger icon on the top left corner to open up the menu. Now, click on Create a resource.
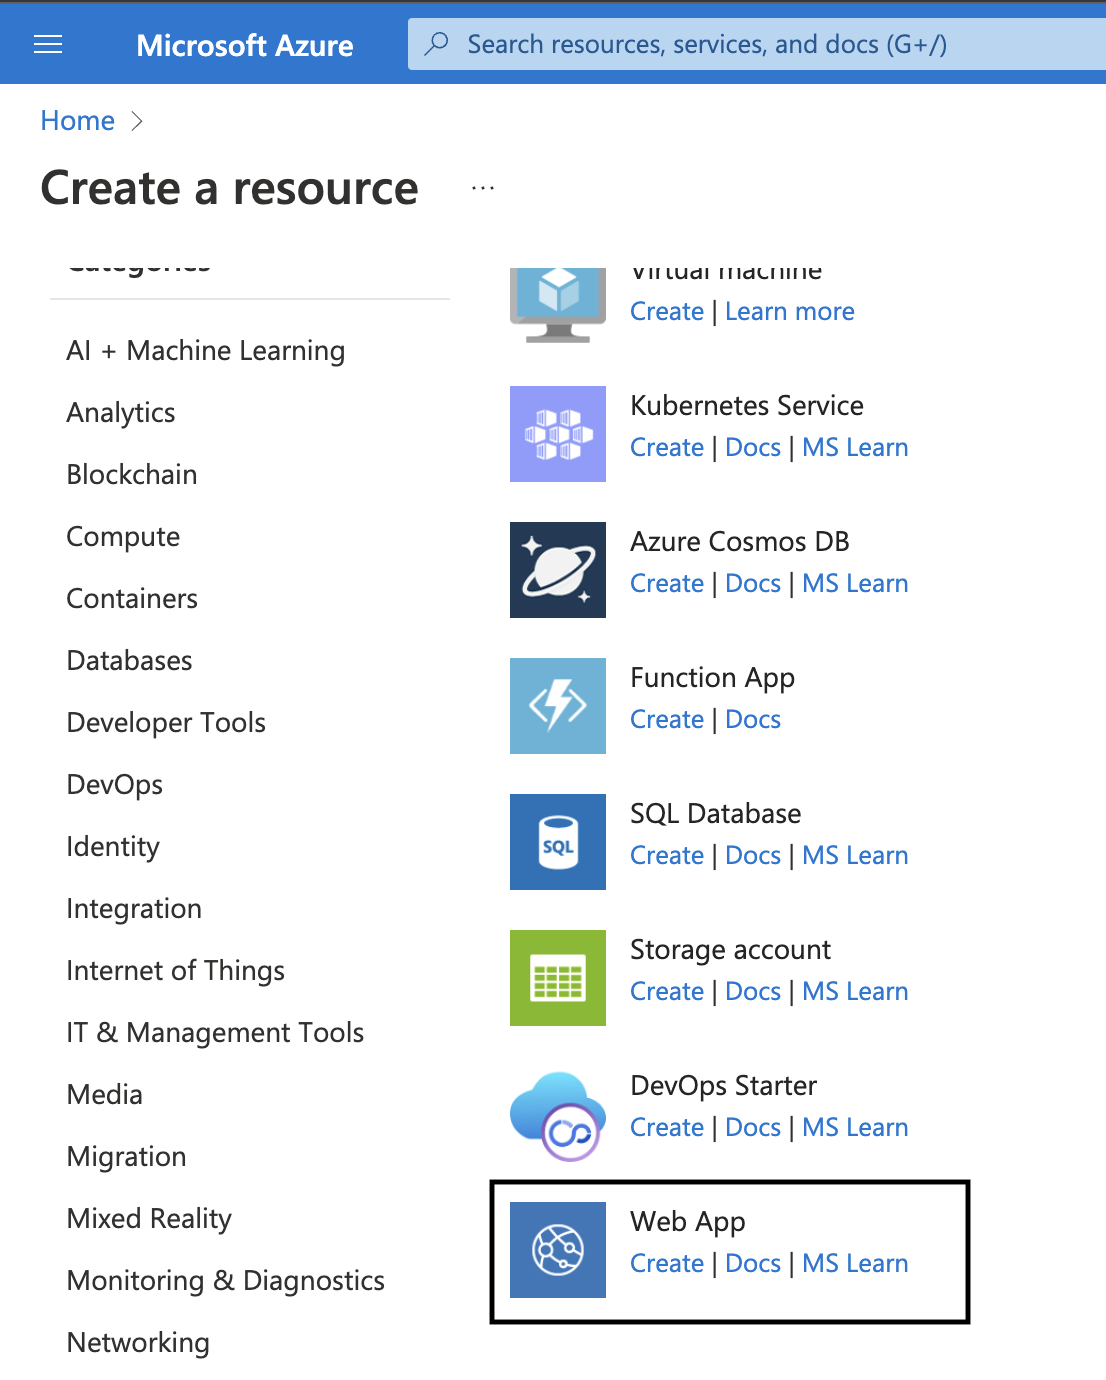
2. Navigate to Web App and click on it.
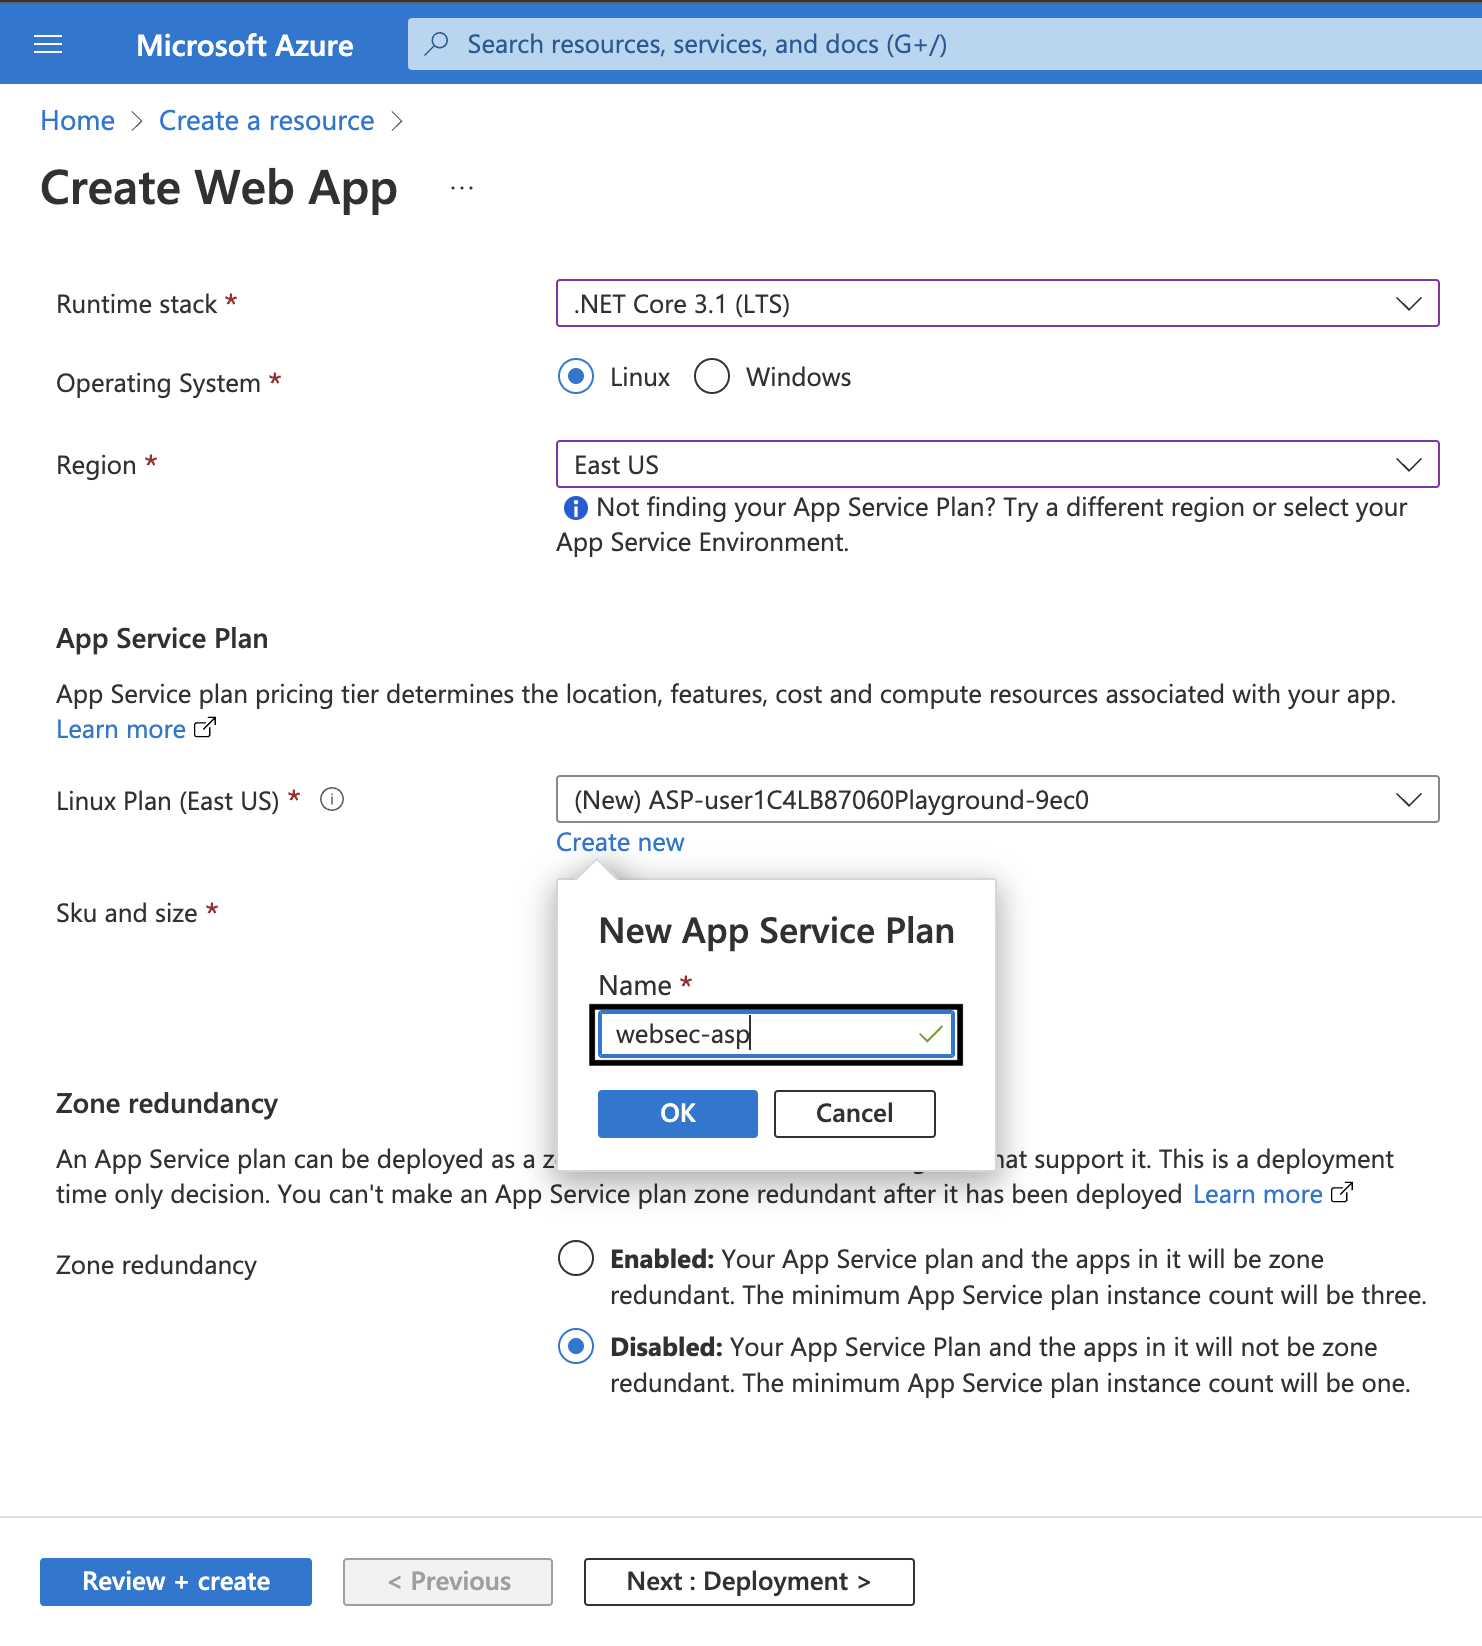
3. Now, fill in the required details. Use the following settings:

4. Scroll down. For Linux Plan click on Create new. Give it a name like websec-asp and click on OK.
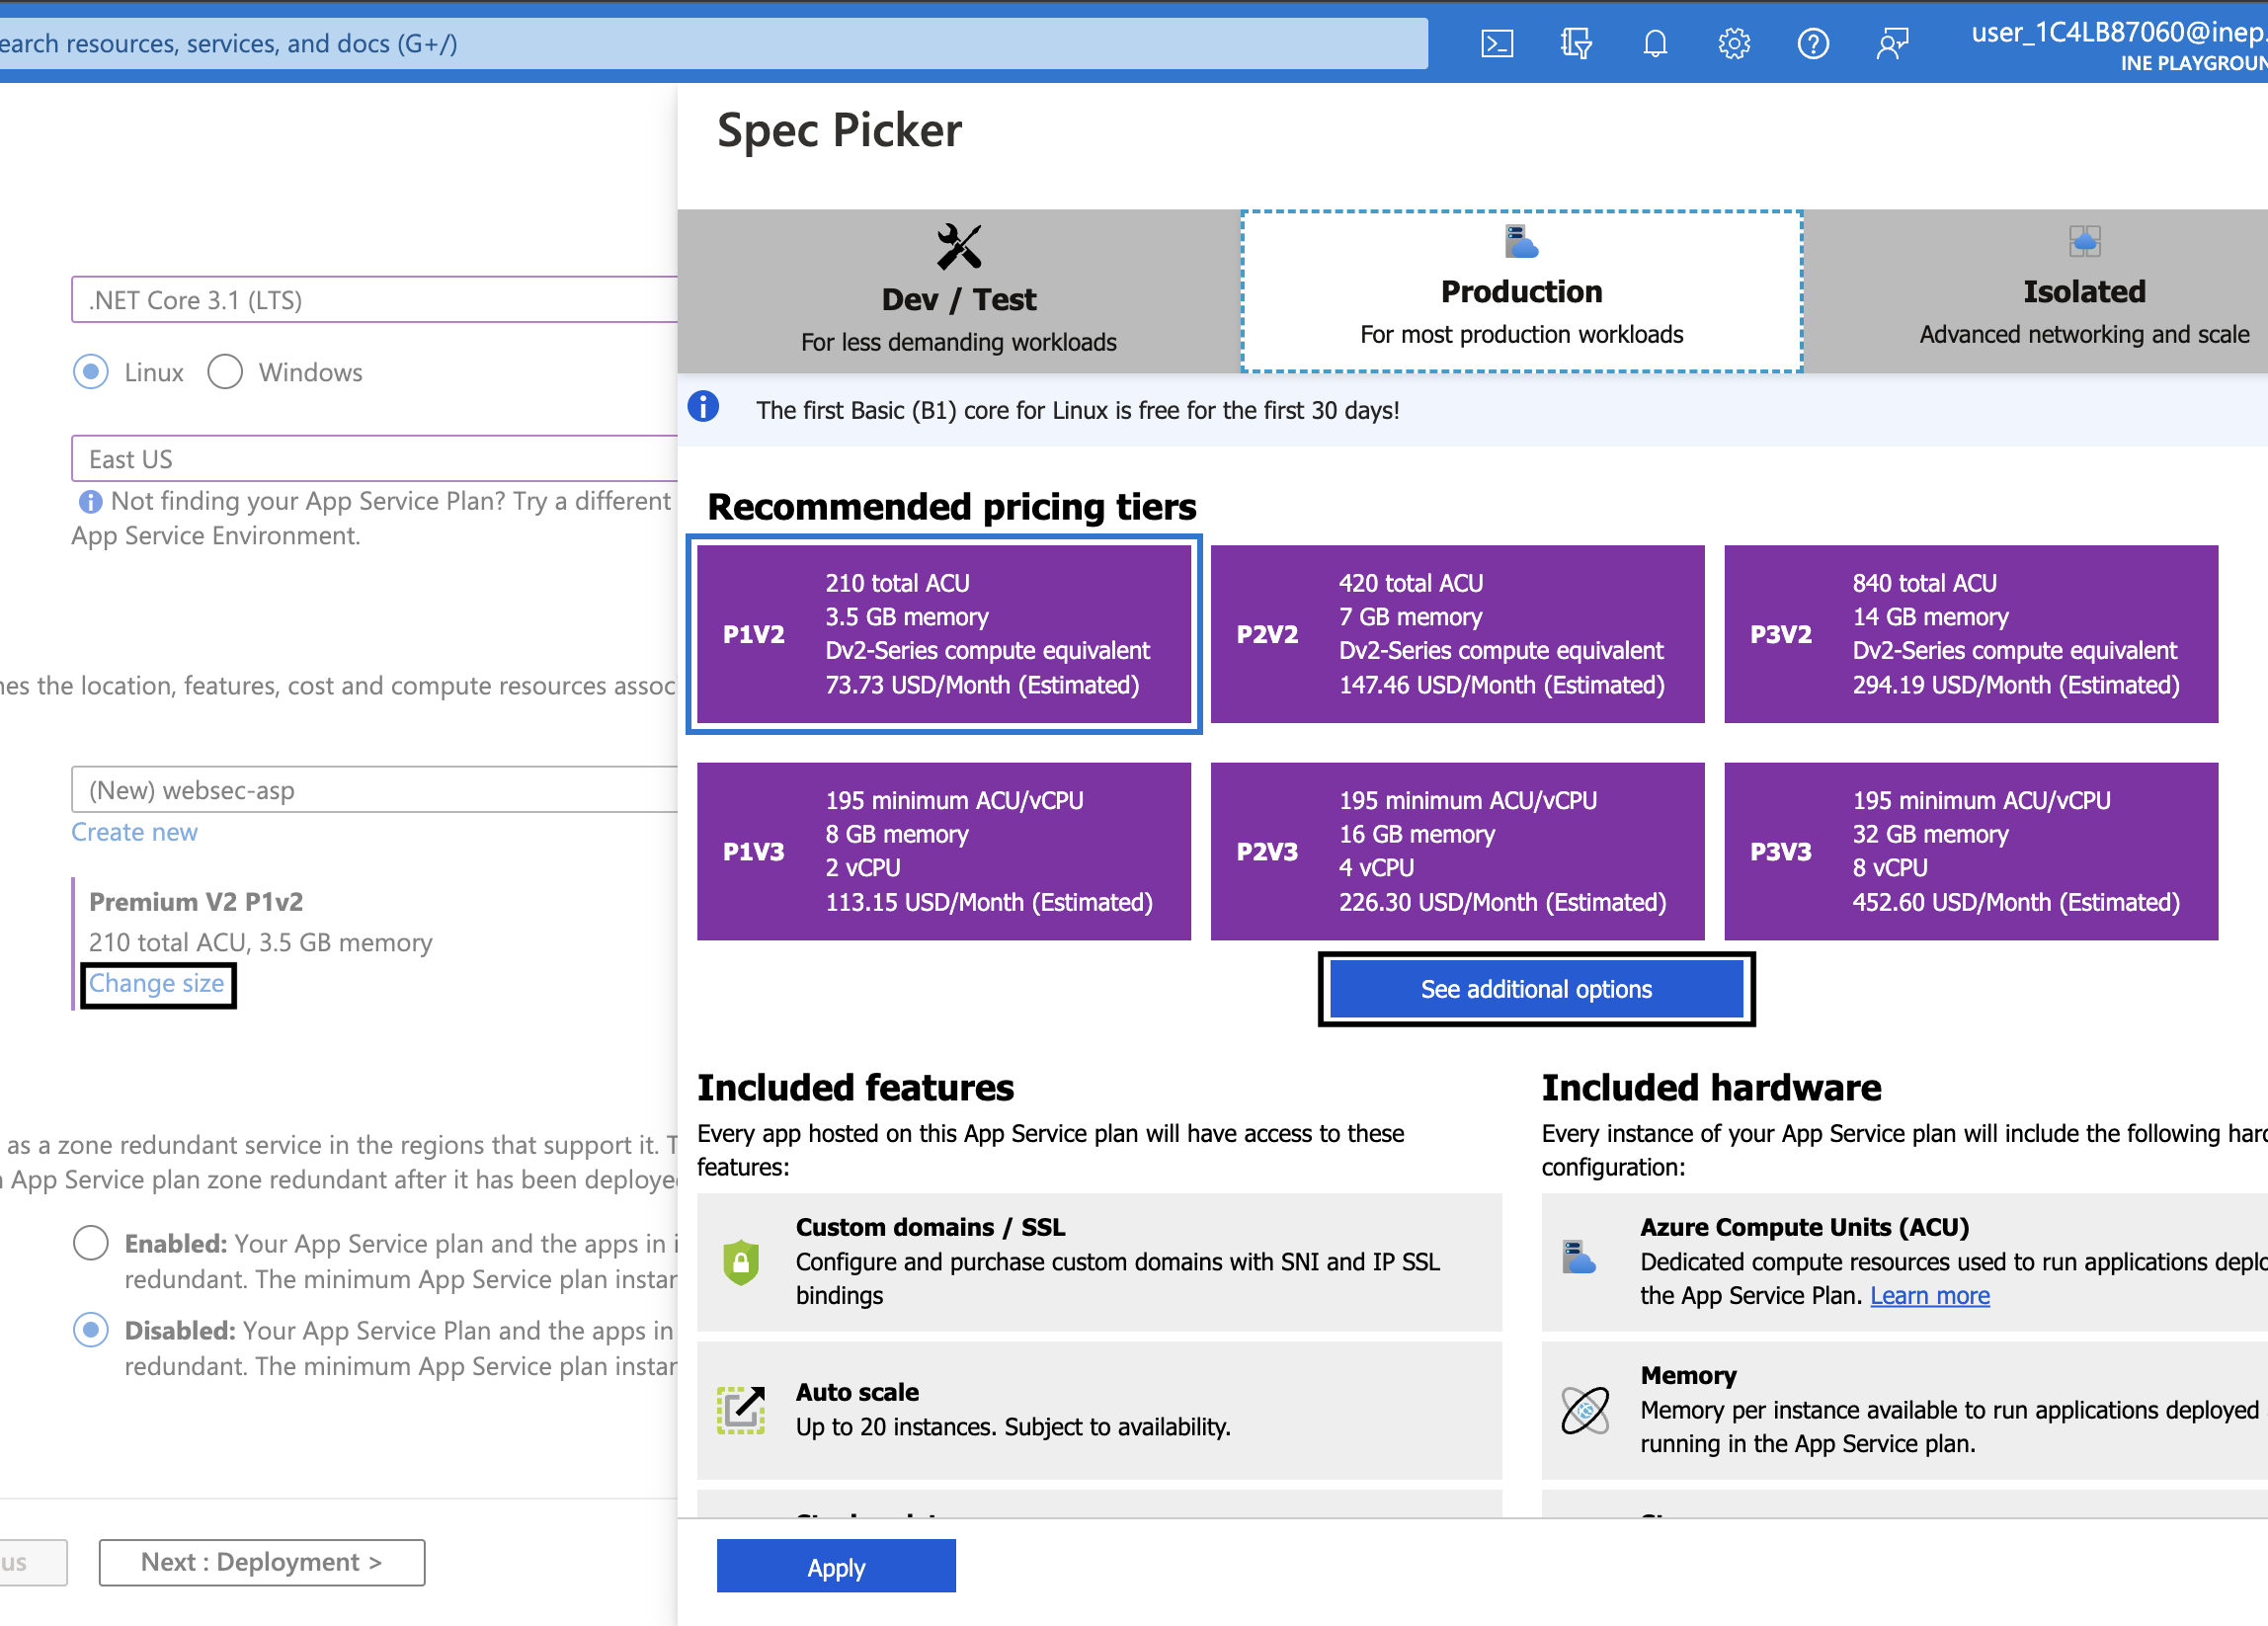
5. For Sku and size, click on Change size. On the Spec Picker page and under Production tab, click on See additional options.
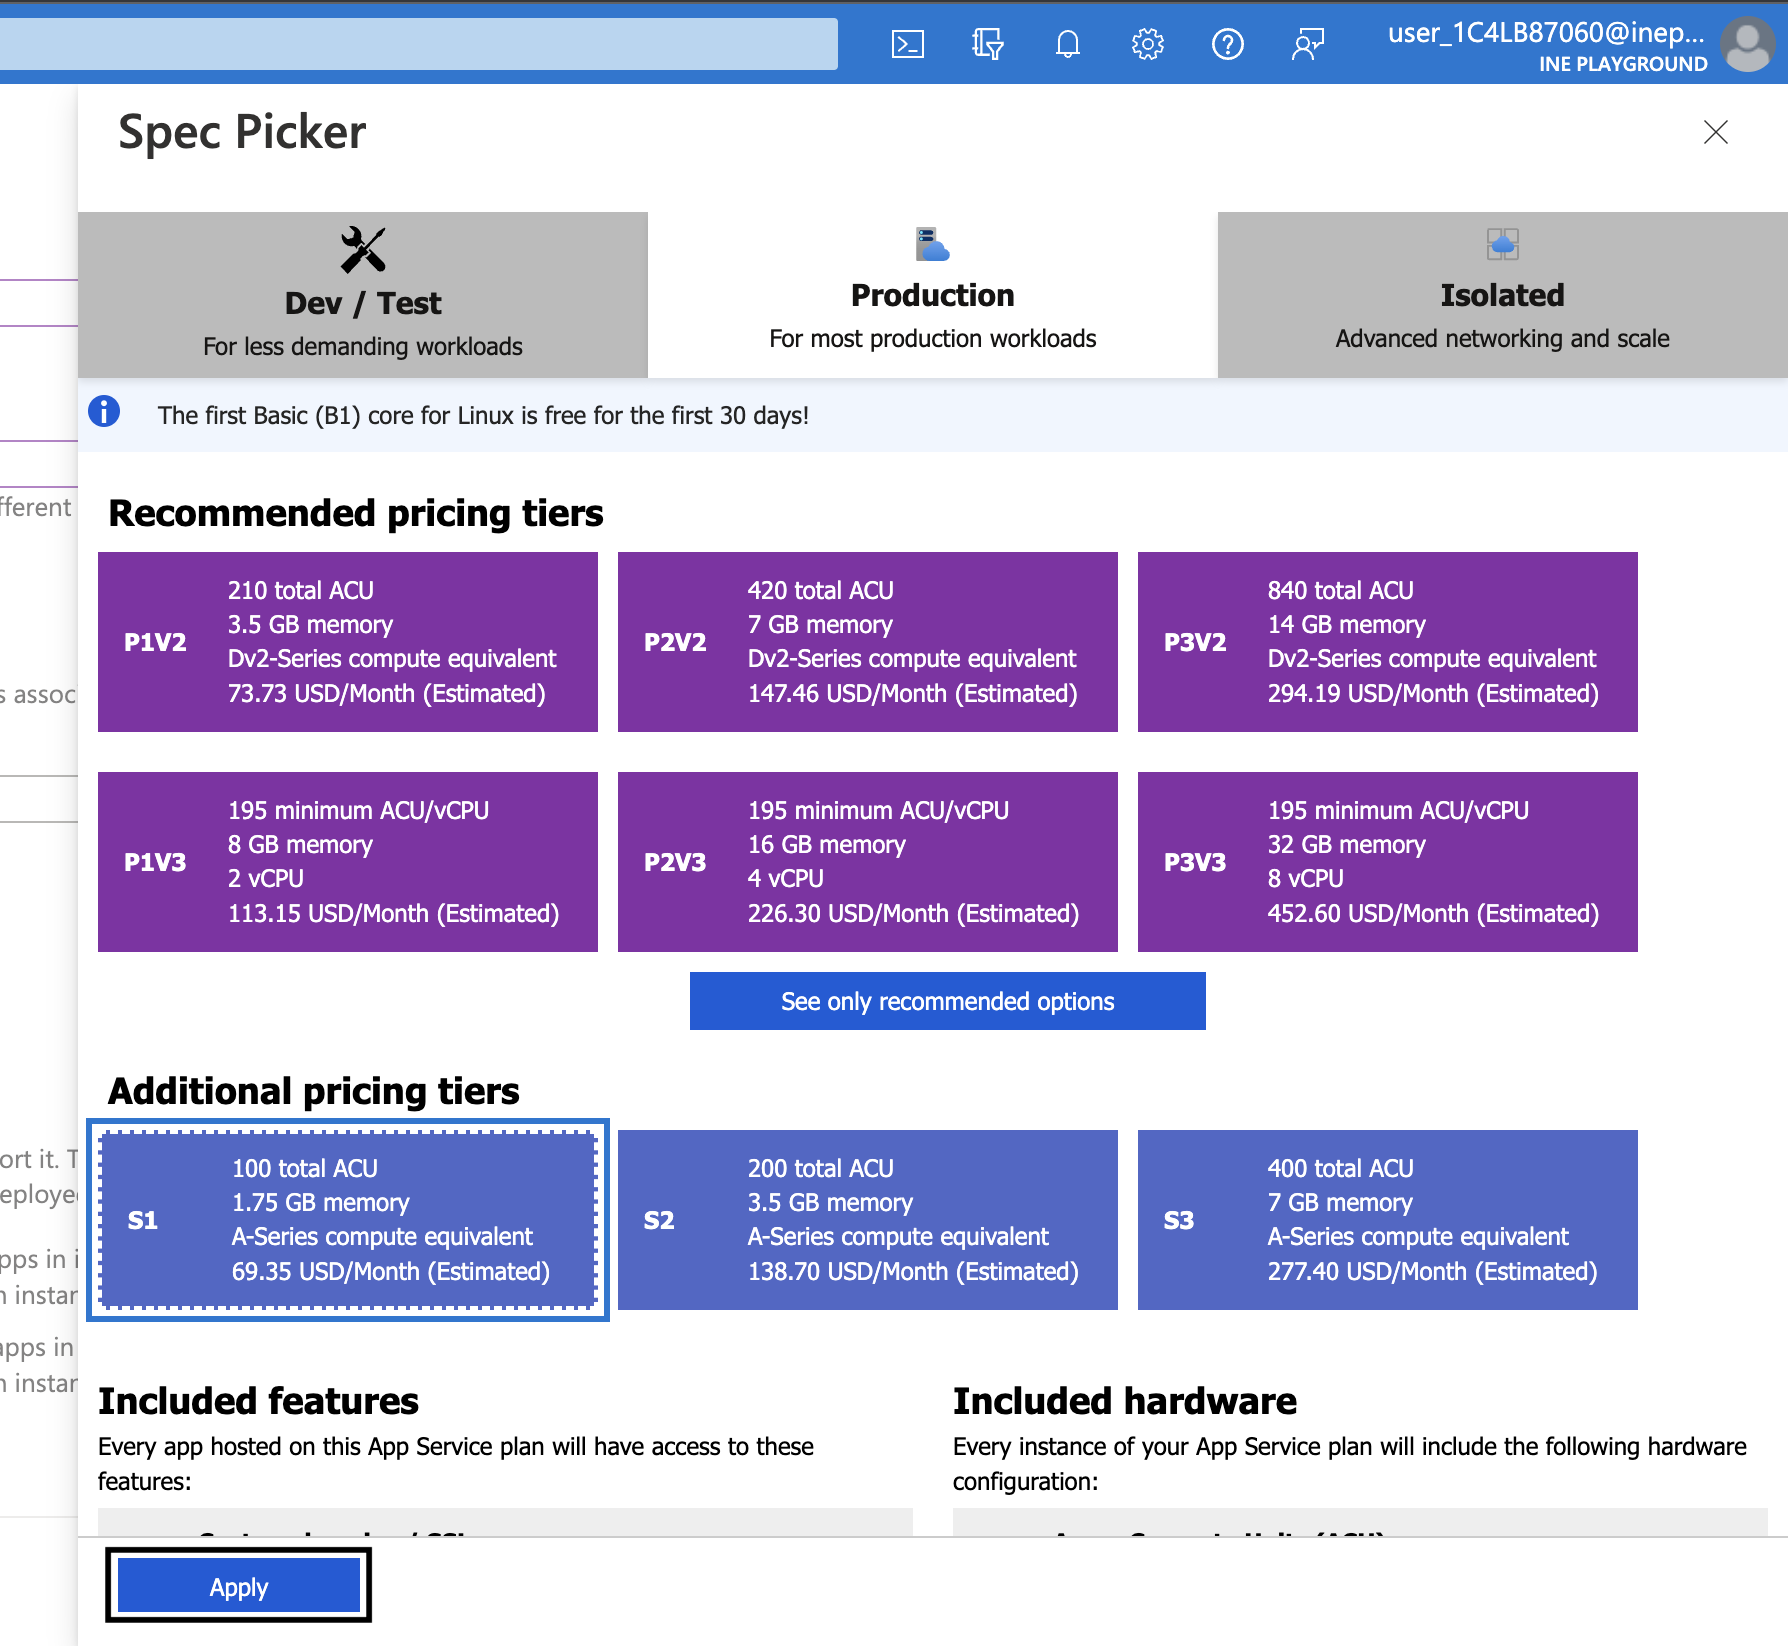
6. Select S1 and click on Apply.
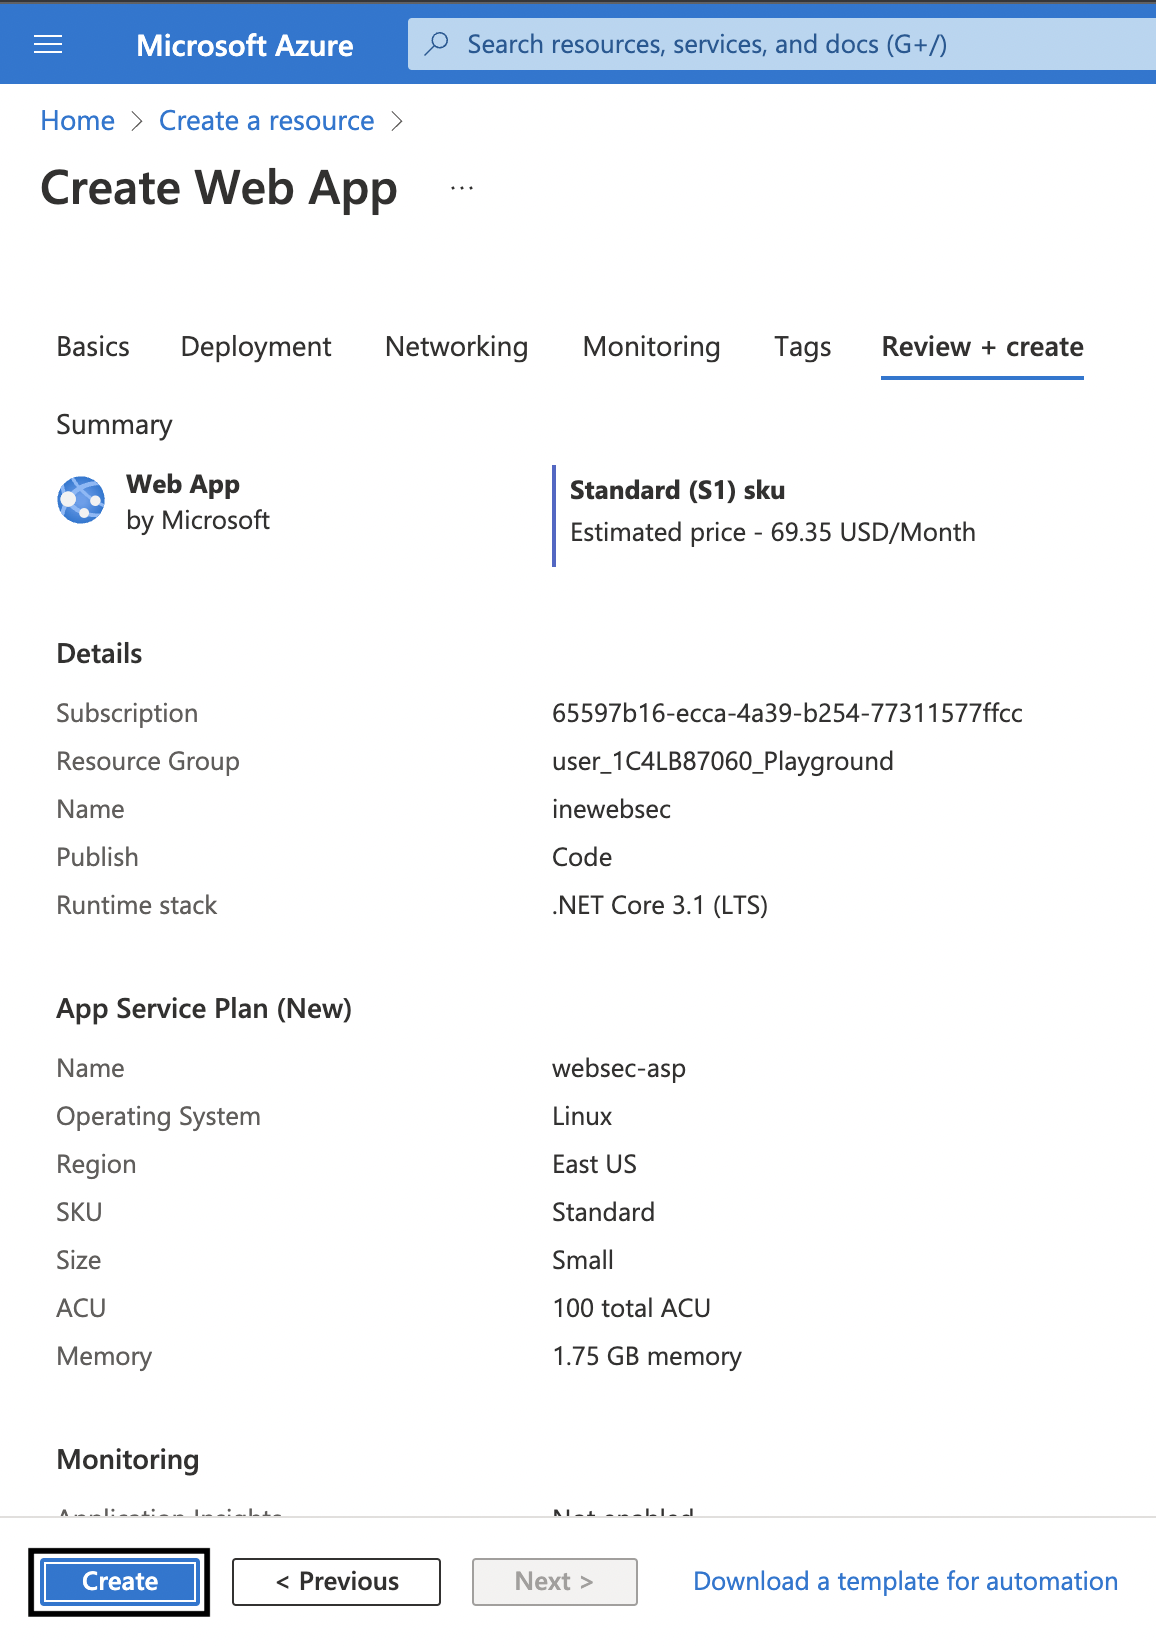
7. Use defaults for all other settings and directly click on Review + create. Review the details and then click on Create.
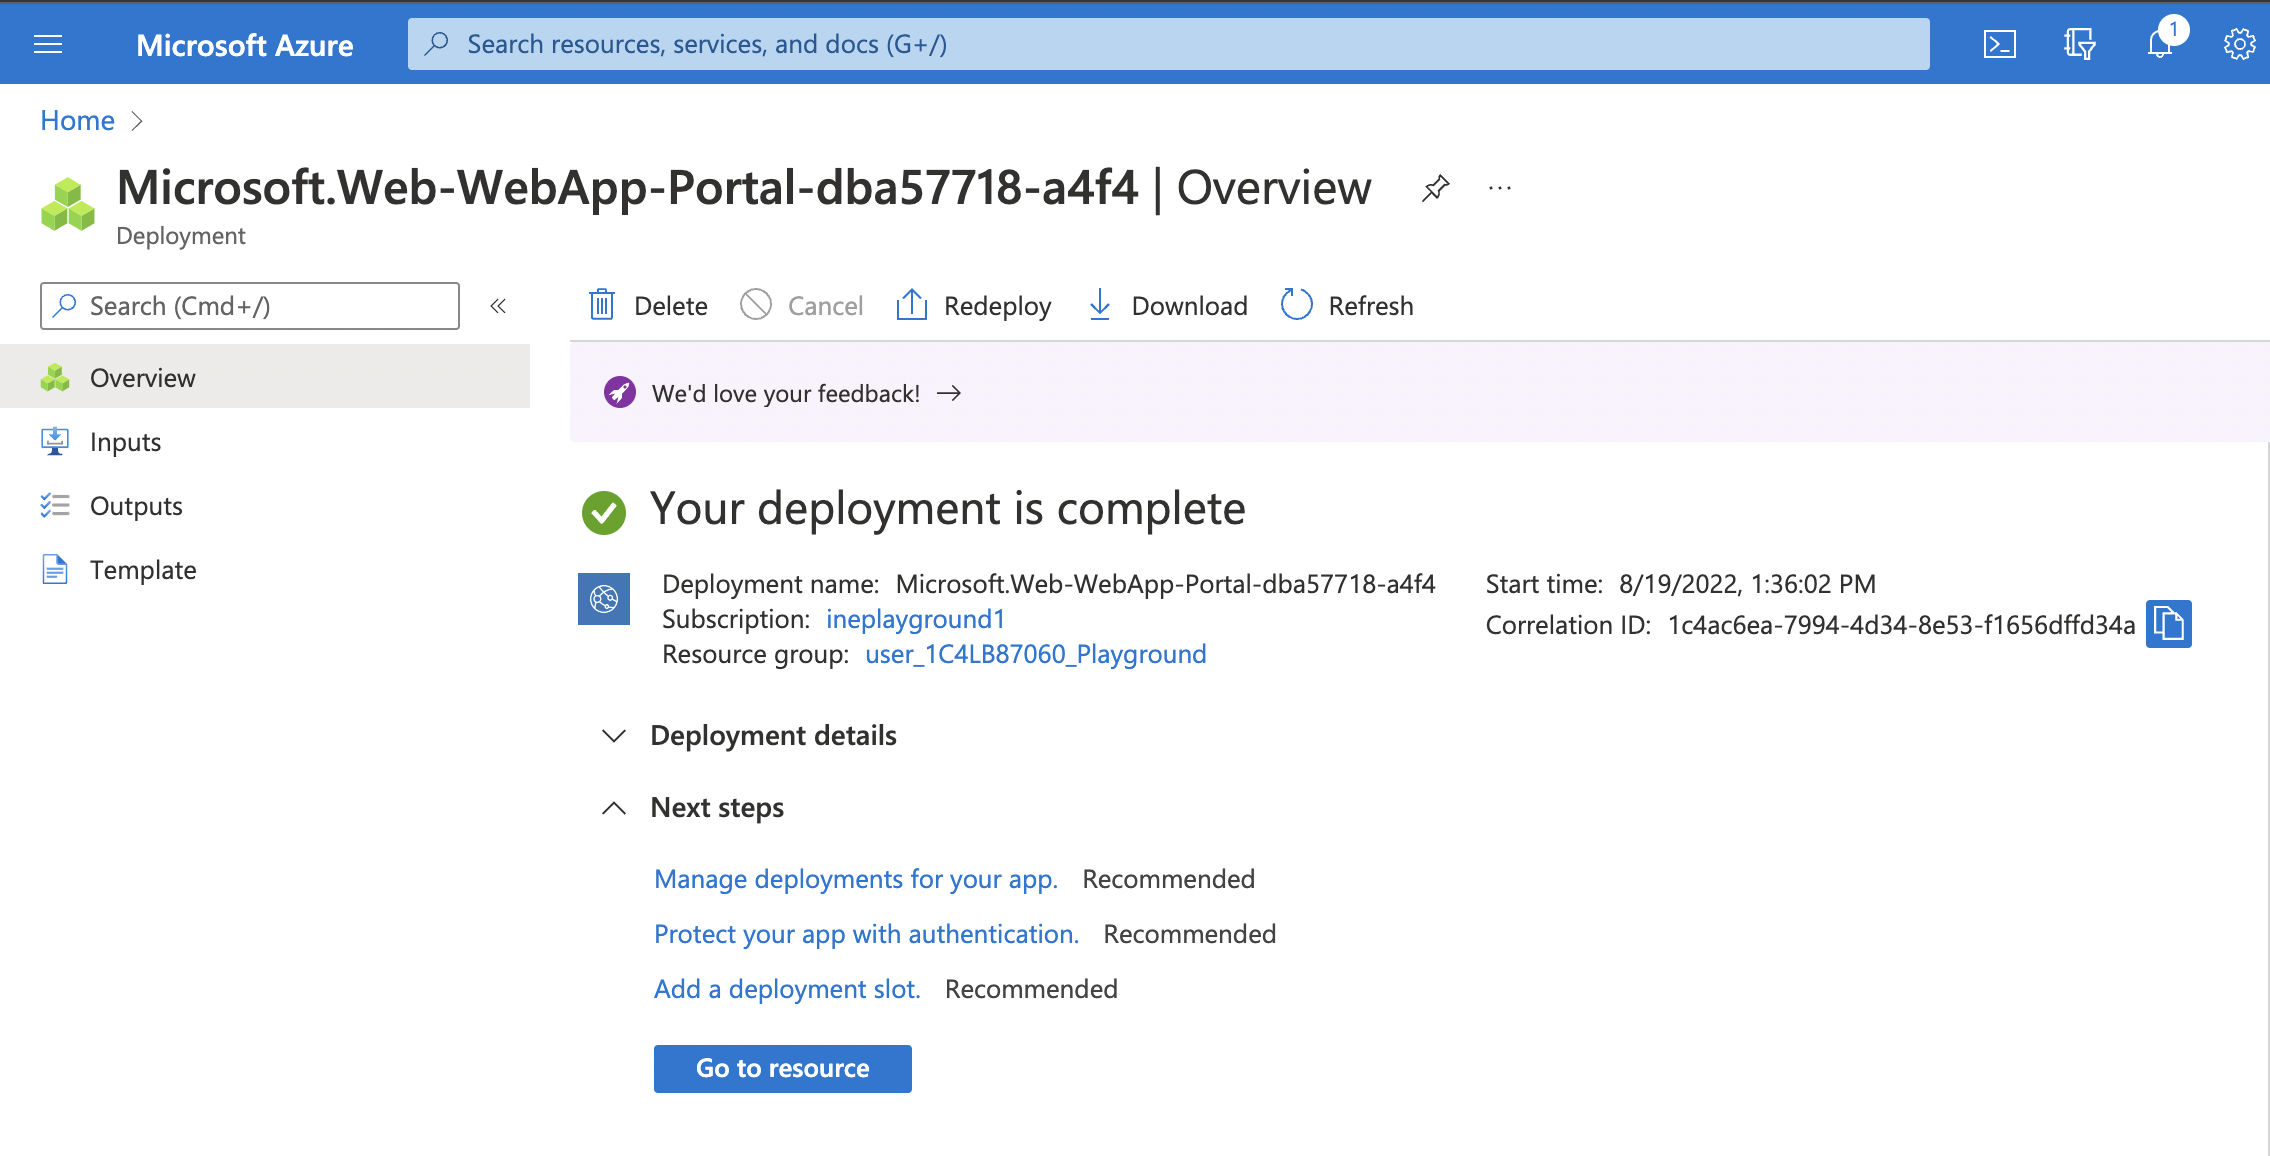
8. Once the deployment is complete, you will see the following.
You need to provision an application gateway with a web application firewall to protect the web app.
1. Click on the hamburger icon on the top left corner to open up the menu. Now, click on Create a resource.
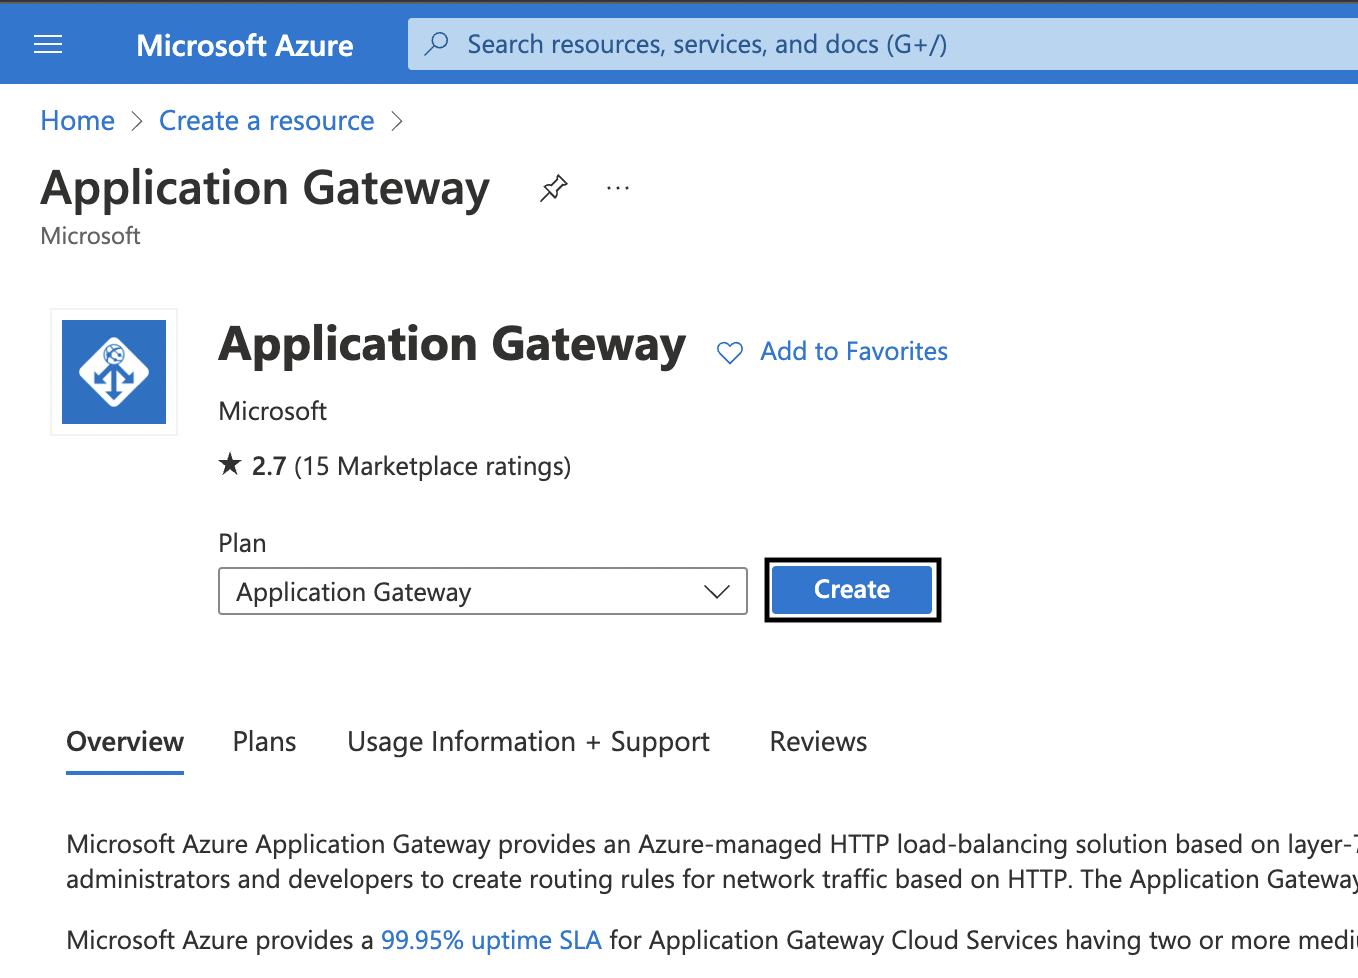
2. Search for Application Gateway and click on it.

3. In the following page, click on Create.
4. Now on the Basics tab, fill in the required details. Use the following settings:
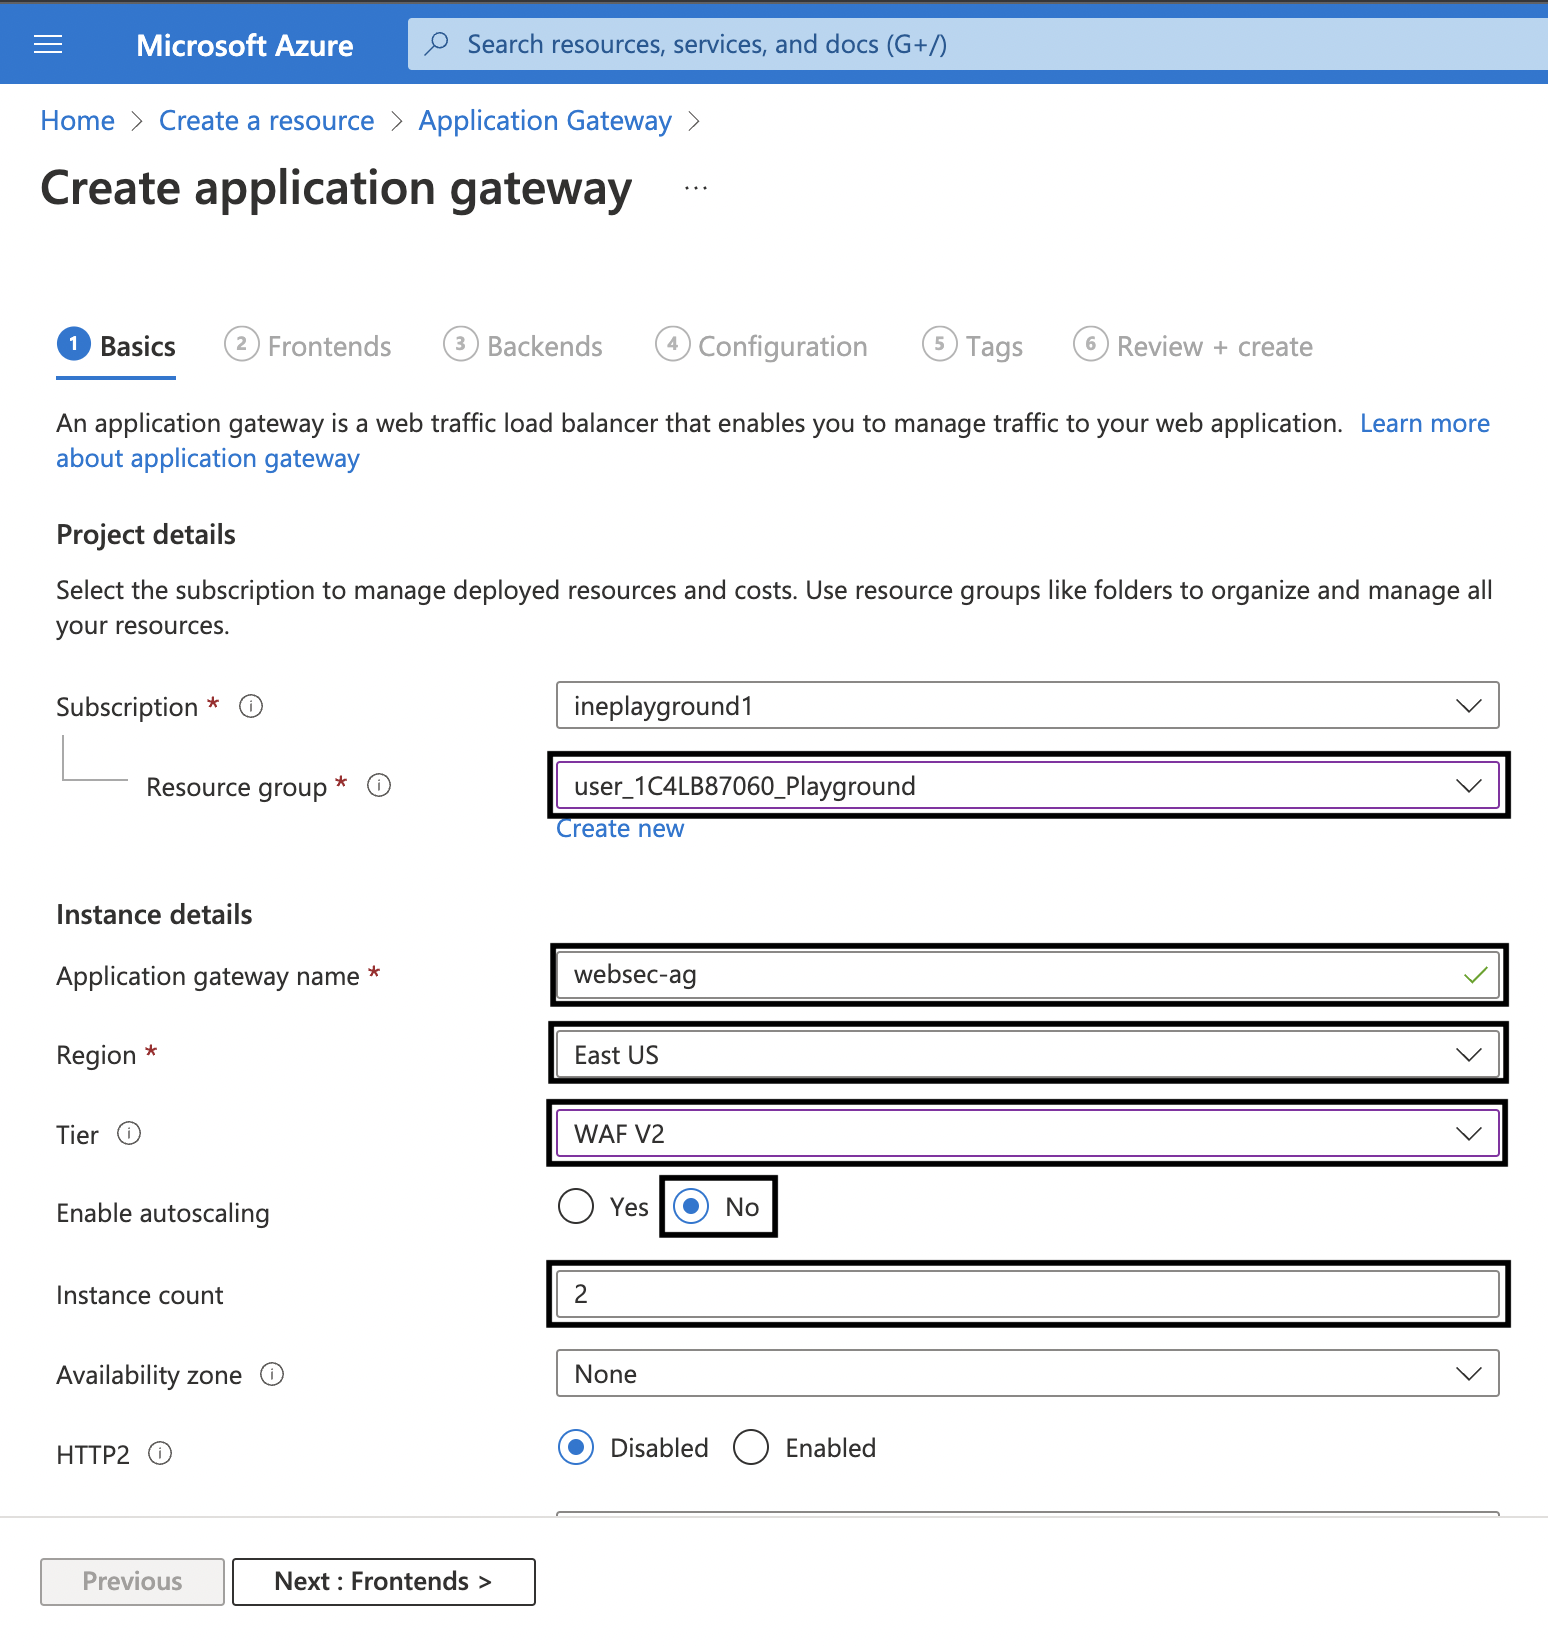
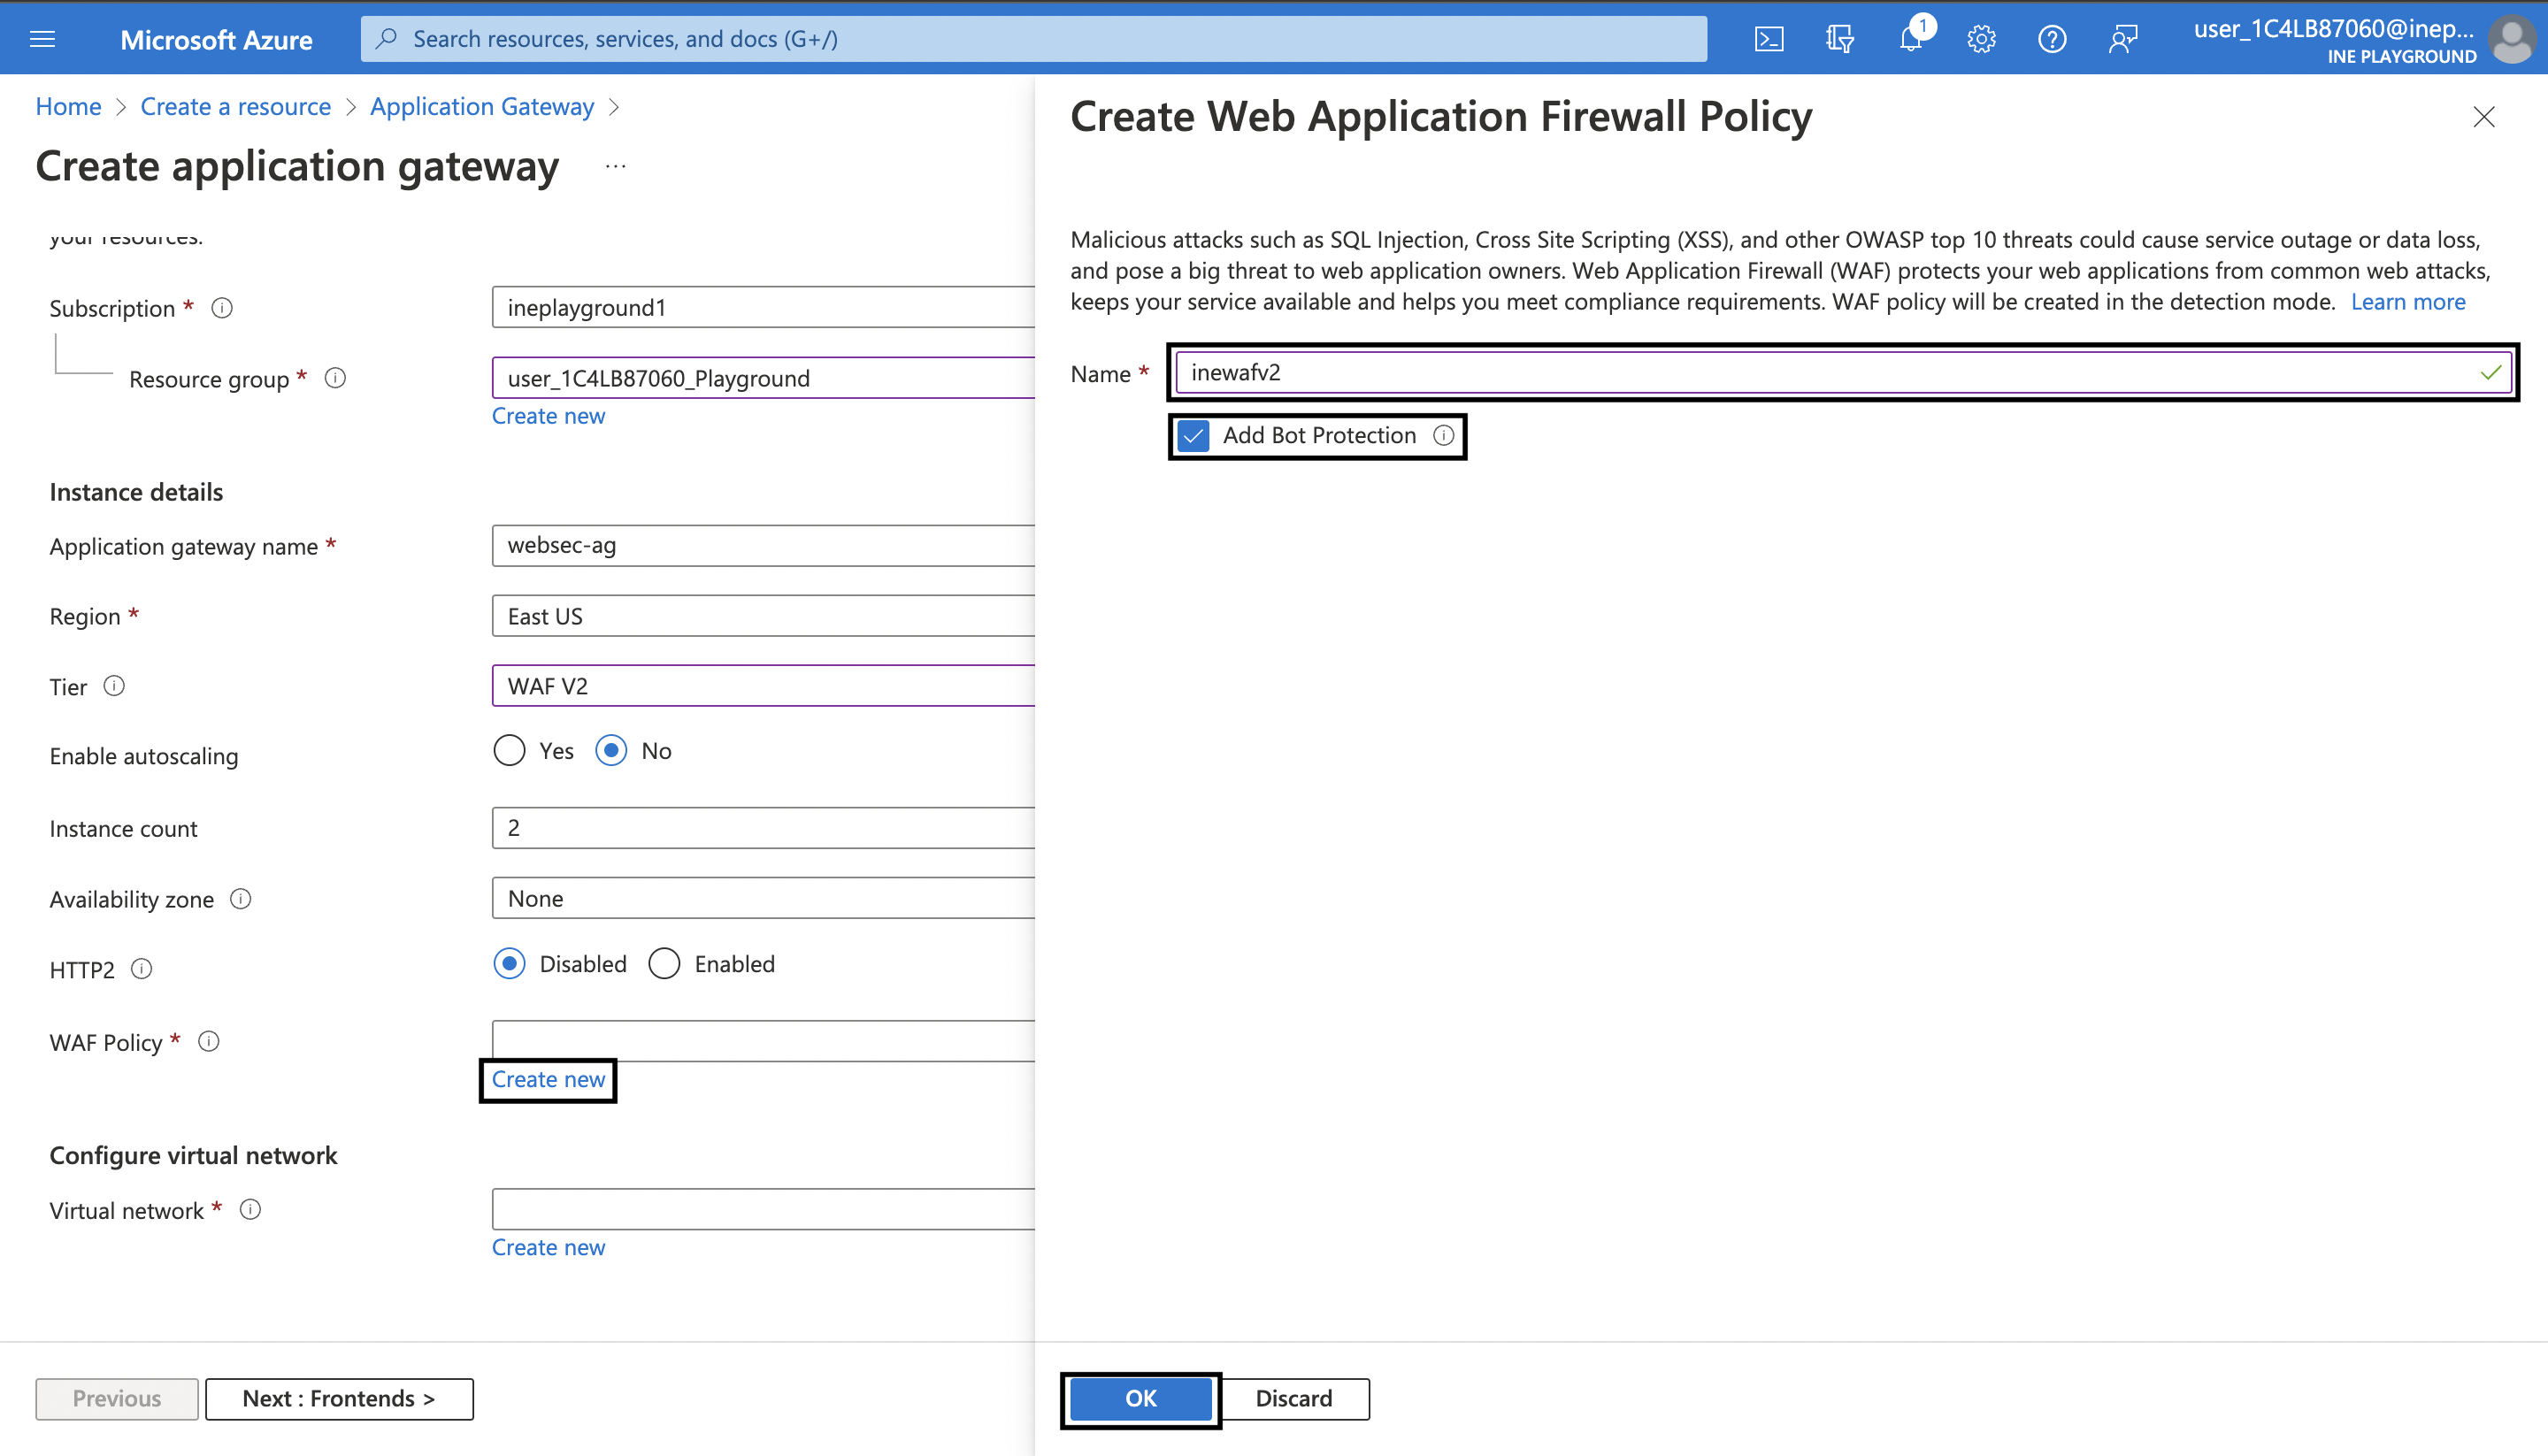
5. Scroll down. For WAF Policy click on Create new. On the blade that has opened, type a unique name say inewafv2. Click on Add Bot Protection checkbox and then click on OK.
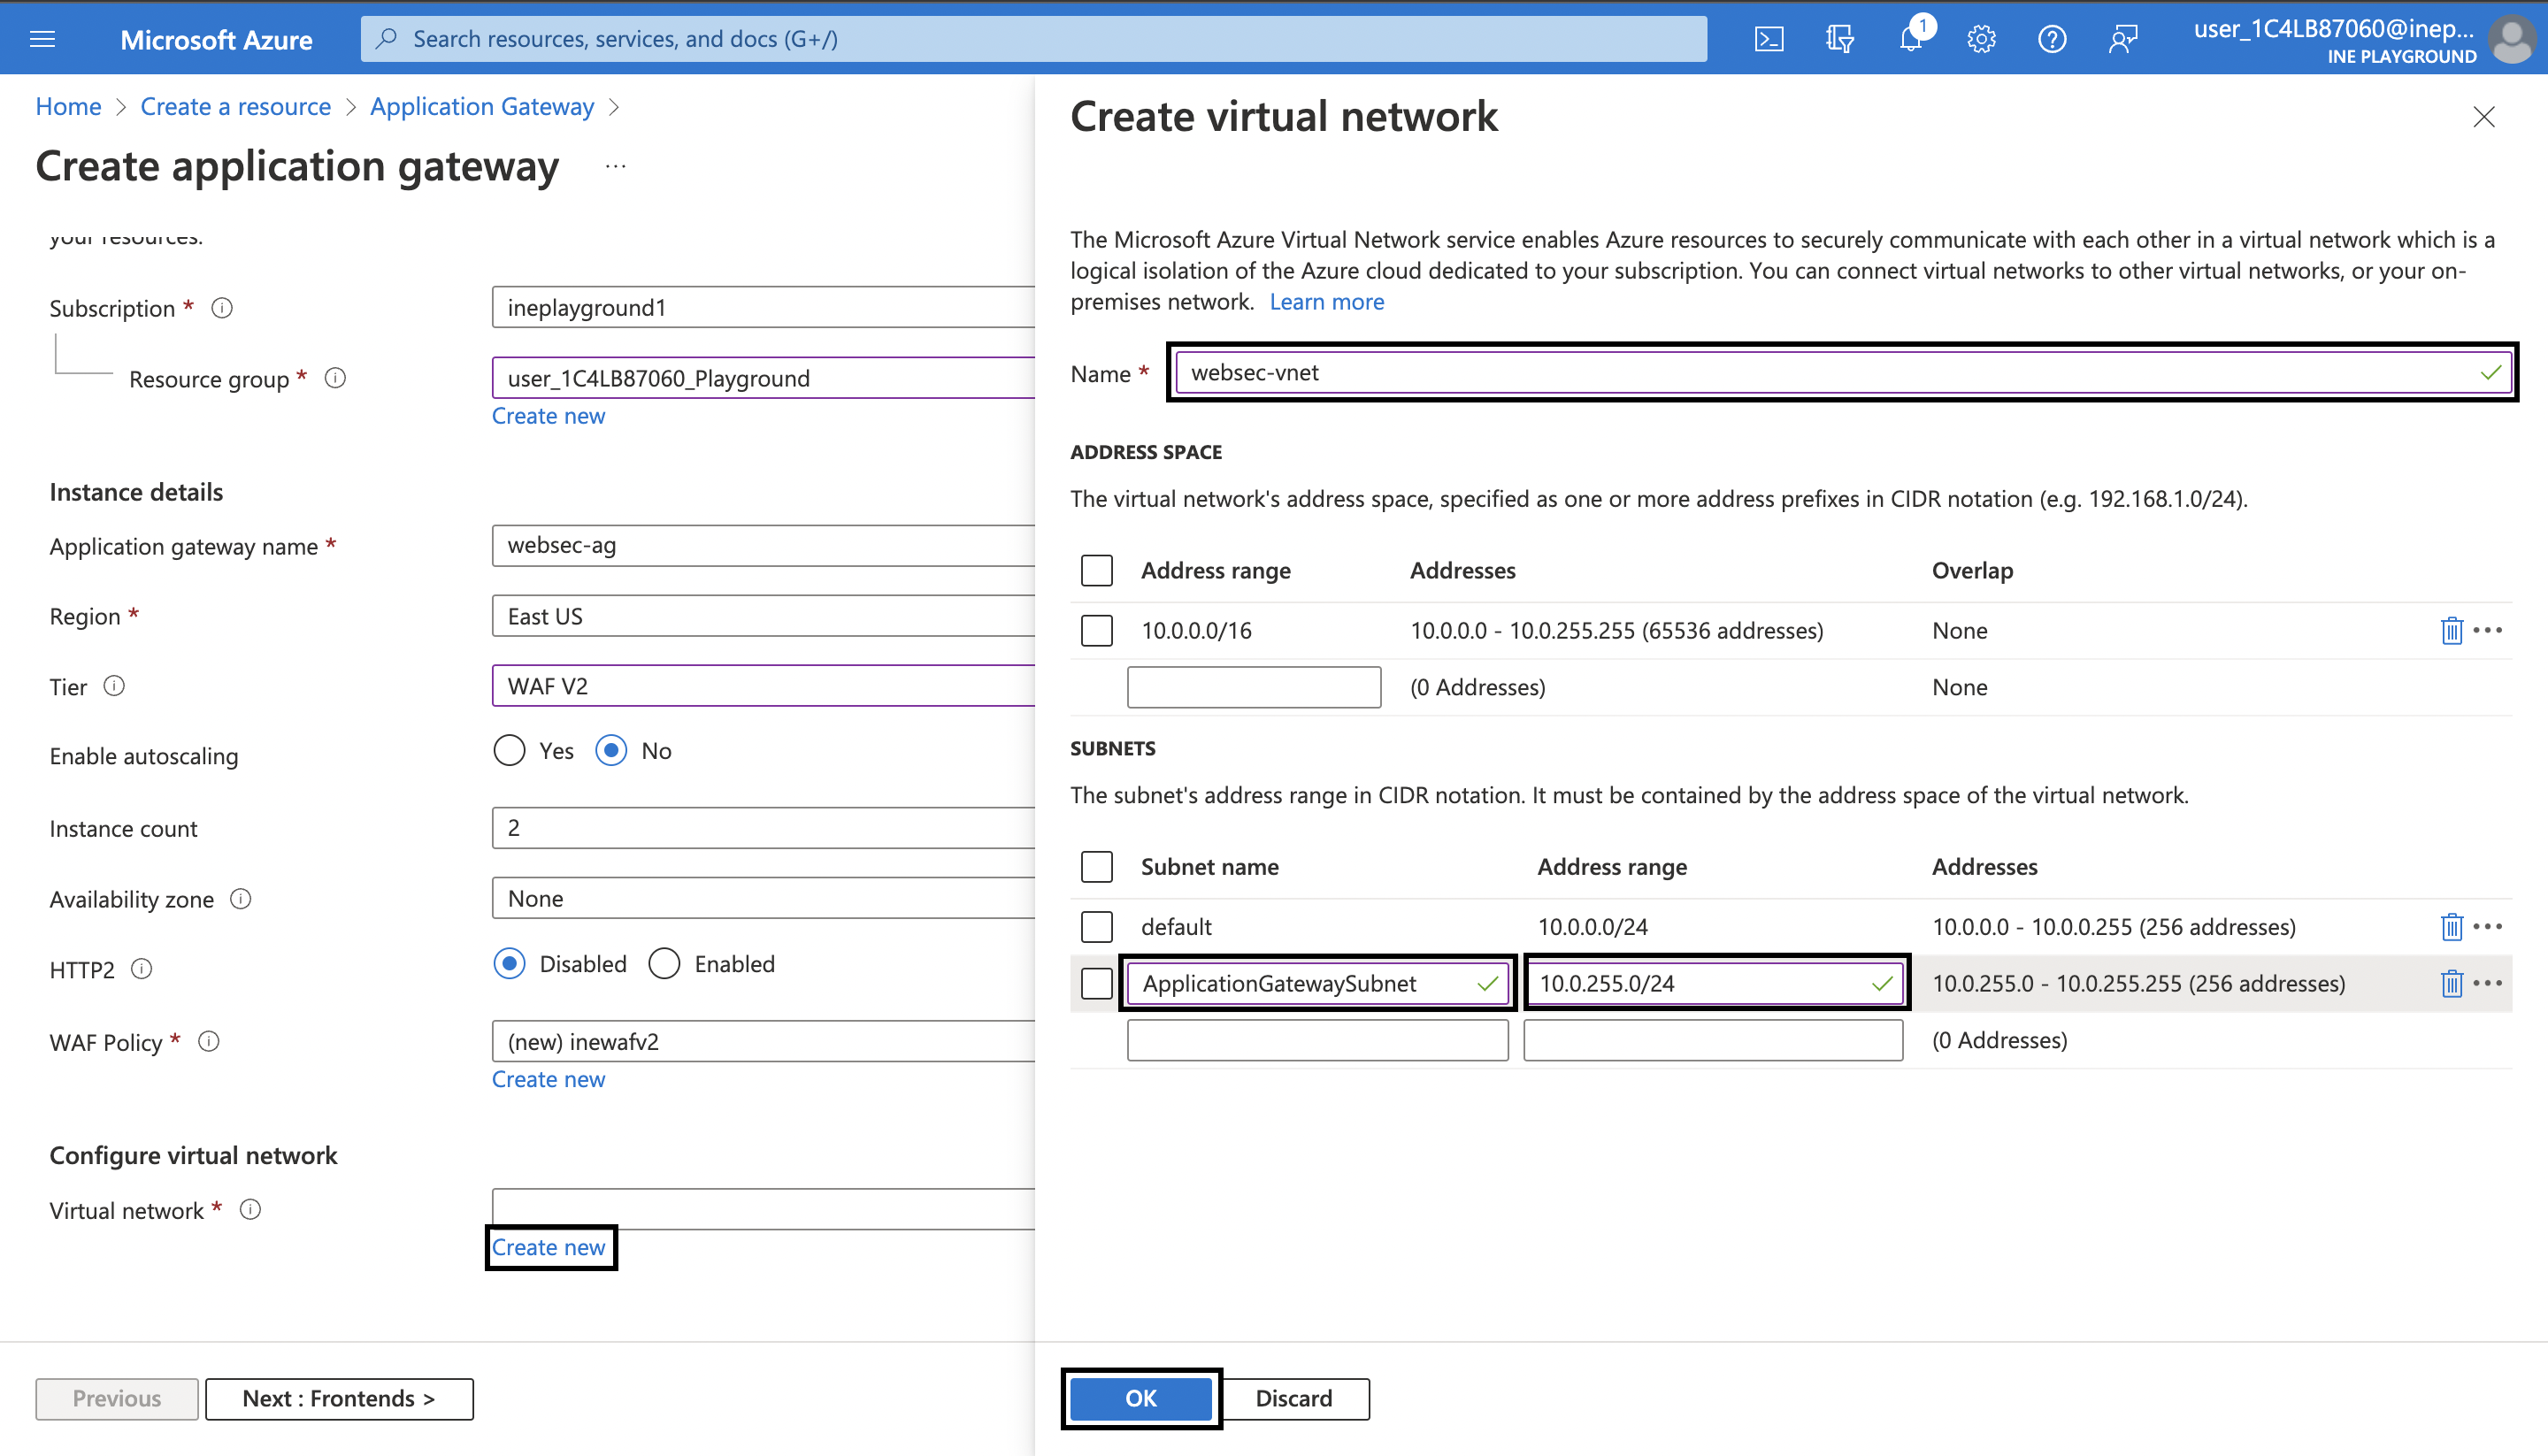
6. For Virtual network click on Create new. On the blade that has opened, type a unique name say websec-vnet. And then just add a second subnet with name as ApplicationGatewaySubnet and the address range as 10.0.255.0/24. After that click on OK.
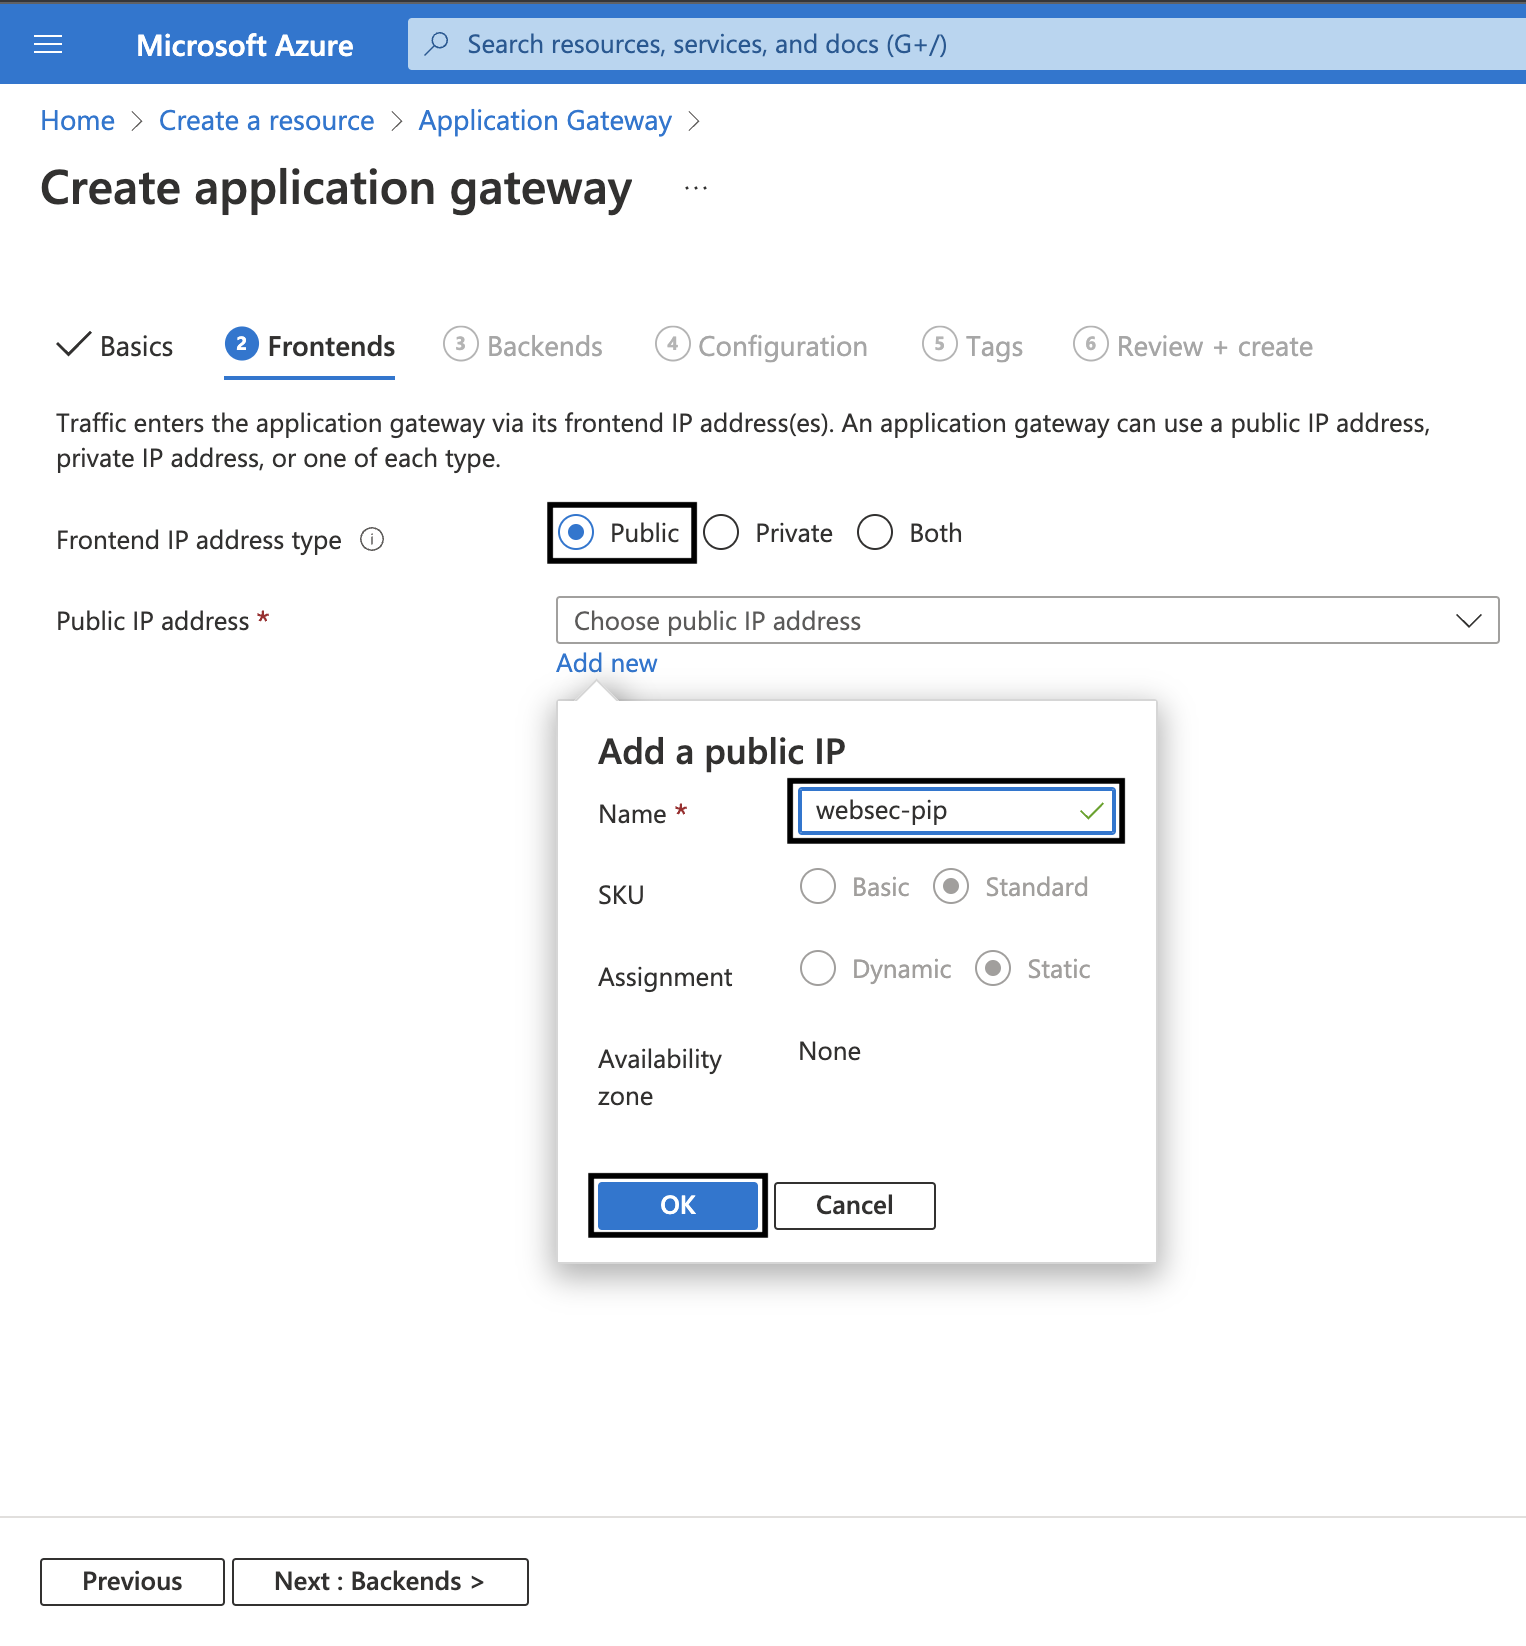
7. Make sure the Subnet selected is ApplicationGatewaySubnet and then go to the Frontends tab. Set the Frontend IP address type to Public. To add a new Public IP Address click on Add new. Give it a uniuqe name say websec-pip and then click on OK.
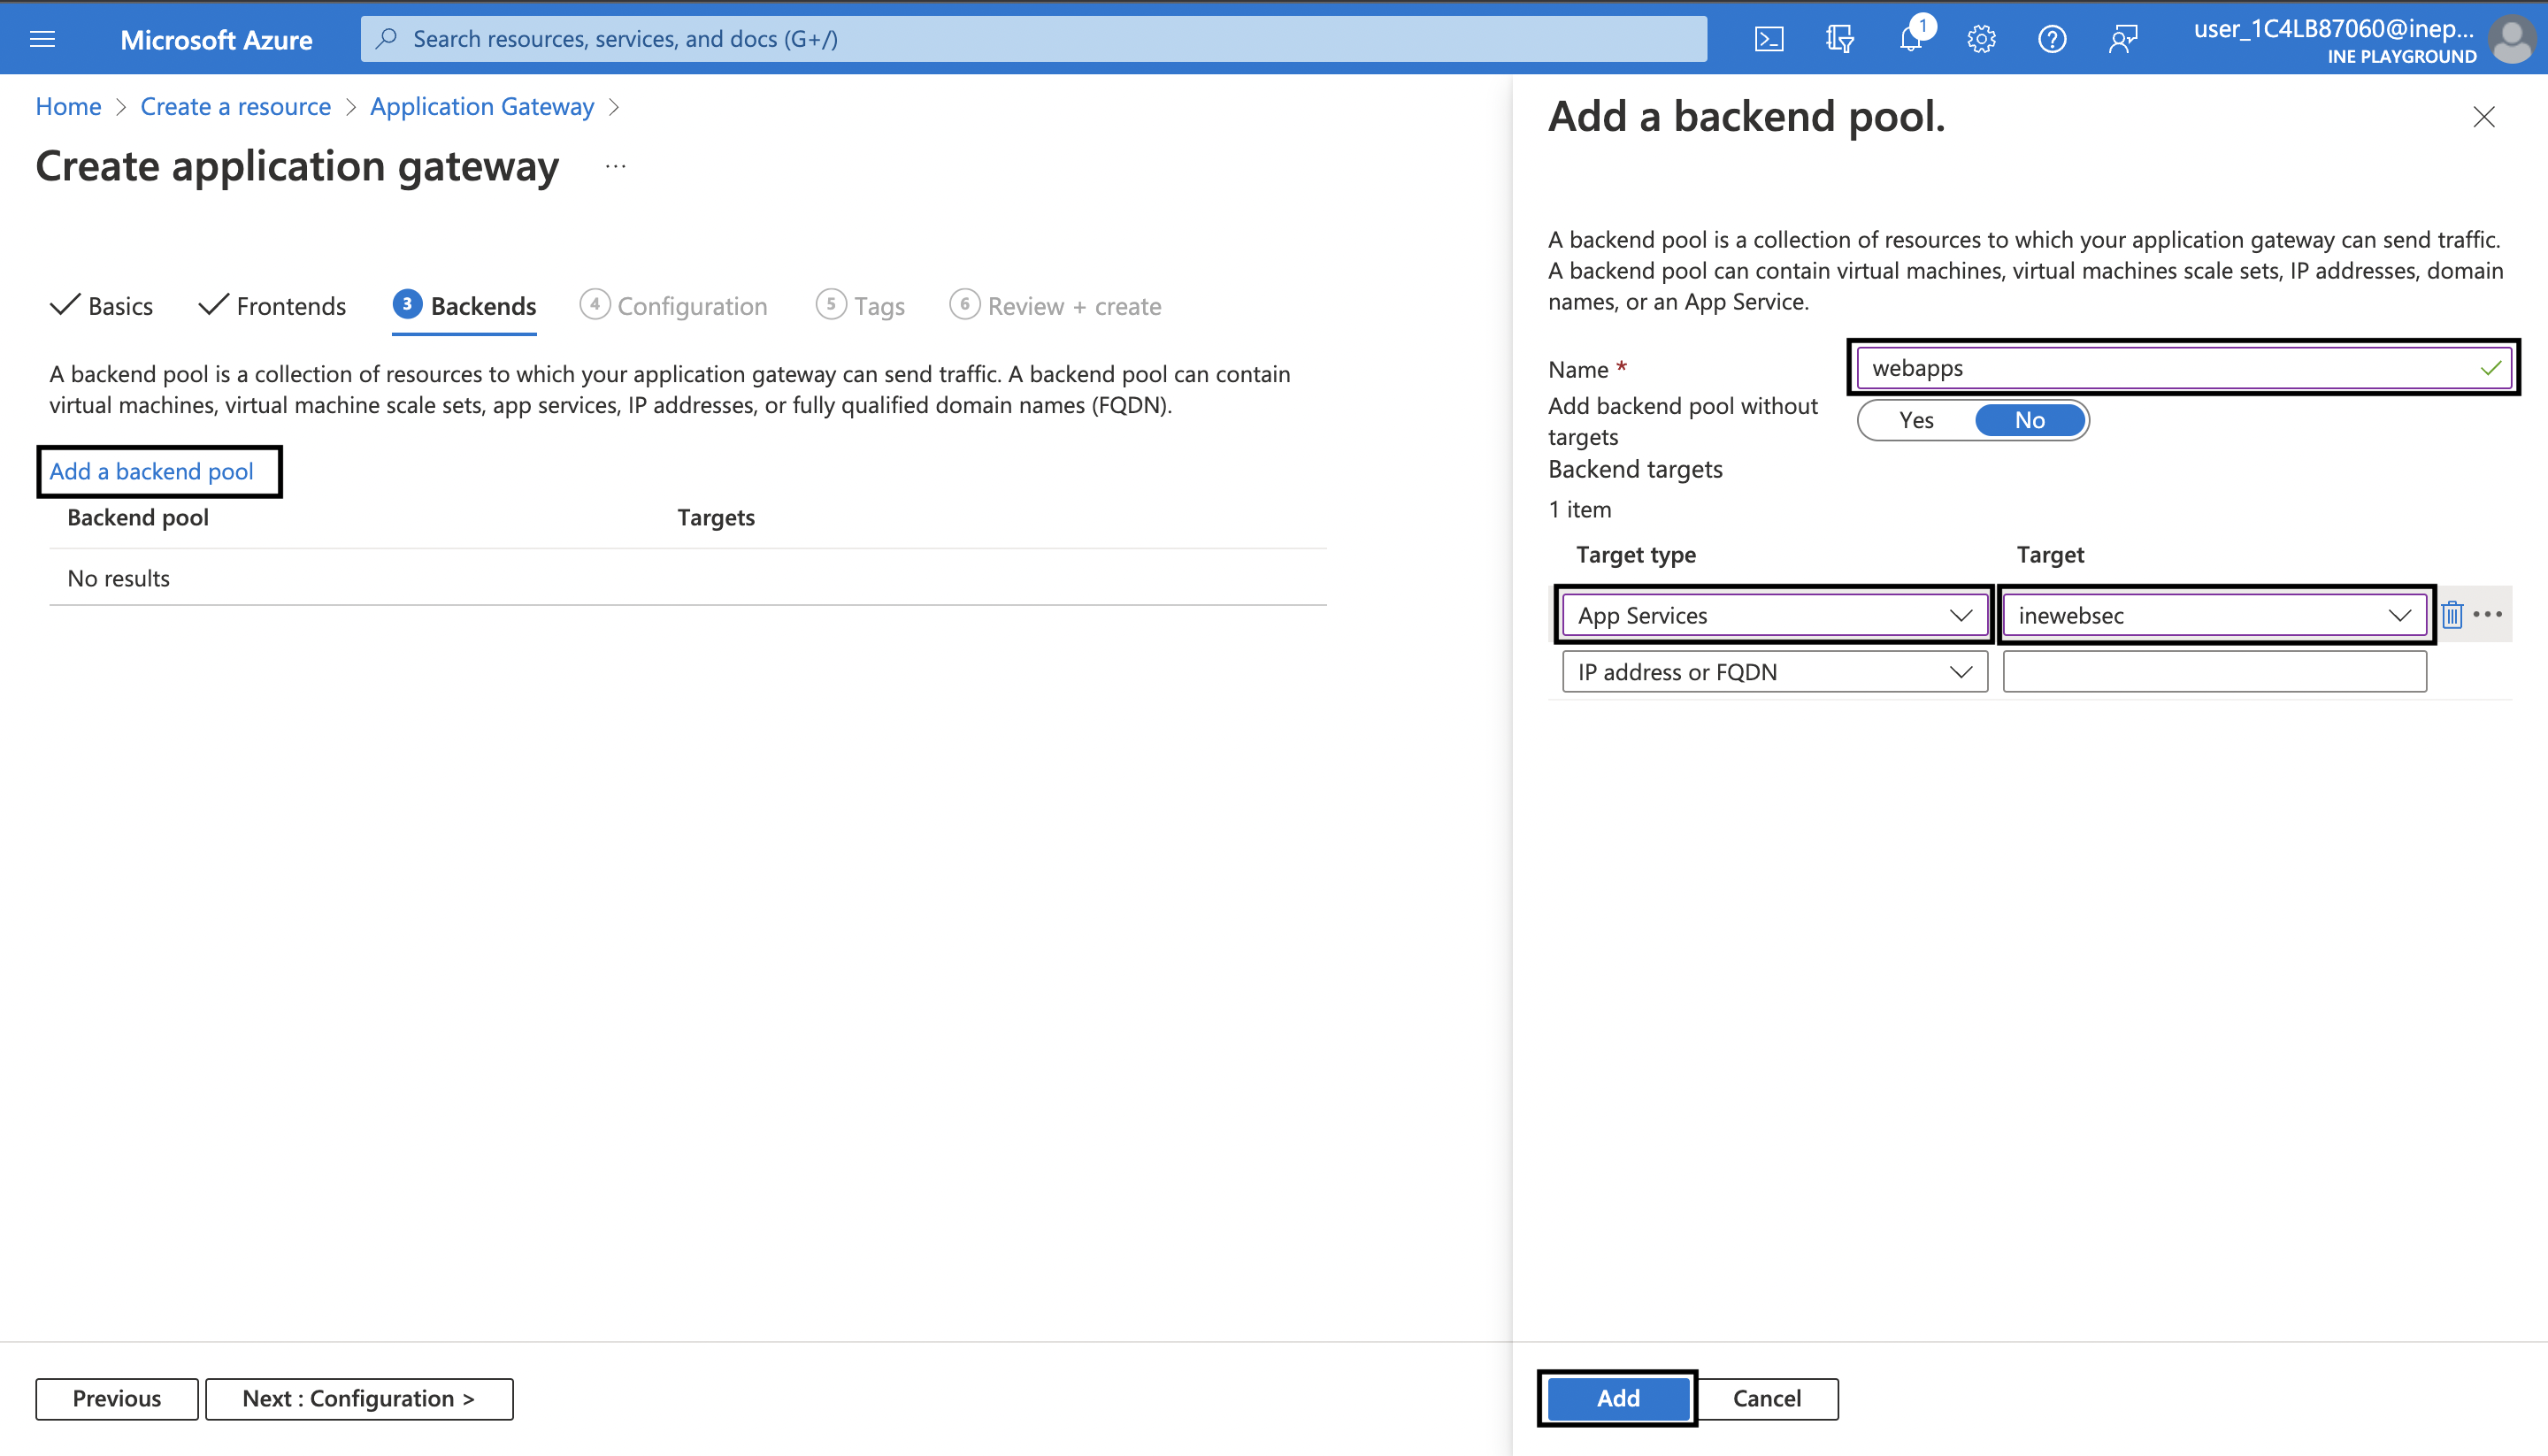
8. Next go to Backends tab. Click on Add a backend pool. On the blade that has opened, type a unique name say webapps. Set the Target Type to App Services and select your web app as the Target. After that click on Add.
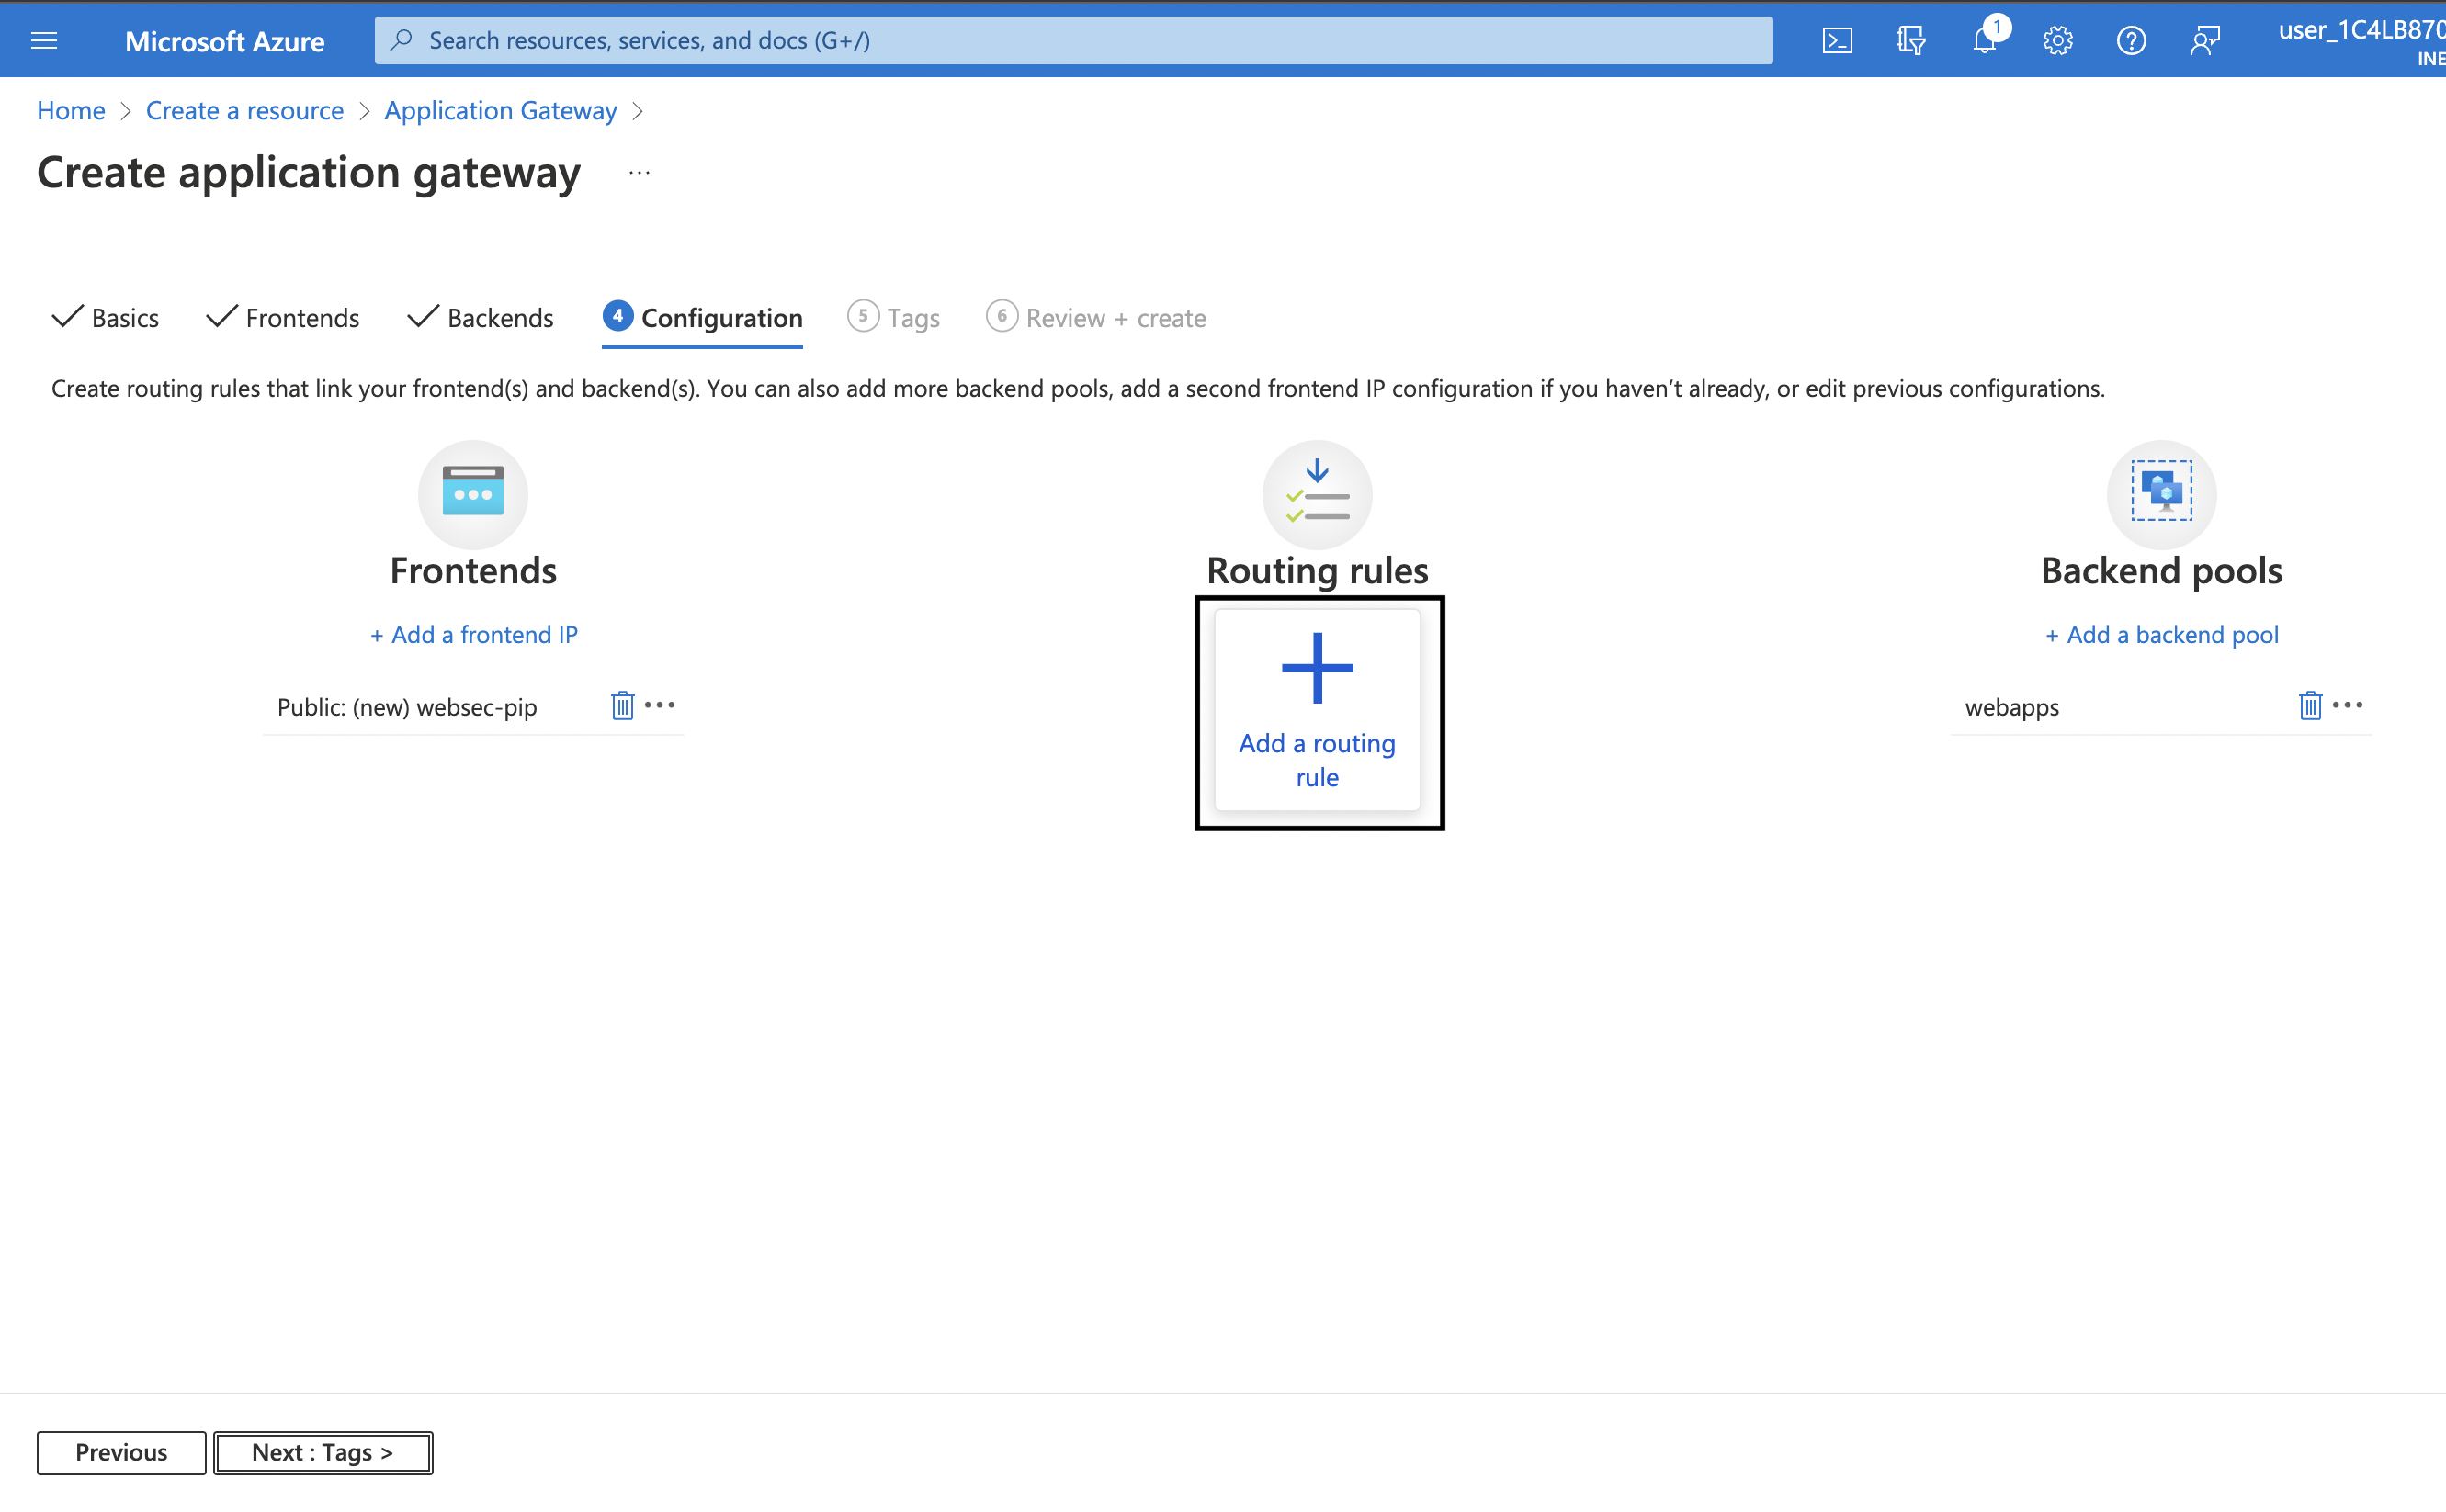
9. Next go to Configuration. Click on Add a routing rule.
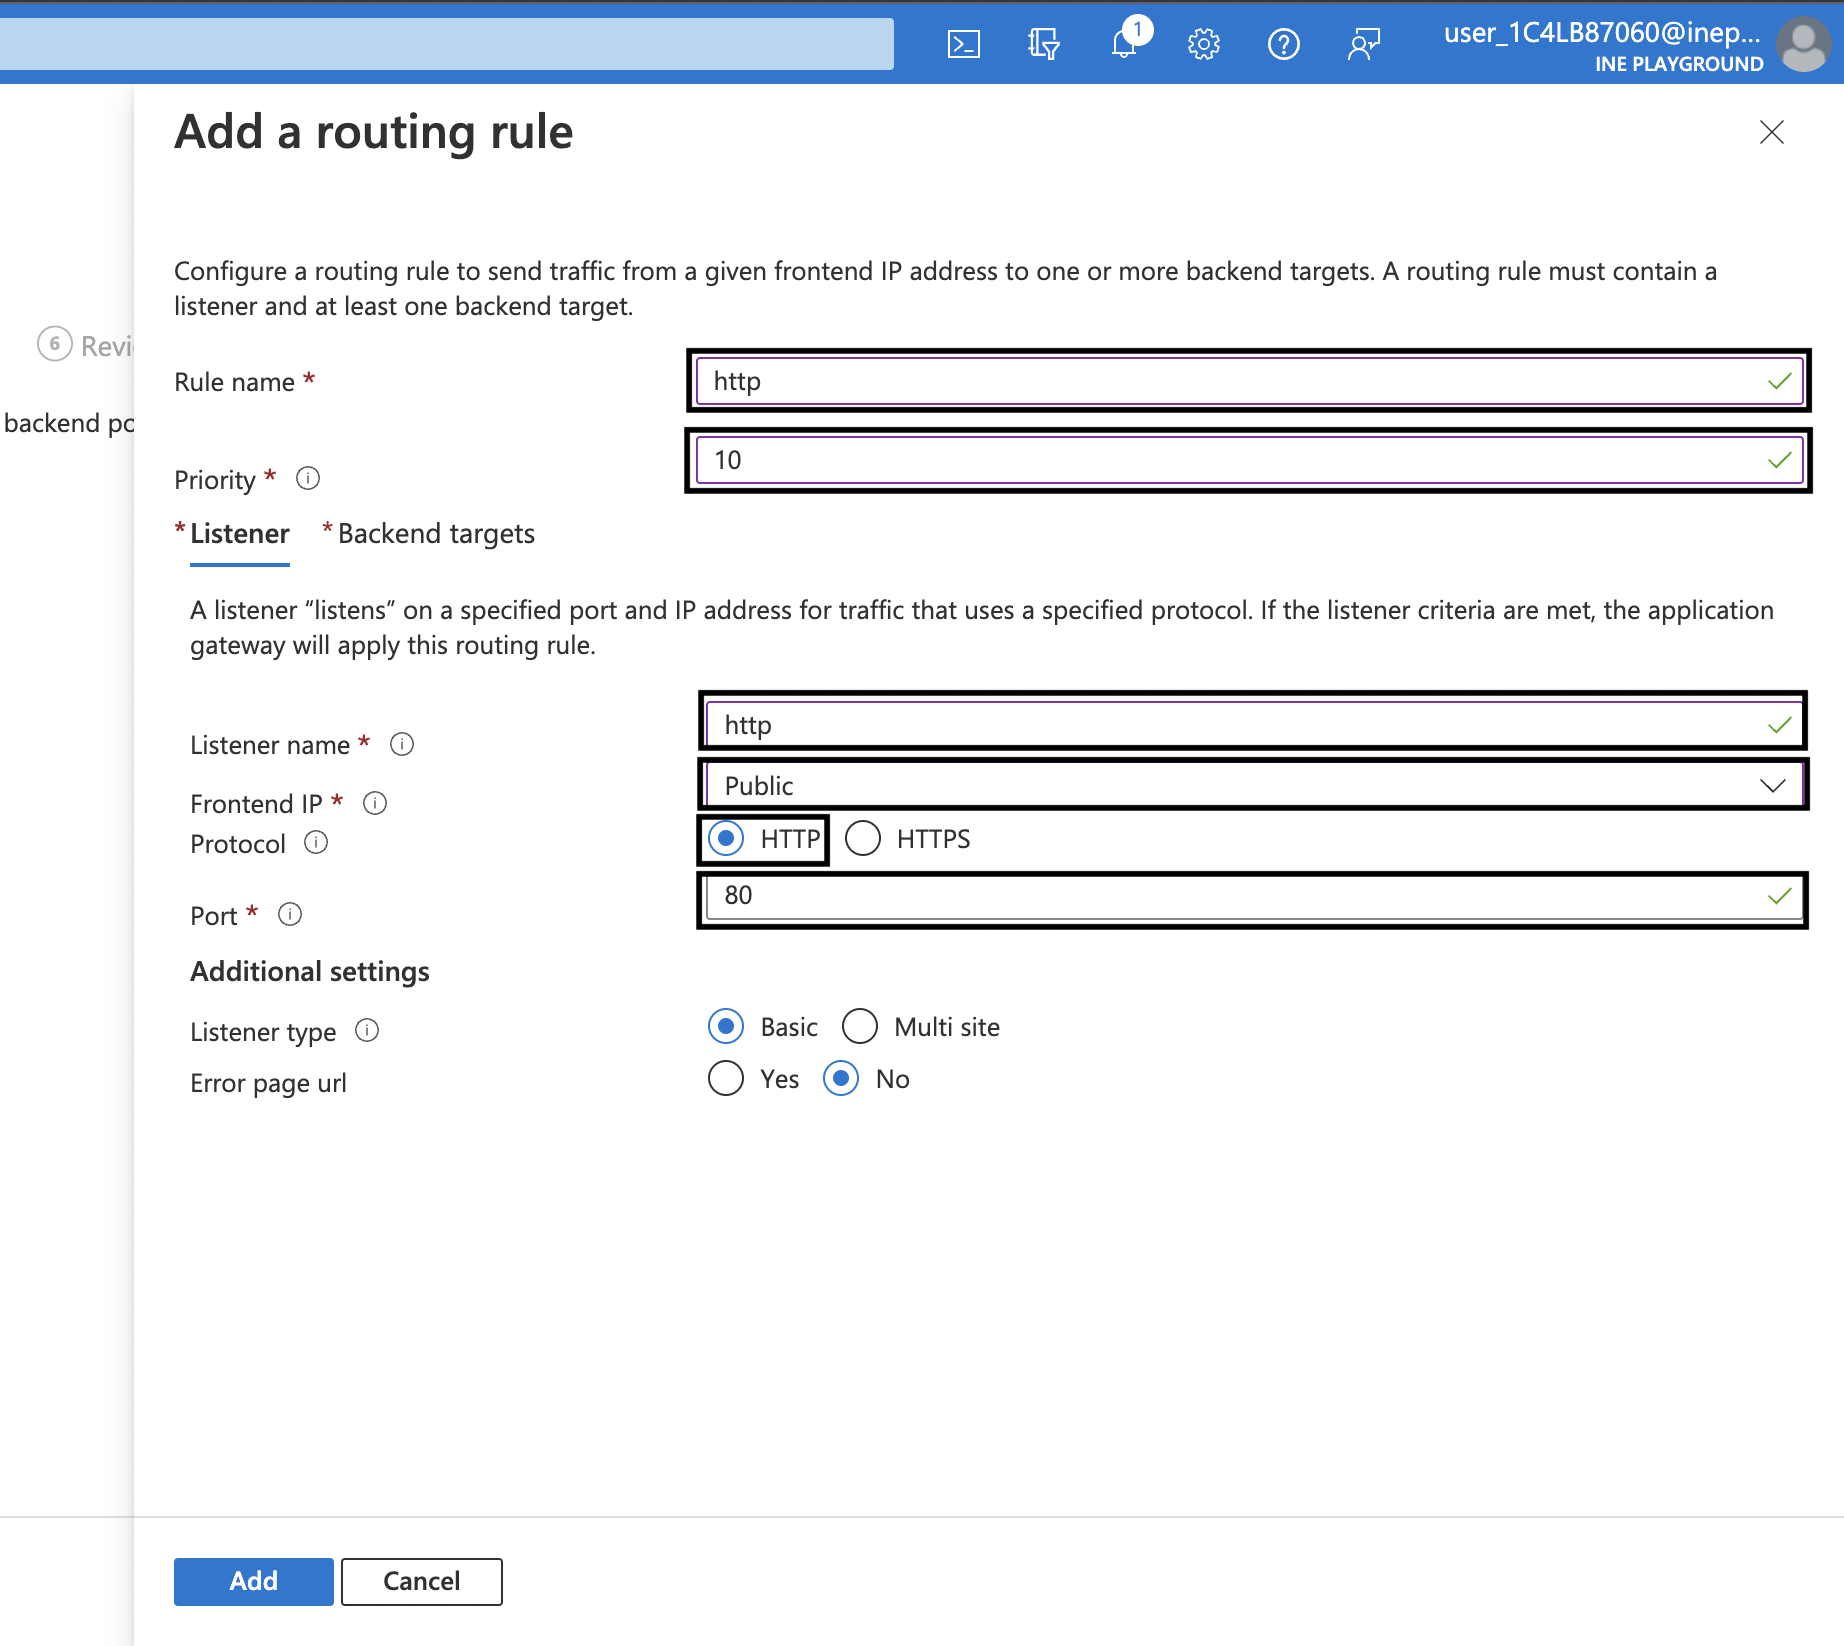
10. On the blade that has opened, type the Rule name as http and a Priority say 10. Under Listener tab use the following settings:
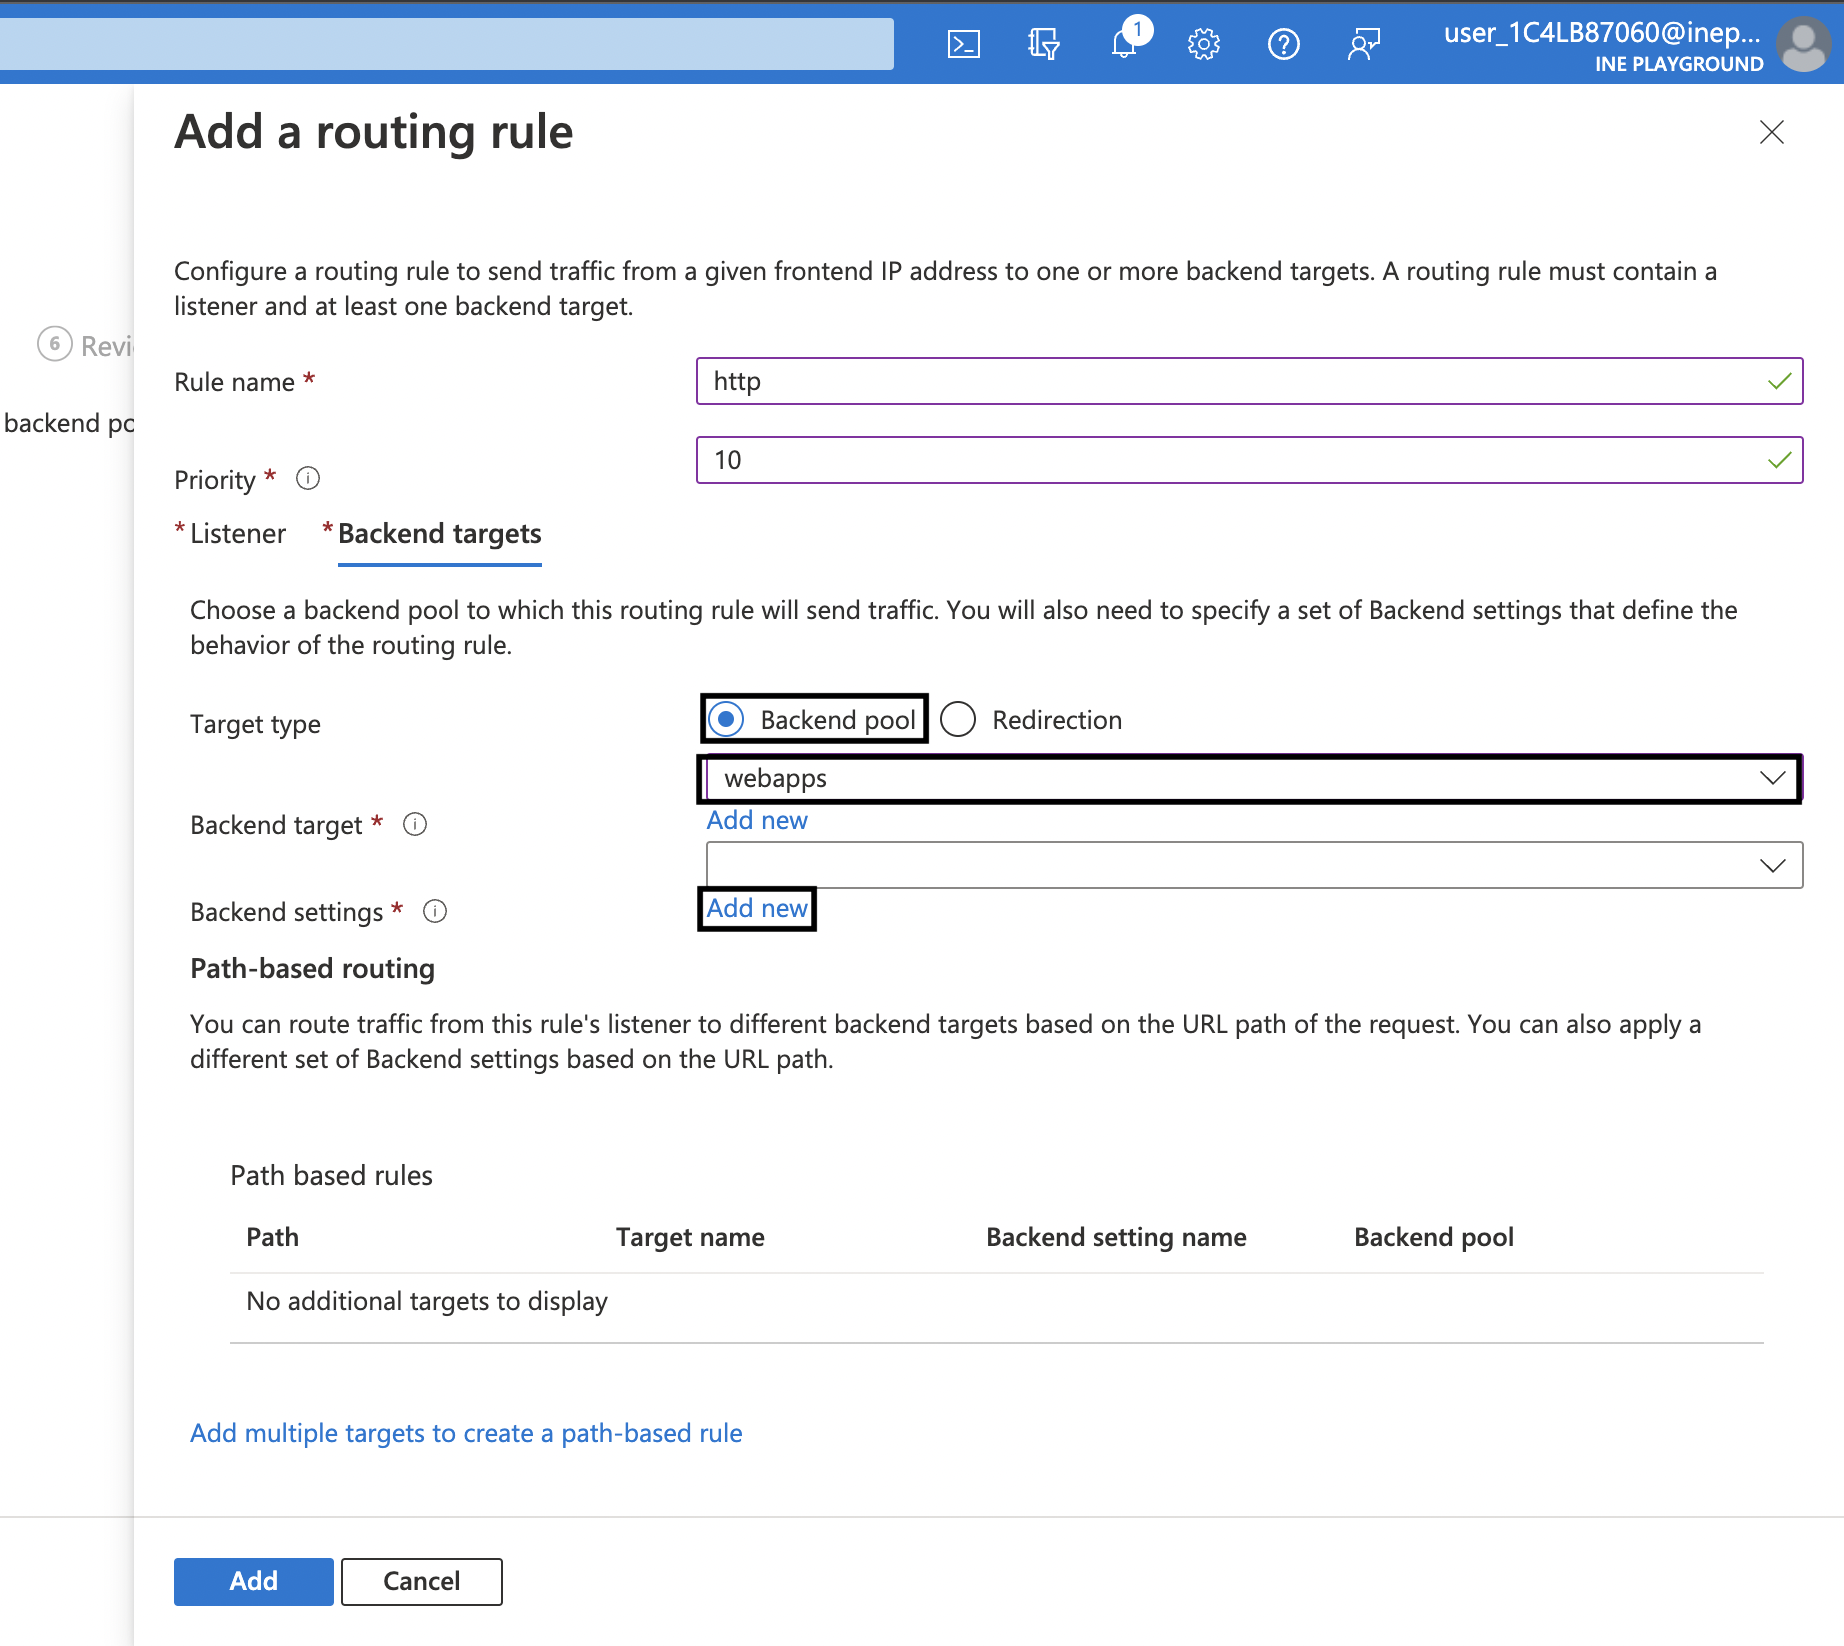
11. Under Backend targets tab, set Target type as Backend Pool and select webapps for Backend target. For Backend settings click on Add new.
12. On the Add Backend setting blade that has opened, use the following settings:
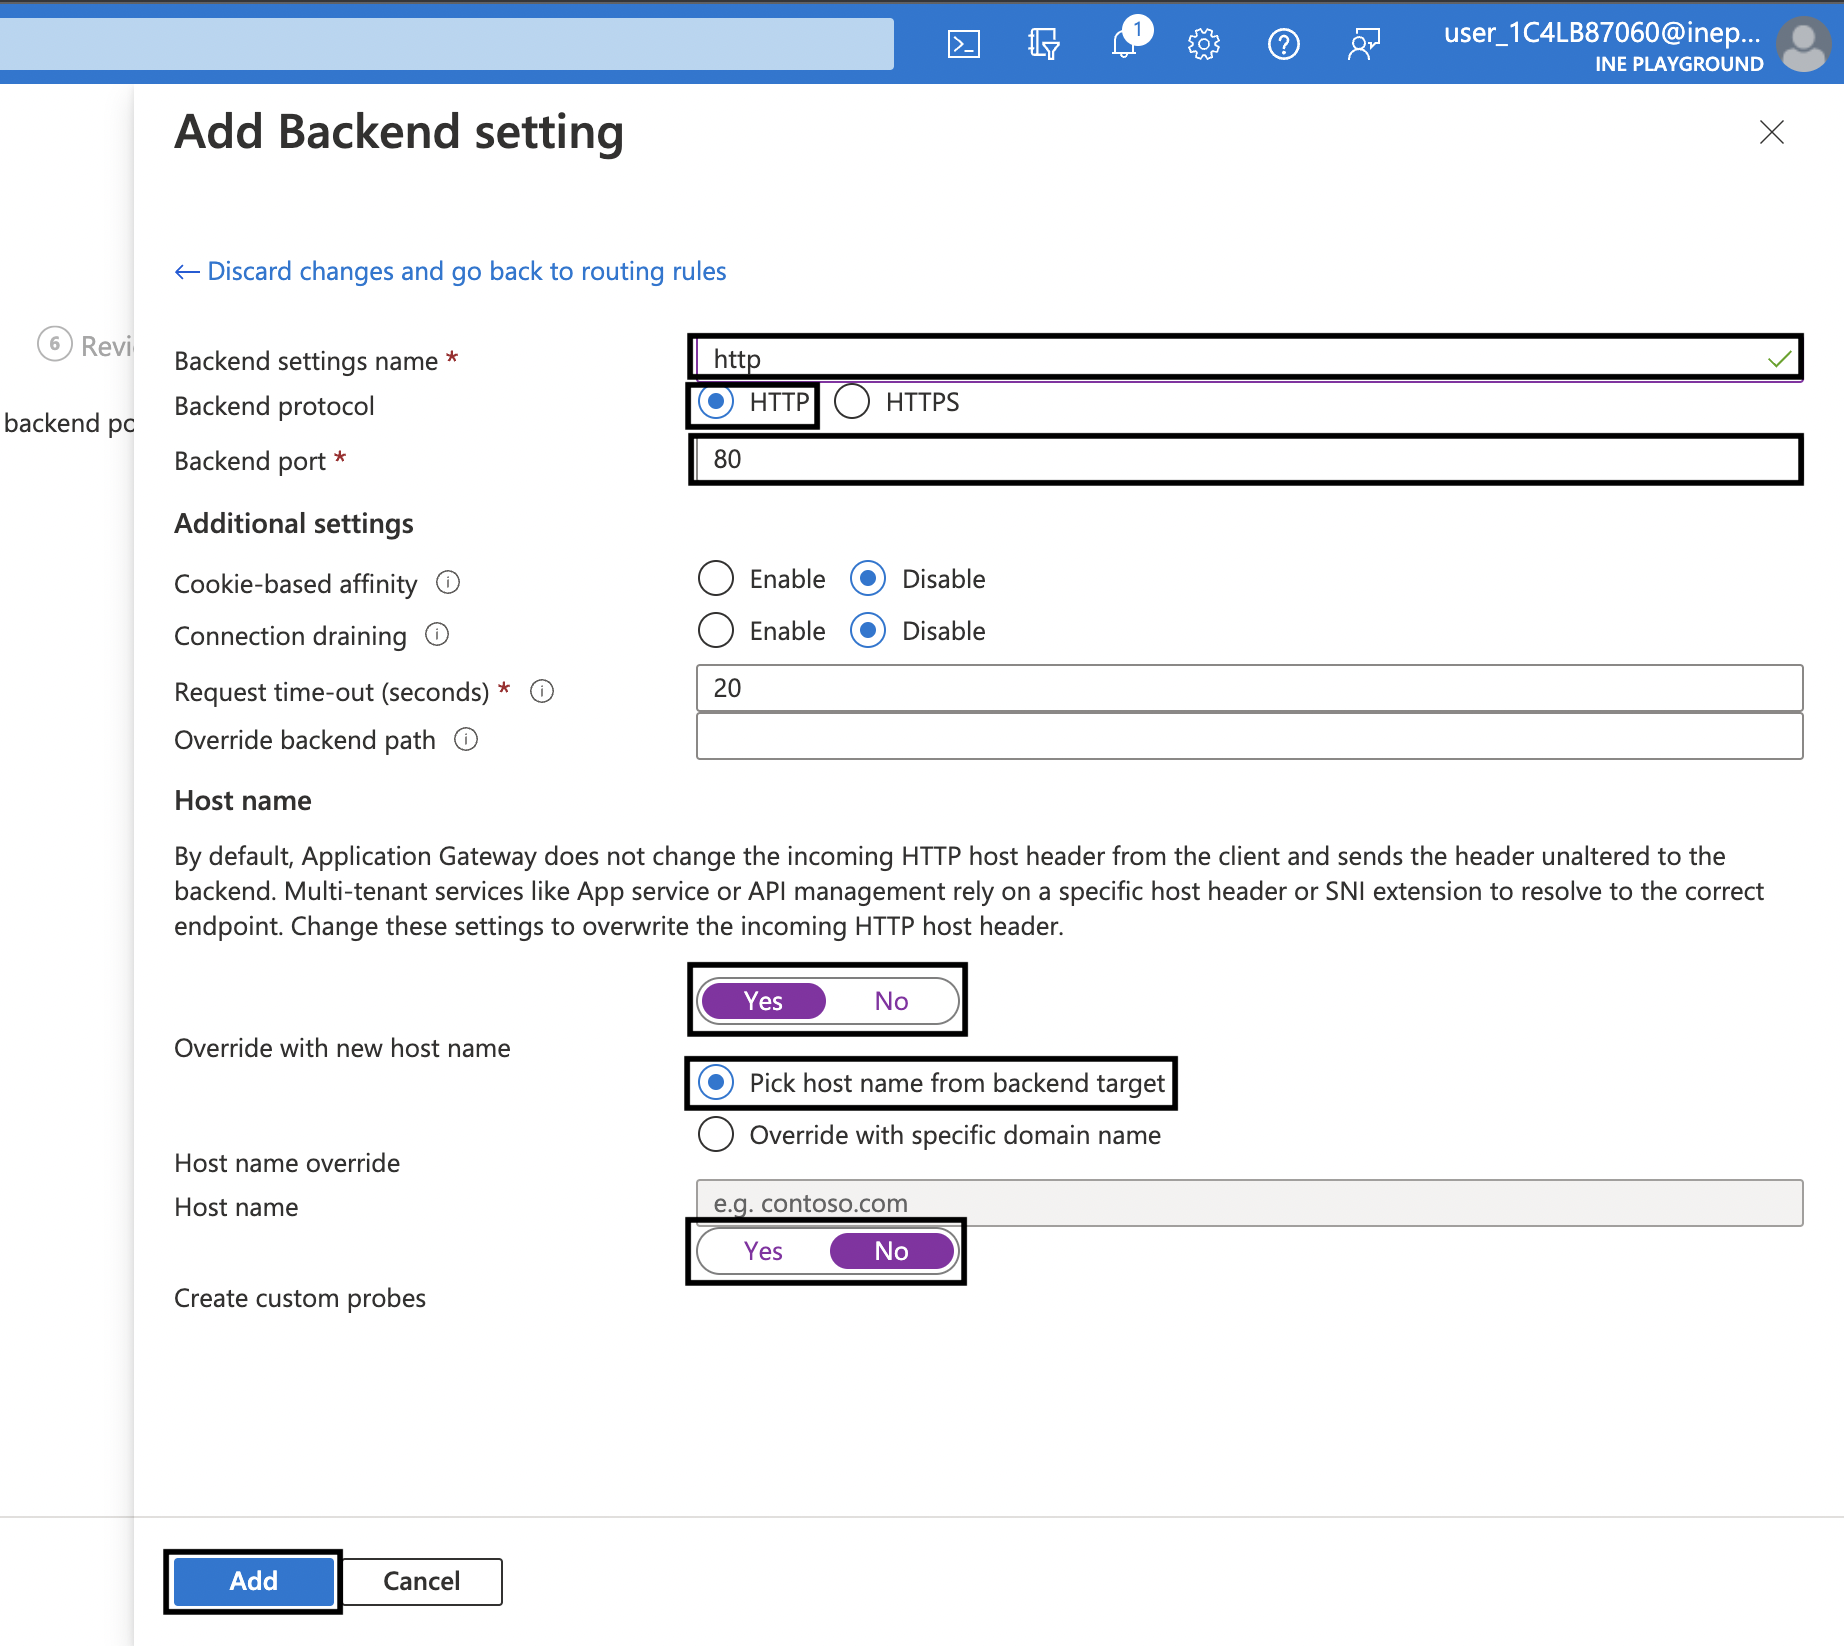
After that click on Add and then again click on Add.
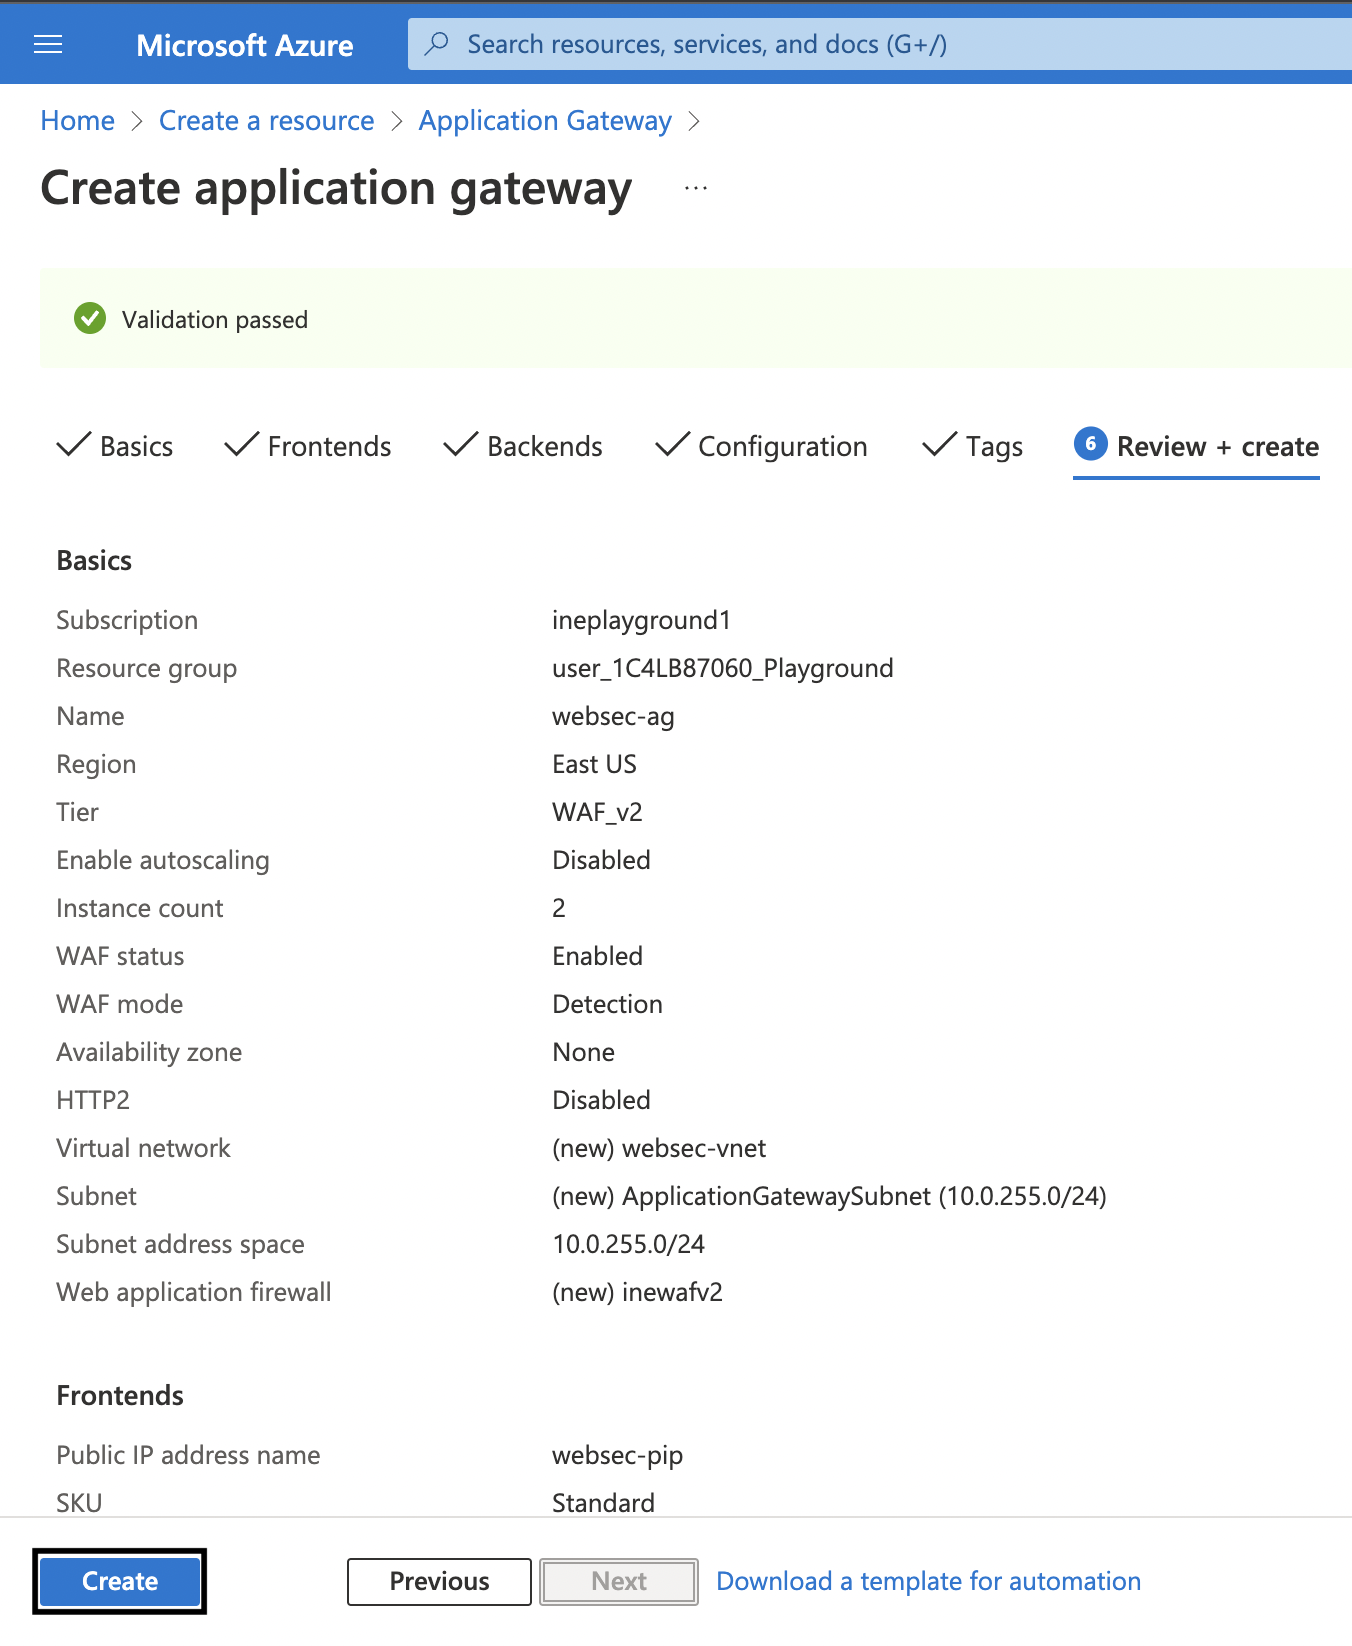
13. Next directly go to Review + create and then click on Create.
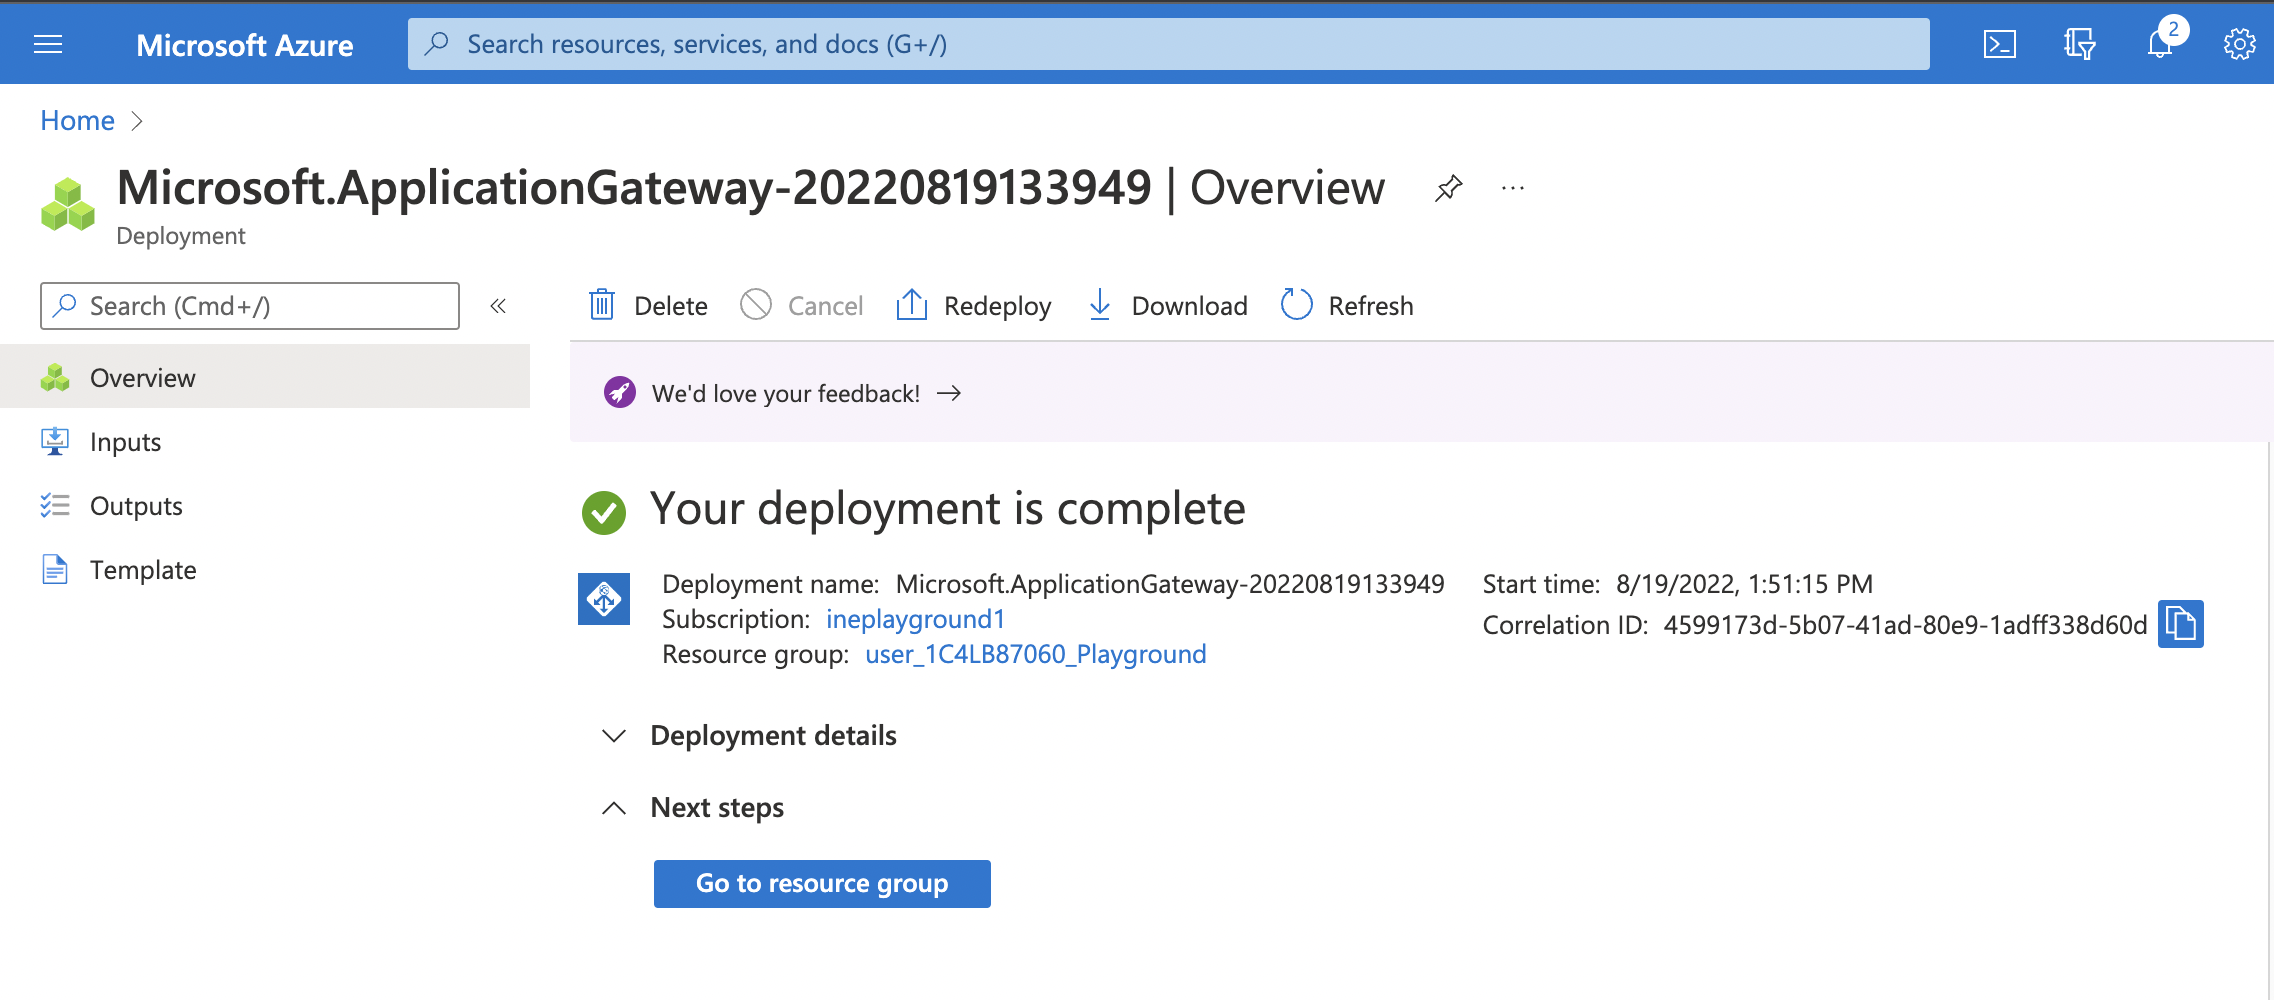
14. Once the deployment is complete, you will see the following.
Next you need to configure the you web app created. The web app should only allow traffic from the ApplicationGatewaySubnet of the websec-vnet virtual network.
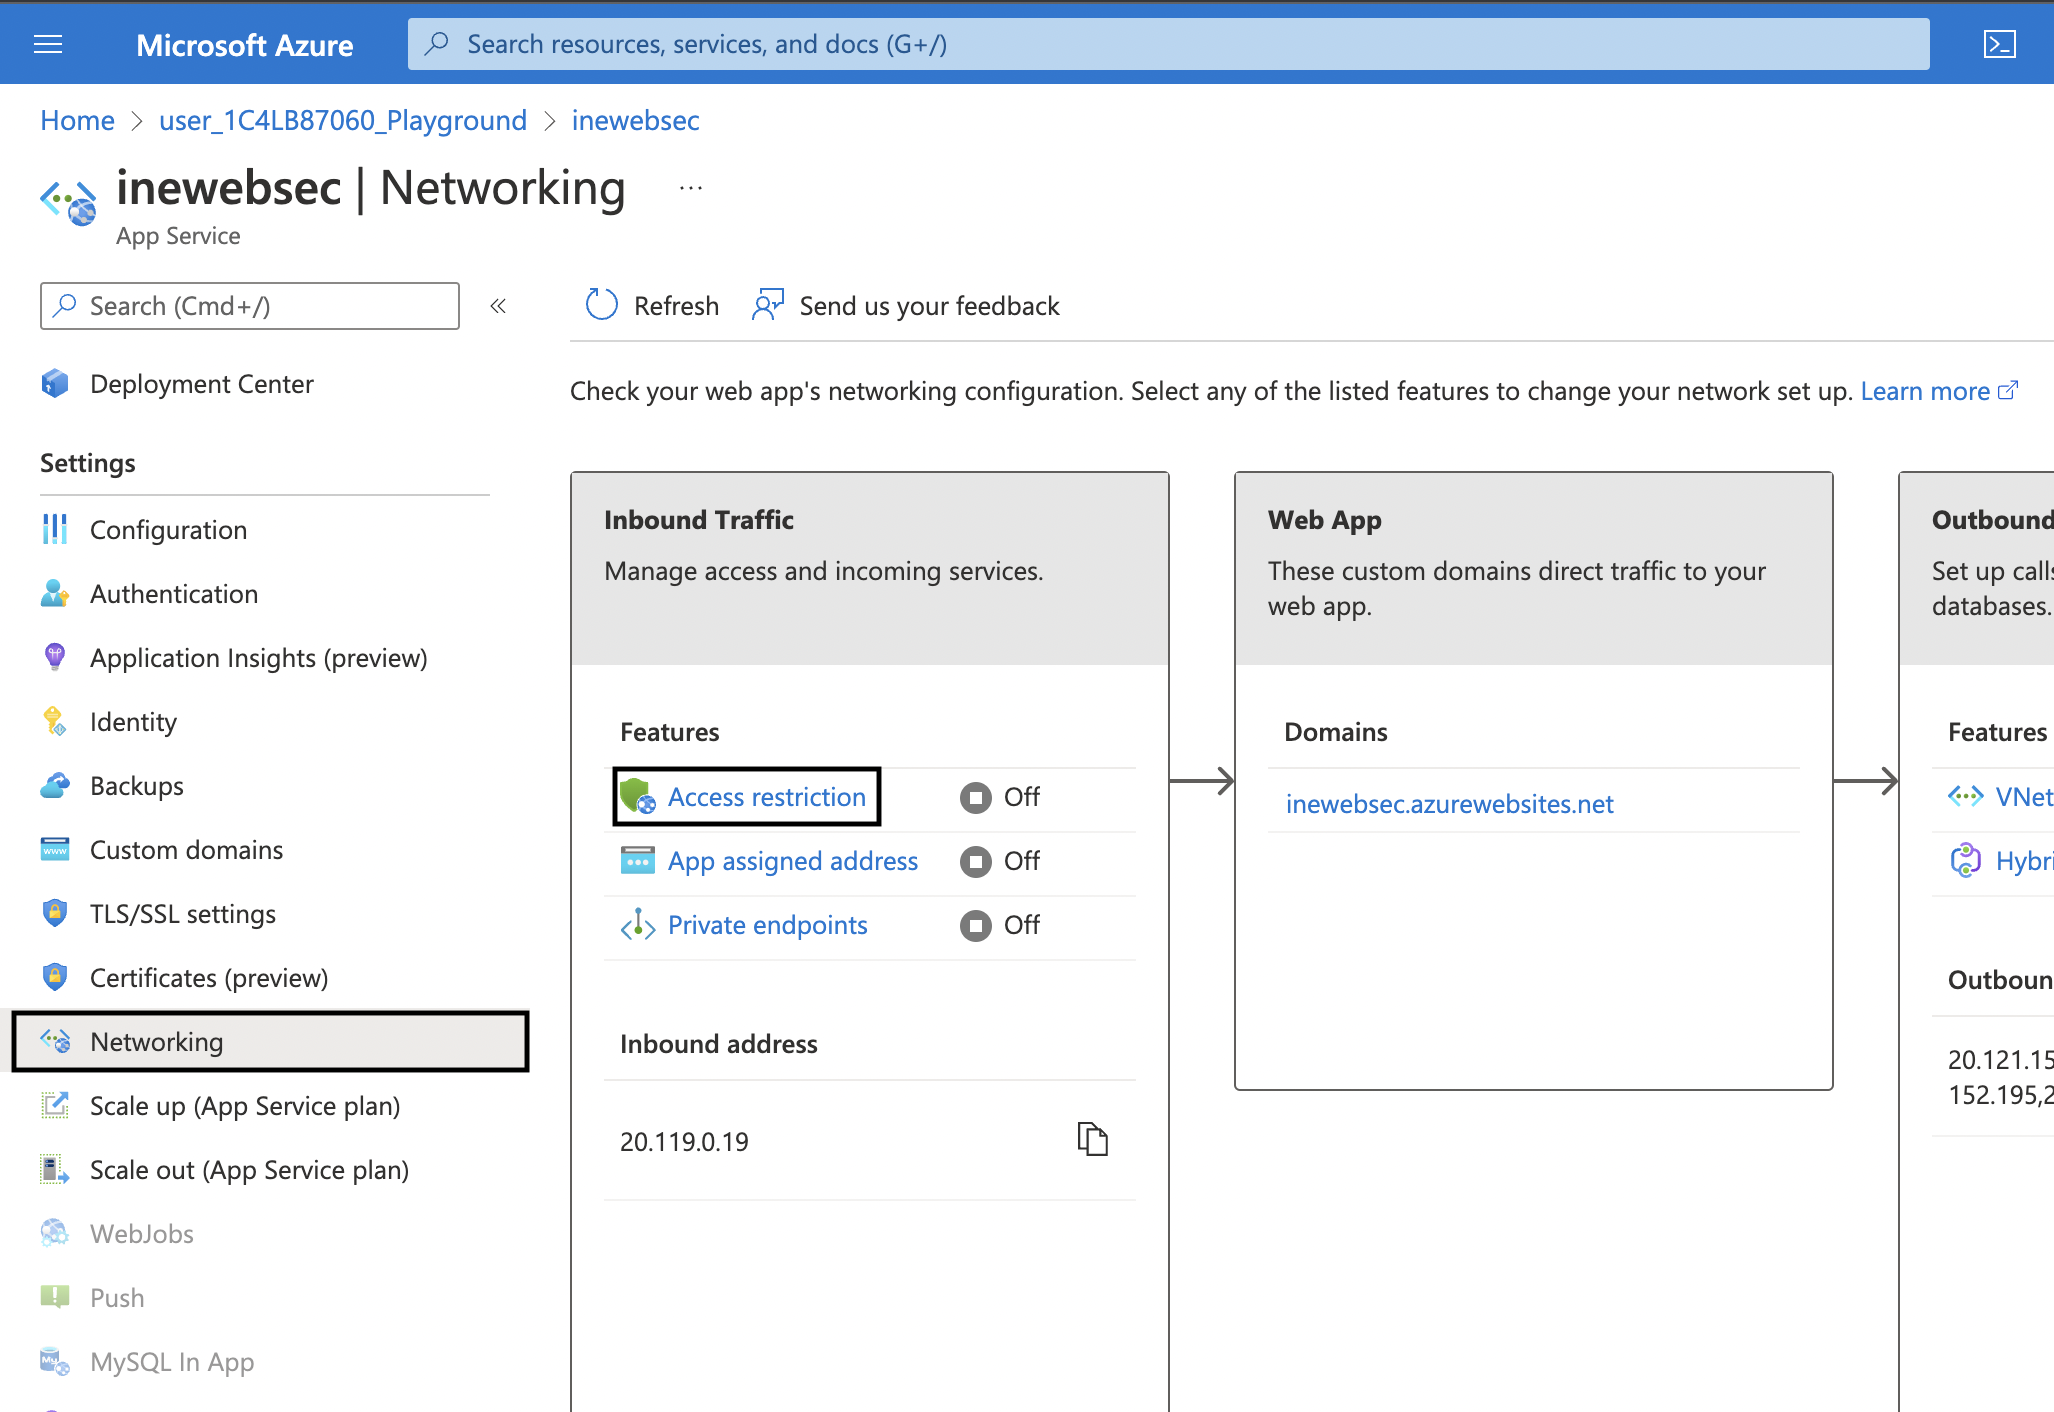
1. Go to your web app and then click on Networking in the left navigation. On this page click on Access restriction.
2. On the Access Restrictions page, click on Add rule. On the blade opened to your right use the following settings:
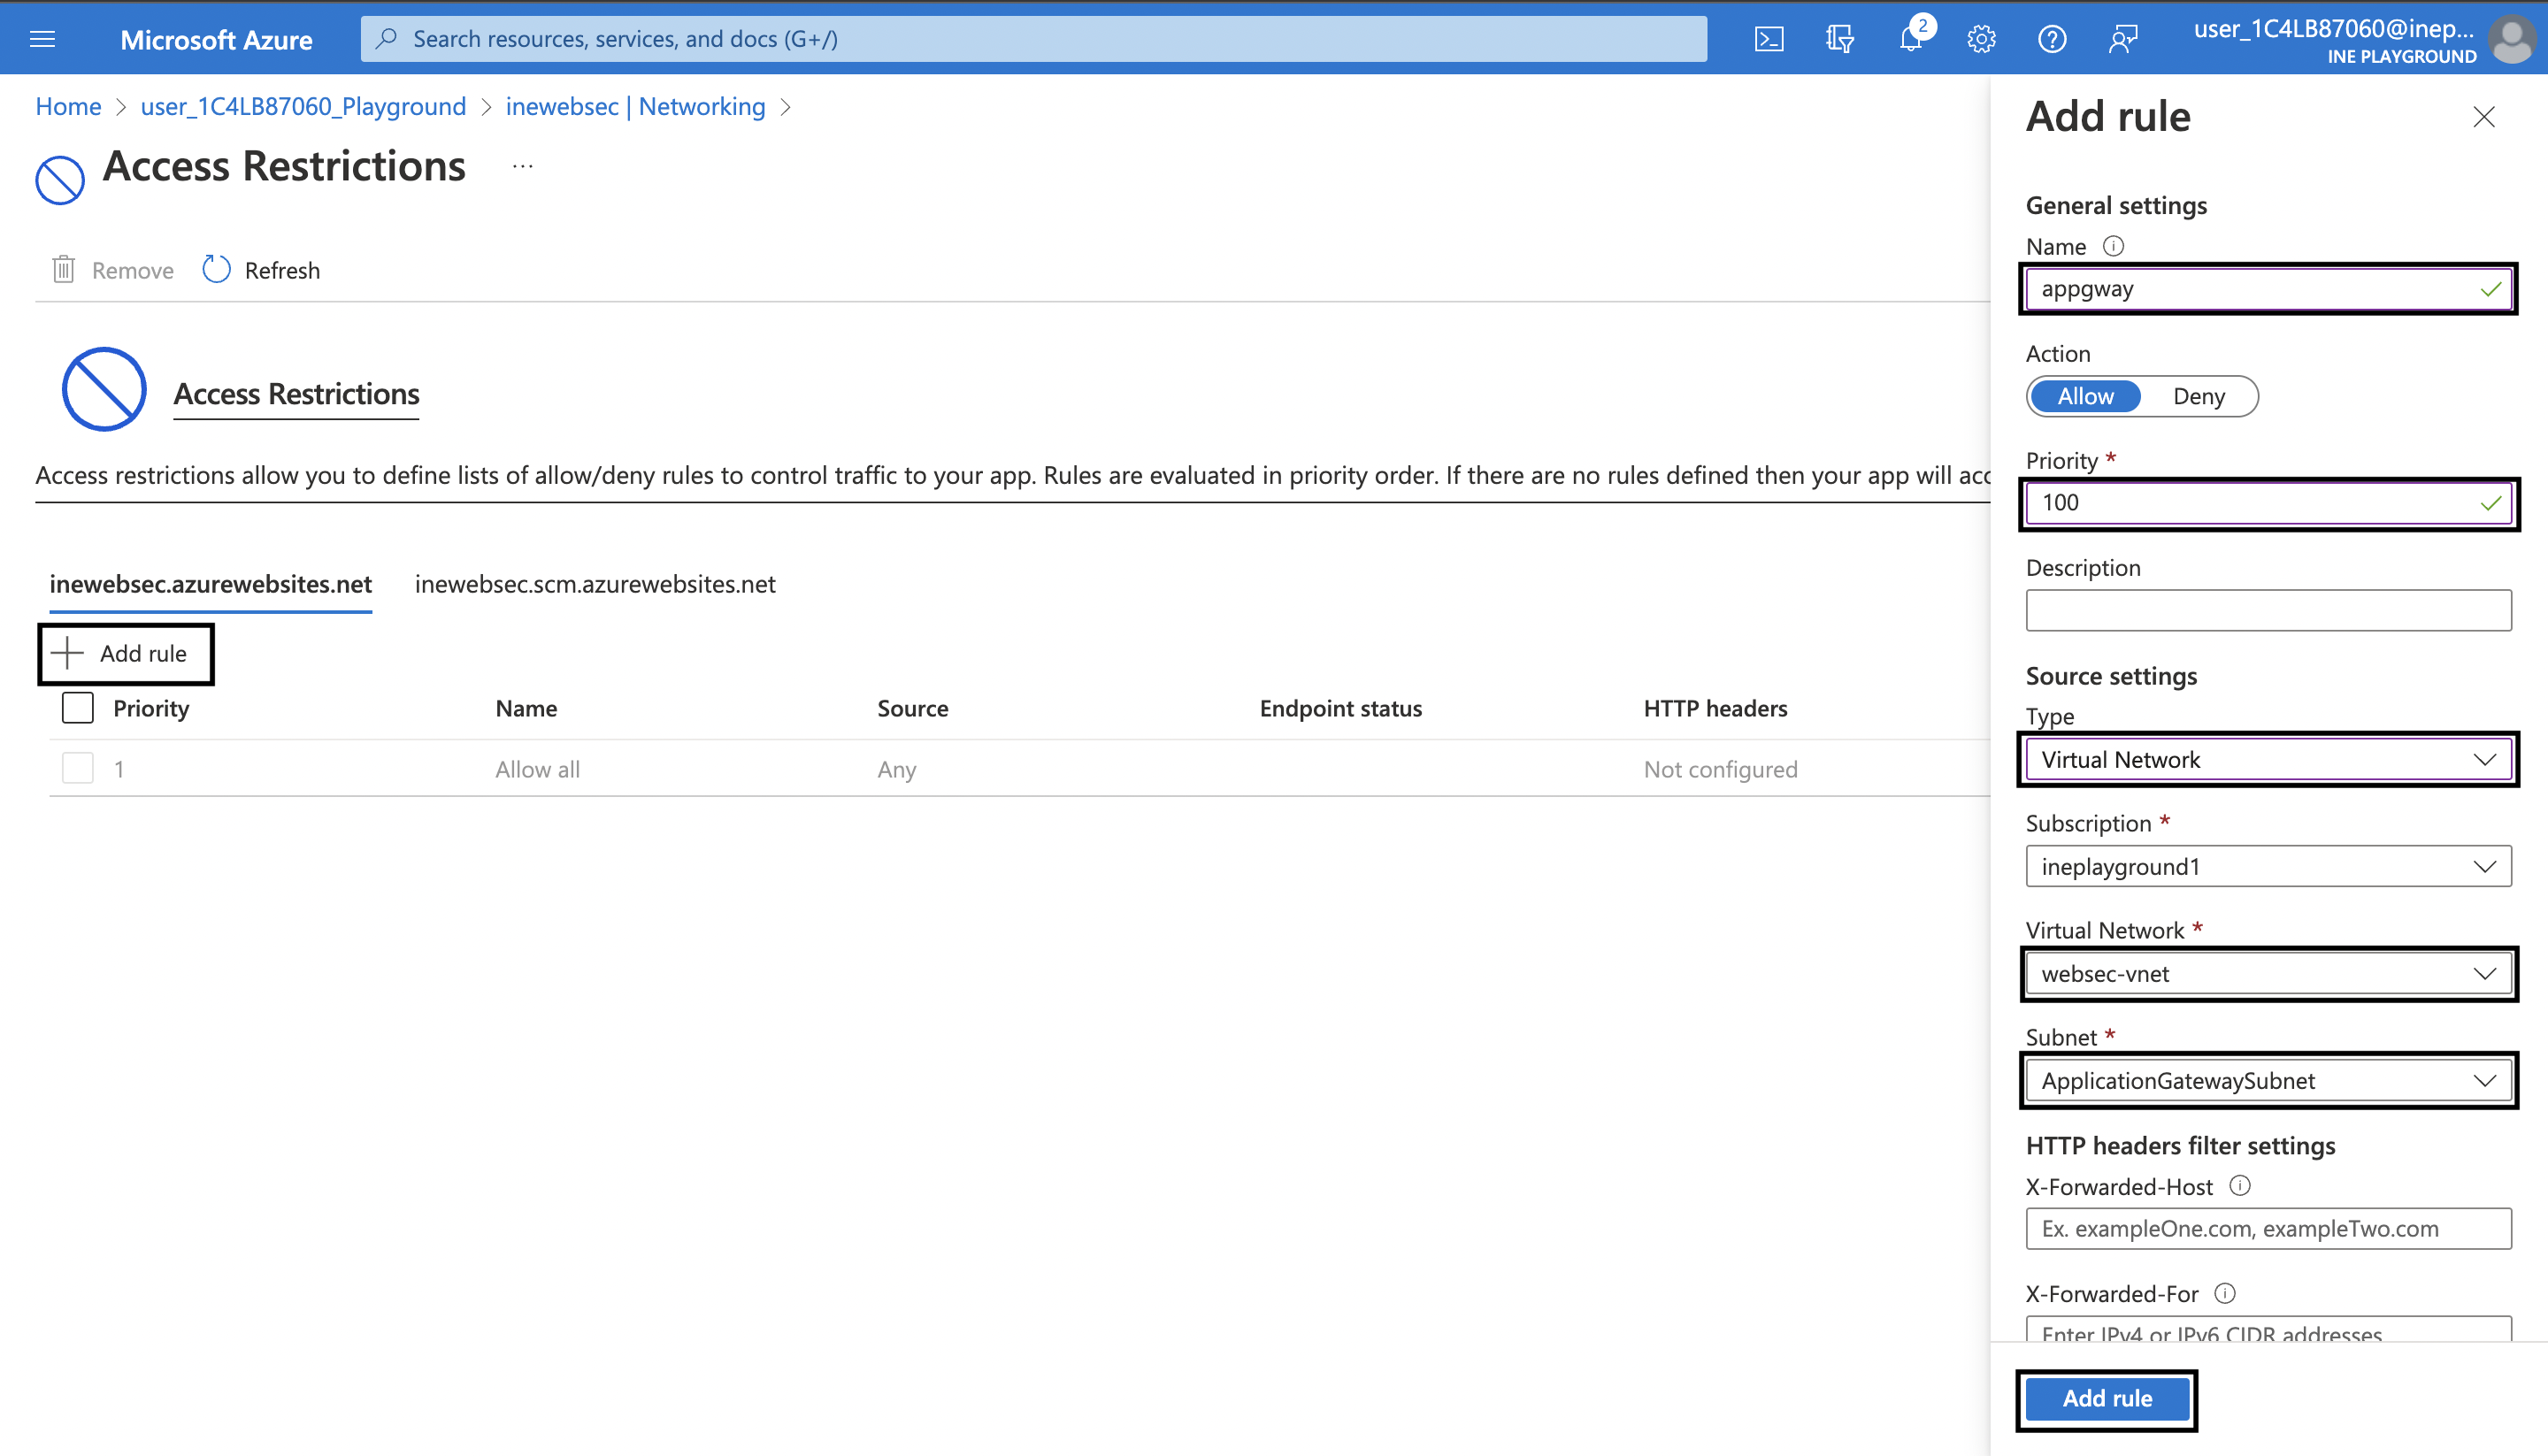
After that click on Add rule.
3. After the rule has been added, go to your web app page and then click on TLS/SSL settings in the left navigation. On this page, set the HTTPS Only setting to Off.
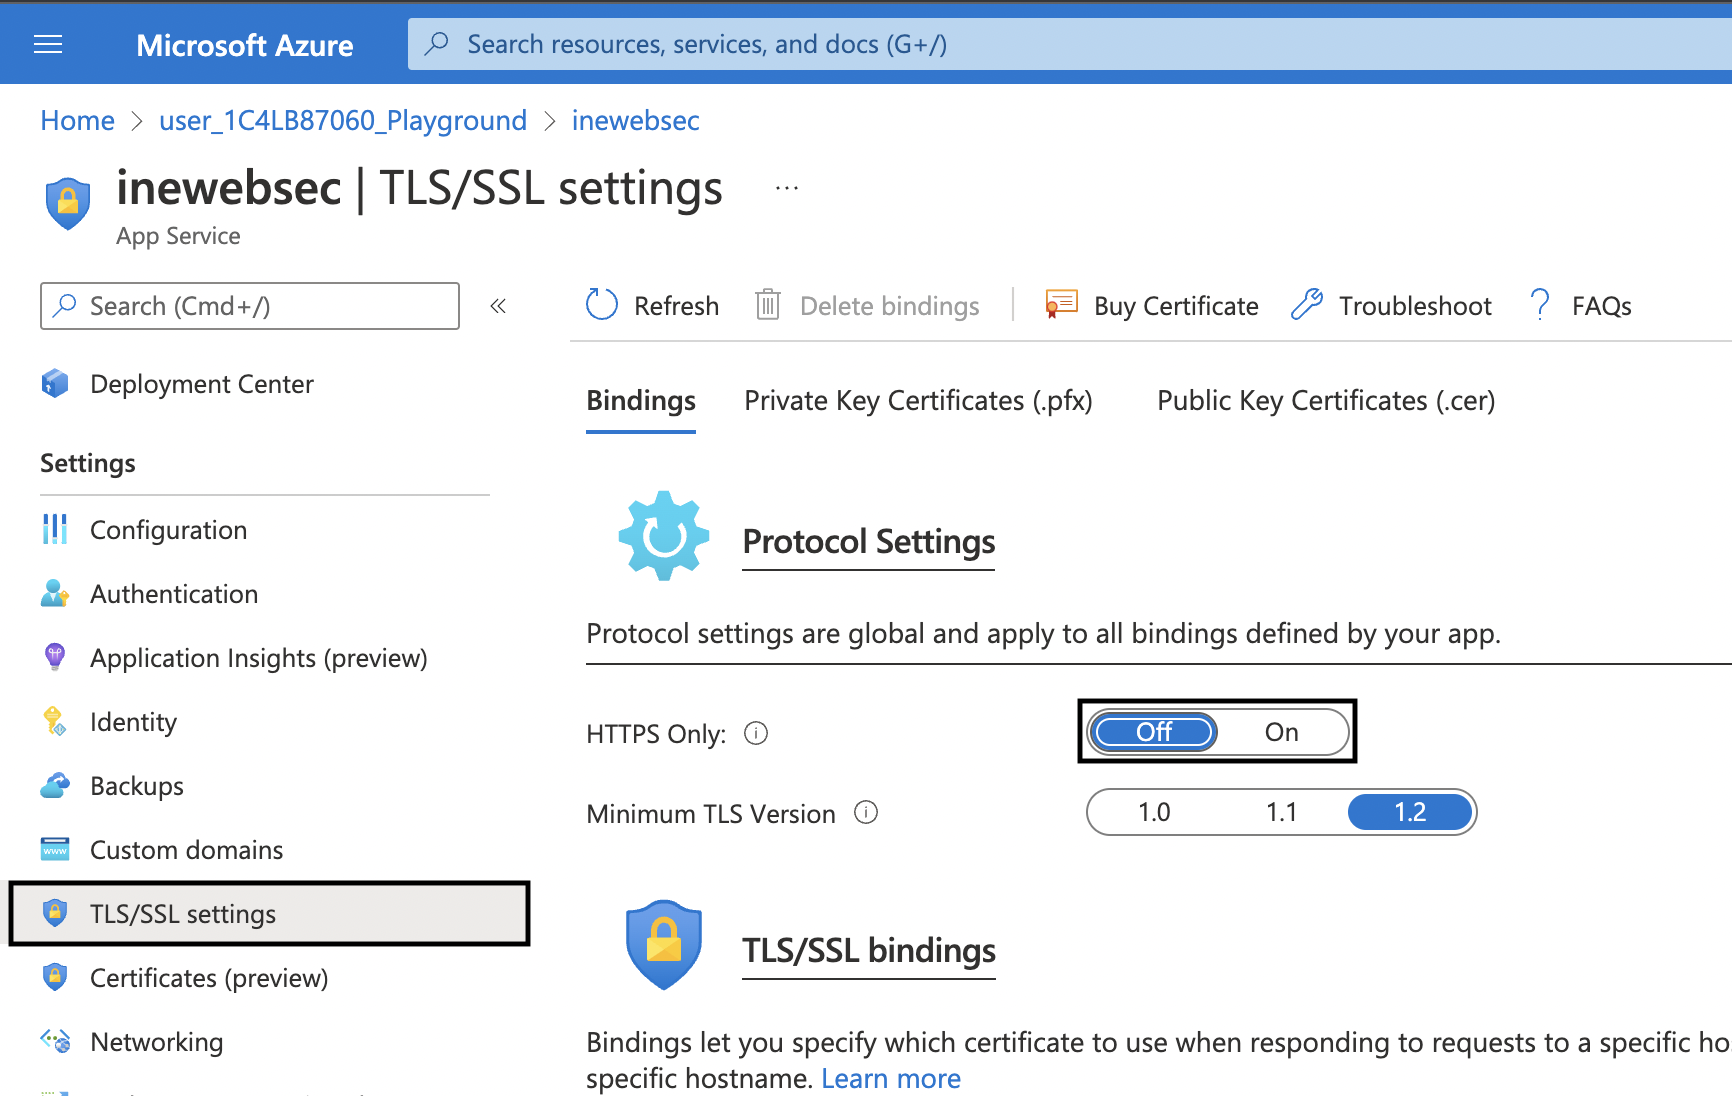
Note: By not requiring HTTPS, you are negating the need to generate a certificate and install it at the web app and application gateway. In production web apps should require HTTPS and TLS 1.2.
Finally, you need to verify that you can only reach the web app via the application gateway.
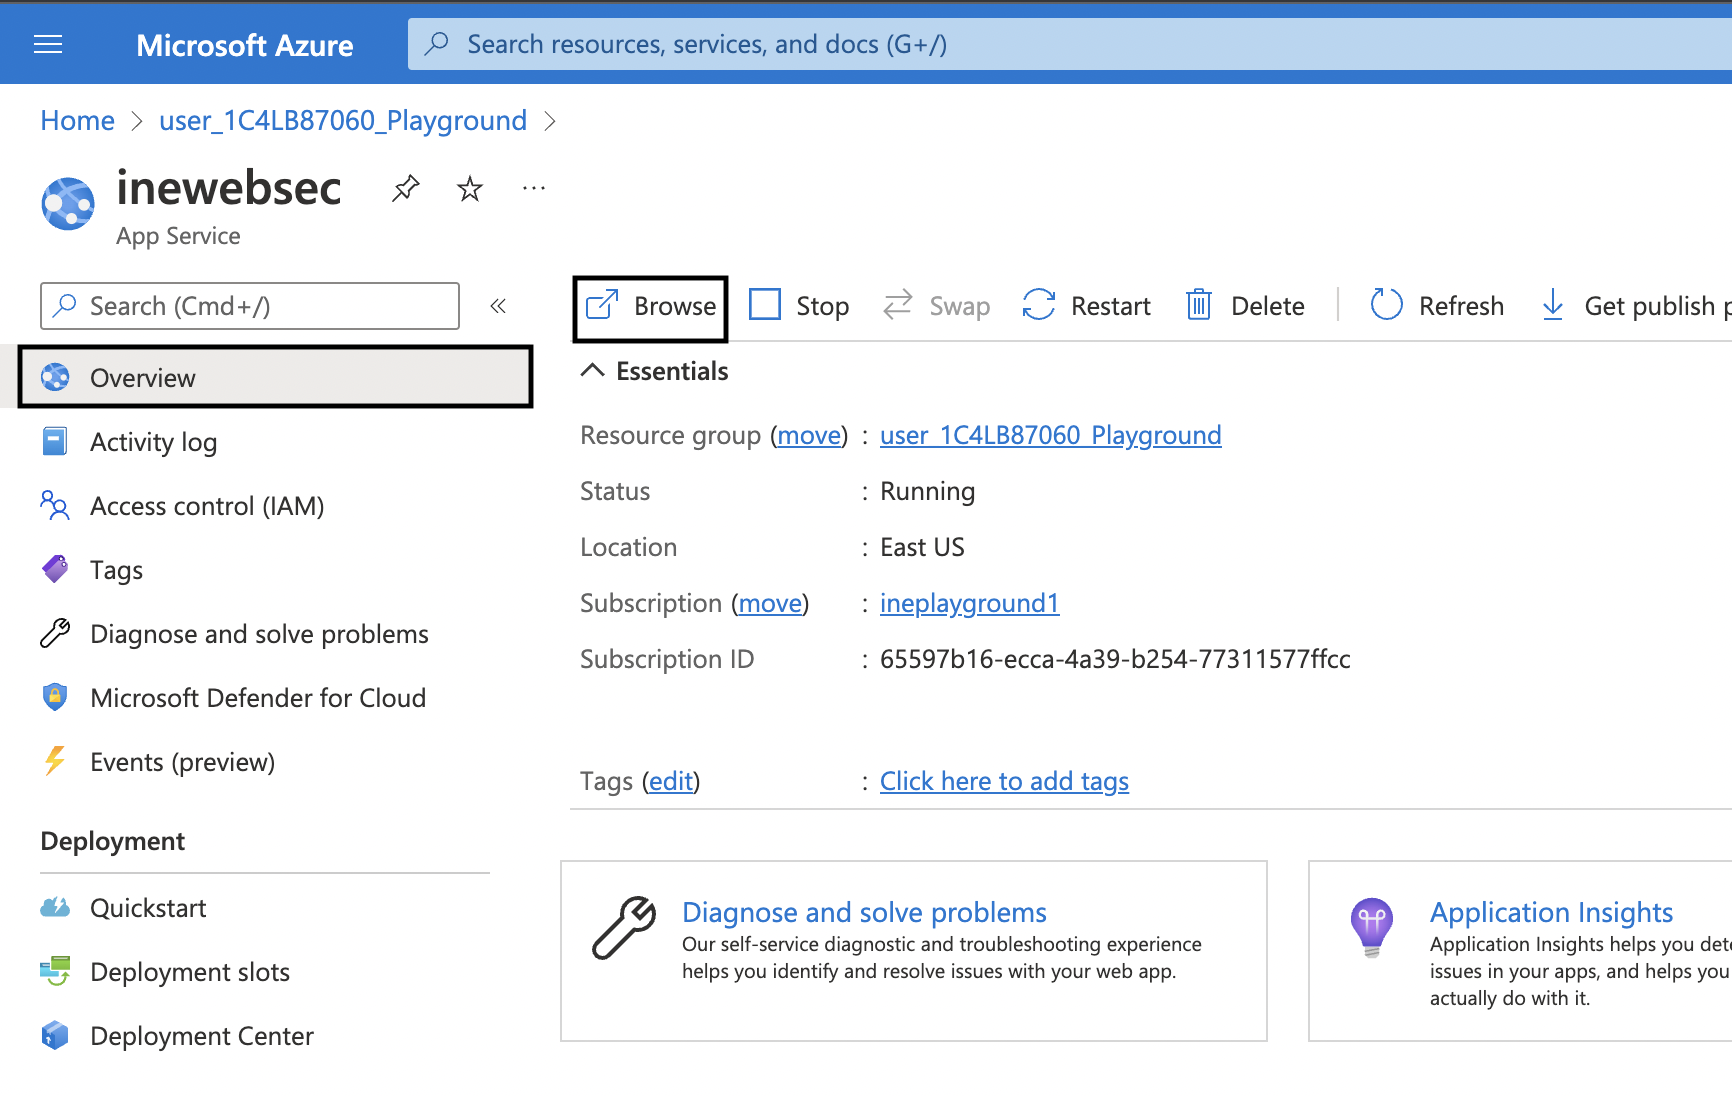
1. Go to the Overview page of your web app. Attempt to browse the web app by clicking on Browse.
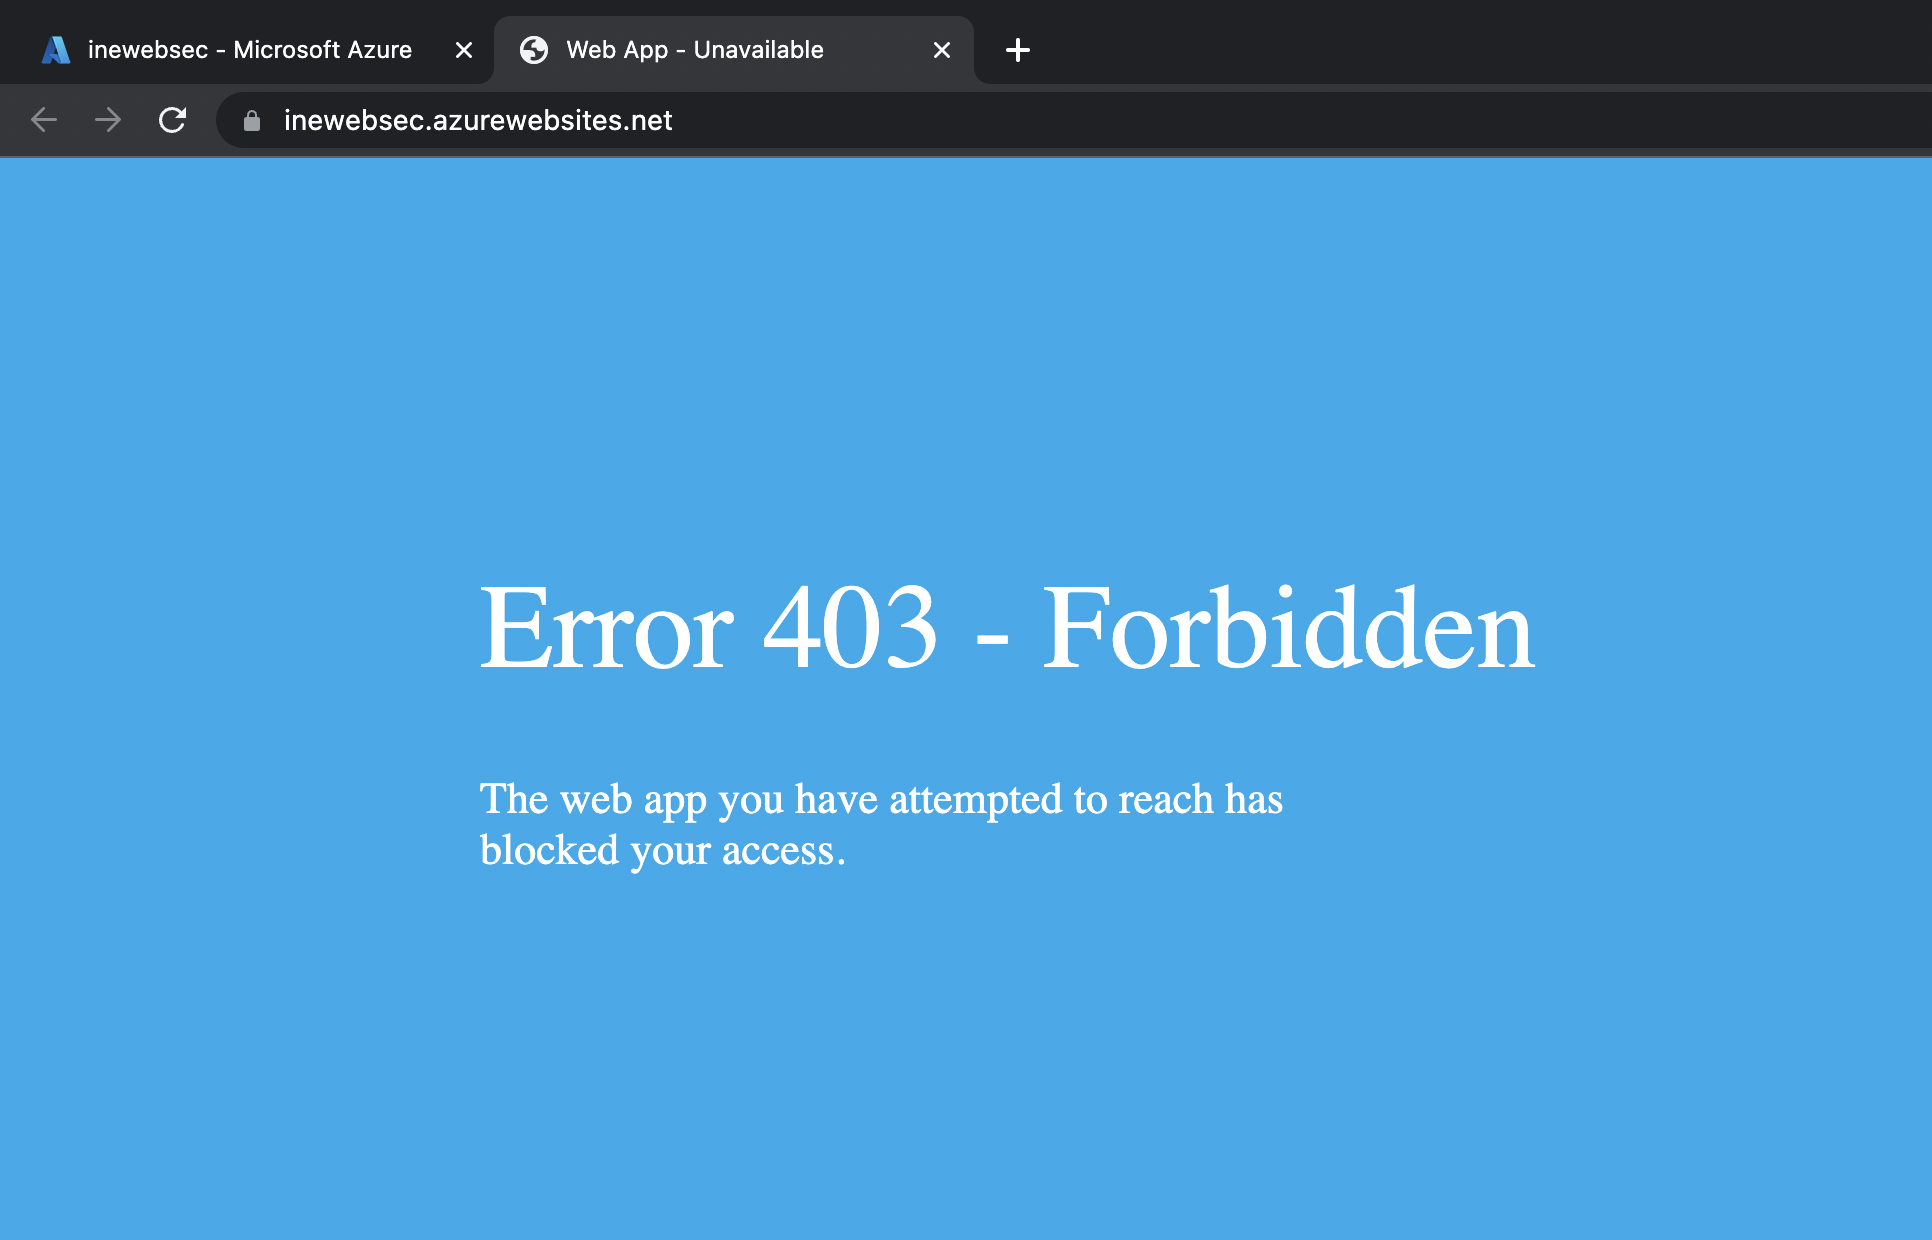
2. You should receive a 403 error as shown.
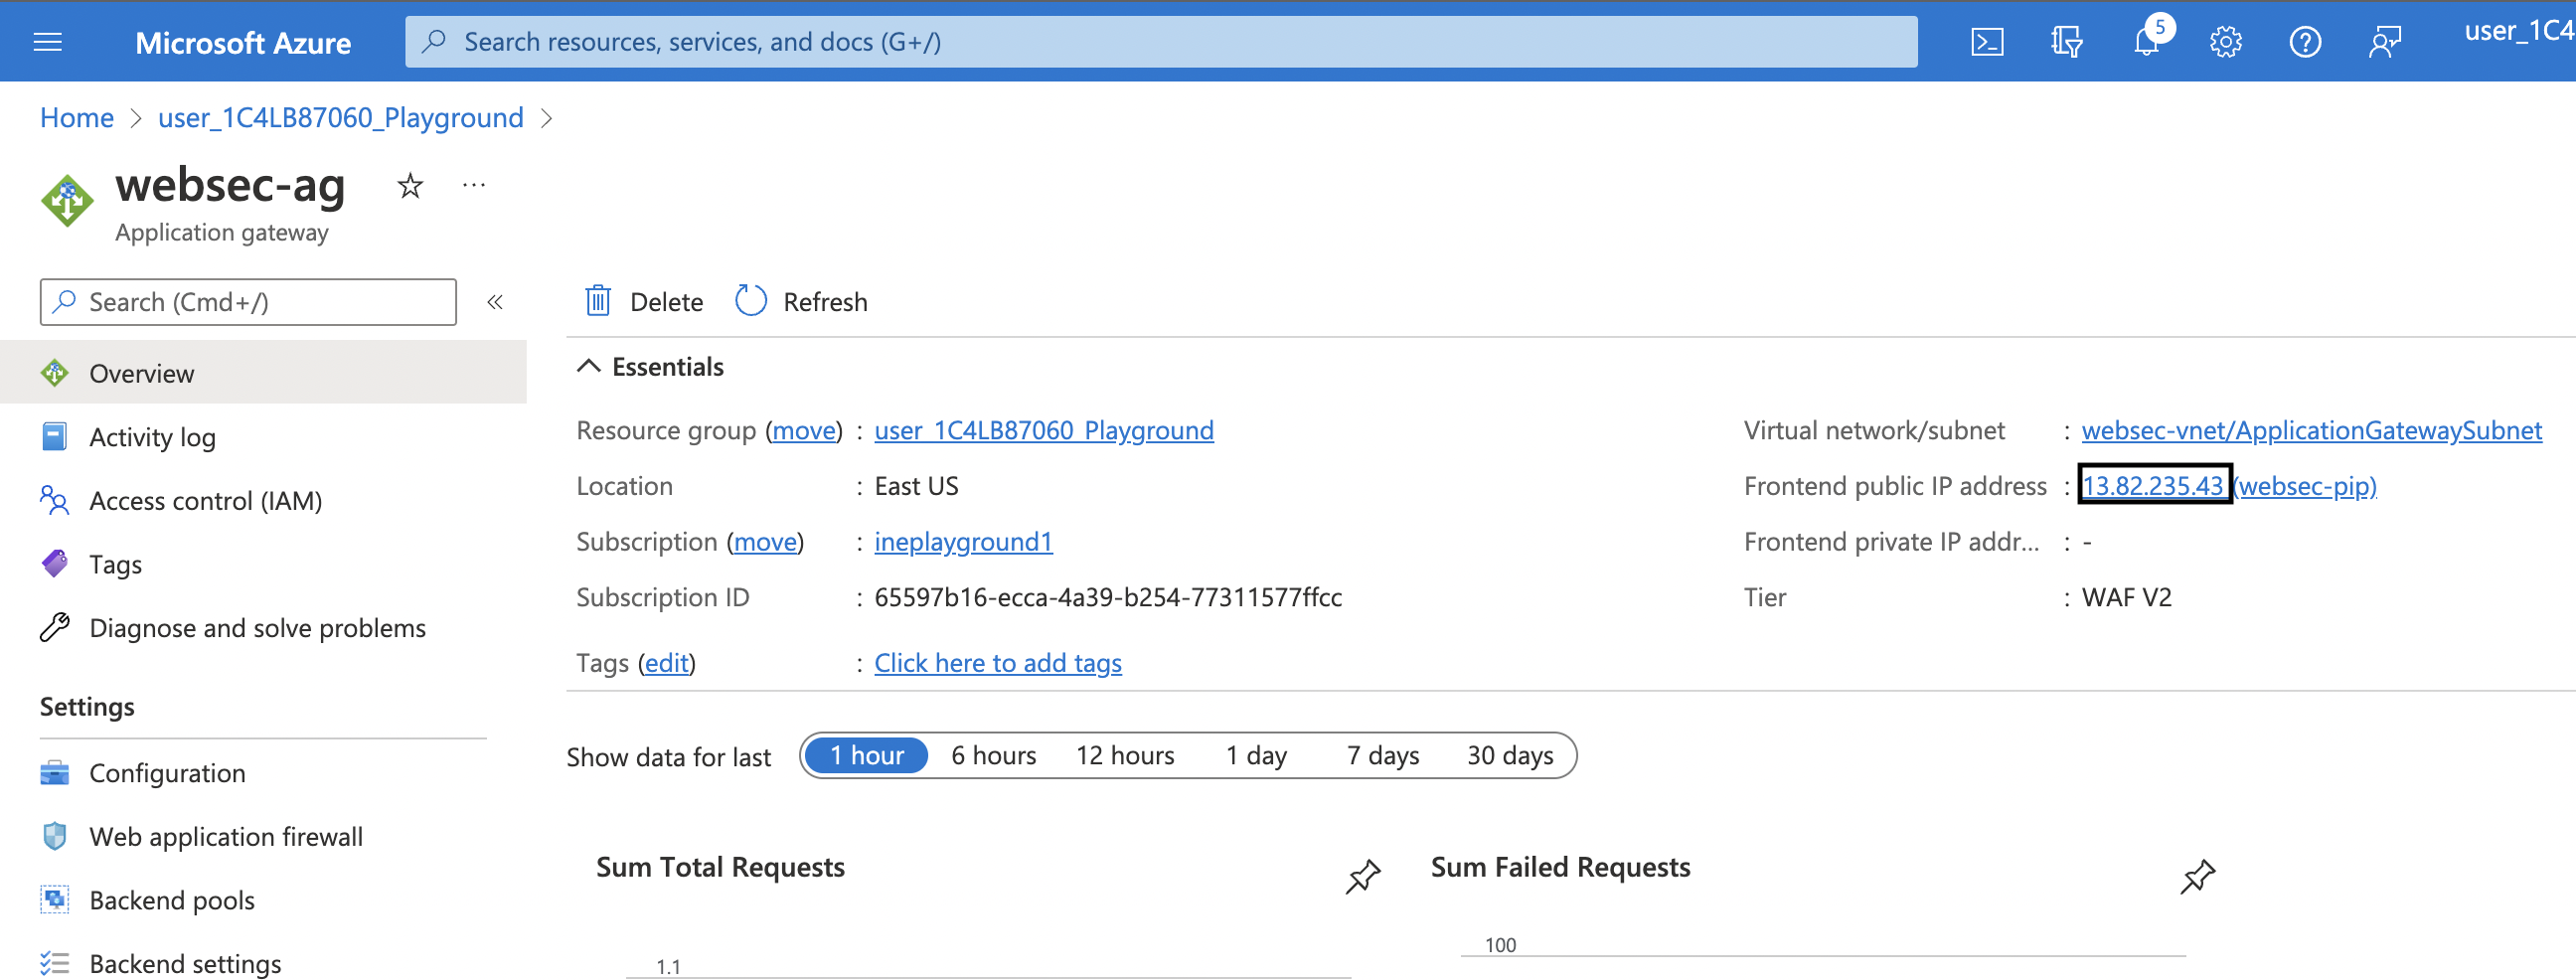
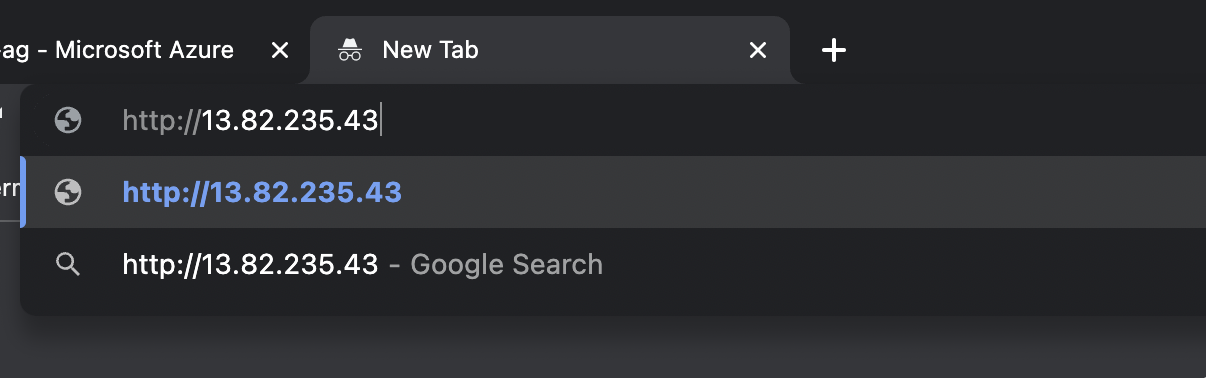
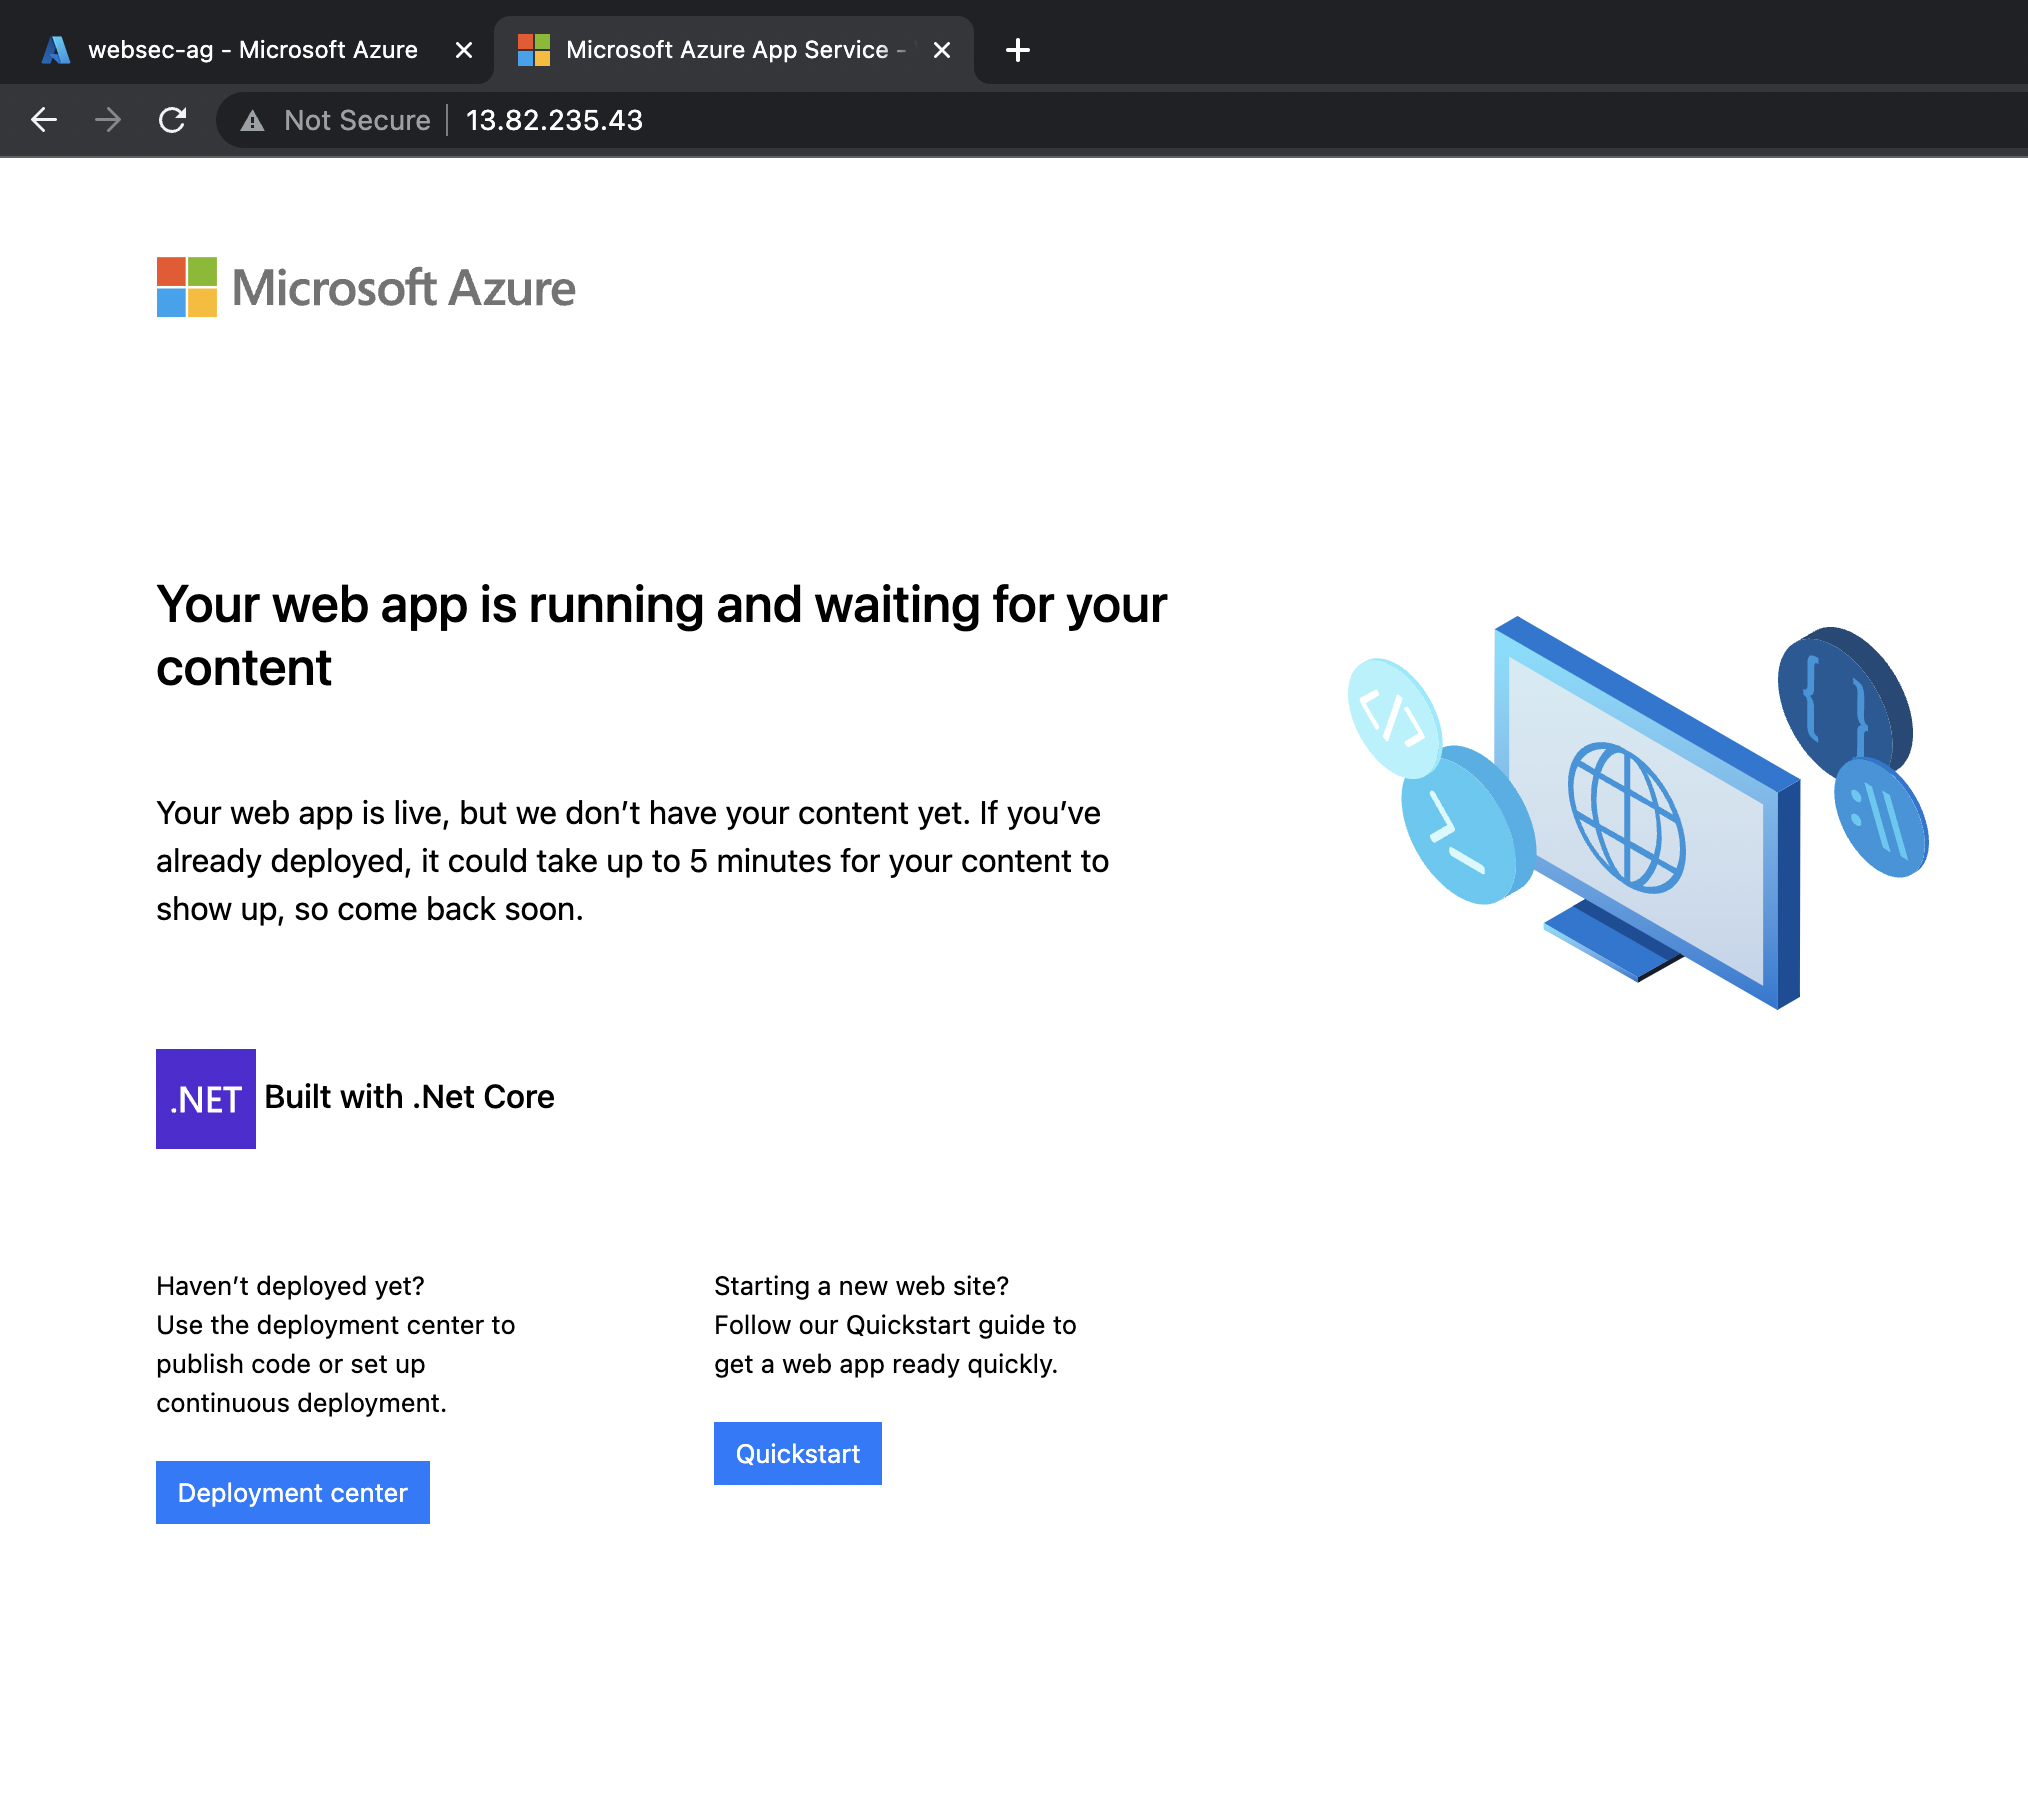
3. Next go to your application gateway page. Record the IP address and attempt to browse to that IP address using HTTP.
4. You should receive the app service placeholder page as shown.
In this task you provisioned a web app and an application gateway with web application firewall to protect it. You configured the web app to only allow traffic from the virtual network associated with the application gateway.