A business called you to investigate three disks. Each one of disks was used to store some important data on, and now the data has either been deleted or formatted on purpose by a suspect. The first disk was found with all the data deleted, the second has been re-formatted, and the third had data overwritten on it.
You are required to investigate each one of them and do your best to recover the files that were stored on each disk, if applicable.
Active@ Disk Editor, Autopsy, and FTK Imager
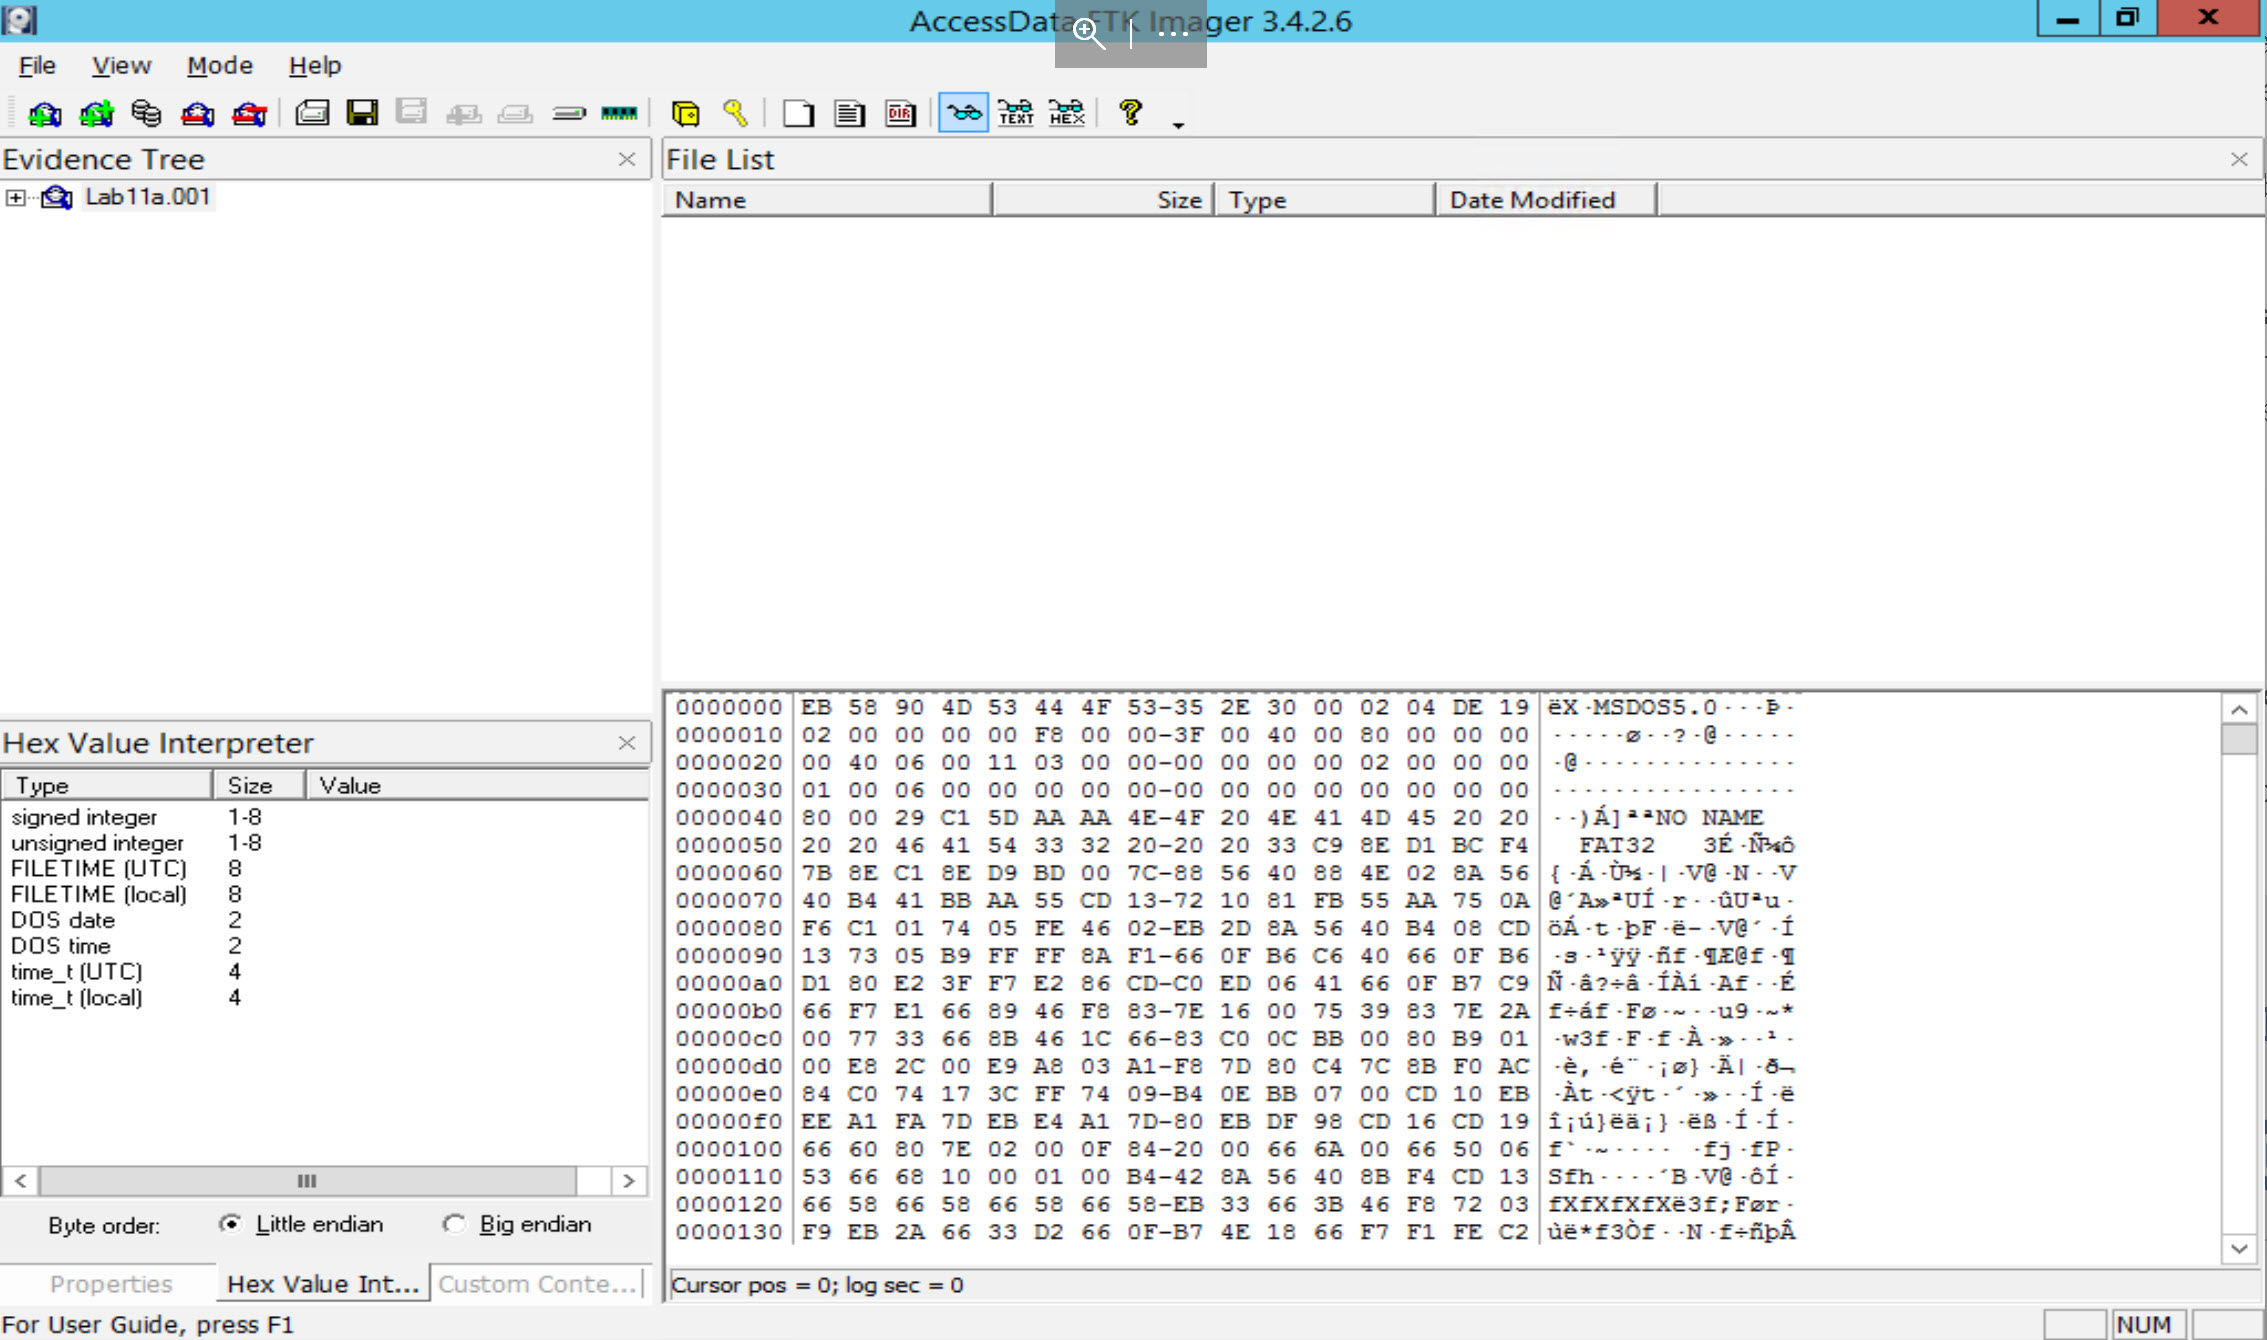
Let us start by opening the first disk which is [Lab11a.001] [located at C:\DFP\Labs\Module05\Lab11\Lab11a.001] and open it using FTK Imager.
Let us start answering the questions we are given.
How can you identify that a file is deleted?
We can accomplish this using different methods, but here let's explain at least two.
Expand the FTK Imager Evidence Tree until you see the directory structure under root. Click on root so that you can see the contents of the folder in File list. You will notice that some of the files and folders have a red x over them.
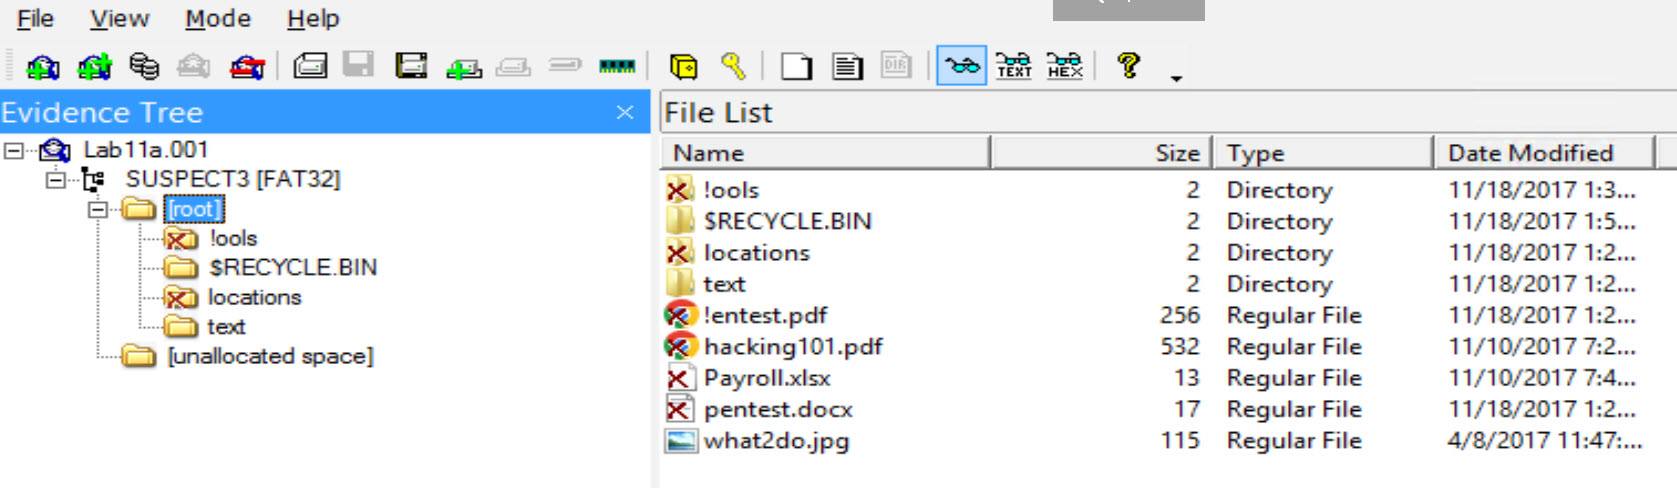
This is how FTK Imager detects deleted files and folders.
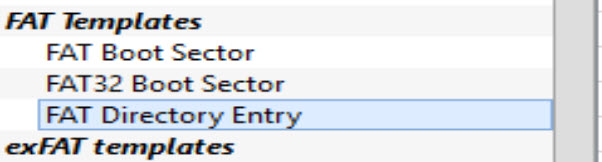
The second method would be to check the root directory entries for these files. Open the image in Active@ Disk Editor. Now, as you can see, we reached the directory entries, let us apply the FAT directory entries on them. To locate the FAT directory entries, select the FAT32 boot sector template. Note the bytes per sector are 512 and the sectors per cluster are 2. We now know that 2 sectors comprise a cluster and each cluster is 512 bytes in size. We detemine cluster size by with Bytes Per Sector * Sectors Per Cluster. In most cases, FAT32 will be 512 * 2 = 1024

This means that the data area should begin after the second cluster (or 4th sector). You can quickly access this buy clicking on the link to the root cluster.
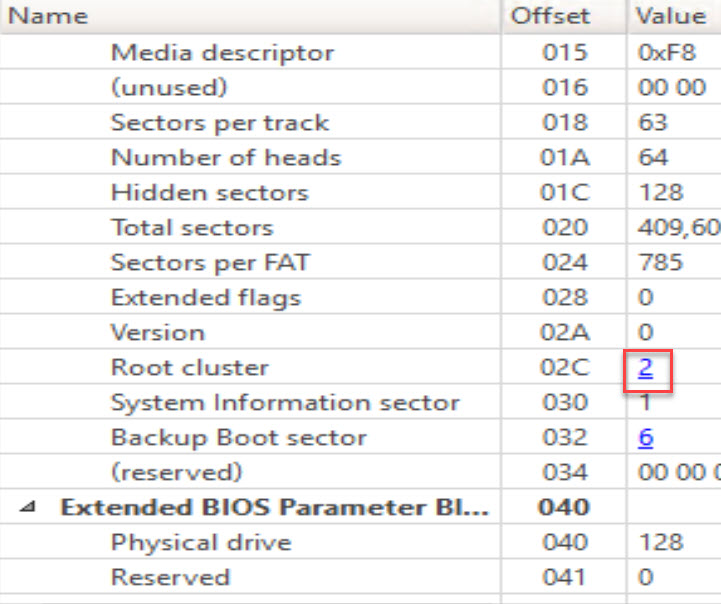
Change your Template from FAT32 Boot sector to FAT Directory entry.
We can skip the first, as it is for the Volume Label, but if you go to the second, we find that it is for a file named what2do.jpg.
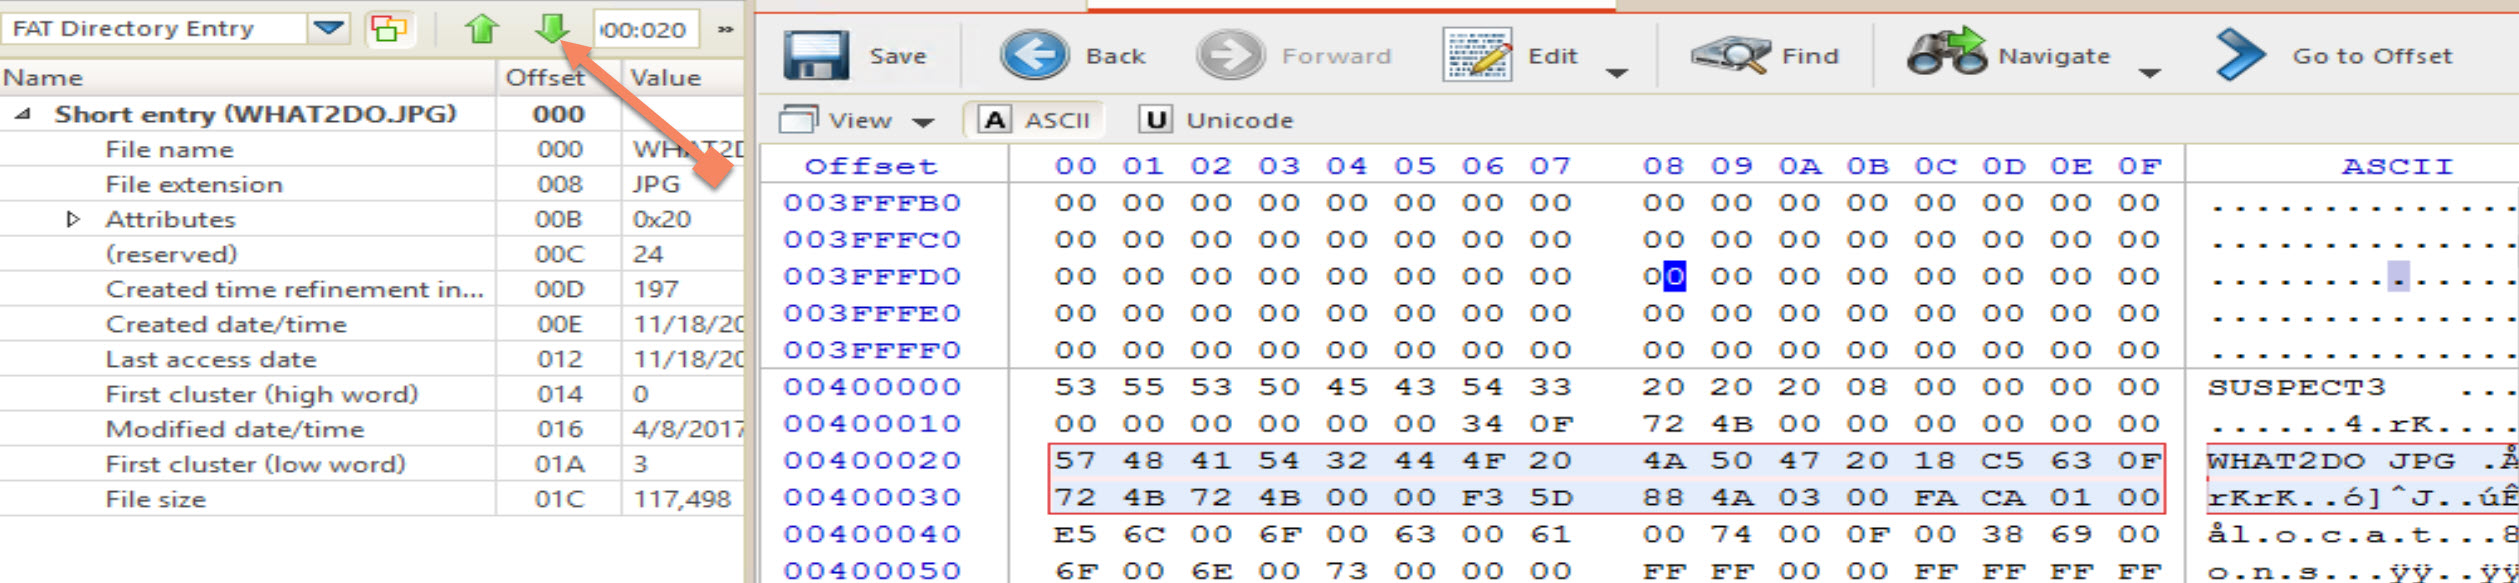
This file is not deleted because it would have its first character changed to any of the following characters (? , ! , _ , 0xE5) as we already know.
The next entry as seen below is clearly for a LFN file, but is also deleted:
If you keep moving through the entries as we can see below, we will be able to identify which files are deleted and which are not, just by checking the erased or not status character at the beginning of any file/directory.
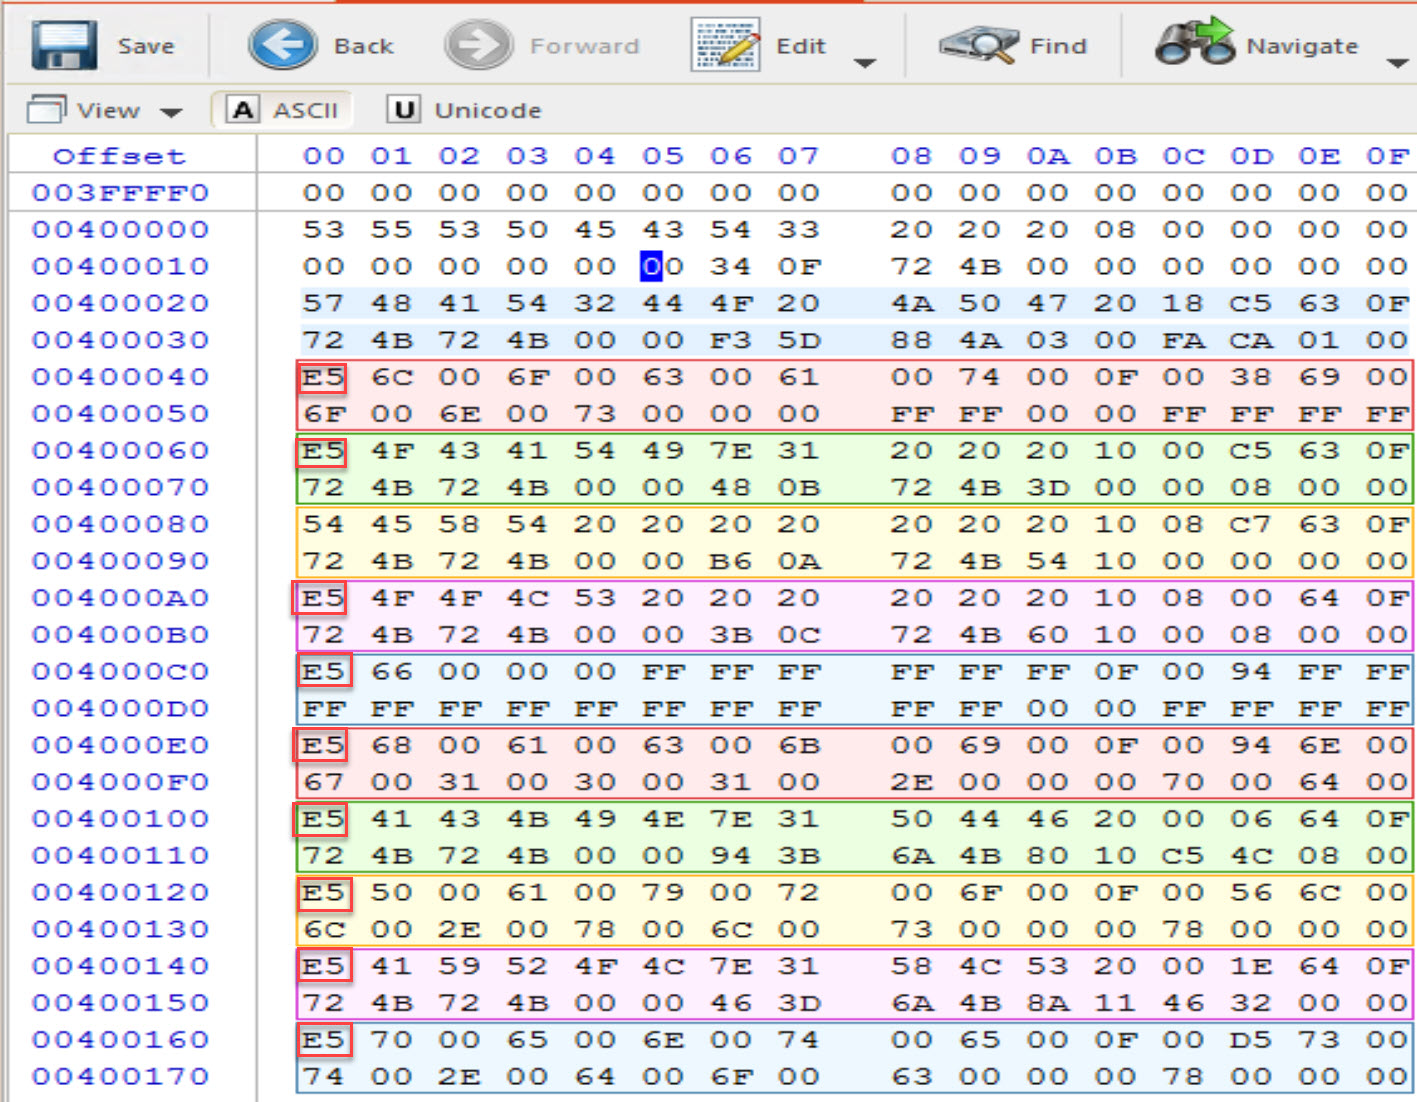
Look through the entry and see if you can identify deleted directories and files.
You can follow the same process to identify all files and directories, I will stop at this point, as all you need is repeat the process. The summary of findings would be found in the table below:
|Entry|Name|File/Directory|Deletion Status| |*||***|****| |1|locations|Directory|Yes| |2|text|Directory|No| |3|tools|Directory|Yes| |4|$RECYCLE.BIN|Directory|No| |5|what2do.jpg|File|No| |6|hacking101.pdf|File|Yes| |7|?entest.pdf|File|Yes| |8|Payroll.xlsx|File|Yes| |9|pentest.docx|File|Yes|
We can export the whole list of files and directories into CSV in FTK Imager. Review the text file for the IsDeleted column.

We can clearly identify which file is deleted and which isn't, as well as the number of deleted files with their full paths. For example, the first file Photo02.JPG is deleted, as the Existent column says No, which means it does not exist. Also, the description says the file previously existed on the file system. Plus, the description also says that the file's data is not necessarily intact, which means we can recover this file. The full path could be seen as \locations\Photo02.JPG.
You can clean this up a little using some Powershell Select-String features

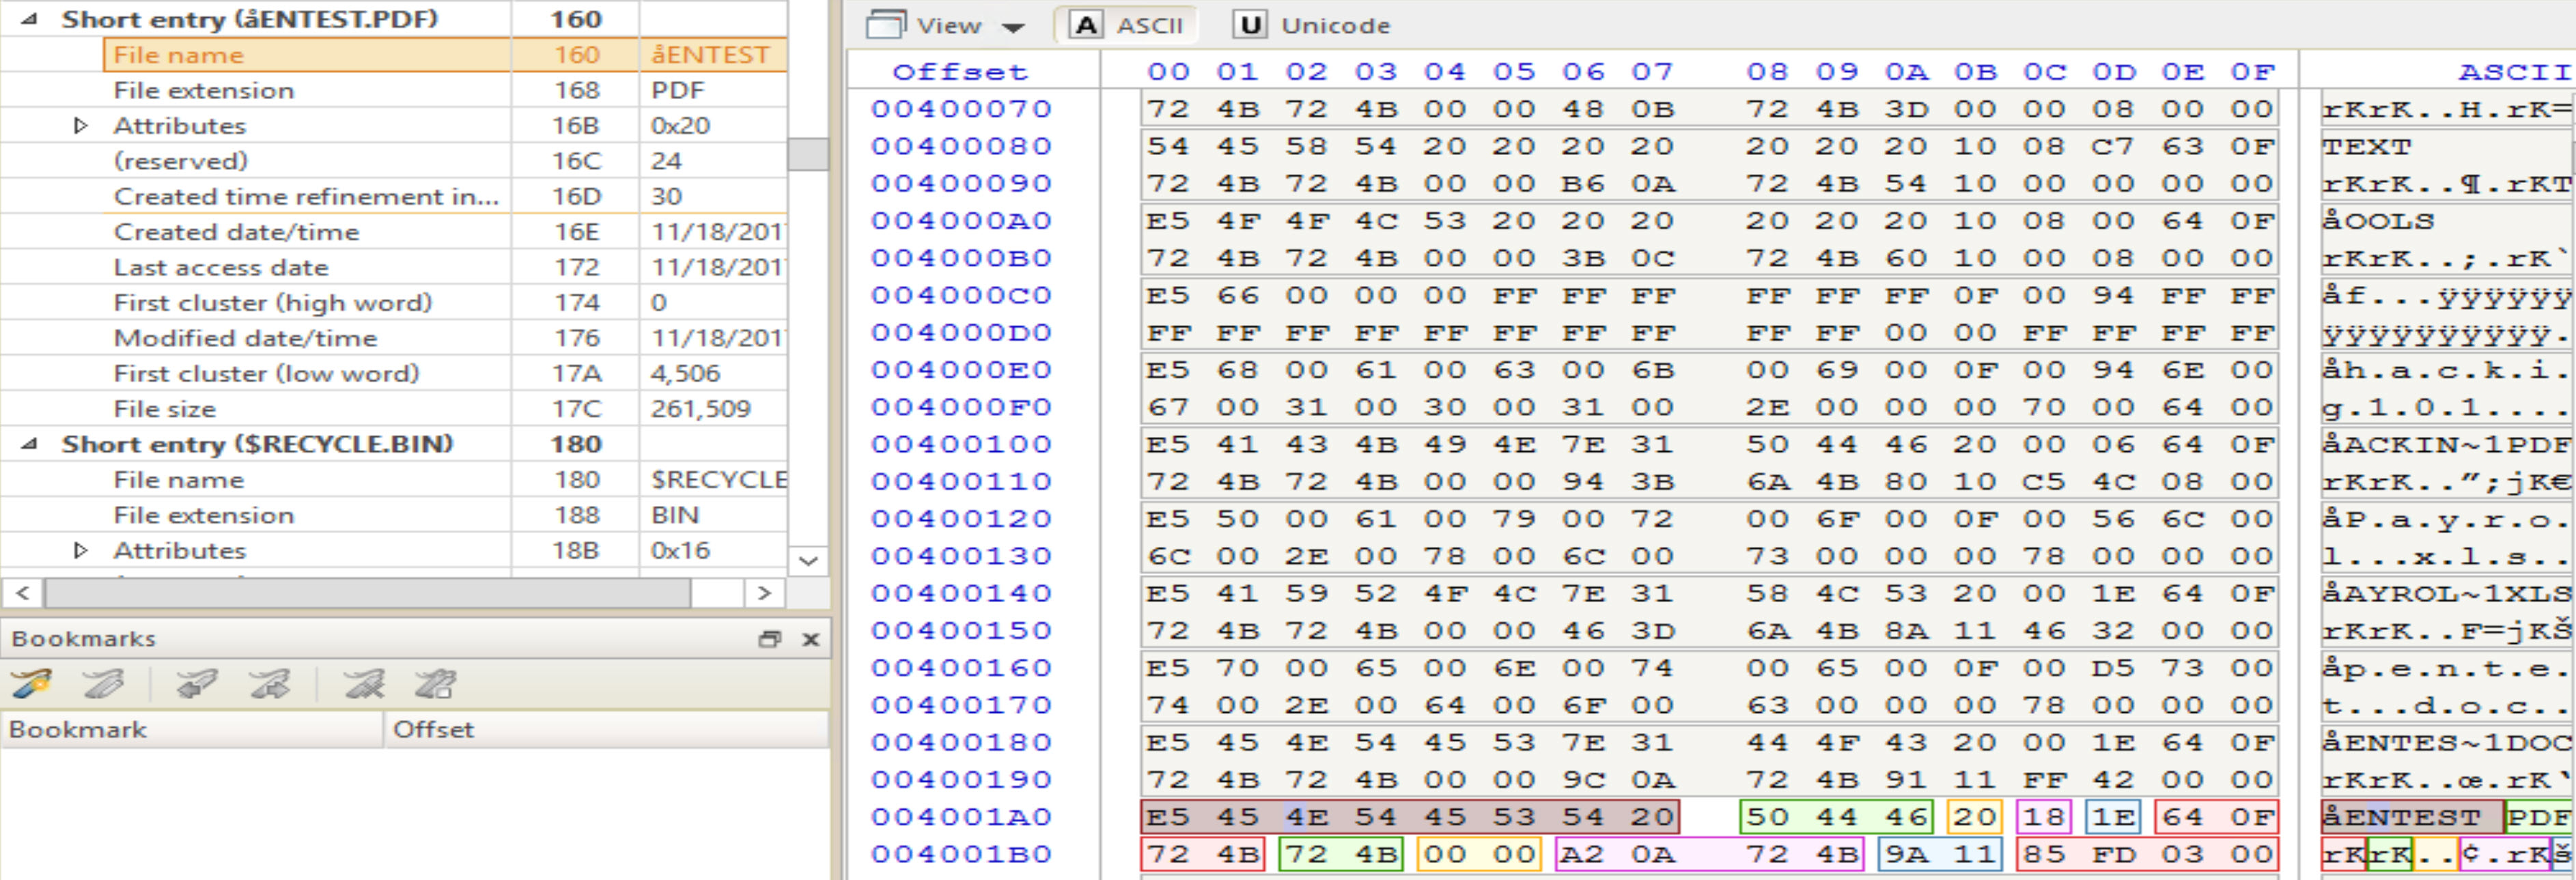
Analyze the directory entry of the file that has its first character replaced with "?" or "!" or the others mentioned above. Answer: the file with the ? in its first char name is ?entest.pdf. We already showed how to analyze the entries in previous tasks and labs, so I'm going directly to this file's entry and applying the FAT Directory Entry (Normal/short entry format) to it. With that done, I got the following:
Where did you find the content of the files? Can you recover them? [Answer:] Every single file when deleted, its allocation units will be added to the unallocated space for other files/directories to occupy. So, all these files that are deleted get their clusters marked as unallocated.
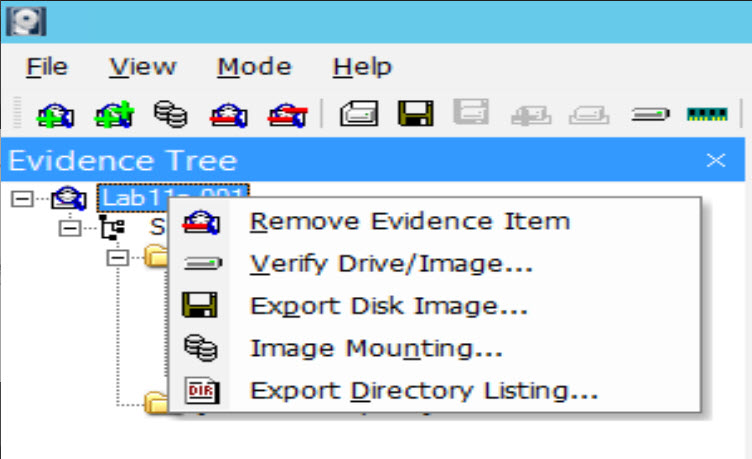
To start the recovery process, I will open the evidence file in Autopsy and process the case using default settings.
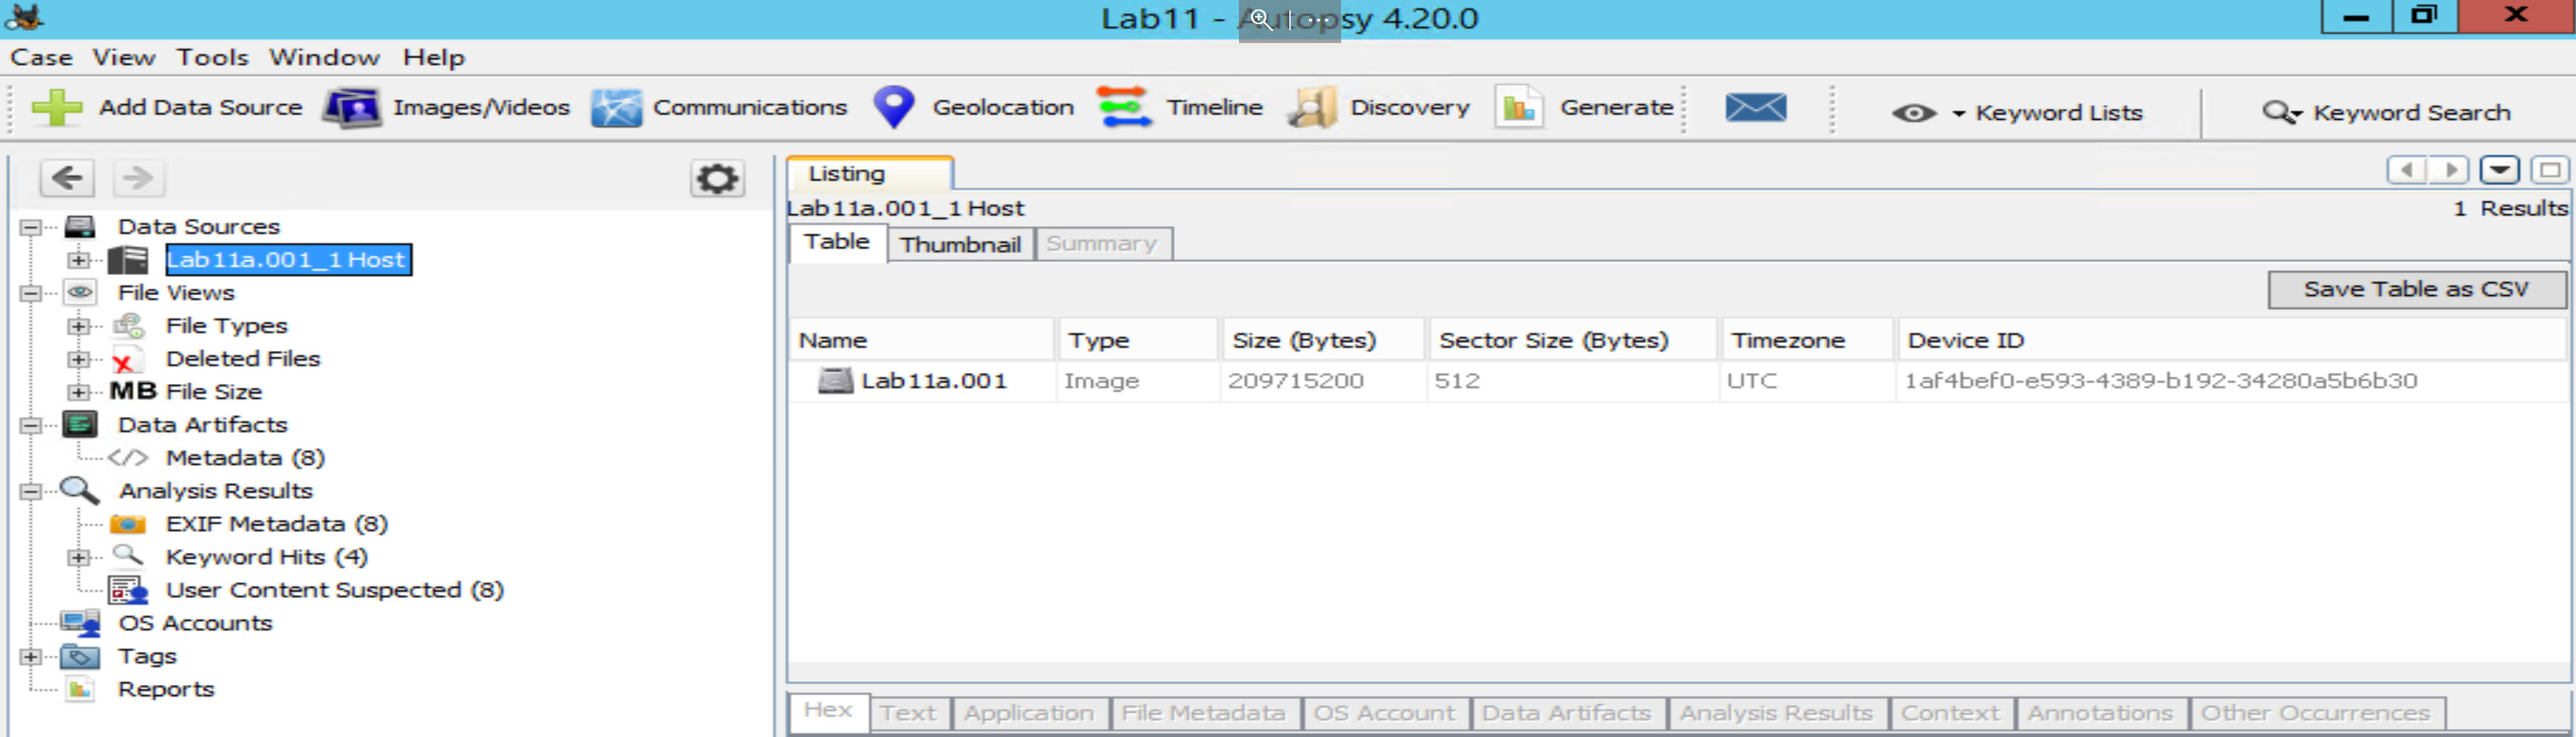
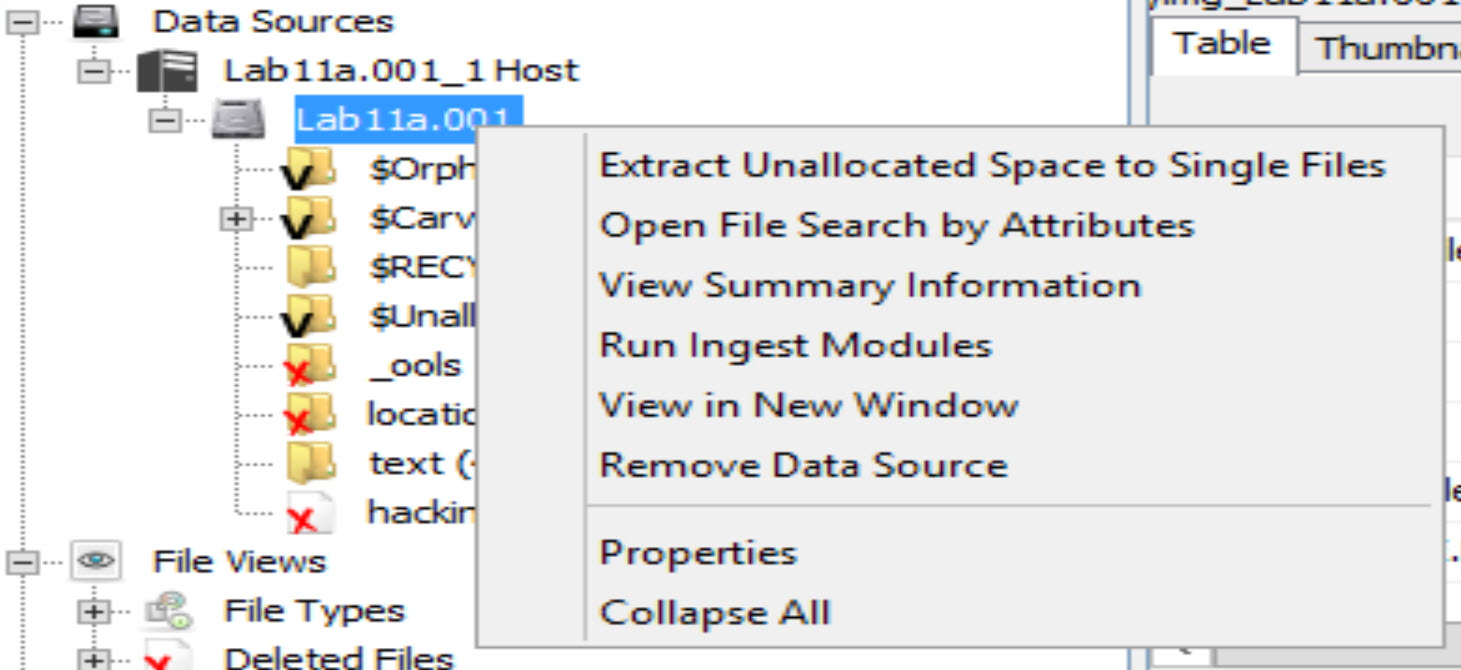
Gather all of the free unallocated space by expanding the data sources tree, then right click on Lab11a.001 and select "Extract Unallocated Space to Single Files". Save to the default export folder.
Autopsy has now copied all of the data in unallocated space into a single file.
Add the file as a datasource. Select "Unallocated Space Image" instead of a disk image.
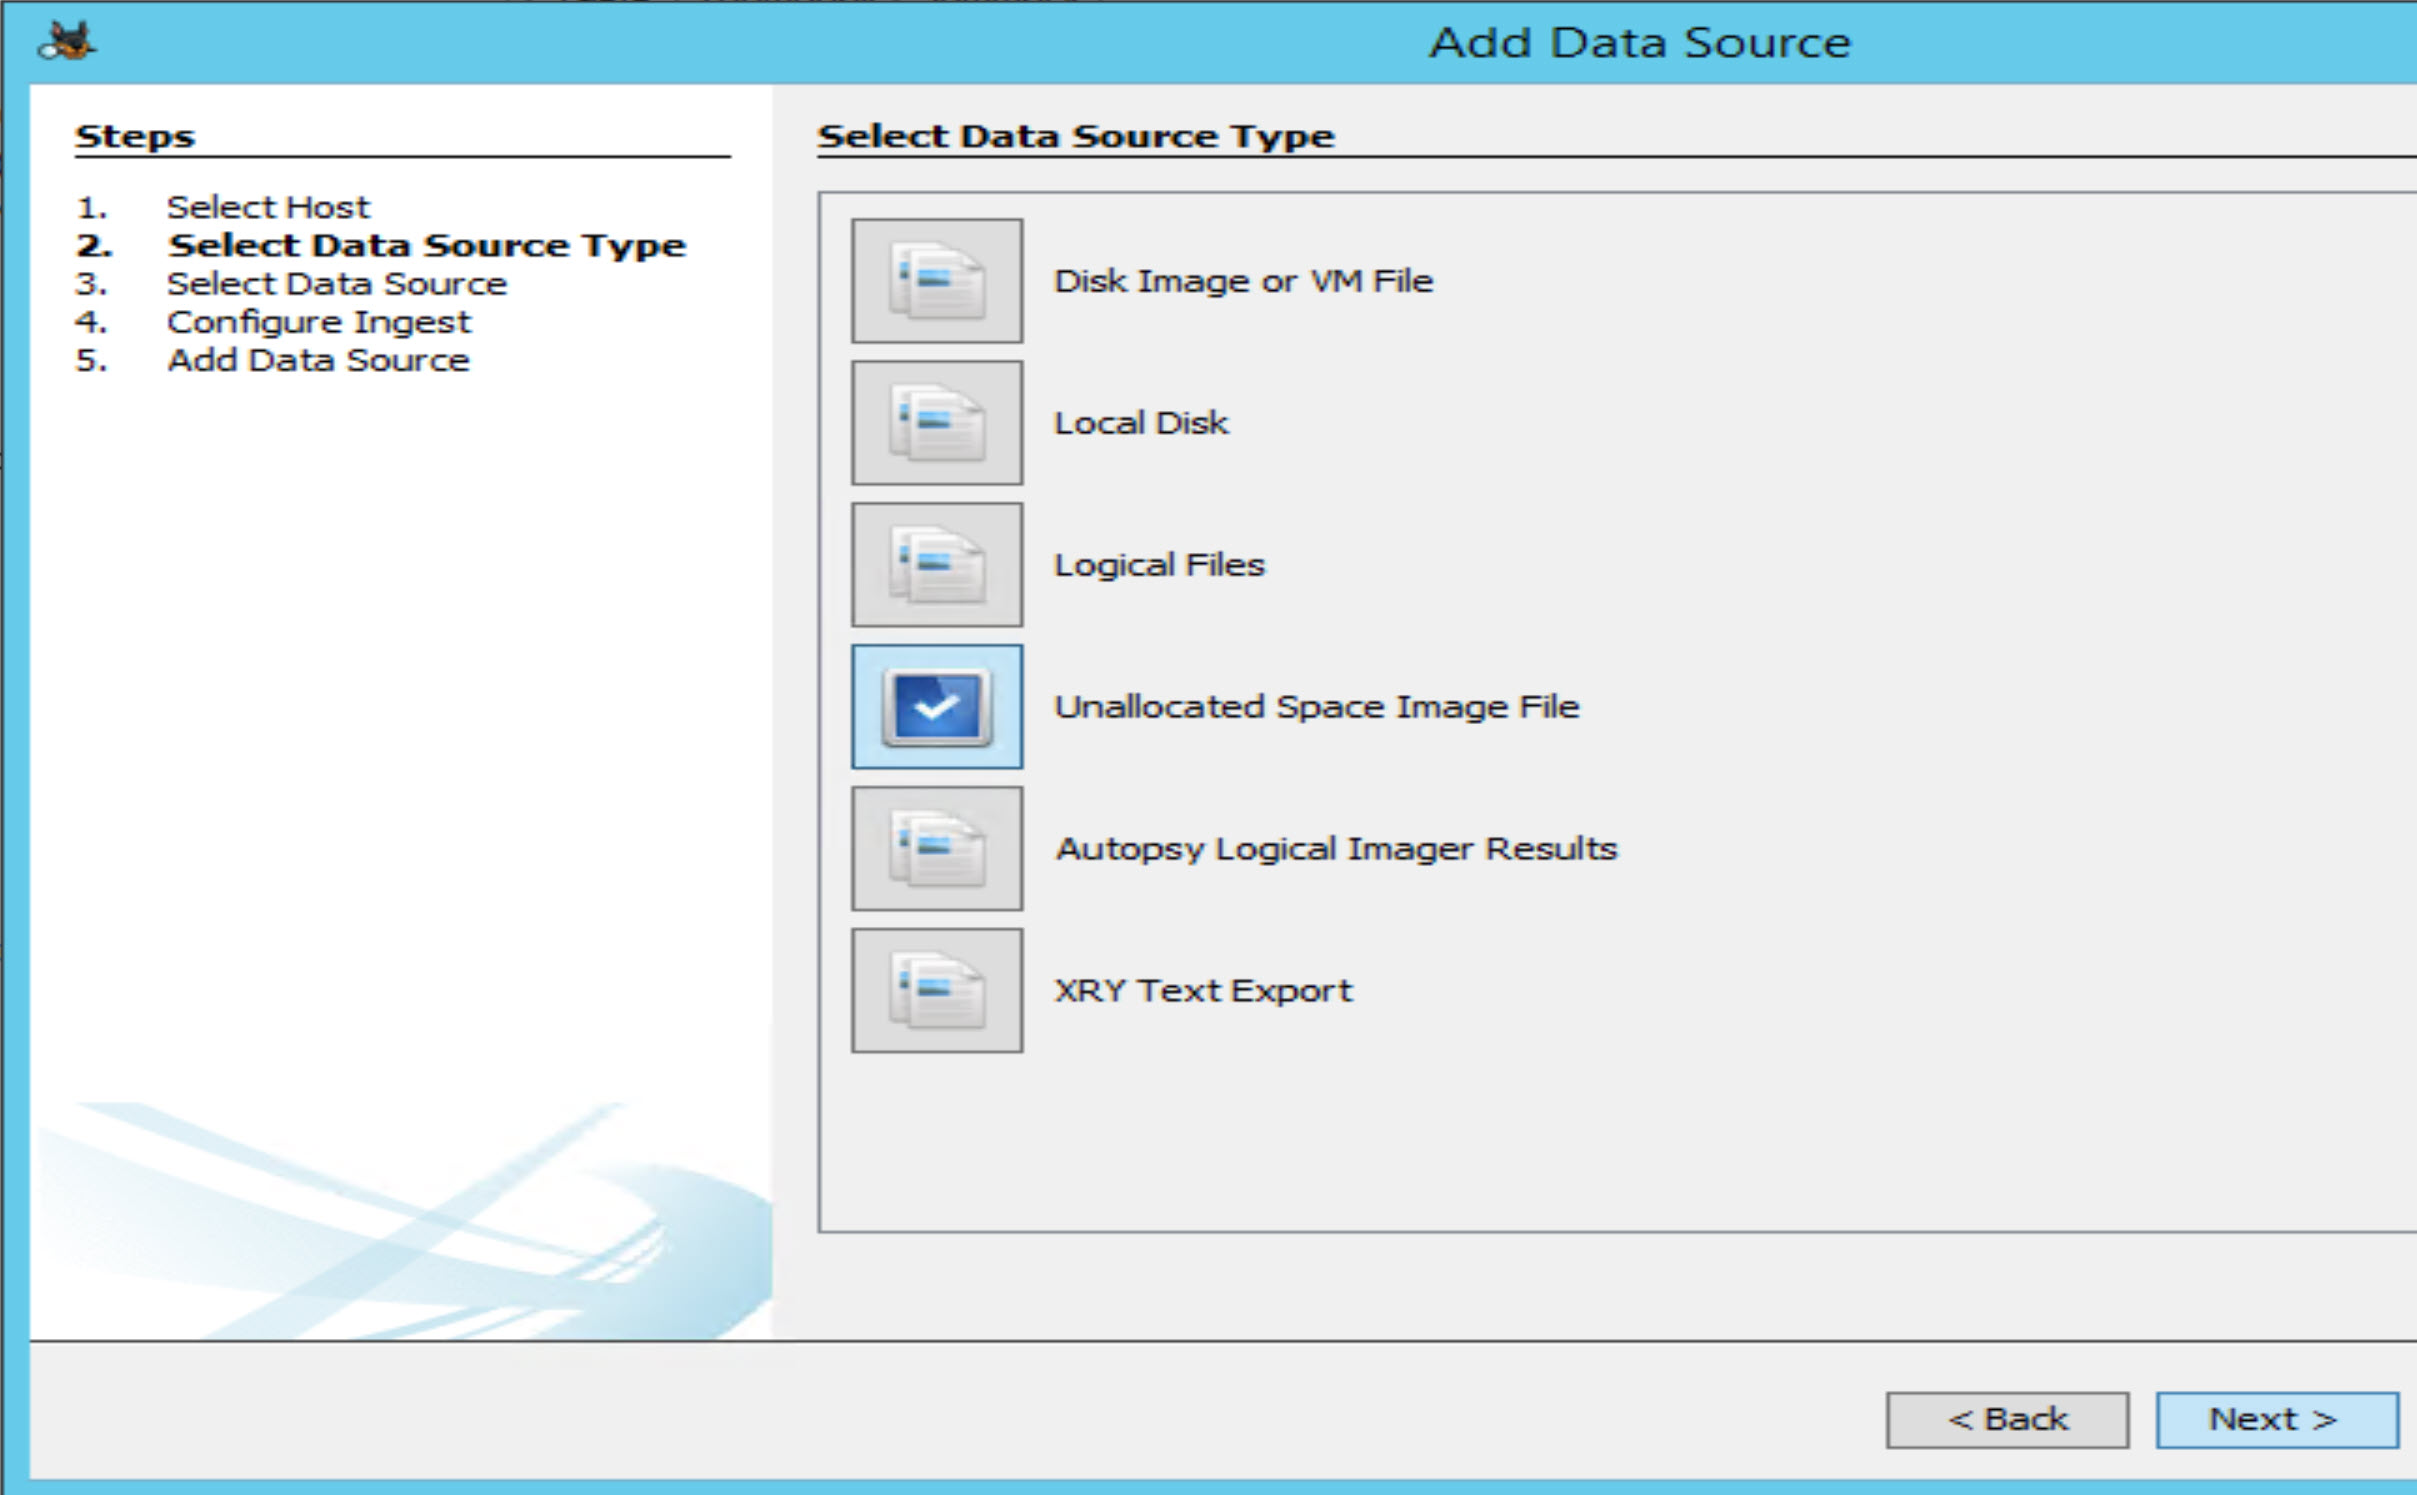
Select your unallocated space image file and select all remaining defaults and finish.
You should now see a new data source. Explore the carved files folder. You will see that while there are carveable files in unallocated space, the document of interest is not there. Hypothesis of how the files were deleted (shift+delete or just delete)? Answer: by logic of using a Windows Operating System (or any other system), I believe these files have been deleted using shift + delete for a simple reason. If they were deleted by just pressing the delete button, then they are supposed to be found within the $RECYCLE.BIN directory, under the user's SID directory there. This will be explained in further details later in the course when we check the Windows Forensics Artifacts - Recycle Bin section.
Let us start by opening Lab11b.001 [located at C:\DFP\Labs\Module05\Lab11\Lab11b.001] and loading it using FTK Imager. You should see something similiar to this screenshot.
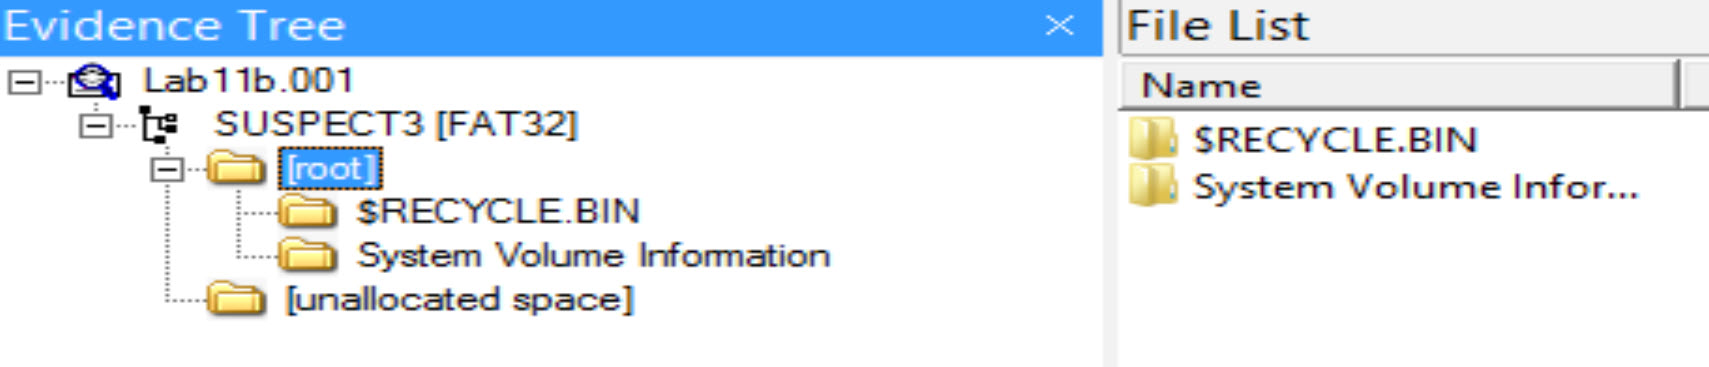
This is strange; we see nothing here! It seems like this disk was recently formatted and no files stored on it because this is how it usually looks like. Let's try to prove if we are right or wrong.
Number of files and directories found in the root directory. [Answer:] we didn't find any files or directories other than those that Windows created "System Volume Information" and "$RECYCLE.BIN."
Can you recover any files from the disk? [Answer:] I think we can, but let us prove it. To do that, all we need to do is apply the same steps we did in task #1, by extracting, for example, the free space and then searching through it. Open up Autopsy and see if you can do it. You should be able to carve 13 files from unallocated space.
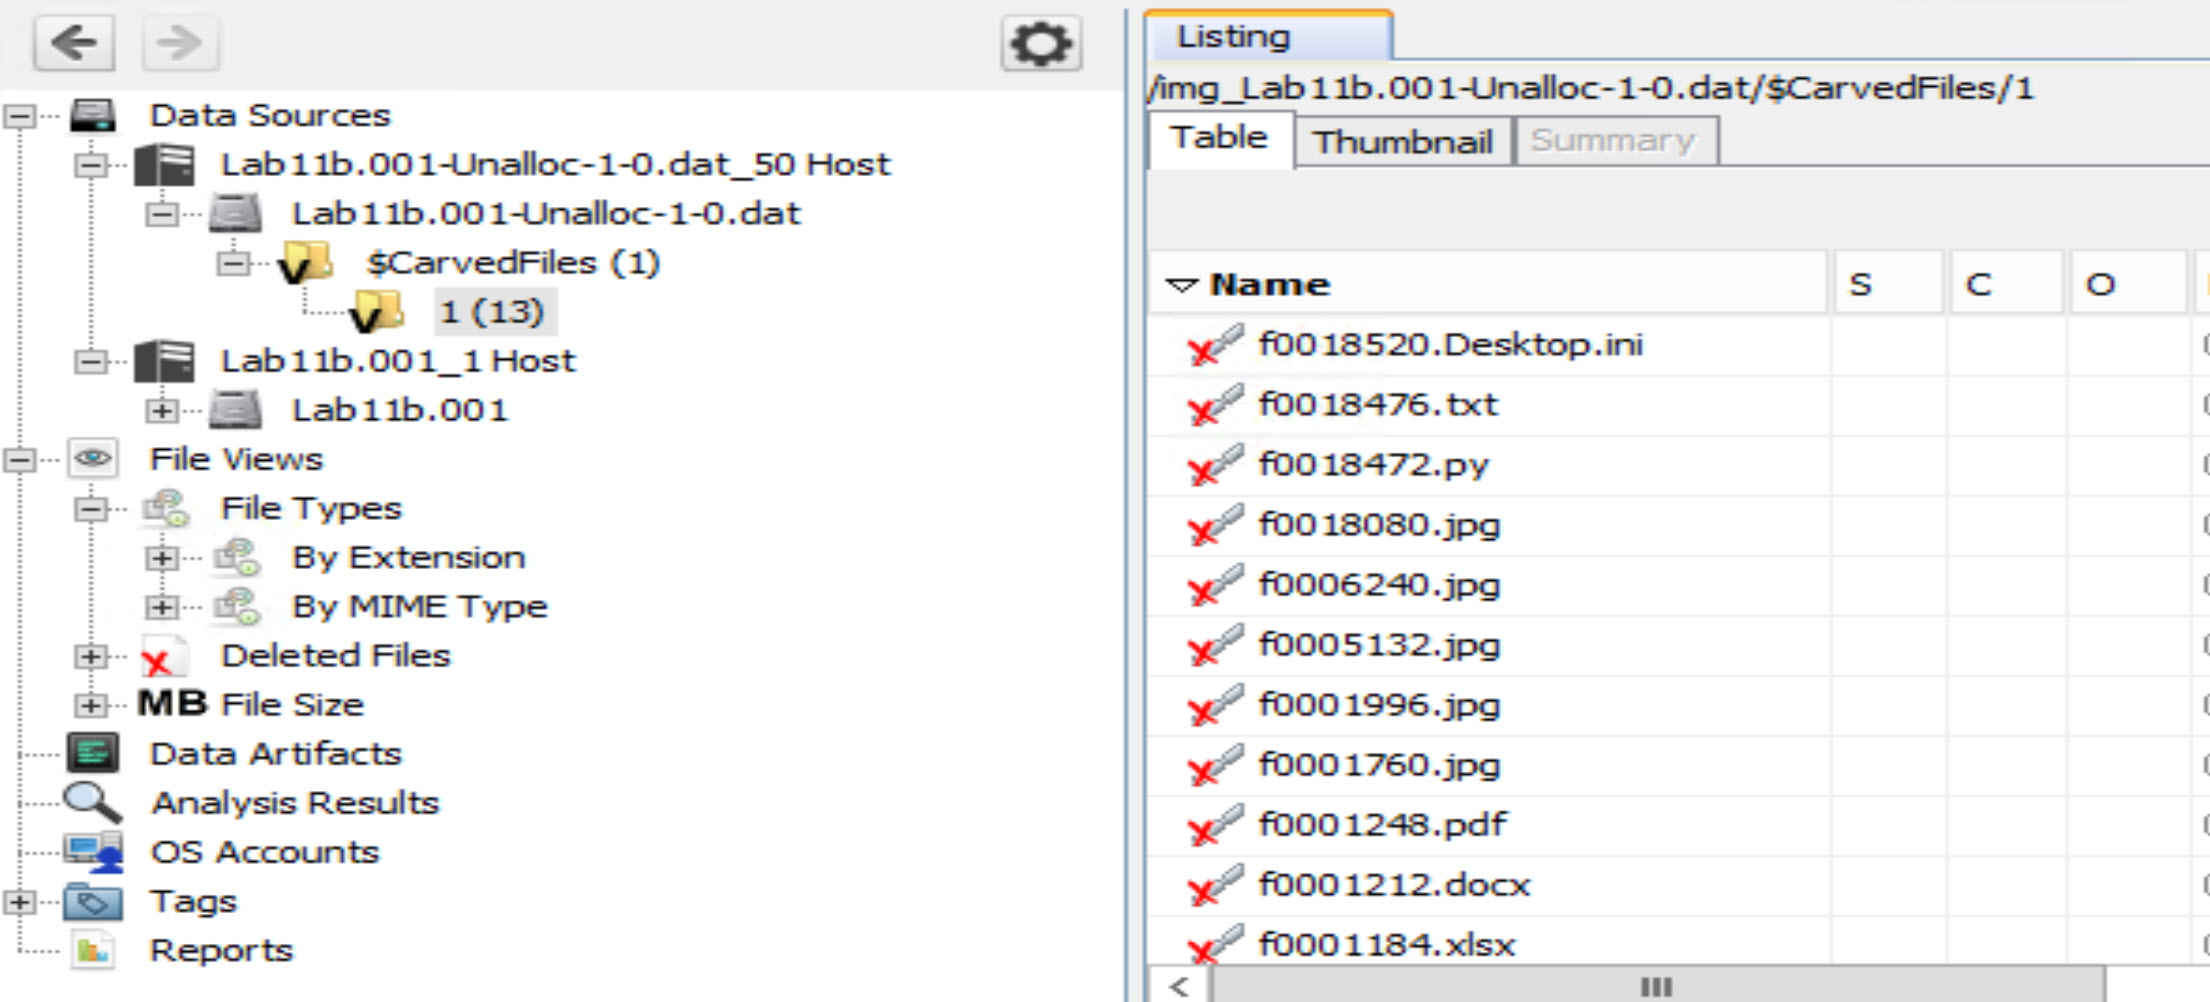
You can also compare the unallocated space data source to the system image. Browse through it and compare both images. One key difference is that in the full syustem image the directory structure and file timestamps have the potential to be preserved.By checking the contents of each directory, we can prove that even after formatting a disk, the data is still preserved and could be retrieved, unless new data occupied the same storage or parts of the storage locations used for the previously available files.
You can also use the file views feature and browse the recovered files by exetension or type.
Your hypothesis of the case. Answer: the suspect corrupted the previously available data by overwriting on the disk a new file. But, what the suspect failed to do is completely overwrite the previously available data because he/she only overwrote the file with 512 bytes, and we managed to recover parts of the old file except for the first 512 bytes. This proves that files will continue to exist unless all of their occupied sectors/clusters are overwritten.
[DIY:] Create a simple disk, wipe it clean with zeros, format the disk, and then copy a simple text file with enough text. For example, let it be no less than 2000 bytes. Then, format the disk again and copy a smaller text file, for example, let it be 500 or fewer bytes and then check the disk using WinHex or any other disk editor or maybe FTK Imager. Could you see the content of the old file or not?