One of the important tasks when analyzing a file system is to know how to locate and find a file's true logical location on disk. Which clusters is it occupying and why is extremely important. This lab is designed to understand how to do that manually. You are required to locate a couple of files by analyzing the NTFS attributes and especially the NTFS data-runs used.
Use the forensic image named "Lab12.001" file [located at C:\DFP\Labs\Module05\Lab12\Lab12.001] for this lab.
FTK Imager
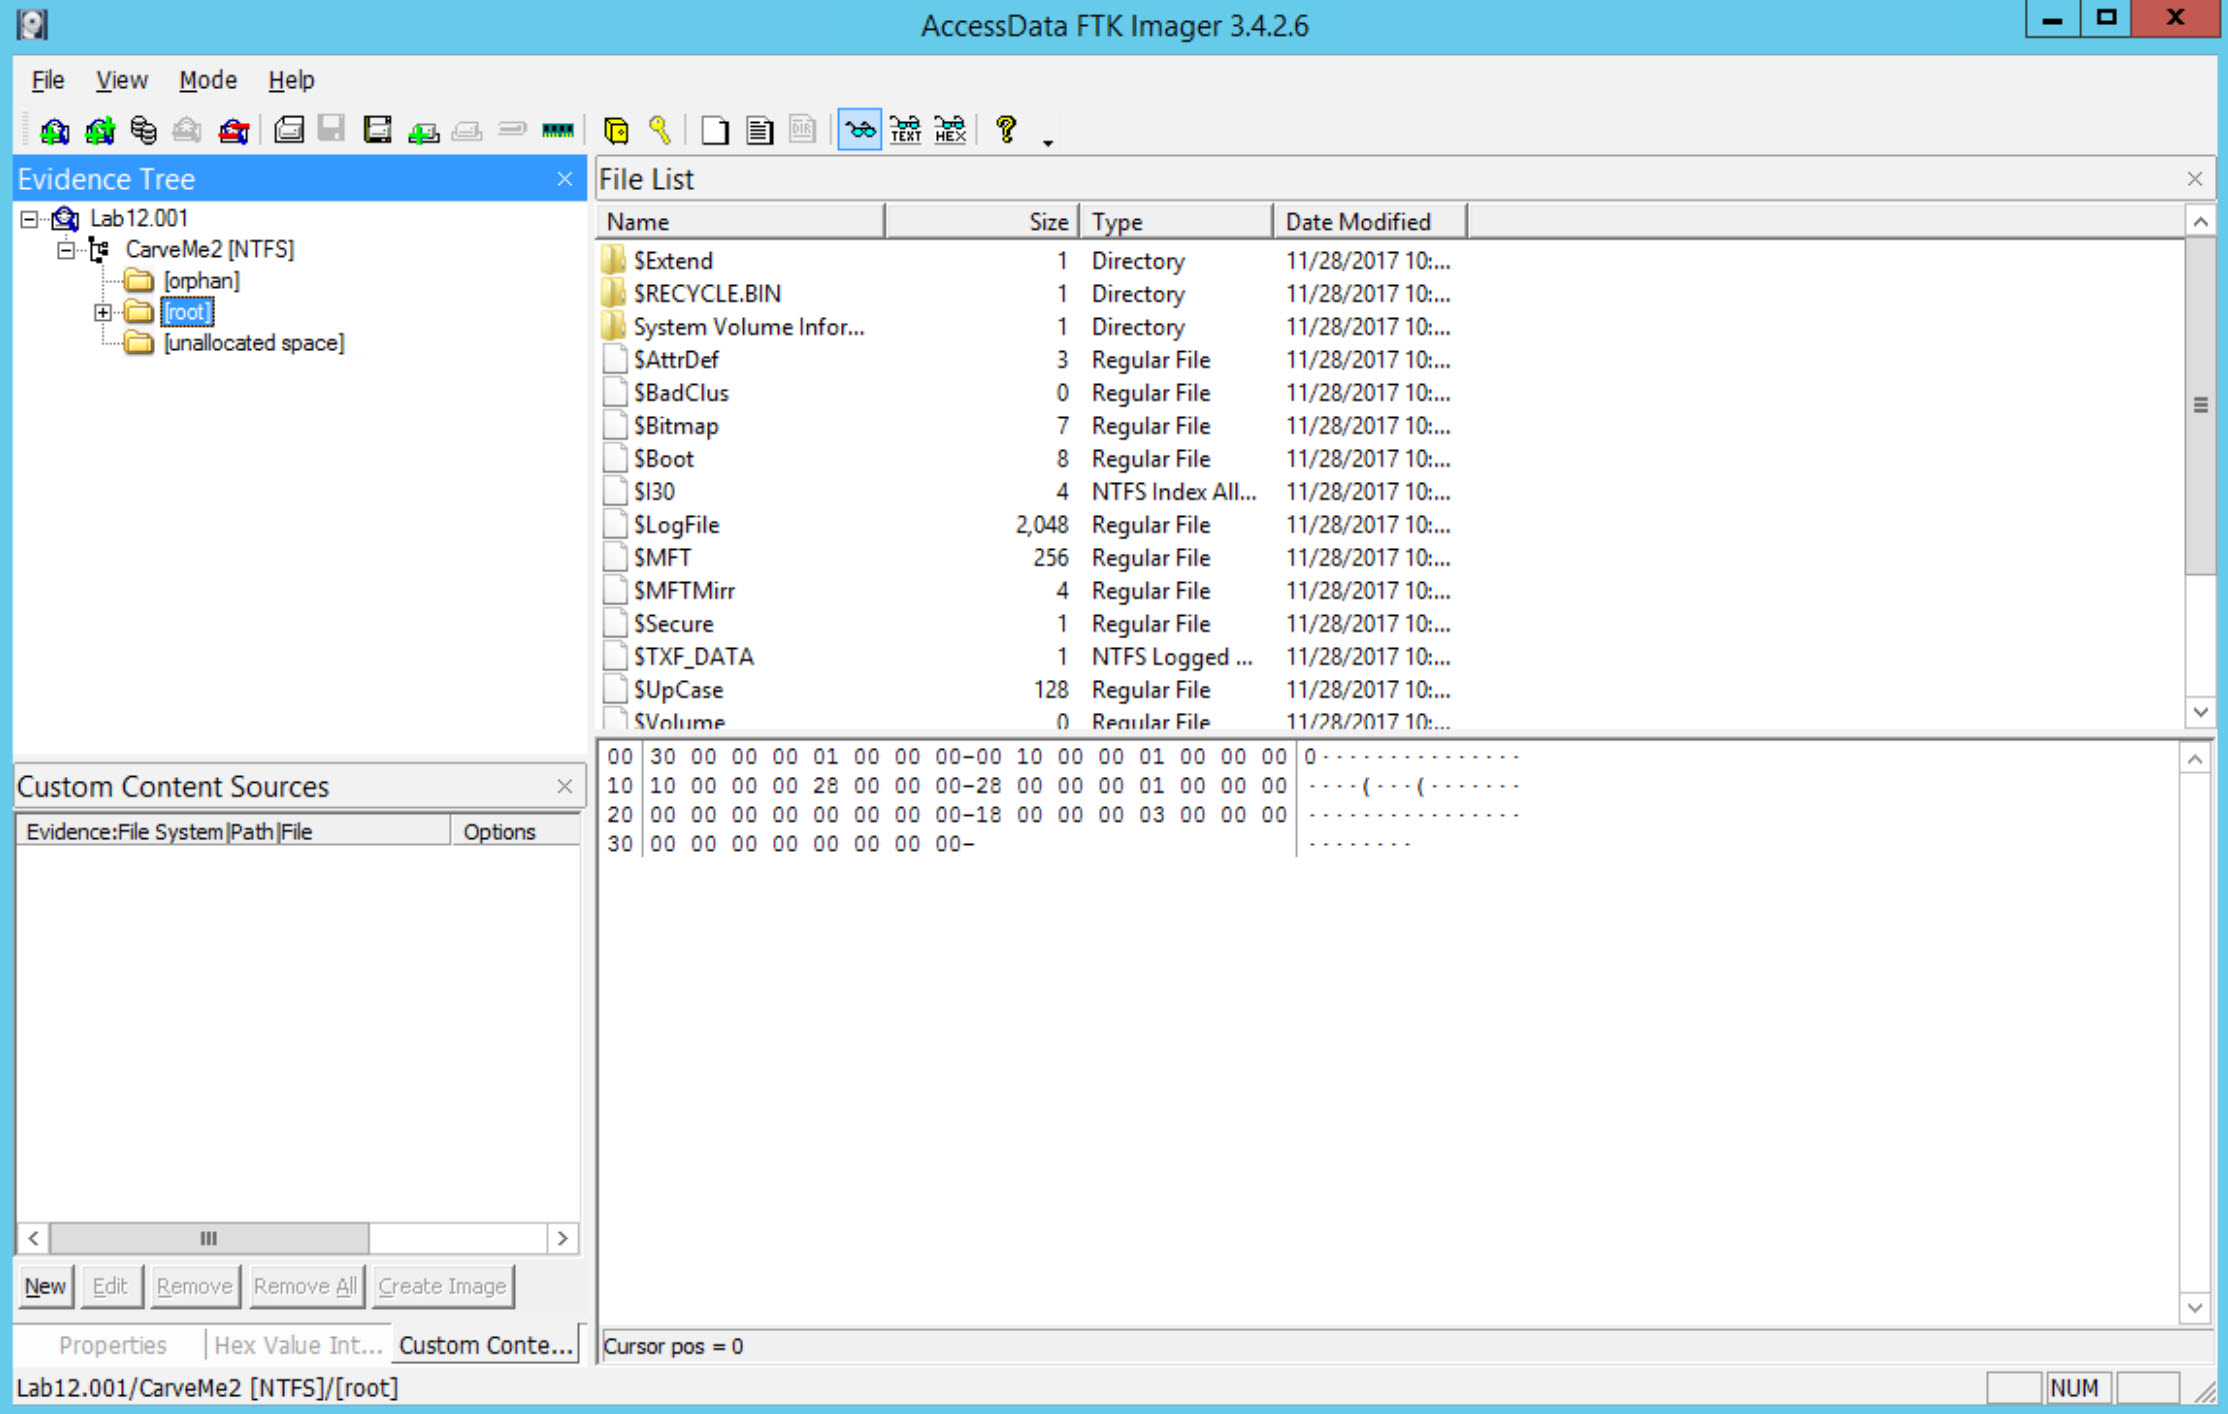
Start by opening the first disk which is [Lab12.001] [located at C:\DFP\Labs\Module05\Lab12\Lab12.001] and loading it using FTK Imager.
Now, let's start answering the required questions.
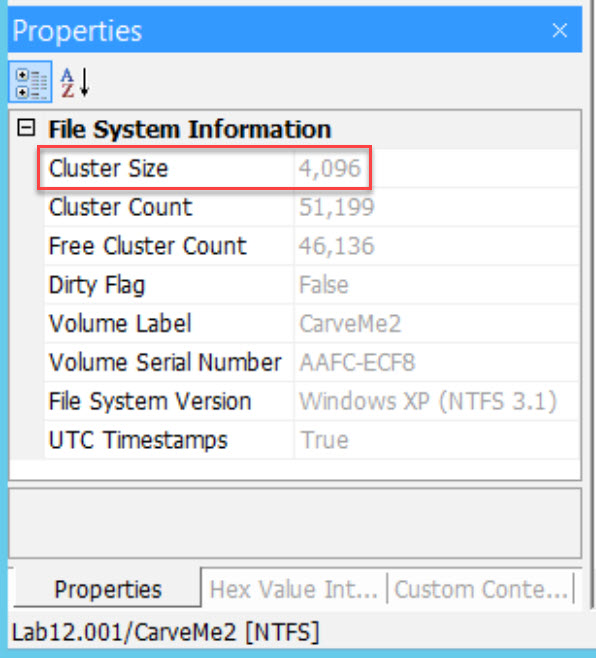
What is the cluster size used for this disk?
This can be found by viewing the volume boot record (VBR). Click on the NTFS Partition "CarveMe2" and switch your view to hexadecimal. Bytes 11-12 bytes per sector. Byte 13 will tell you the sectors per cluster. Sweep bytes 11-12, and click on Hex Value Interpreter.
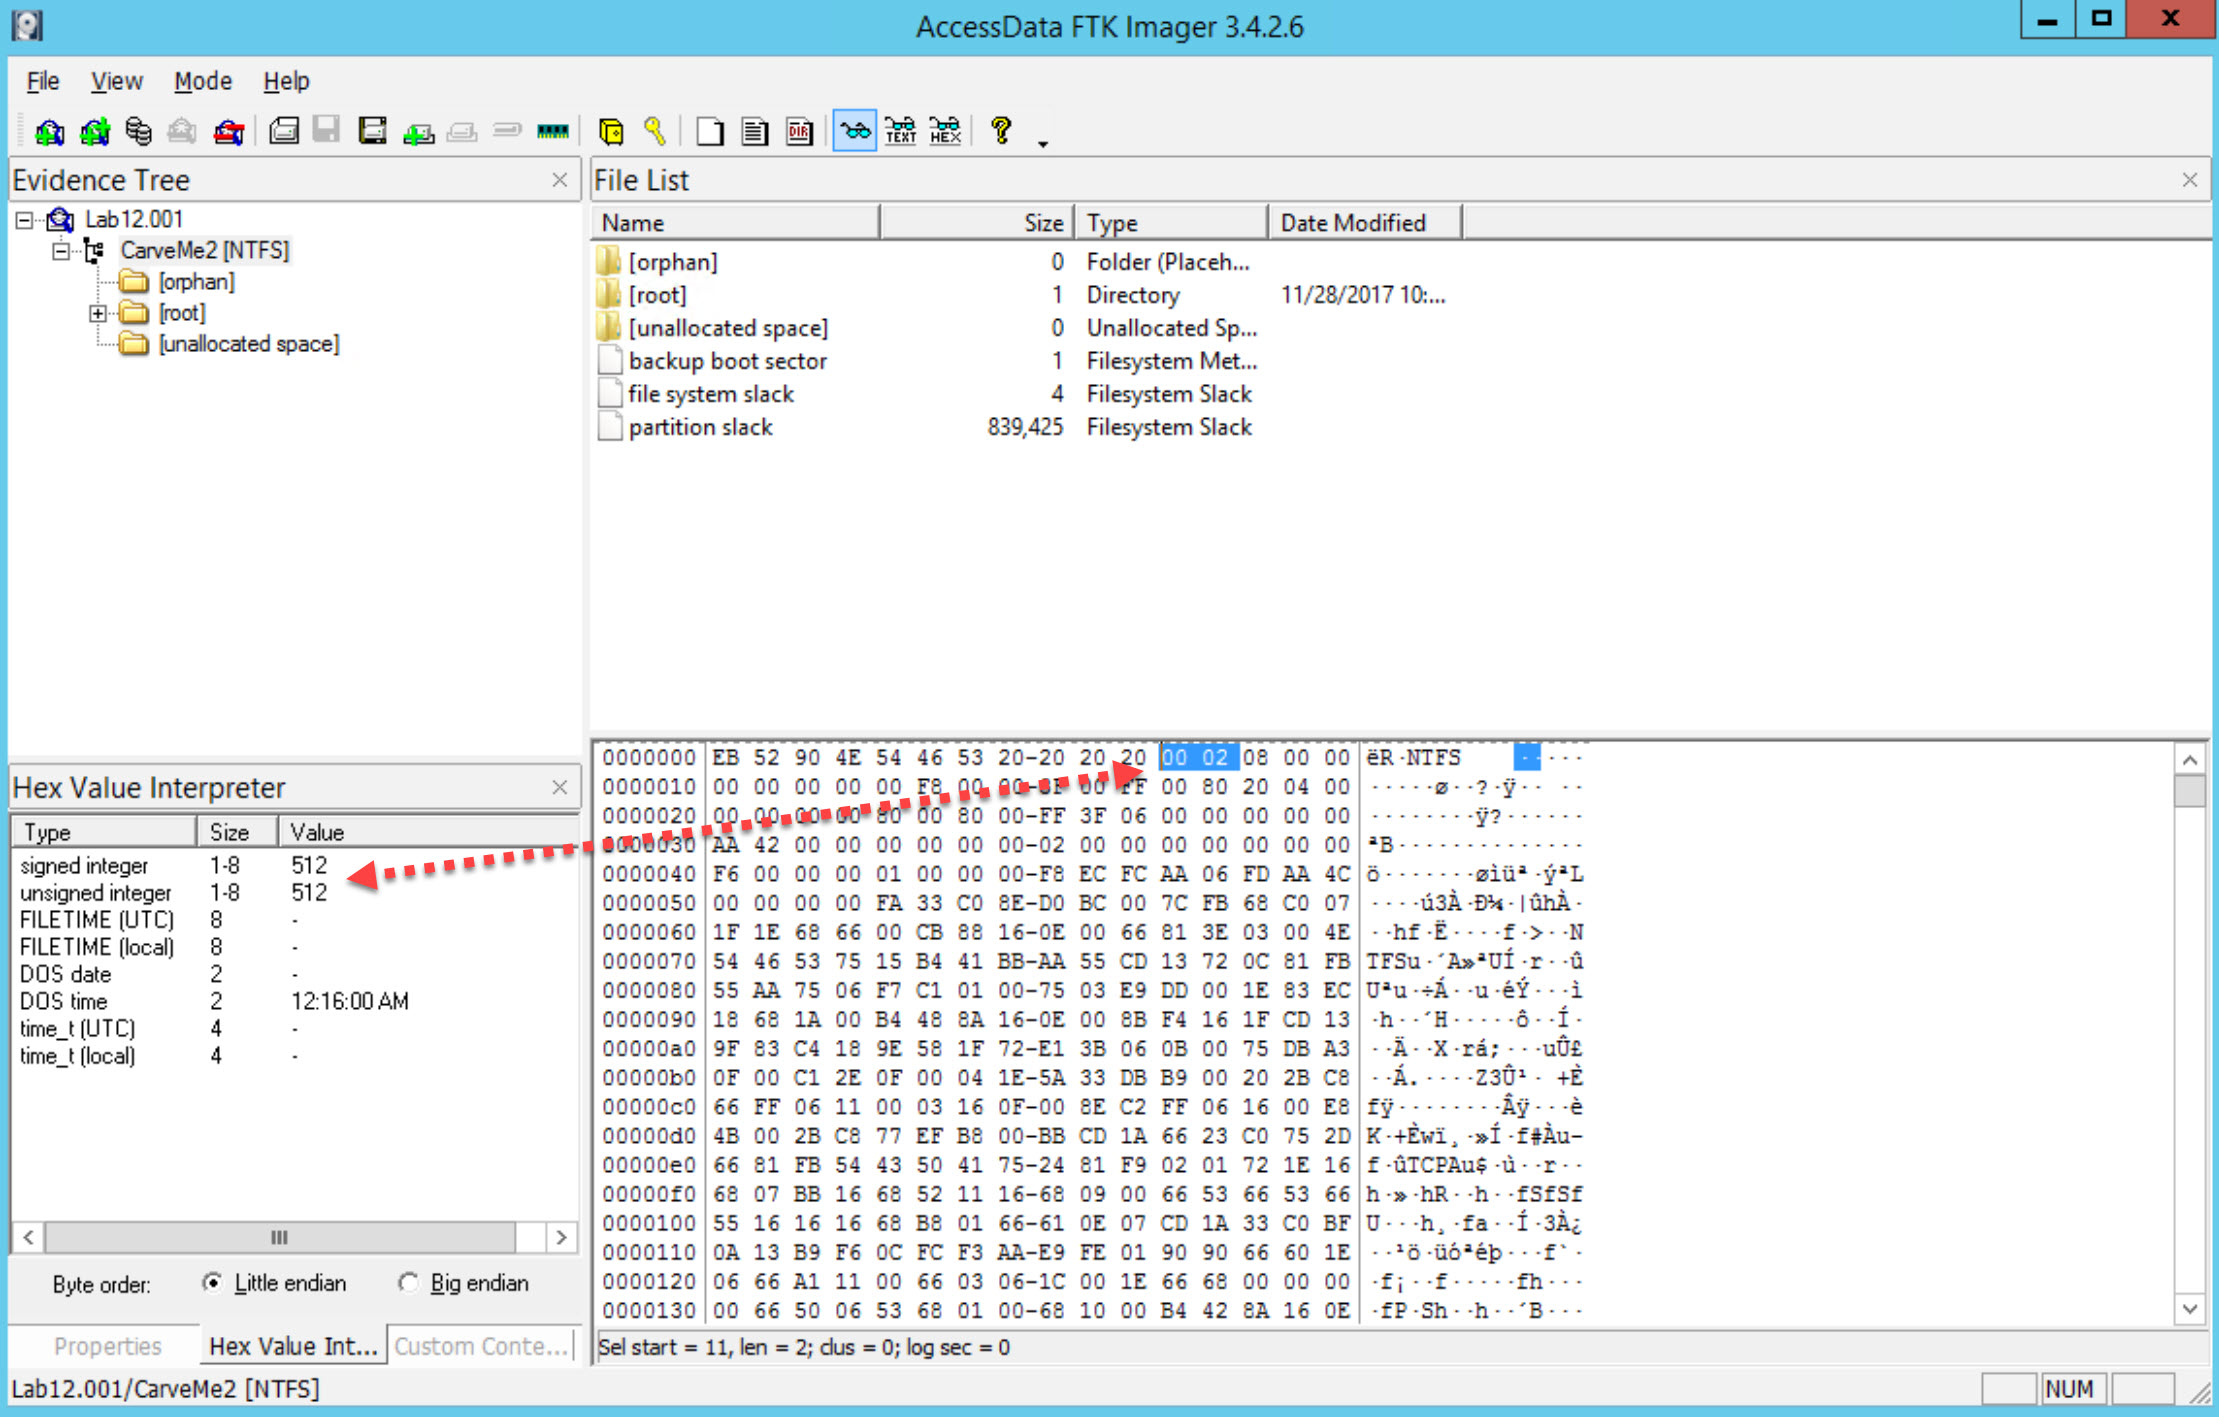
Now sweep byte 13 for sectors per cluster
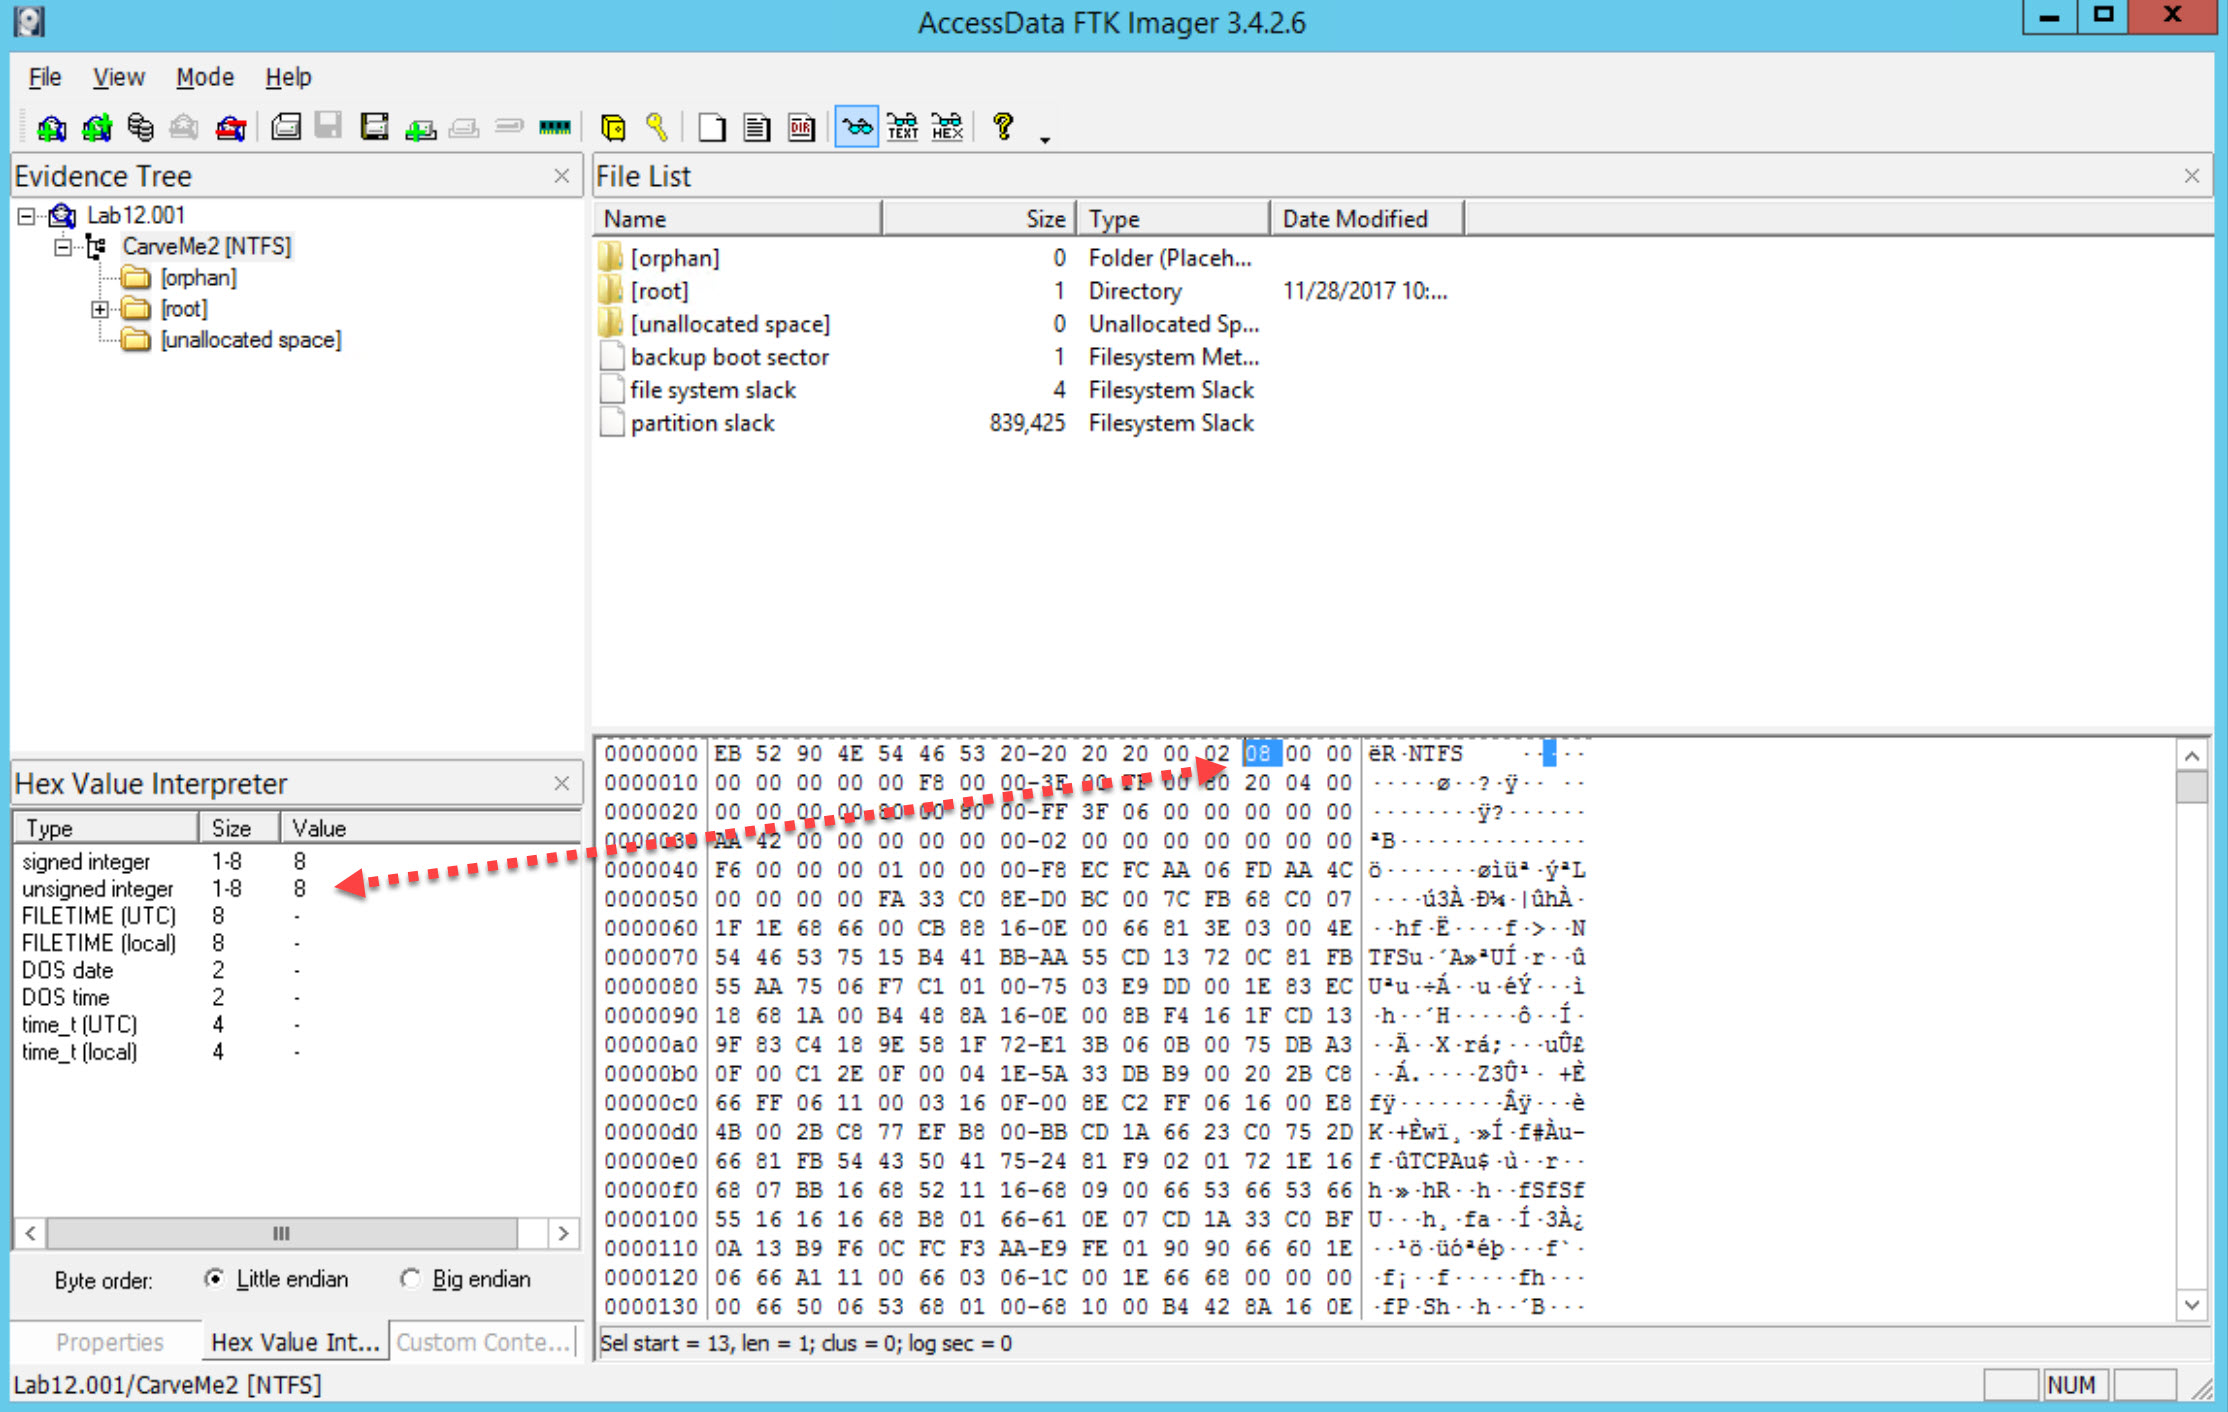
There are 512 bytes per sector and 8 secors in a cluster. That means each cluster is 4096kb.
Check this by switching from Hex Value Interpreter to Properties.
How many user files (pdf, exe, etc.) did you find and what was the size of each one of them.
| Item | File Name | Size |
|---|---|---|
| 1 | bin2sc.py | 373 bytes |
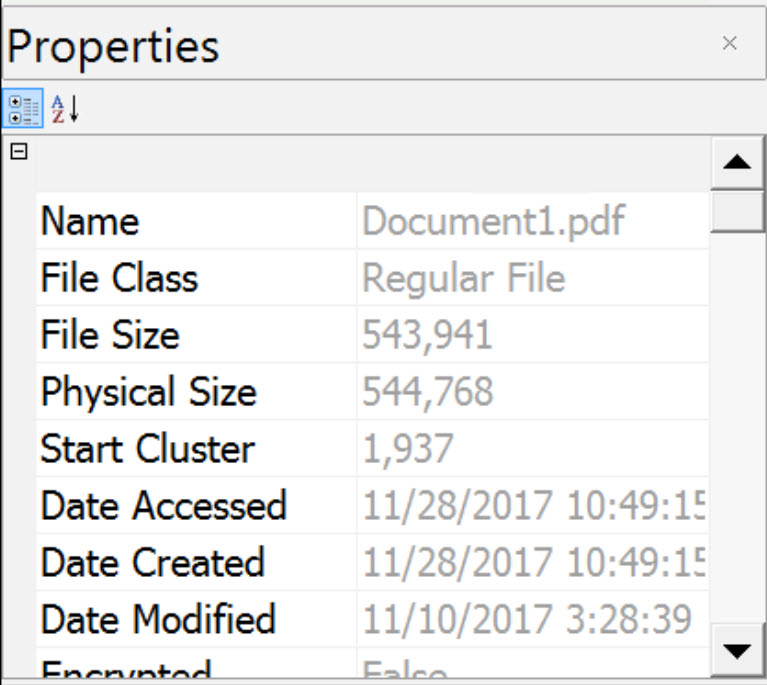
| 2 | Document1.pdf | 531 Kilobytes |
| 3 | File02.exe | 7.9 Megabytes |
| 4 | Photo05.jpg | 1.4 Megabytes |
Now we need to locate the MFT entry for each file and report back the following: a. Attribute ID for the Standard Information Attribute and its size b. File Name Attribute and its size c. Data Attribute and whether the file is resident or not (check residency flag) d. Offset to the data-run, and the data run itself
[Answer for the first file:] bin2sc.py
Right click in the hexadecimal space and select find. Search for: "bin2sec.py", leaving the options at default. You will need to press F3 to continue to search. You are looking for the filename to me near the FILE0 entry. You should find this at offset 069946608, with FILE0 being at 069946368. You may need to switch to decimal offsets by right clicking in the hexadecimal space and selecting the option.
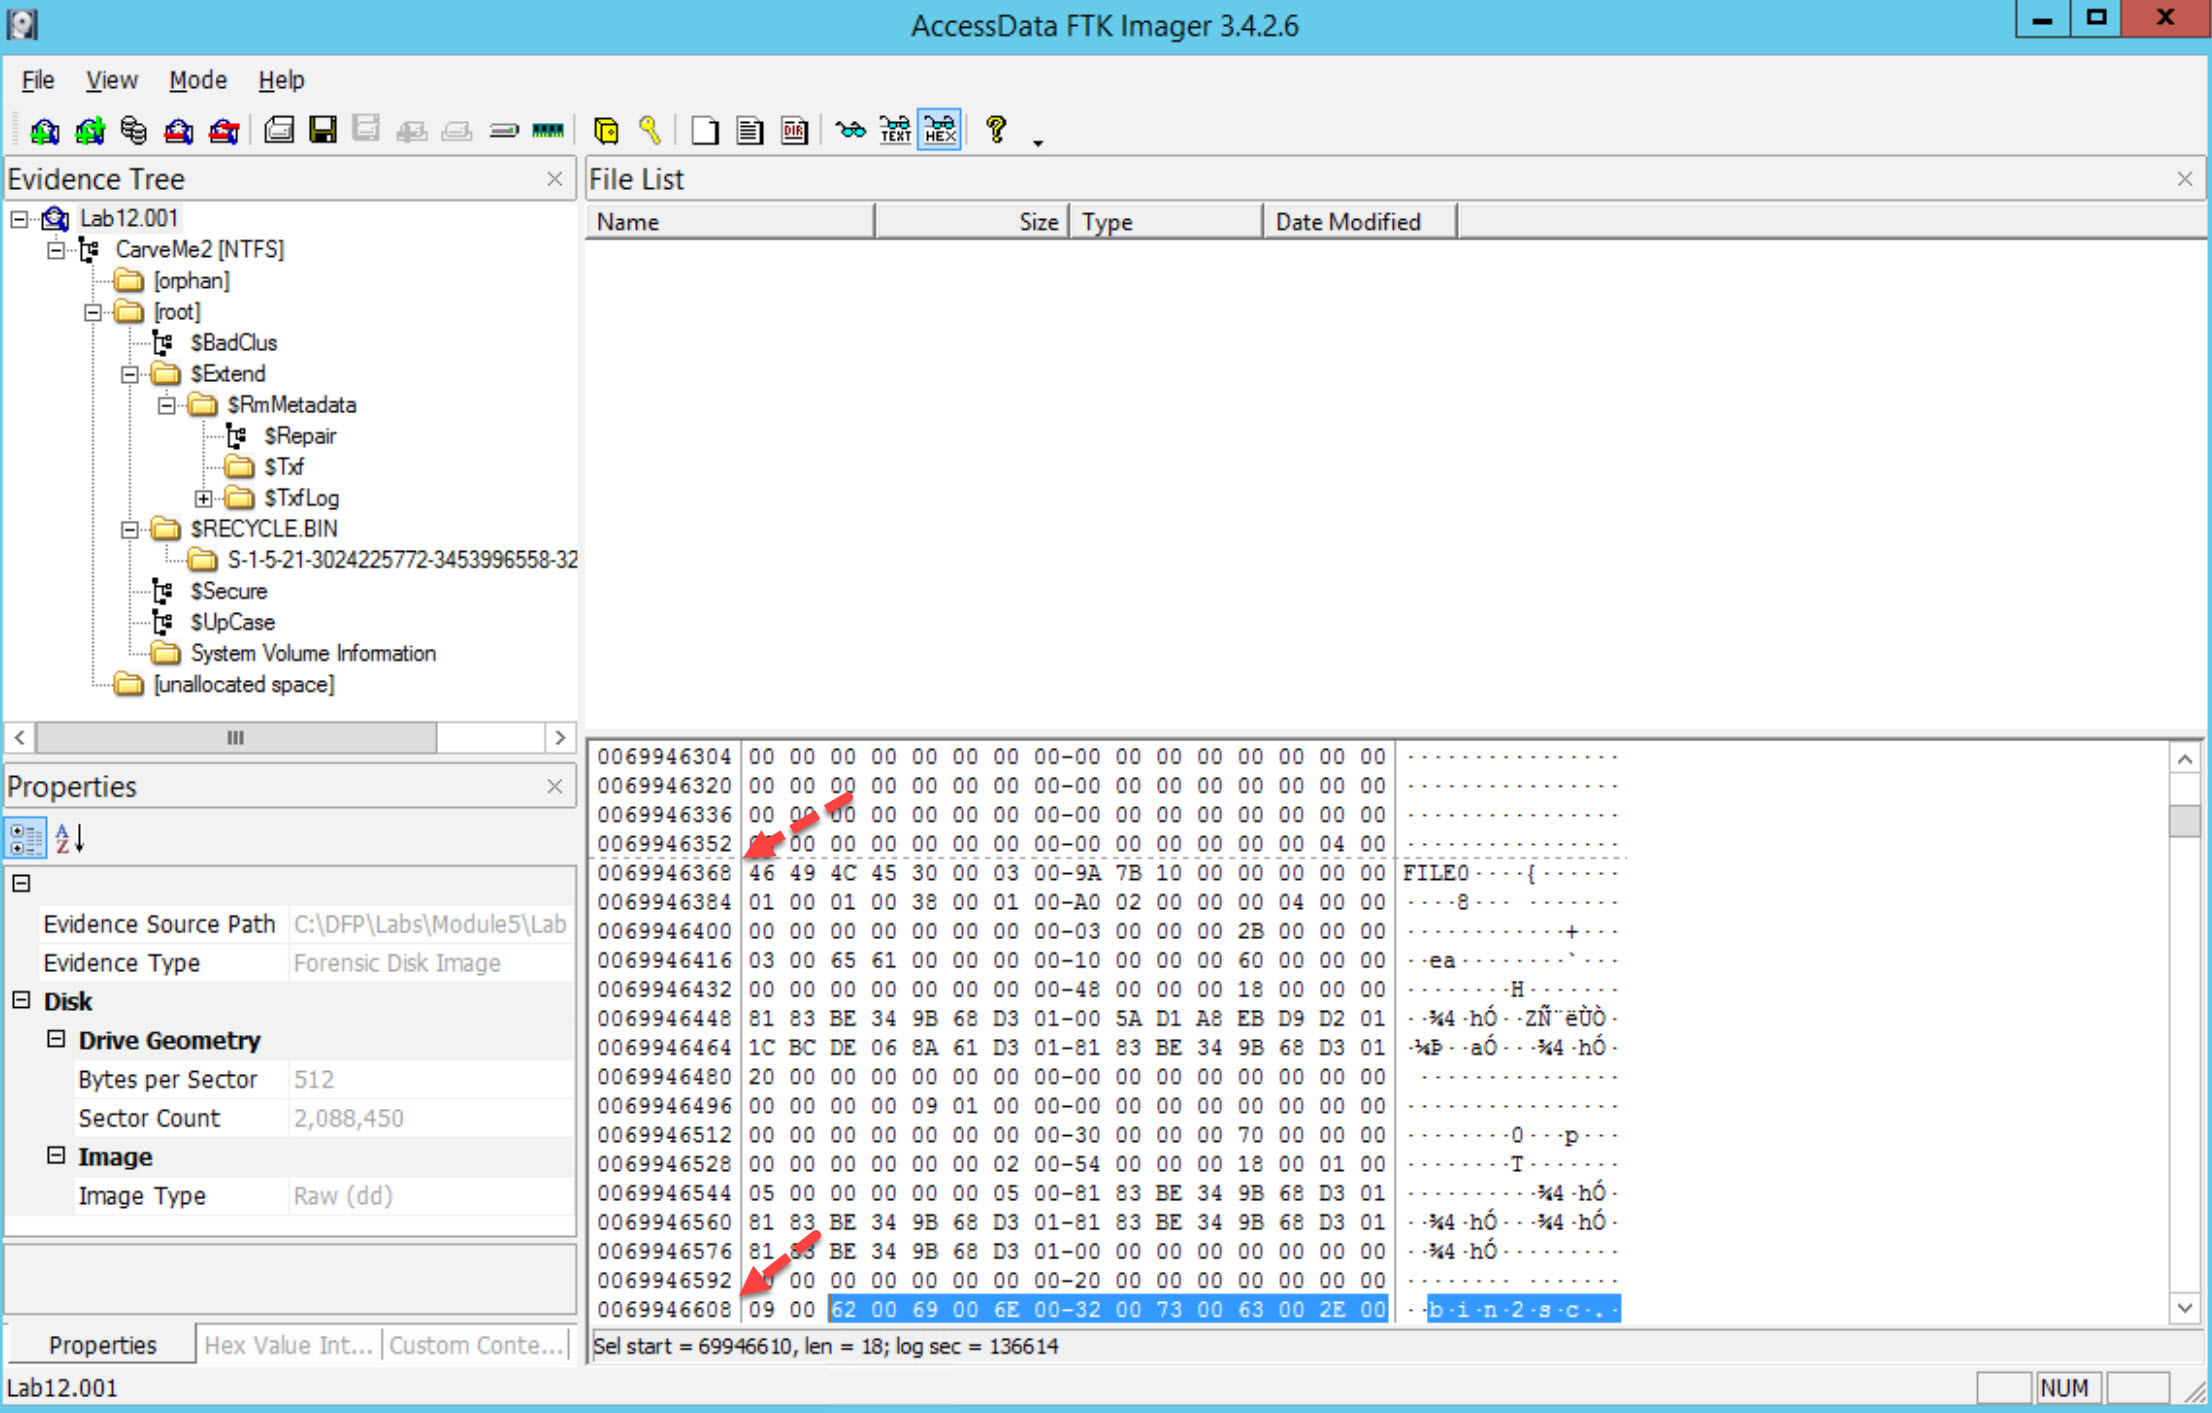
The File record header is from offset 1-55, The $STANDARD_INFORMATION attribute begins at offset 56 and continues through the next 80 bytes.
Now, based on the NTFS documentation and the course notes, the standard information attribute has a type ID of 0x10.
Therefore at offset 56 we find 10000000 which is the $STANDARD_INFORMATION attribute id 0x10. To locate the next attribute, we need to calculate the length of the $STANDARD_INFORMATION attribute, which is found in the next four bytes after the 4 bytes related to the attribute type ID. So, here we find the value (0x60000000 little endian) which means this attribute is 0x60 bytes long or 96 bytes (decimal).
This can be seen in the figure below.
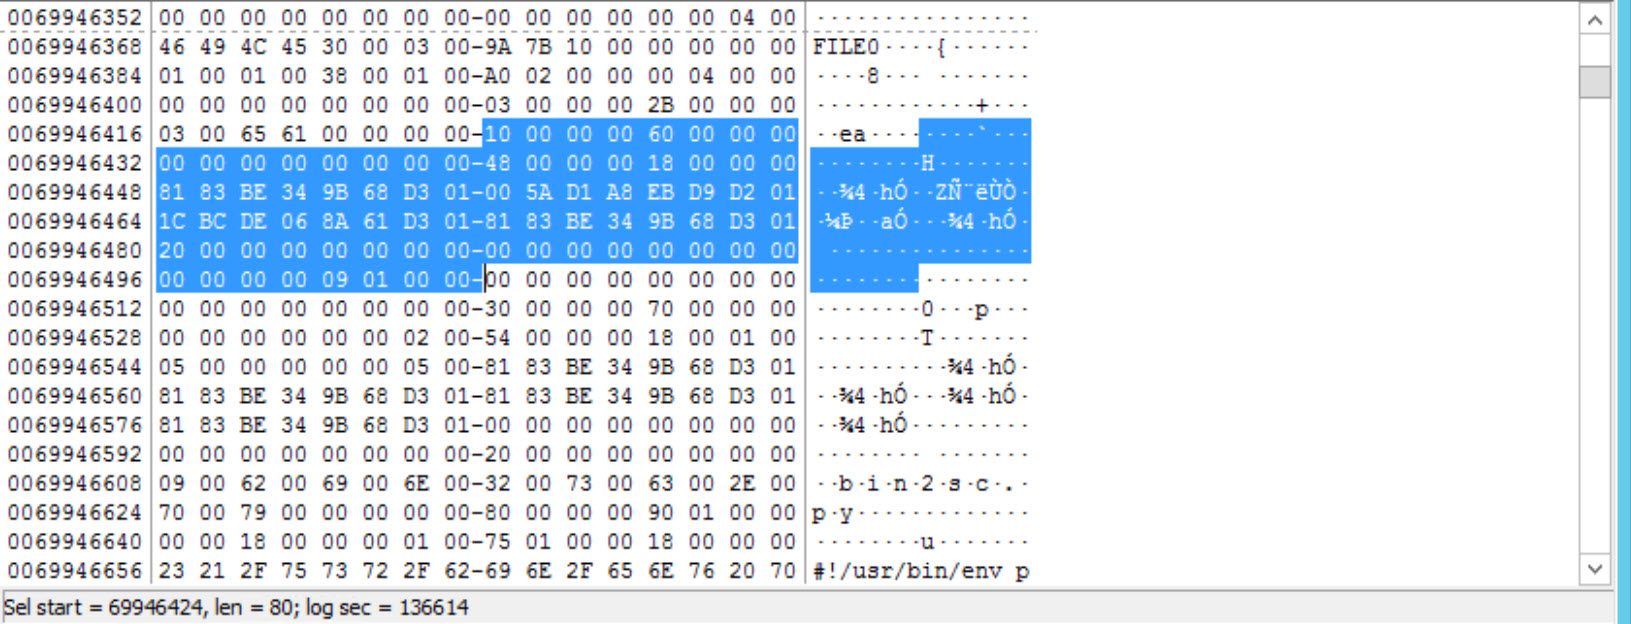
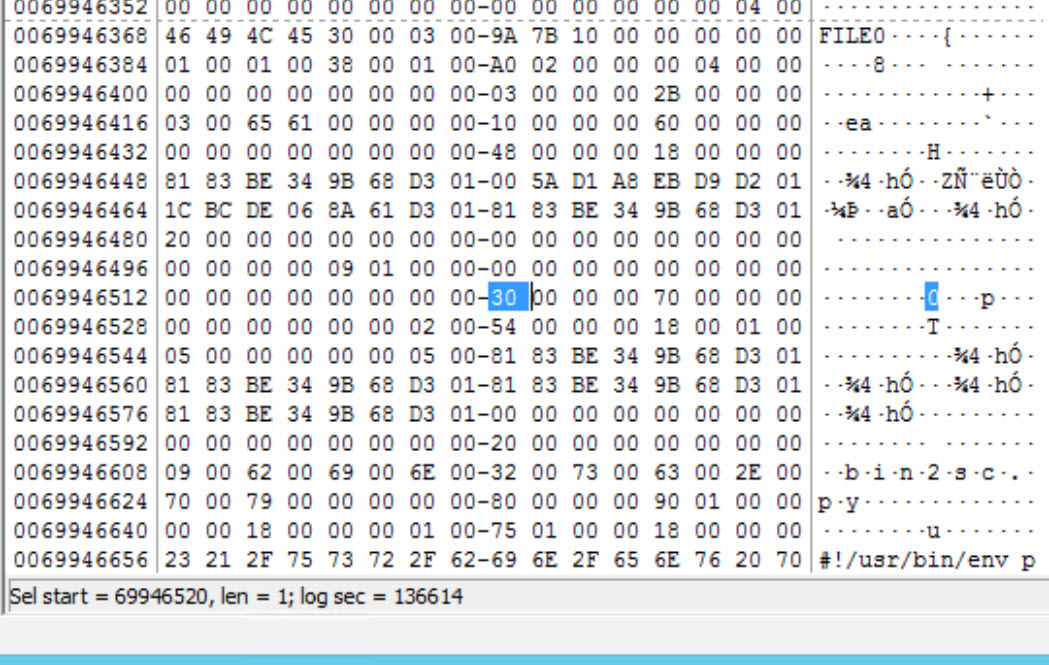
Now, as you can see, we have arrived at the next attribute which is 0x30000000 or 0x30. The attribute that has an ID of 0x30 is the $FILE_NAME attribute. The size is calculated the same way; we take the next four bytes to get the size of the attribute. Here we see 0x70000000 which means 0x70 or 112 in decimal. This can also be seen in the next figure.
Now we reach the next attribute which starts with 0x80000000 or 0x80. The $DATA attribute is the one that uses an ID of 0x80. Now, if you go back and look at the size of this file, you will find that it is 373 bytes, which is under 700 bytes, and means we have a resident attribute here. This means the file content is going to be found within the MFT File Record entry, or in other words; within the 1024 bytes, allocated for the entry.
If we calculate the length of the file, we will find that it is 0x90010000 or 0x0190 bytes long, and this leads that our file has been allocated 400 bytes. Don't forget this includes the header. Before we finish the analysis for this file, just remember that at offset 0x8 we can find a single byte that is used to mark the attribute whether resident or not. So, if you go to offset 0x8, we find that it has the value 0x00, which means our file is resident (non-resident = 0x01).
Since this is not a non-resident file, then we don't have a data run for it. Let us move on to the next file.
Answer for the second file: Document1.pdf
Same as before, we start by right-clicking on the file and then select Navigation -> Seek FILE Record. Again, at offset 0x14 in hexadecimal, we can find a two bytes value which represents the offset to the first attribute for this file. So, if we check offset 0x14 (20 decimal), we find the value 0x3800 (little endian). This means that our first attribute is at offset 0x38 in hex or 56 in decimal.
Again, at offset 56 we found 10000000 which is the \$STANDARD_INFORMATION id 0x10. As we did before, to locate the next attribute, we need to calculate the length of the $STANDARD_INFORMATION attribute, which can be found in the next four bytes after the 4 bytes related to the attribute type ID. So, here we find the value (0x60000000 little endian) which means this attribute is 0x60 bytes long or 96 bytes (decimal). This can be seen in the next figure.
Now, as you can see, we have arrived at the next attribute which is 0x30000000 or 0x30. The attribute that has an ID of 0x30 is the $FILE_NAME attribute. The size is calculated the same way; we take the next four bytes to get the size of the attribute. Here we see 0x78000000 which means 0x78 or 120 in decimal. This can be seen in the next figure.
Now we reach the next attribute which starts with 0x80000000 or 0x80. The $DATA attribute is the one that uses an ID of 0x80. Now, if you go to offset 0x8, we find that it has the value 0x01, which means our file is non-resident. Also, the length of this attribute is 0x48000000 or 0x48 (72 decimal) as seen in the next figure.
To find where this file is stored, we need to locate the data run for the file. This can be done by checking offset 0x20, which is two bytes long. So, by going to offset 0x20 or 32 in decimal, we find that the data run is located at 0x40 or 64 in decimal. Now, by going to that location, we find the following:
So, the data run is: 0x2285009107. We will come back to this later in Task #2.
BTW, the values 0xFFFFFFFF82794711 are the marker of the end of the MFT File Record.
Now, all you need to do is repeat the same process for the rest of the files (File02.exe and Photo05.jpg).
Summary of findings:
| File Name | SIA (size) | FNA (size) | Data (size) | Resident | Data-run |
|---|---|---|---|---|---|
| Bin2sc.py | 10 (0x60) | 30 (0x70) | 80 (0x190) | Yes | None |
| Document1.pdf | 10 (0x60) | 30 (0x78) | 80 (0x48) | No | 0x2285009107 |
| File02.exe | 10 (0x60) | 30 (0x70) | 80 (0x48) | No | 0x22DD071608 |
| Photo05.jpg | 10 (0x60) | 30 (0x70) | 80 (0x48) | No | 0x2264012D06 |
Now, let's use the results we got in Task #1 to answer the questions below:
What does each part of the data run mean? [Answer:]
The data run string is defined like this:
The first byte is actually divided and parsed like this:
a. The first nibble represents the number of bytes that represent the first cluster number
b. The second nibble represents the number of bytes that represent the number of clusters this file is occupying
| Byte | Bytes | Bytes |
|---|---|---|
| Nibble Nibble | Representing No. of Clusters | Representing No. of the First Cluster |
So, as you can see, it all goes down to the first byte in the data run.
Let's answer both questions 2 and 3 together.
What is the first cluster for each file?
How many clusters are being used for each file?
Answer:
Since the first file is resident, we are not going to calculate where the first cluster is.
The first cluster for the second file Document1.pdf is calculated like this:
Data run: 0x2285009107
2: 91 07 -> number of the first cluster (little endian)
= 1937
2: 85 00 -> number of clusters allocated (little endian)
= 133
And for the data run for File02.exe = 0x22DD071608
2: 16 08 -> the first cluster
= 2070
2: DD 07 -> no. of clusters
= 2013
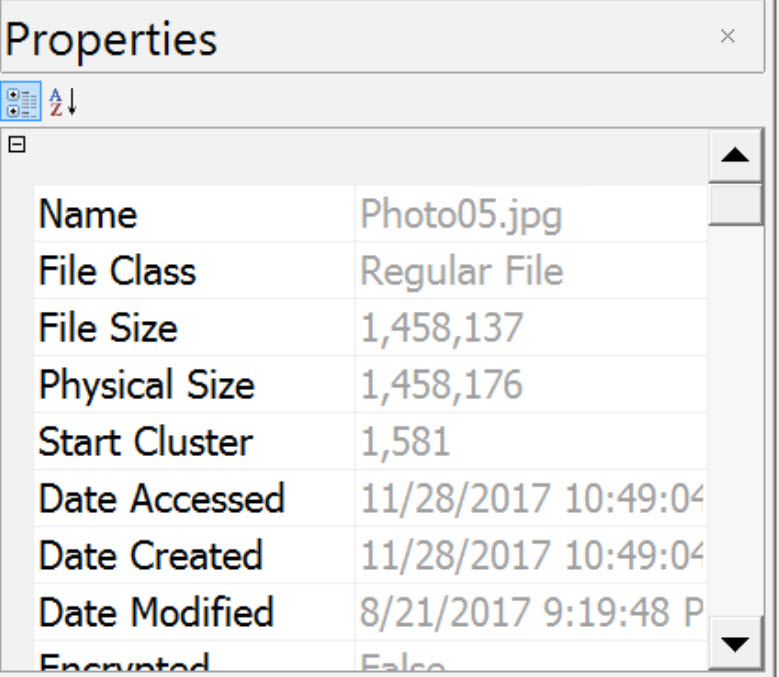
Finally, the data run for file Photo05.jpg = 0x2264012D06
2: 2D 06 -> the first cluster
= 1581 2: 64 01 -> no. of clusters = 356
What is the first sector number for each non-resident file? Answer:
Here is when the size of the cluster comes in handy! Now, to locate the first sector for each file, we can do that based on the equation found below:
First sector = (First cluster no. * cluster size ) / sector size
Means, for the second file Document1.pdf
First sector = 1937 * 4096 / 512 = 15496
For the third file File02.exe
First sector = 2070 * 4096 / 512 = 16560
Means, for the second file Photo05.jpg
First sector = 1581 * 4096 / 512 = 12648
Verify your results with the results automatically given to you by WinHex. Answer:
This is easily done by right-clicking on the file and then Navigation List Clusters. The proof for each file is below. (Cluster = First cluster and Total = No. of clusters)
Document1.pdf
File02.exe
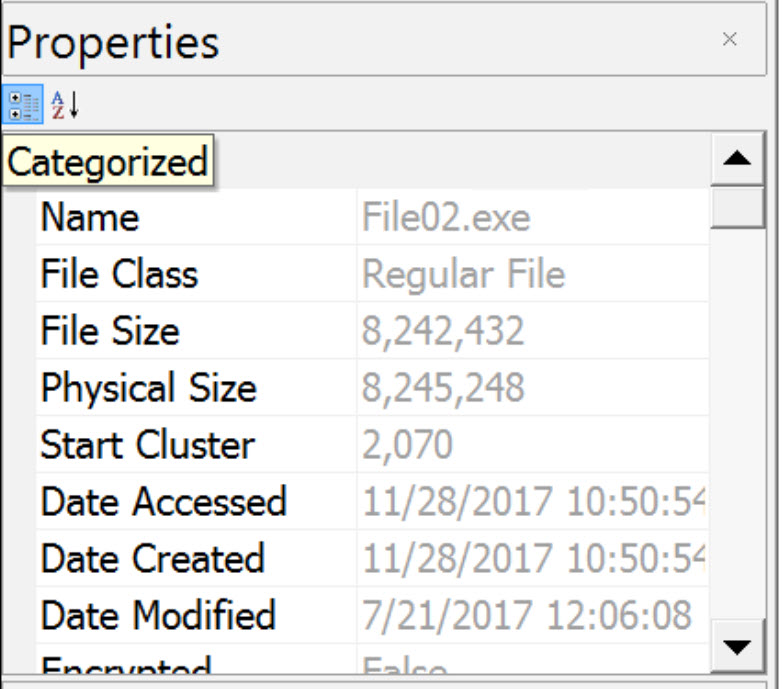
Photo05.jpg
Summary of findings:
| File Name | First Cluster | No. of clusters | First sector |
|---|---|---|---|
| Document1.pdf | 1937 | 133 | 15496 |
| File02.exe | 2070 | 2013 | 16560 |
| Photo05.jpg | 1581 | 356 | 12648 |